Xenoblade Chronicles 2 Combat Guide: battle system and combat strategy tips for battles in Alrest
Xenoblade Chronicles 2 is a stellar game that we suggest no JRPG fan pass up, but even to series veterans it can be daunting to unravel the many overlapping mechanics and nuances of the game's battle system. The jam-packed UI is enough to make anyone's head spin, and that's just the tip of the combat iceberg.
Even if you follow the tutorials carefully, it's easy to forget a specific singular mechanic and sorting it out can be frustrating. With the way the various systems all interact, even forgetting one little detail can make even regular battles feel extra clumsy and baffling.
We're going to help compartmentalize all the aspects of the games combat system into digestible chunks. While many returning players to the franchise are likely familiar with the base system present in the original Xenoblade Chronicles and Xenoblade Chronicles X, it's still best to start with the very basics. The way that the systems layer on top of each other require that the basics are understood perfectly before more advanced mechanics can be performed properly.
We've got even more Xenoblade Chronicles 2 assistance if you need it:
- Dual Audio: how to get Japanese Voices via download
- Classes Guide: All the roles and jobs available to party members
- Rare Blades Guide: All elements, roles, field skills, and where to find every rare blade
- Booster Guide: all about Bravery, Truth, Compassion and Justice Boosters
- Tiger Tiger Guide: how to play and upgrade Poppi
- Finding Confusion Ivy for the Concerned Carpenter Side Quest
- Snow-White Rhino Location for the Young Man's Prize Side Quest

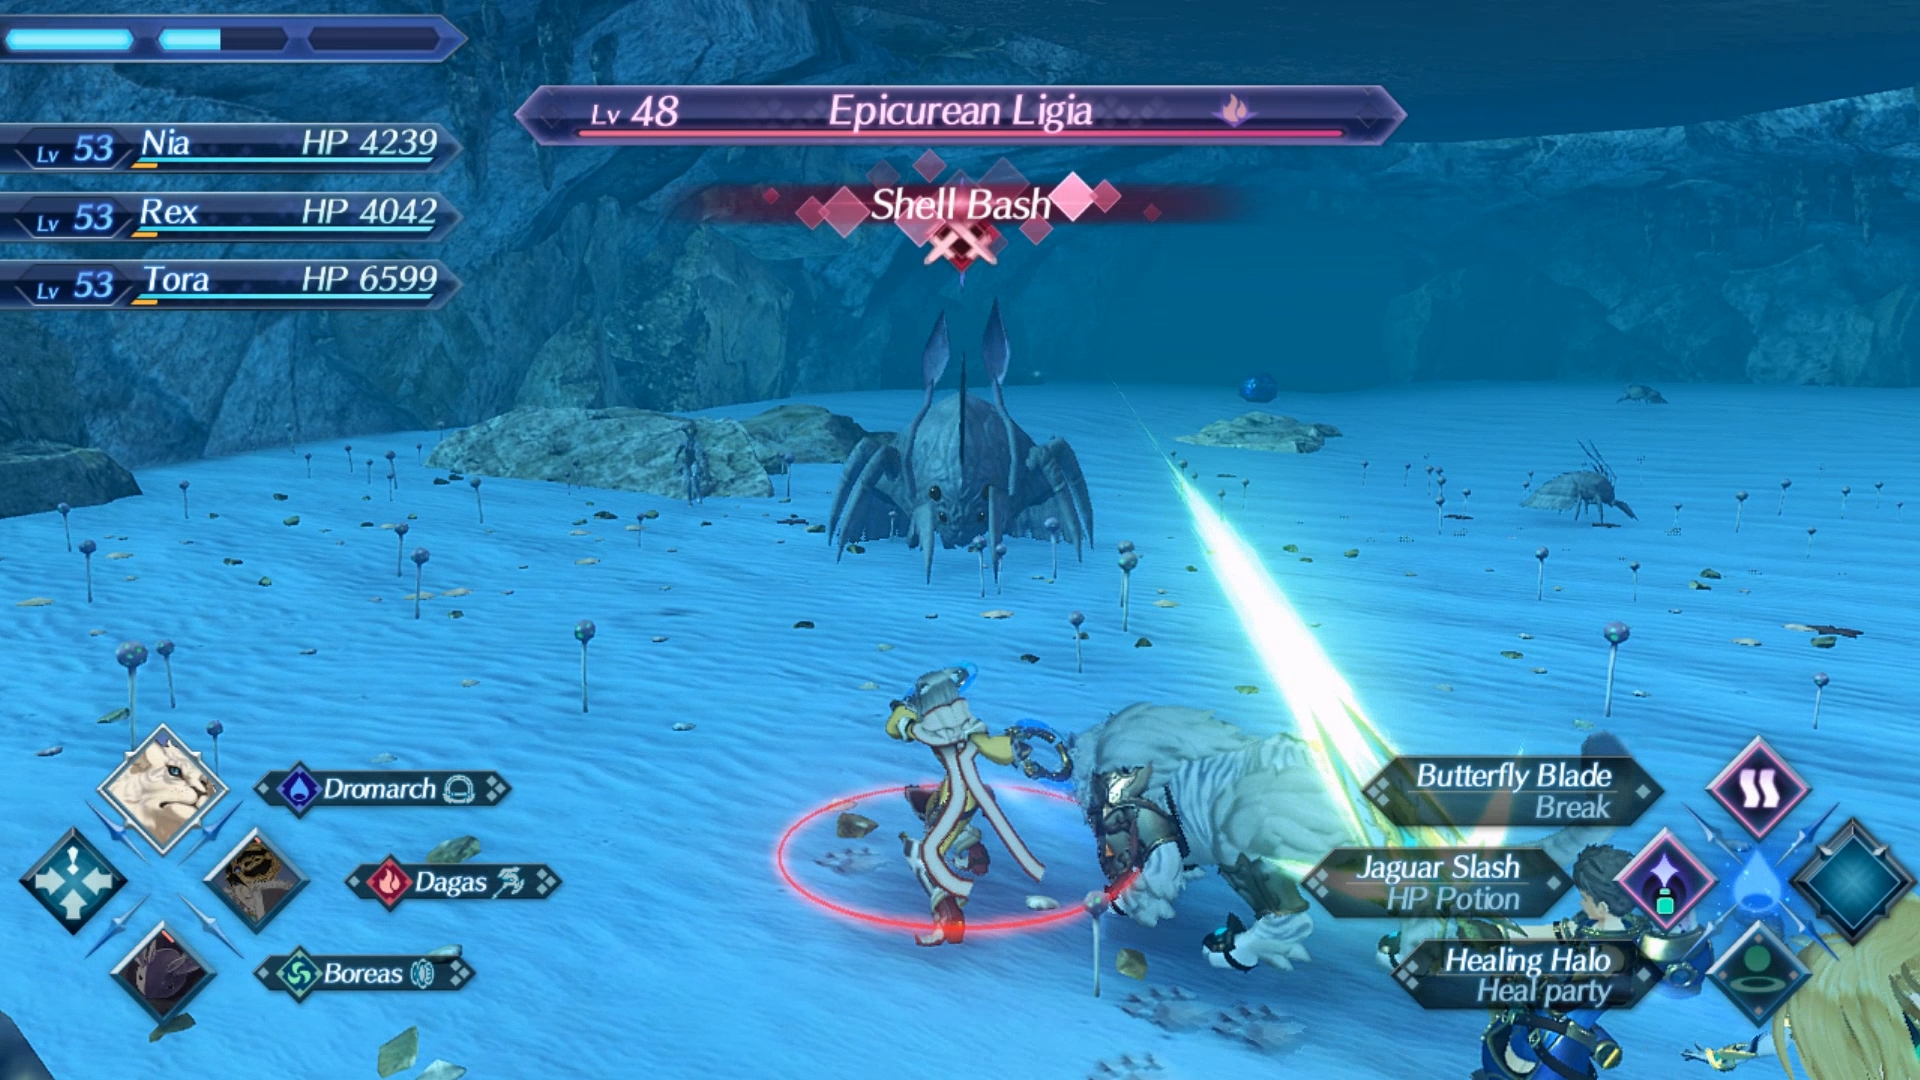
The Basics of Combat: Auto-attacks and Positioning
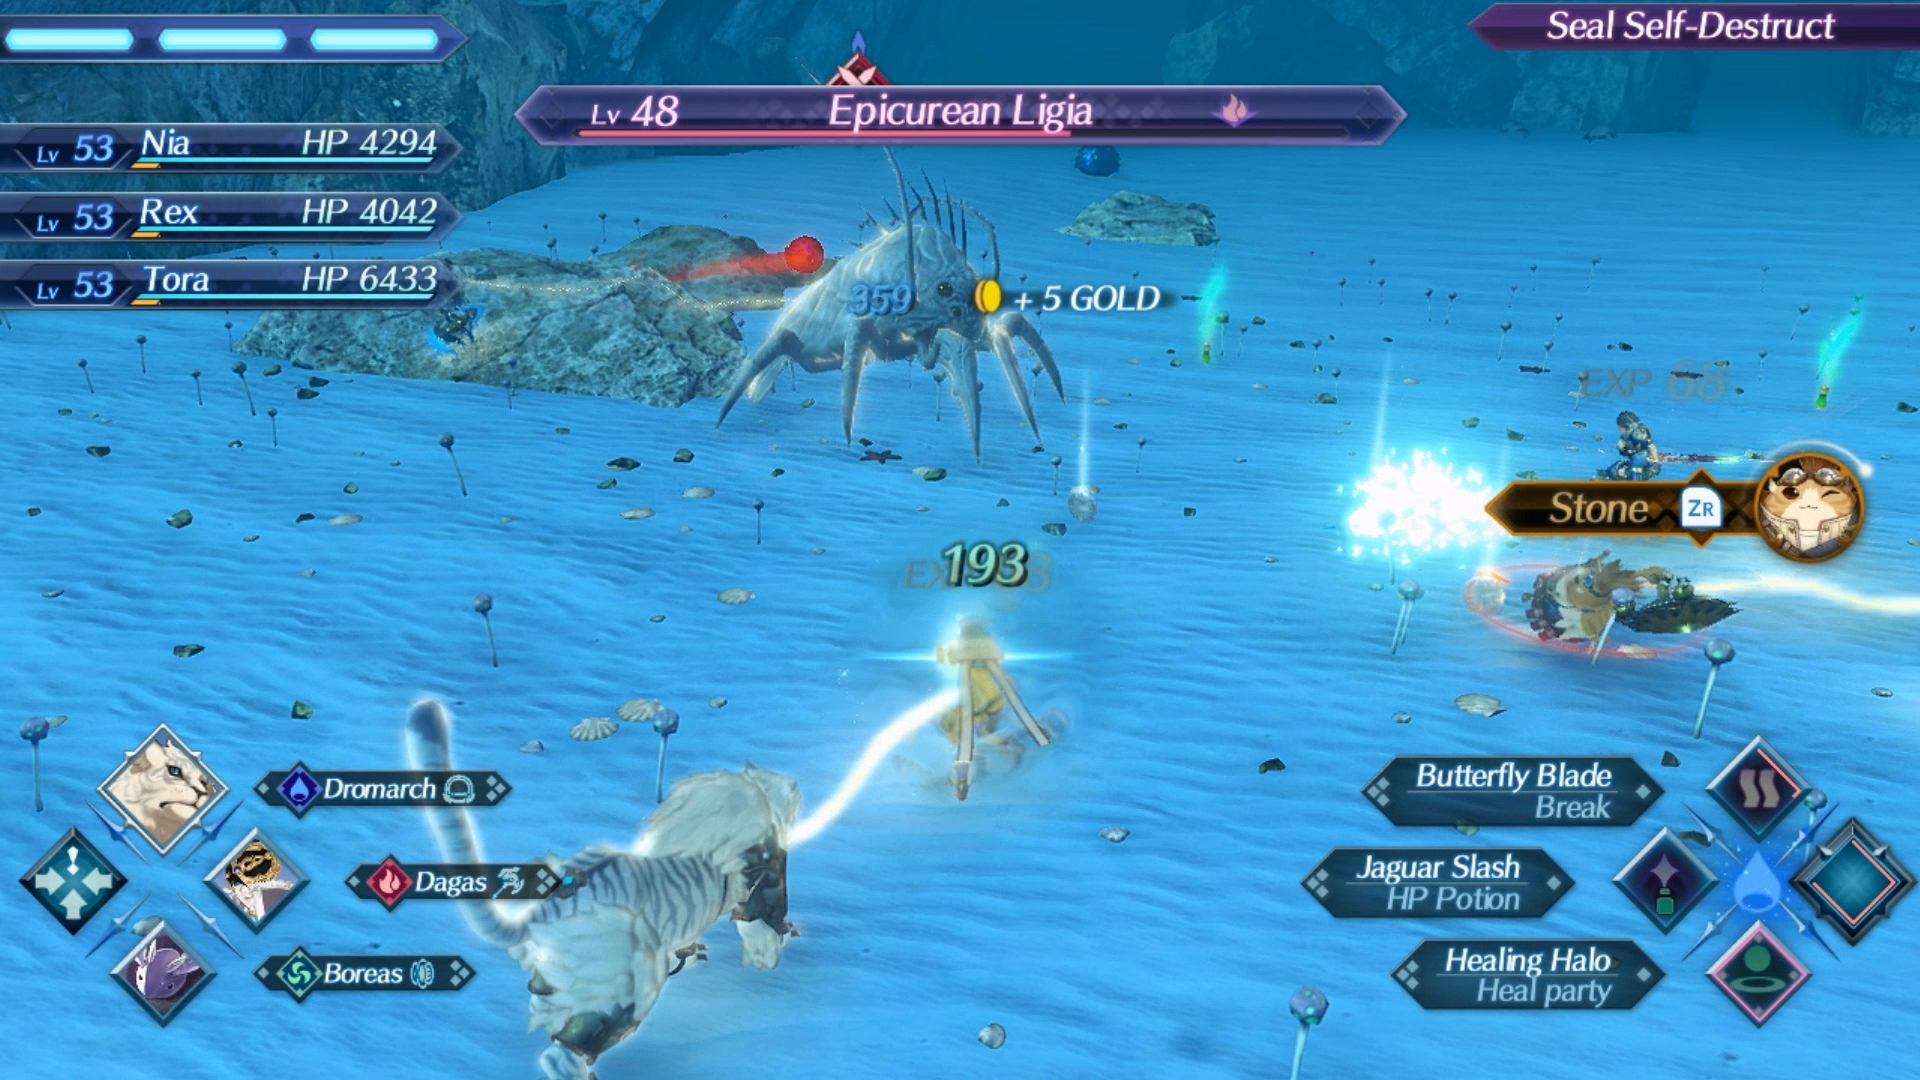
In most RPGs, the basic act of attacking the enemy usually comes down to a basic button press or a selection from a menu, usually the first one. Xenoblade's system is different: as long as you are standing near an enemy with your weapon drawn, you will auto-attack the enemy at a regular rate, depending on the weapon.
Your character's weapon type will depend on the Blade you have equipped and may attack more quickly (sword) or slowly (hammers) depending on the weapon.
While it seems like this main mechanic would lead the game to "play itself" with the basic attacks being performed for you, well, we're just getting started. The first thing you'll want to do is notice which arts you have equipped and what their abilities are.
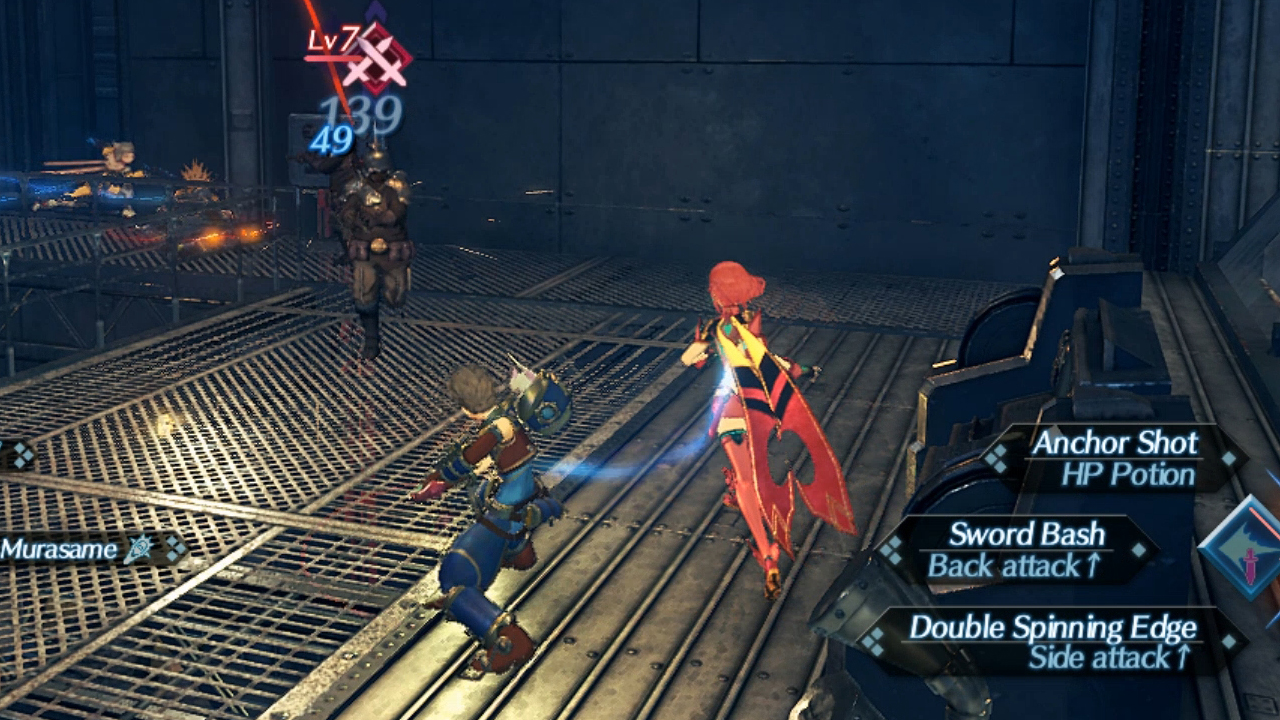
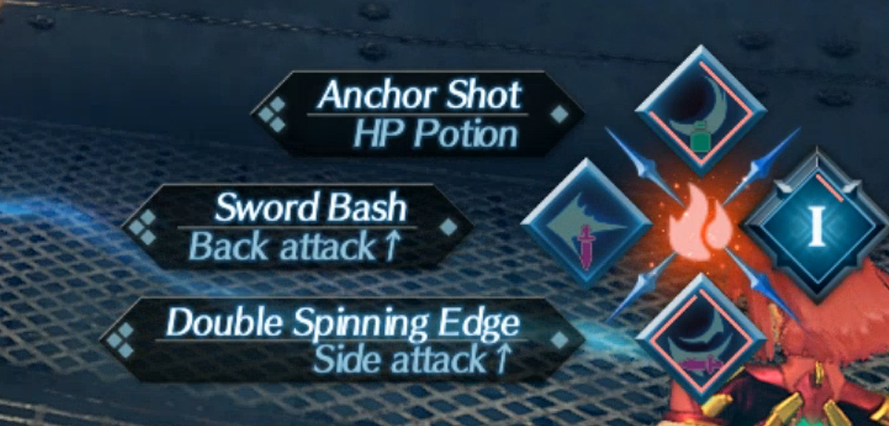
Driver Arts - Xenoblade 2's special moves
Every blade has a specific weapon type which comes with four arts. These arts not only do much more damage than regular attacks but will often come with added bonuses such as doing more damage from behind or to the side, or increasing/decreasing your aggro (more on that later).
Certain abilities might have other effects such as creating consumable health potions or inflicting Break status. The very first decision you'll have to make is to decide which of the four arts you want to go without for any given weapon.
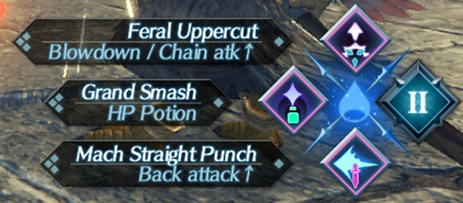
Once you know which of the three Driver Arts you want to have slotted to the face buttons on your switch, it's time to learn how to use them. Every Art will have a listed Recharge value, which will determine how long it takes for the Art to become available before you can use it. The colored outline will slowly work around the icon as you auto-attack, and the Art will become usable once it's fully charged.
Note that if you time an Art use right after an auto-attack, you'll charge your Special attack. You'll charge it even more if you wait for the full auto chain to finish. You'll know you timed it properly if you see a blue bubble appear around your character as you use a Driver Art. So using an art right as it comes off cooldown might not always be the wisest choice.
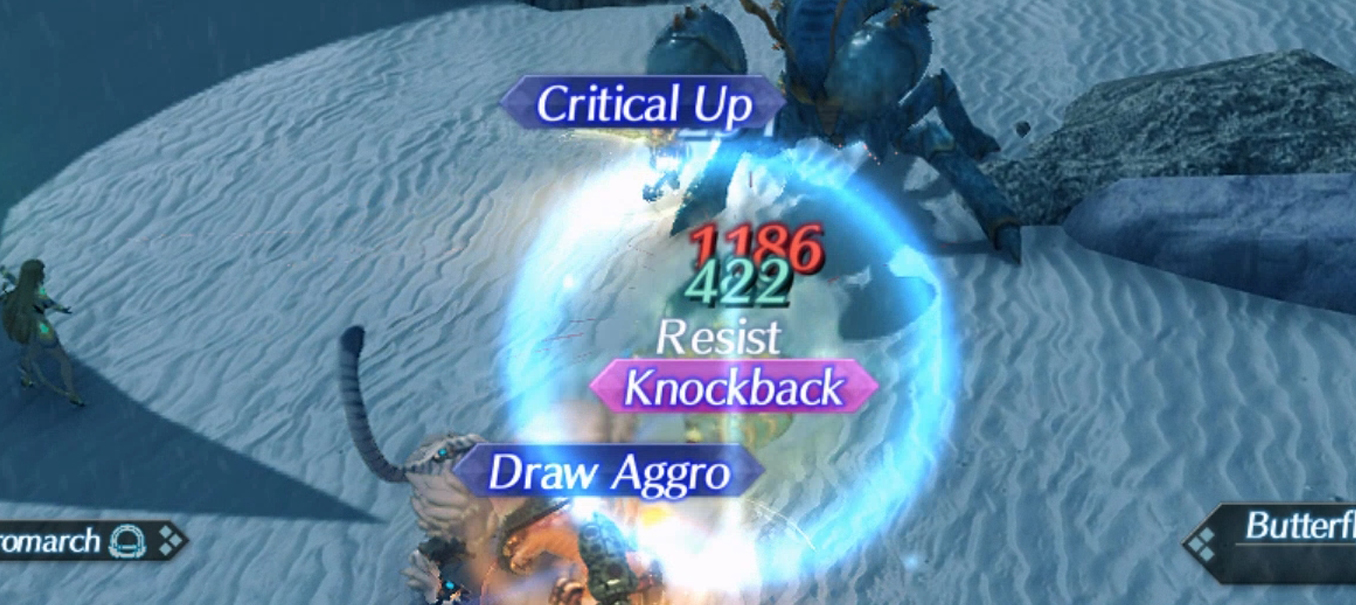
Understanding Aggro in Xenoblade 2
One very important concept in combat is that of Aggro. The character that currently has the attention of the enemy will have a glowing red reticle at their feet along with a yellow marker facing towards that enemy. If the character currently with aggro is a defensive character with high health, then that's relatively ideal. If it's a glassy character, or even worse, your healer, you might want to reconfigure how aggro is gathered in your party.
Aggro is gained automatically when you attack an enemy, based on the damage dealt. It's very important to try to use equipment or arts that will reduce aggro on your damage dealers and increase it on your defensive characters that can take a few hits. It's usually very prudent to have one of your drivers equipped with a TNK type Blade to have a good way of gathering aggro.
Driver Combo
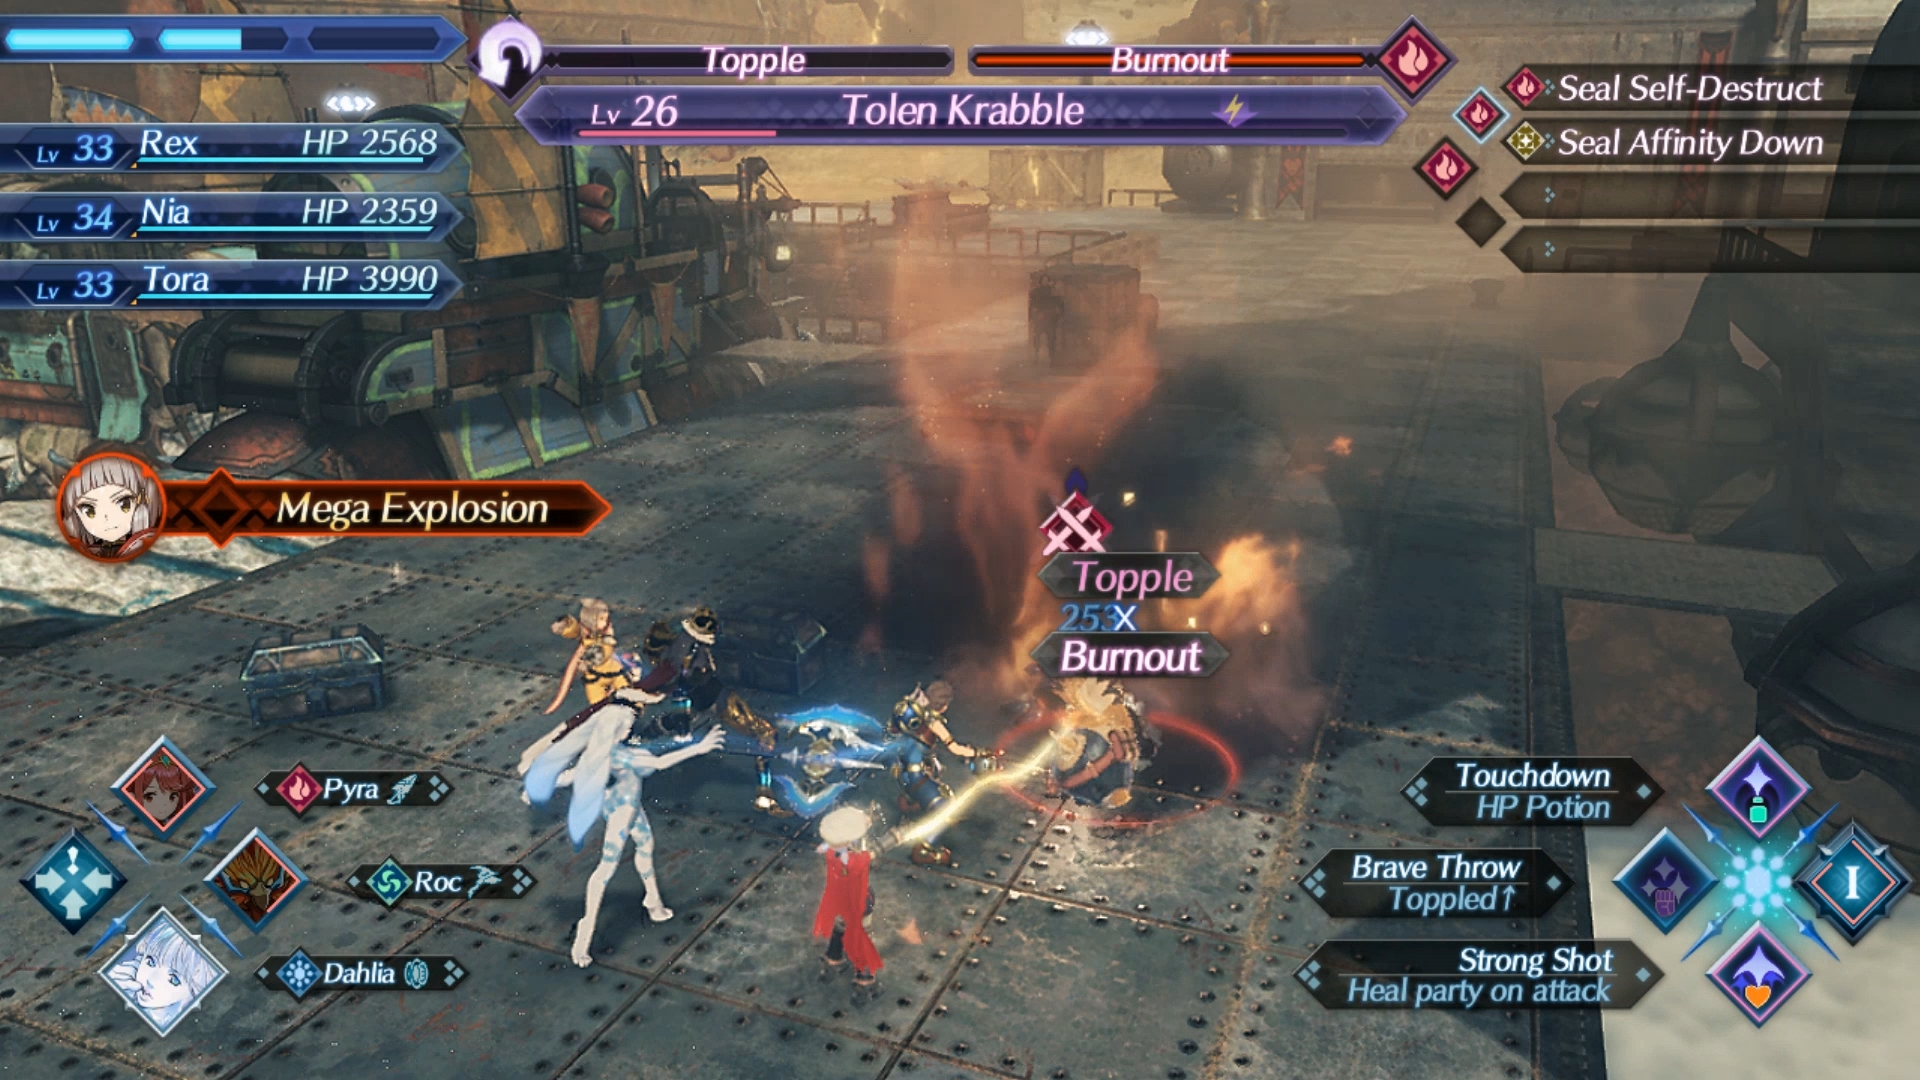
Driver combos are actually a (mostly) returning mechanic from the original Xenoblade Chronicles. Certain Driver Arts can inflict a status called Break. From there, the target can be susceptible to Topple and then Launch, and finally Smash. You can only Topple a target that has been affected by Break. And so on for Launch, and so forth for Smash. Smashing. I'll see myself out
Following so far? Break --> Topple --> Launch --> Smash
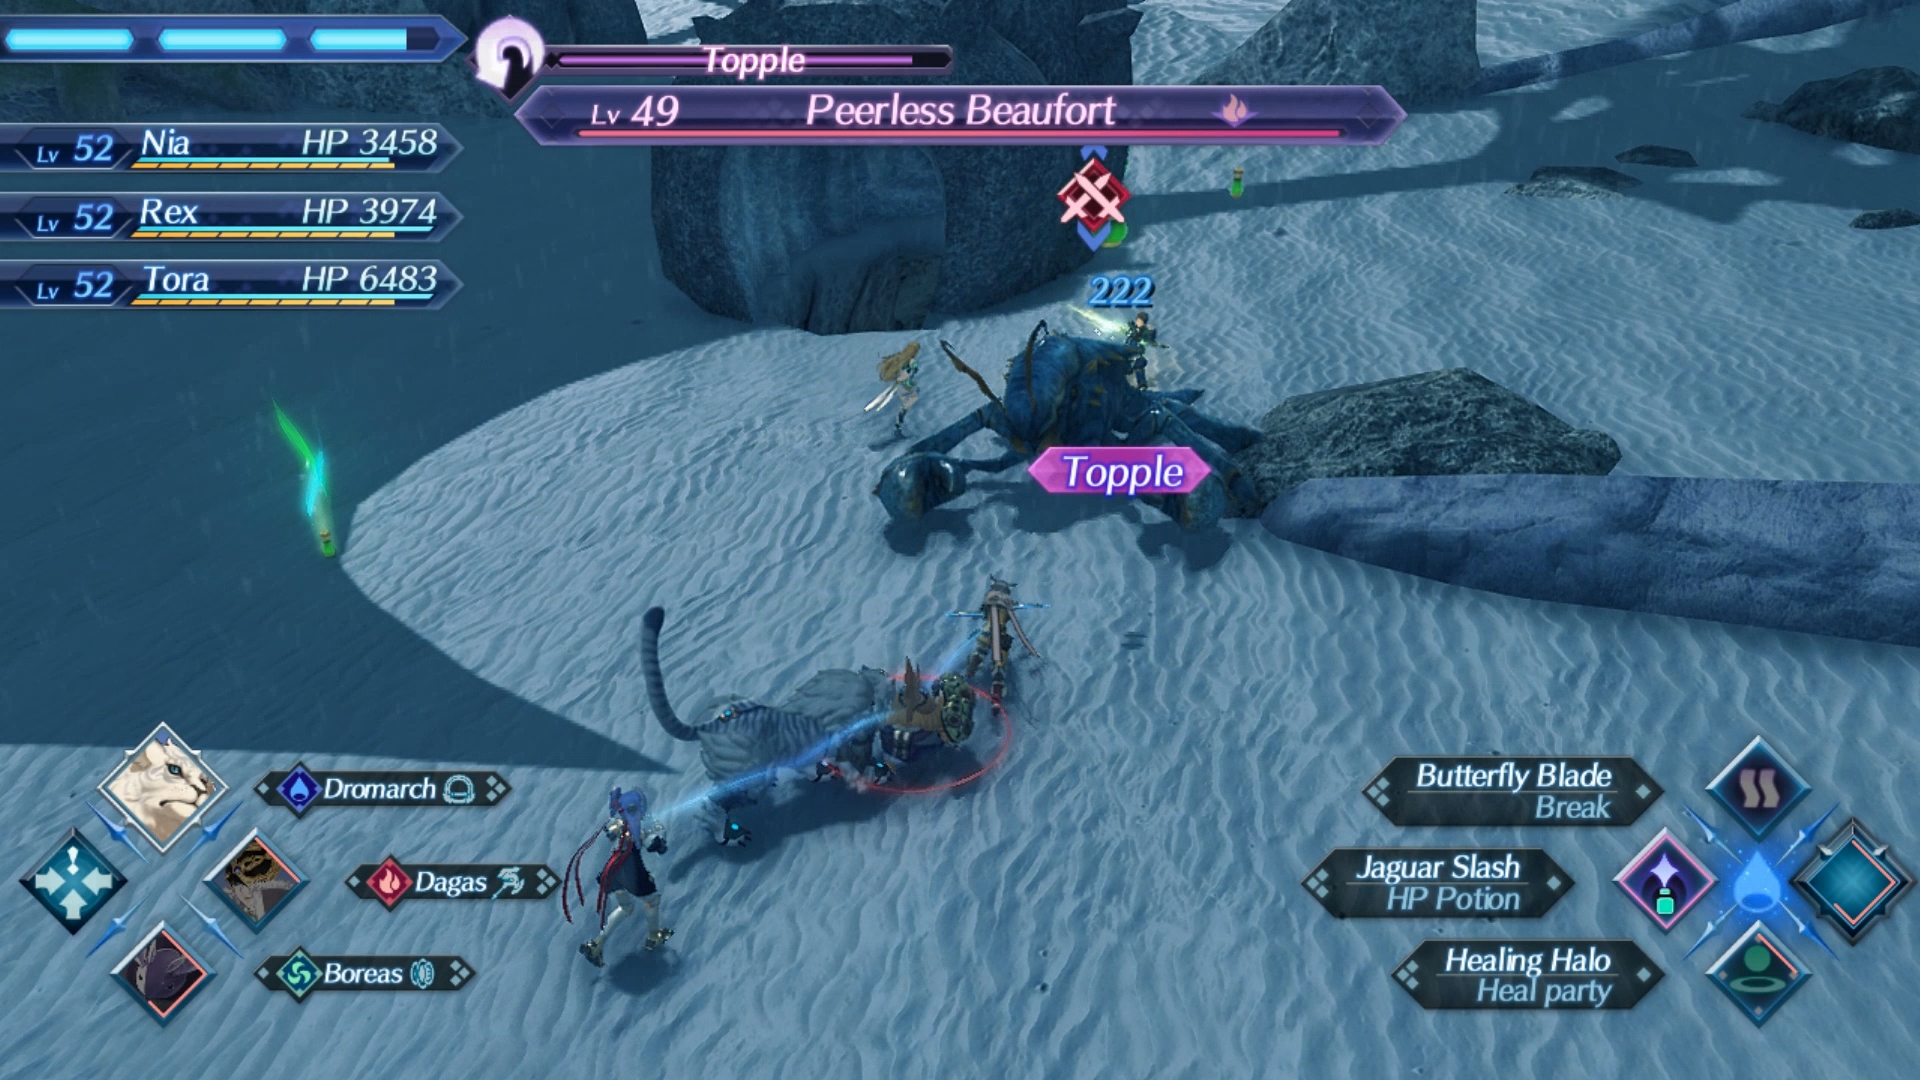
Other Driver Arts will do extra damage to Toppled or Launched foes. Therefore it's important to decide whether you need to further chain the combo and decide to launch a toppled enemy, or deal the extra damage while a specific debuff is in place. With enough skill and preparation, you will eventually be able to attempt both.
Toppled and Launched foes are not only defenseless while they are under the status, but are no longer capable of attacking your party, so these combos can be used defensively as well.
Fitting in the status effects needed to successfully perform a full combo could potentially mean a little bit of weapon switching, so it's always a good idea to build up Trust with your Blades so that swapping out for a new weapon type in order to fit a debuff in in time will never be a problem.
Blade Arts
Blade Arts are a bit simpler mechanically compared to Driver Arts due to the fact that Blades are not in the player's direct control. Instead, Blade Arts are passive buffs that are given to your Driver while they are engaged with a specific Blade in battle. These arts can range from significant damage increases to the ability to evade attacks. Most of the time, you won't have to think too hard about Blade Arts. Just make sure to keep progressing your Blades through the unlock requirement in their Skill trees and you'll be able to make use of their powerful abilities in battle. The exception comes with Specials, in which the player has direct control:
Specials - the ultimate character abilities
The last of the face buttons near your Driver Arts is reserved for your currently equipped Blade's Special abilities. There are three tiers of Specials and then a final fourth tier that works a little differently.
As mentioned with Driver Arts, activating an Art after the completion of an auto-attack (or a full auto-attack chain) will charge your Special ability. Once enough charge has been reached, you'll be able to perform that Special like any other Art as a combination attack between your Driver and their Blade. These Specials will come with a certain button press QTE that needs to be performed in order to maximize their damage.
One note is that the fourth Special works slightly differently than the first three. Once you have performed enough Arts to maximize the Special charge to three, you need to stay in close proximity to your Blade in order to reach the final Special. Once you have max affinity with a Blade in combat, the line tether between that Blade and your Driver will turn yellow. Not only will this engage specific Blade Arts (such as Mythra's Foresight), but it will also allow you to upgrade from a Tier III Special to a Tier IV special. Past that point, it functions the same as the others, just stronger and with more pizazz, of course.
But that's not all! You'll be able to order your other Drivers in your party to use their Specials using the two trigger buttons when their Icons become available on the left and right hand sides of the screen. This is critically important when it comes to the next mechanic that builds from Specials: Blade Combos.
Blade Combos
Here's the single most intricate aspect of Xenoblade Chronicles 2's combat system. I hope you have a good grasp of what's going on before this point, because this can get messy if you're not paying attention.
Let's recap: Auto-attacks charge Driver Arts which can Combo while also charging Special attacks, while being buffed by Blade Arts. We on the same page? Good.
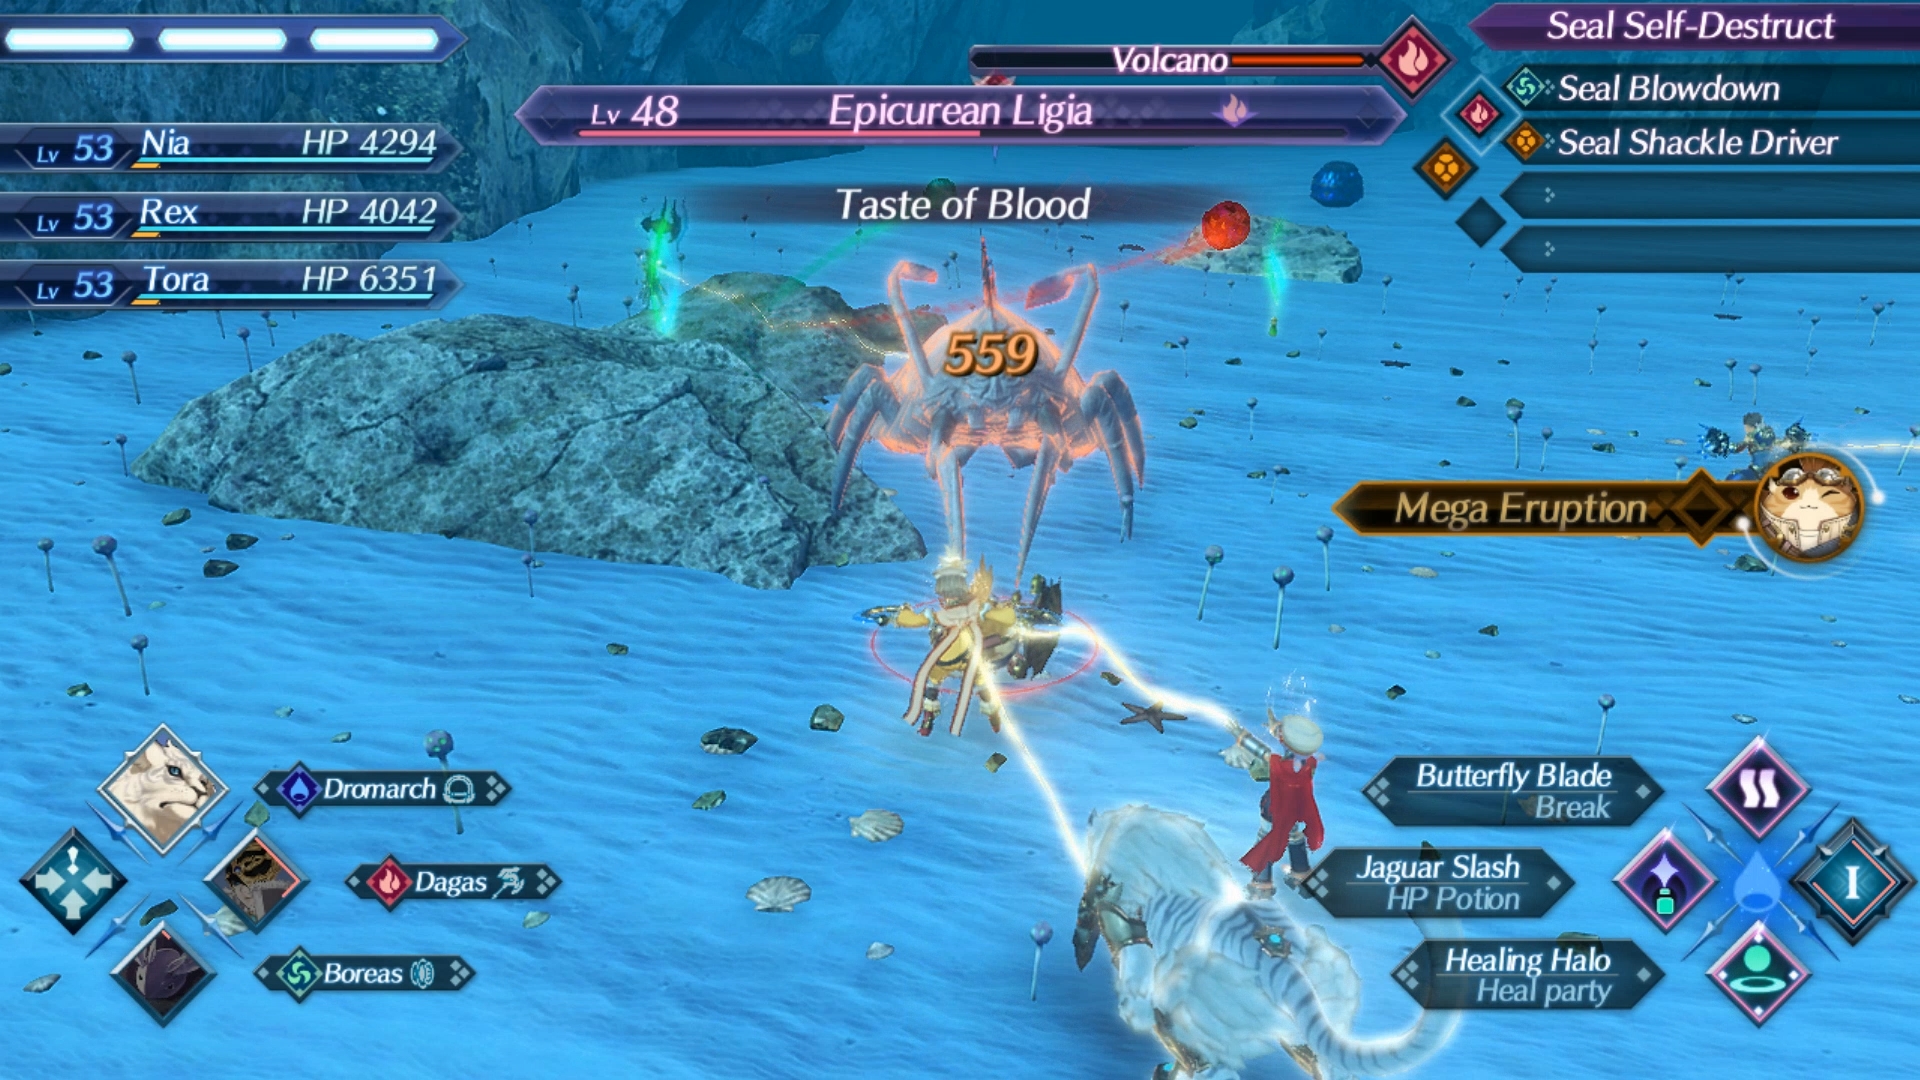
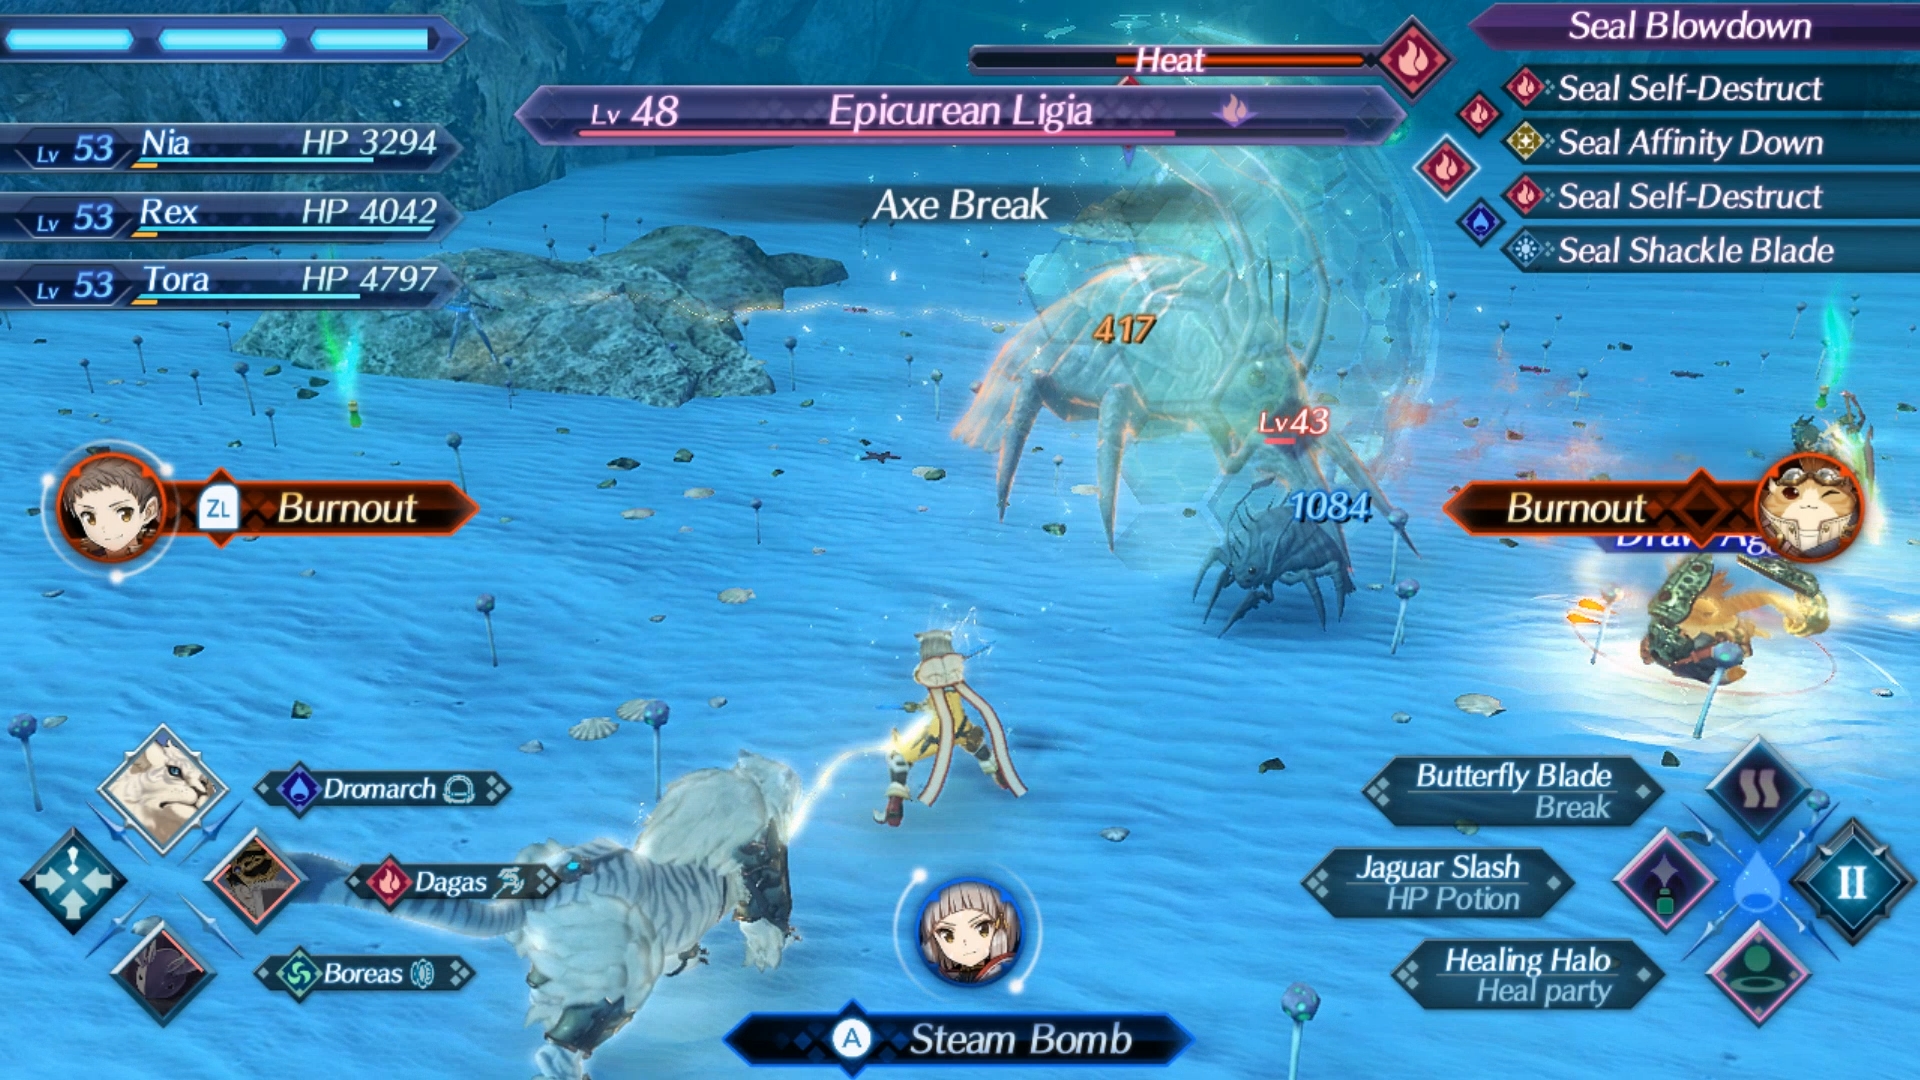
Once a Special attack has been performed on any target by either the player-controller driver or one of your party members (via the left and right triggers), that target will have a colored aura around their model and a debuff-style UI element next to where the Break/Topple/Launch debuff would be indicated. This is a bar that will gradually diminish just like any other debuff. While an elemental aura is on the target, the following UI tree will be present.
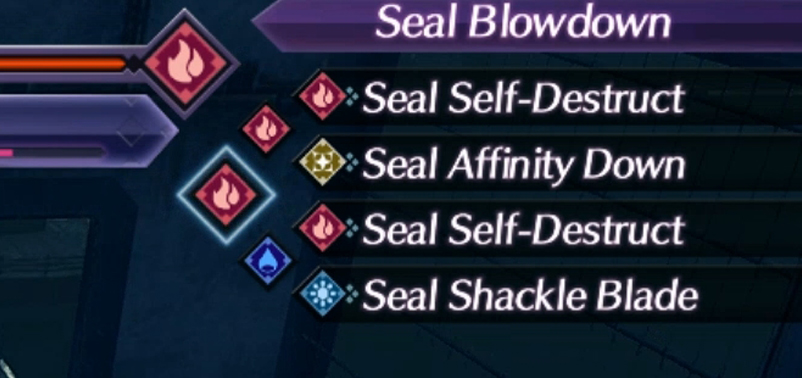
During this, there will be an additional UI element to the right of the enemy health bar. This UI tree isn't completely intuitive to read, so here's how to decipher it.
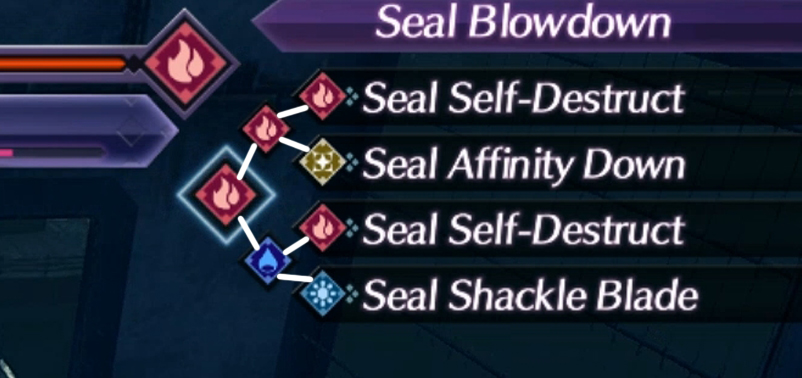
The indicated Diamond is the aura currently present. To the right of that there are two other elemental icons. That is the element of the next Special element that must be performed.
While the first Special used to initiate the Blade Combo can be of any level, the second must be at least level 2. The player-controlled Driver can either perform the Special, or you can wait for one of the party members to pull it off. I would highly recommend making sure your party members are focusing the same target by pressing left on the D-pad.
A party member that currently has an element-compatible blade capable of continuing the Blade Combo will have their Icon appear on the left or right side; the player-character will also have their icon show up on the bottom if they are also capable of performing a special of the necessary element.
These combos are often given confusing attack names, but really the most important thing to keep in mind is the necessary element. Once you or a party member are capable of continuing the combo, press the trigger (or A) to unleash your level 2 Special. Note you don't have to worry about a party member performing too low of a Special for the combo, if the trigger button shows, then they will extend the combo, guaranteed.
Finally, you must perform a level 3 Special in order to finish the Combo. This works exactly like before, with the only change that this will also incur a specific effect on the enemy, such as locking out the ability to call reinforcements.
As you can see, making sure your Drivers and Blades have good varied coverage of the different elements is crucial in order to be able to successfully complete Blade Combos: there's no worse feeling than not being able to finish a Blade Combo because you don't have a Blade of the proper element equipped on any of your party members.
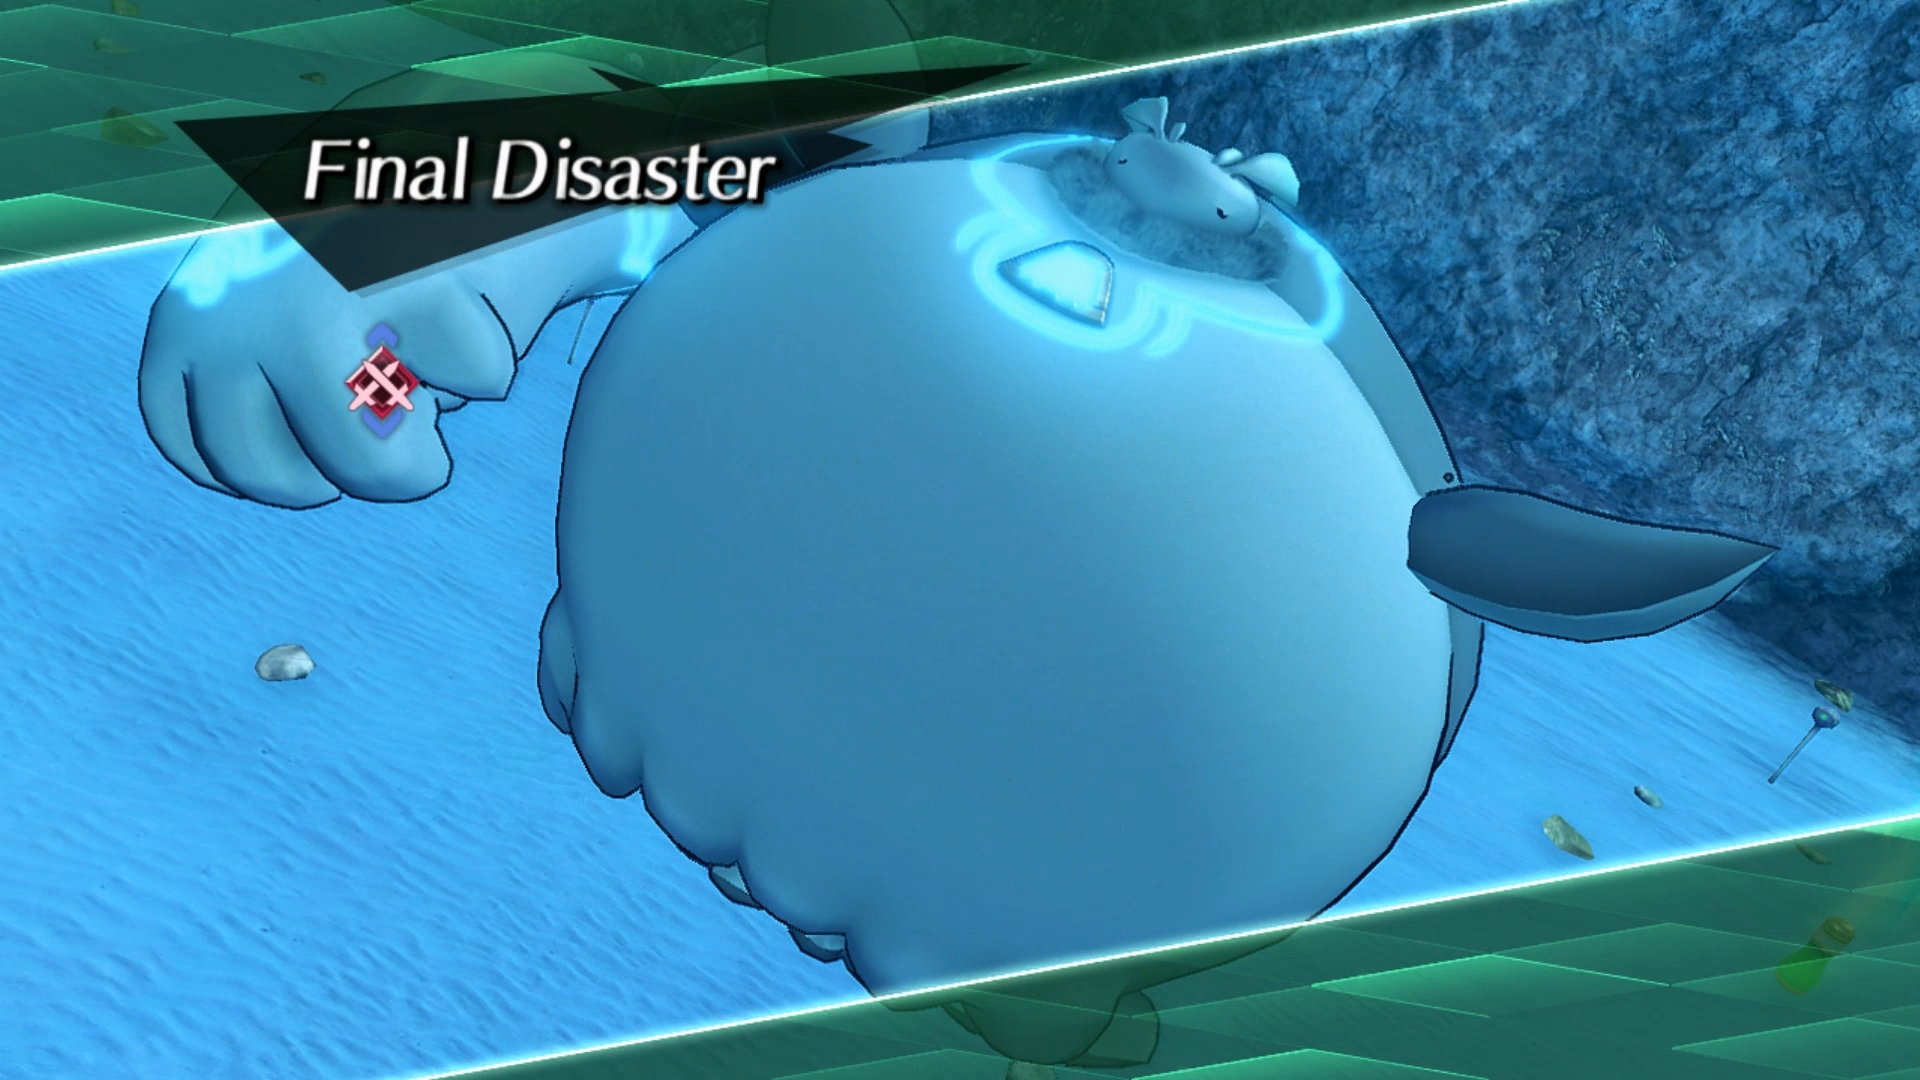
You will notice that any enemy hardy enough to survive a full Blade Combo will end up with an elemental orb of the final elemental attack floating around the enemy. How curious. These orbs become important later when it comes to Chain Attacks. Note that if you are skilled enough, you can put multiple orbs on a target by completing more Blade Combos, but not of the same element. In fact, a follow-up Blade Combo ending in the same element will do significantly less damage, so it's best to keep things mixed up.
Fusion Combo
Fusion Combo sounds complicated, but it really isn't. Fusion Combos are basically the game rewarding the player for being adept at both using Driver Combos to Topple and Launch enemies and Blade Combos to link Special attacks in succession. If you are doing both of these things, you're performing Fusion Combos, it's that easy.
A Fusion Combo occurs when a Driver Combo debuff (IE, Topple) and a Blade Combo aura (IE, Heat) are present on an enemy at the same time. When this happens, the game will indicate that your attack power or debuff duration will temporarily increase while your Party Gauge will fill.
That's really it. There's no new mechanic in play here, mostly just learning how to pair Driver and Blade Combos together in effective ways in order to reach the final destination of this crazy contraption of mechanics: Chain Attacks.
Chain Attack
Chain Attacks are, for all intents and purposes, the ultimate goal of any big encounter as the stakes ramp up and Combos begin flying off left and right. Once past a certain post in the story, a Chain Attack can be initiated whenever the Party Gauge is full by pressing the + button.
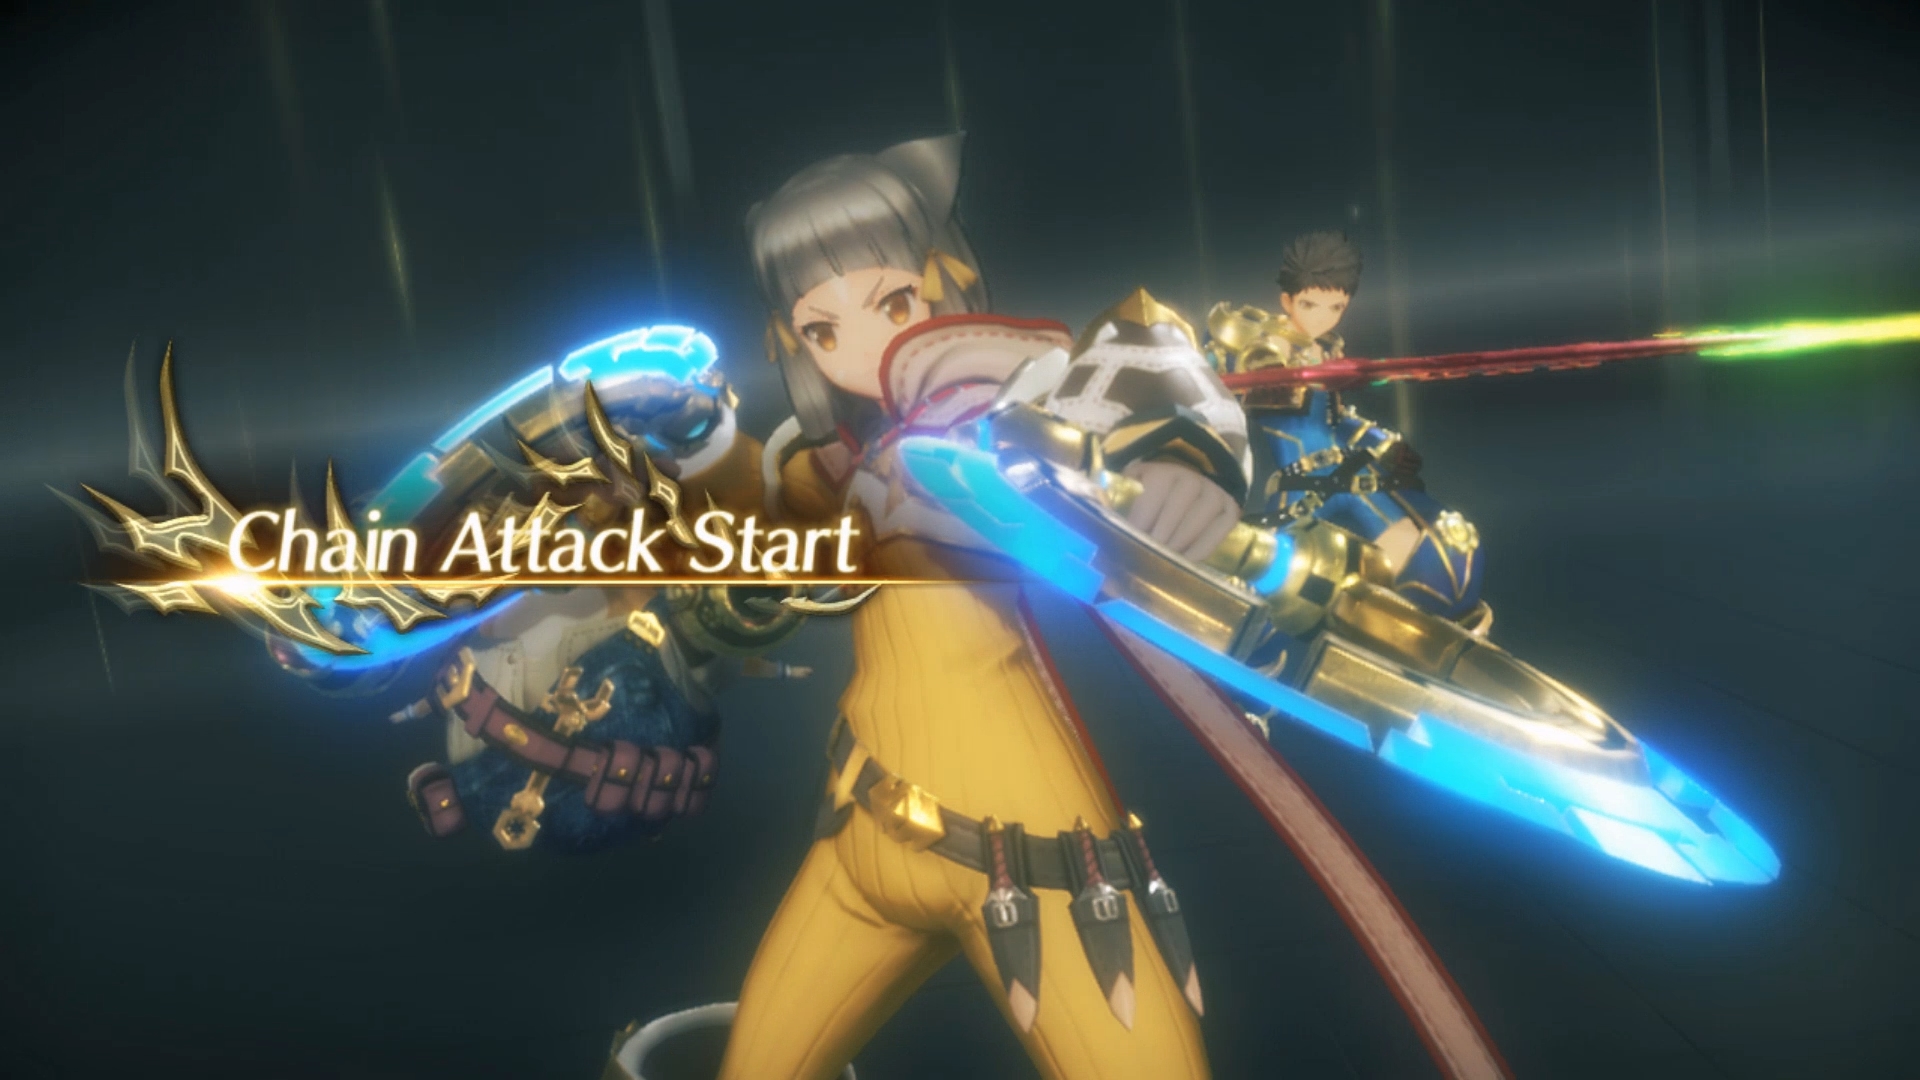
Chain Attacks work mostly similar to those in the original Xenoblade Chronicles, but in this case, it's the Blade Specials that are Linked together. Each Driver will get a chance to use one of their Specials on their engaged blades one at a time for massive damage.
But wait, there's even more! Remember those pesky orbs that can appear after a Blade Combo? Well here's where they can actually become useful for you: during a Chain Attack, these orbs can be broken to increase the length of the chain. These orbs can be more easily broken if using specials of the opposite element: Fire will break Water, Dark is effective against Light, Wind is good against Ice, and Earth pairs with Electric. So once again, having a good variety of elements covered via your engaged blades is crucial in order to keep your chain attack growing and watching the damage totals go through the roof.
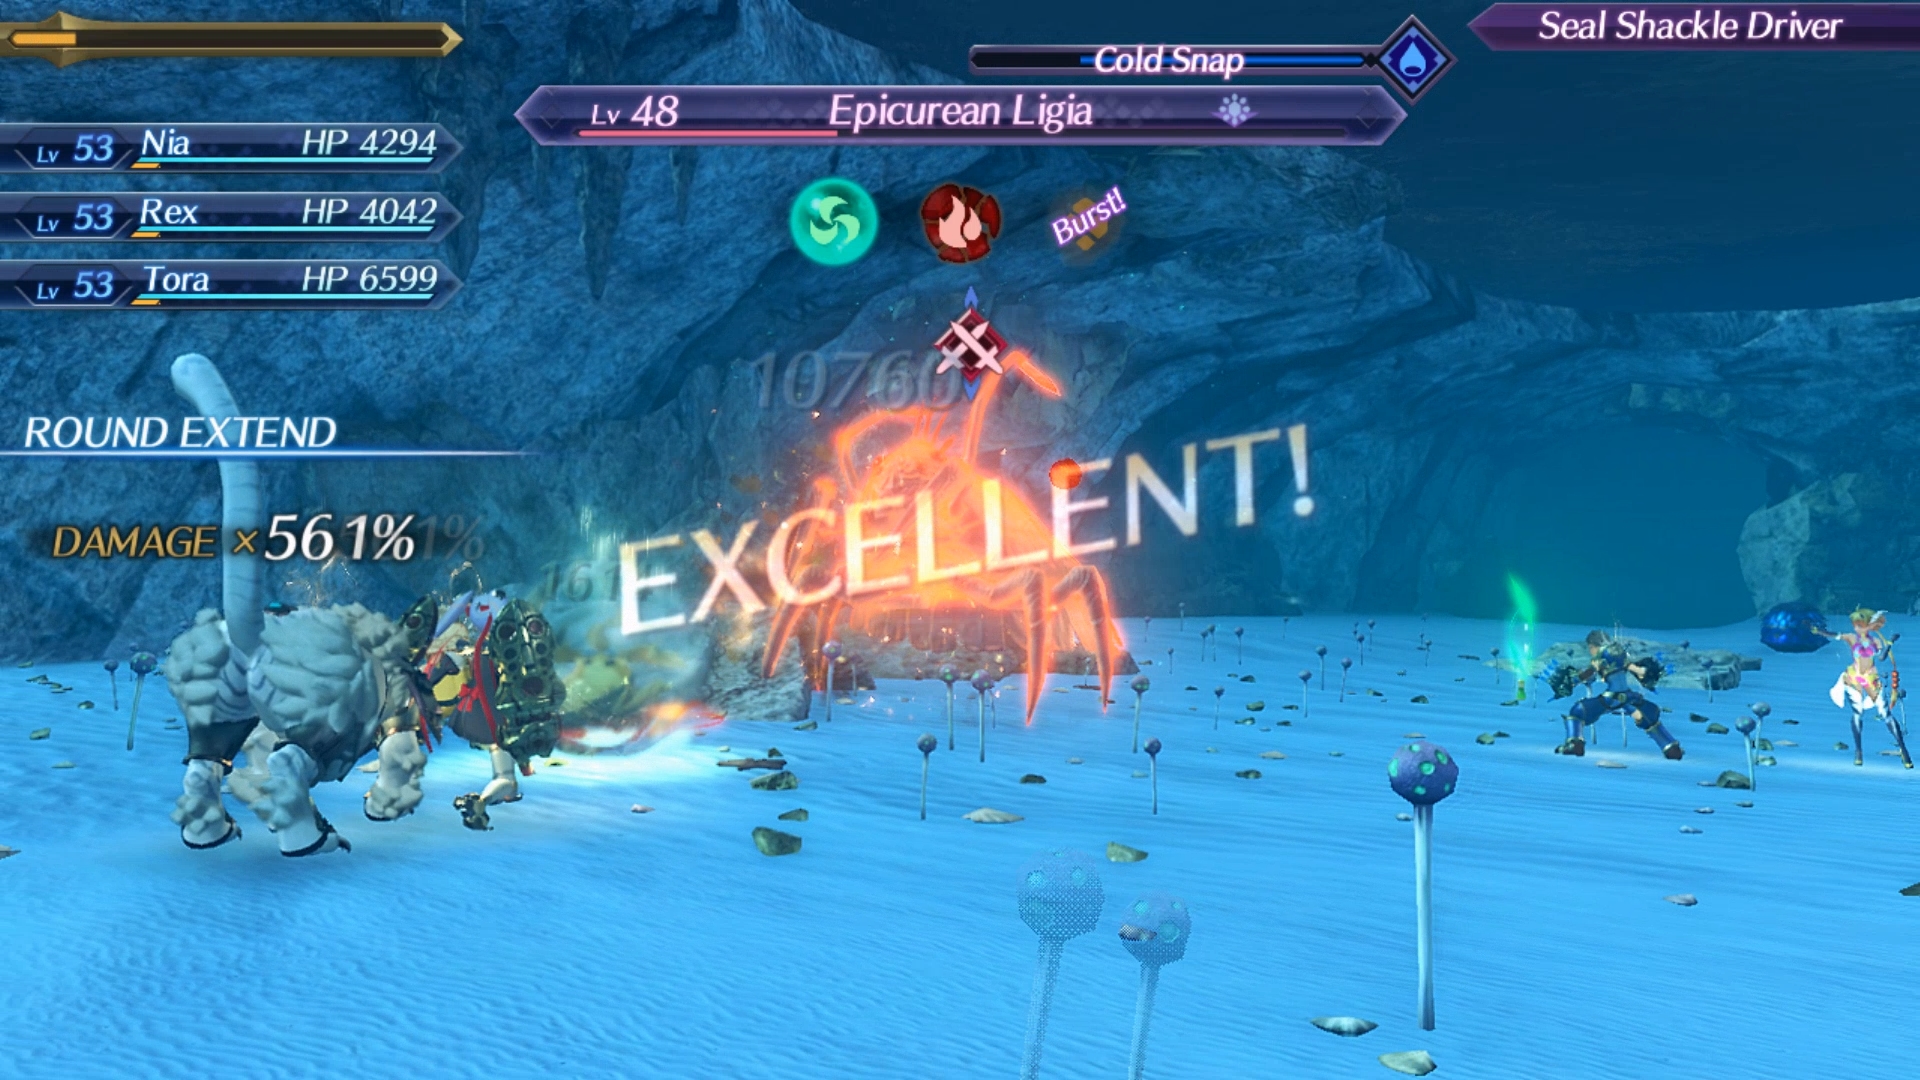
For every orb that gets broken during a Chain Attack, your damage output will increase substantially, and you'll be given a trigger to extend the Chain Attack to another round of Specials. A successful trigger will increase the specials performed to Tier II for the second round, and so on.
Note that if you break enough Orbs with successful triggers during a chain attack, you'll charge a Full Burst, which is the ultimate damage output in the game. A chain attack that reaches Full Burst can easily dish out damage in the millions and will be essential to toppling the game's toughest foes.
We hope that this has helped tie up some of the daunting nature of the UI and combat systems which can be a lot to take in at once if not broken down to their base components. Of course, the best way to truly learn the ins and outs of the system is to put it to the test, so it never hurts to just go out and find some tough monsters to dust off the mechanics and see how your party composition is looking. With some practice, maybe those tough looking Gogols aren't so tough after all.