
Monster Hunter World: Limited Bounties, Wyvernian Prints, and the Elder Melder explained
Now that the game has been out for well over a month Hunters have probably noticed the weekly rotation of limited bounties in Monster Hunter World, but one of the beauties and the stresses of Monster Hunter is that there's new stuff around seemingly every corner, especially in the late game.
It seems pretty likely that some players might be confused as to what their "Wyvernian Print" rewards actually do, and whether or not they're worth going out of your way to complete the necessary steps to grab them. The truth is that these objectives are relatively simple but give out massive rewards that can make grinding for top-rarity monster parts much less of a game of chance than it would be otherwise. That, in turn, is incredibly useful for getting to the high rank armor sets and weapon upgrades you'll need to kit your hunter out for the end-game content. Here's how all that works made absolutely clear...
Need more Monster Hunter World assistance? Check out our comprehensive Monster Hunter World Guide, with help for everyone, from beginners to seasoned pros.
Limited Bounties - how they work in Monster Hunter World
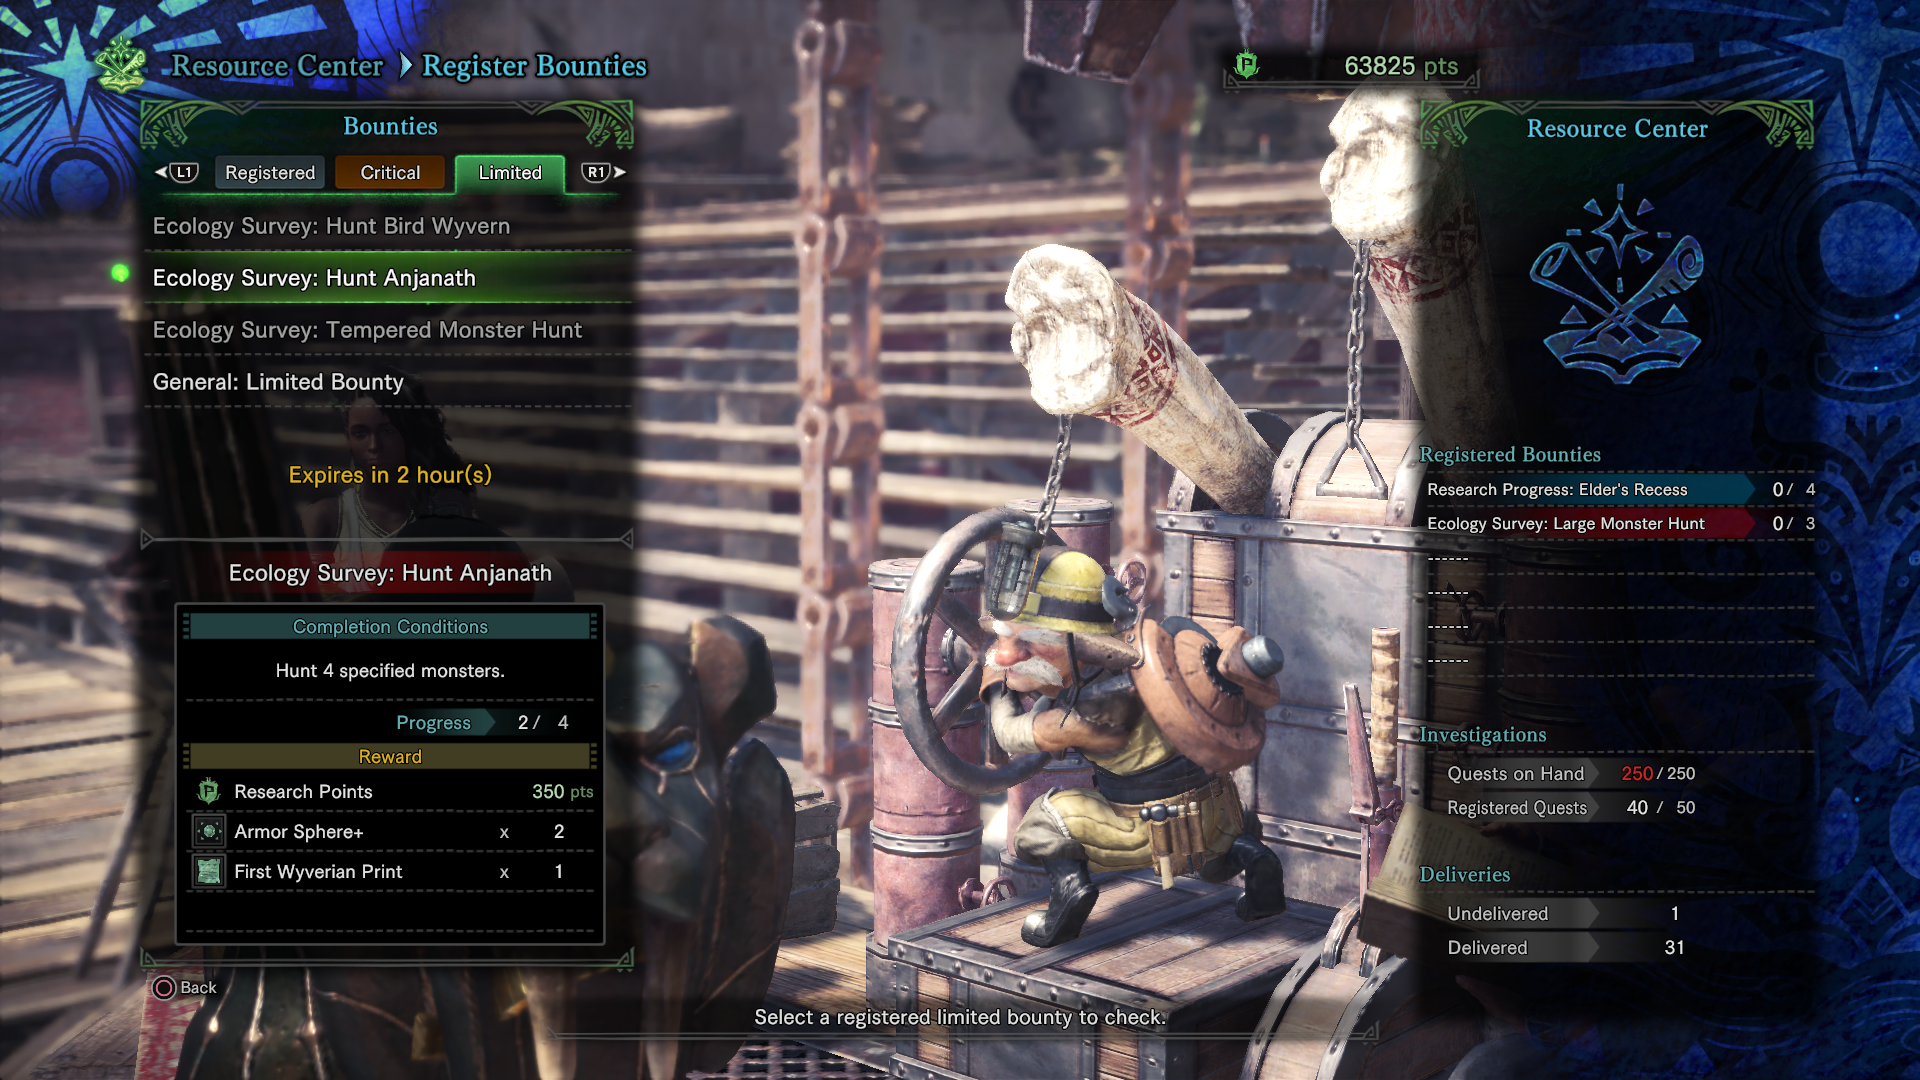
Limited Bounties, like Registered and Critical Bounties, are small tasks that can be completed across multiple quests in order to receive rewards. They'ew only limited time, as the name suggests, which means that there's a steady flow of them that'll allow you to earn those much-needed rewards beyond Monster Hunter World's boiler-plate included quest content.
The rewards will be familiar to players: Research Points and Armor Spheres. These are used for character progression and upgrades, and so they're incredibly useful the more you play. One of the best rewards, the Gold Wyverian Print, is saved for last, however - more on that in a second.
Limited Bounties are unique in the sense that players are given 3 of them to complete each week - each rising in both the difficulty to complete them, as well as the significance of the reward. It's only when you've cleared all three of a given week's limited bounty requests that you tend to get a Gold Wyverian Print as your reward - and that's an absolutely essential item for conquering and countering Monster Hunter's infamous reliance on random chance RNG loot-dropping.

Wyvernian Prints & the Elder Melder
Wyvernian Prints can be exchanged at the Elder Melder alongside Research Points to craft monster parts. The higher the rarity of the print - Steel Wyvernian, Silver Wyvernian, Gold Wyvernian - the rarer the monster part you're able to exchange said print for. Steel Wyvernian Prints can be exchanged for things like Spikes or Marrows. Silver can be exchanged for plates. Gold, the most useful, can be exchanged for Gems/Rubies, the rarest monster parts in the game.
If you need an Anjanath Gem, for instance, this is a guaranteed way to get ti without farming out the difficult Anjanath encounter over and over again in the hopes that an Anjanath Gem will drop. This goes for pretty much all the different monster parts.
Although you'll only get one print a week, and not every week may necessarily give out Gold Wyvernian Prints, the vast majority of the time grinding said prints out will be worth your time and will be quicker than the alternatives. Most weeks, you'll probably have enough other reasons to do the Limited Bounties anyway. Maybe you might have another excuse to grind a specific monster, or you want the armor sphere rewards for upgrading your end-game armor set (which becomes especially important once you reach the end-game), if nothing else - it guarantees that you'll be able to craft/upgrade certain equipment, without being at the whim of RNG that might never drop the rare parts that you need.