
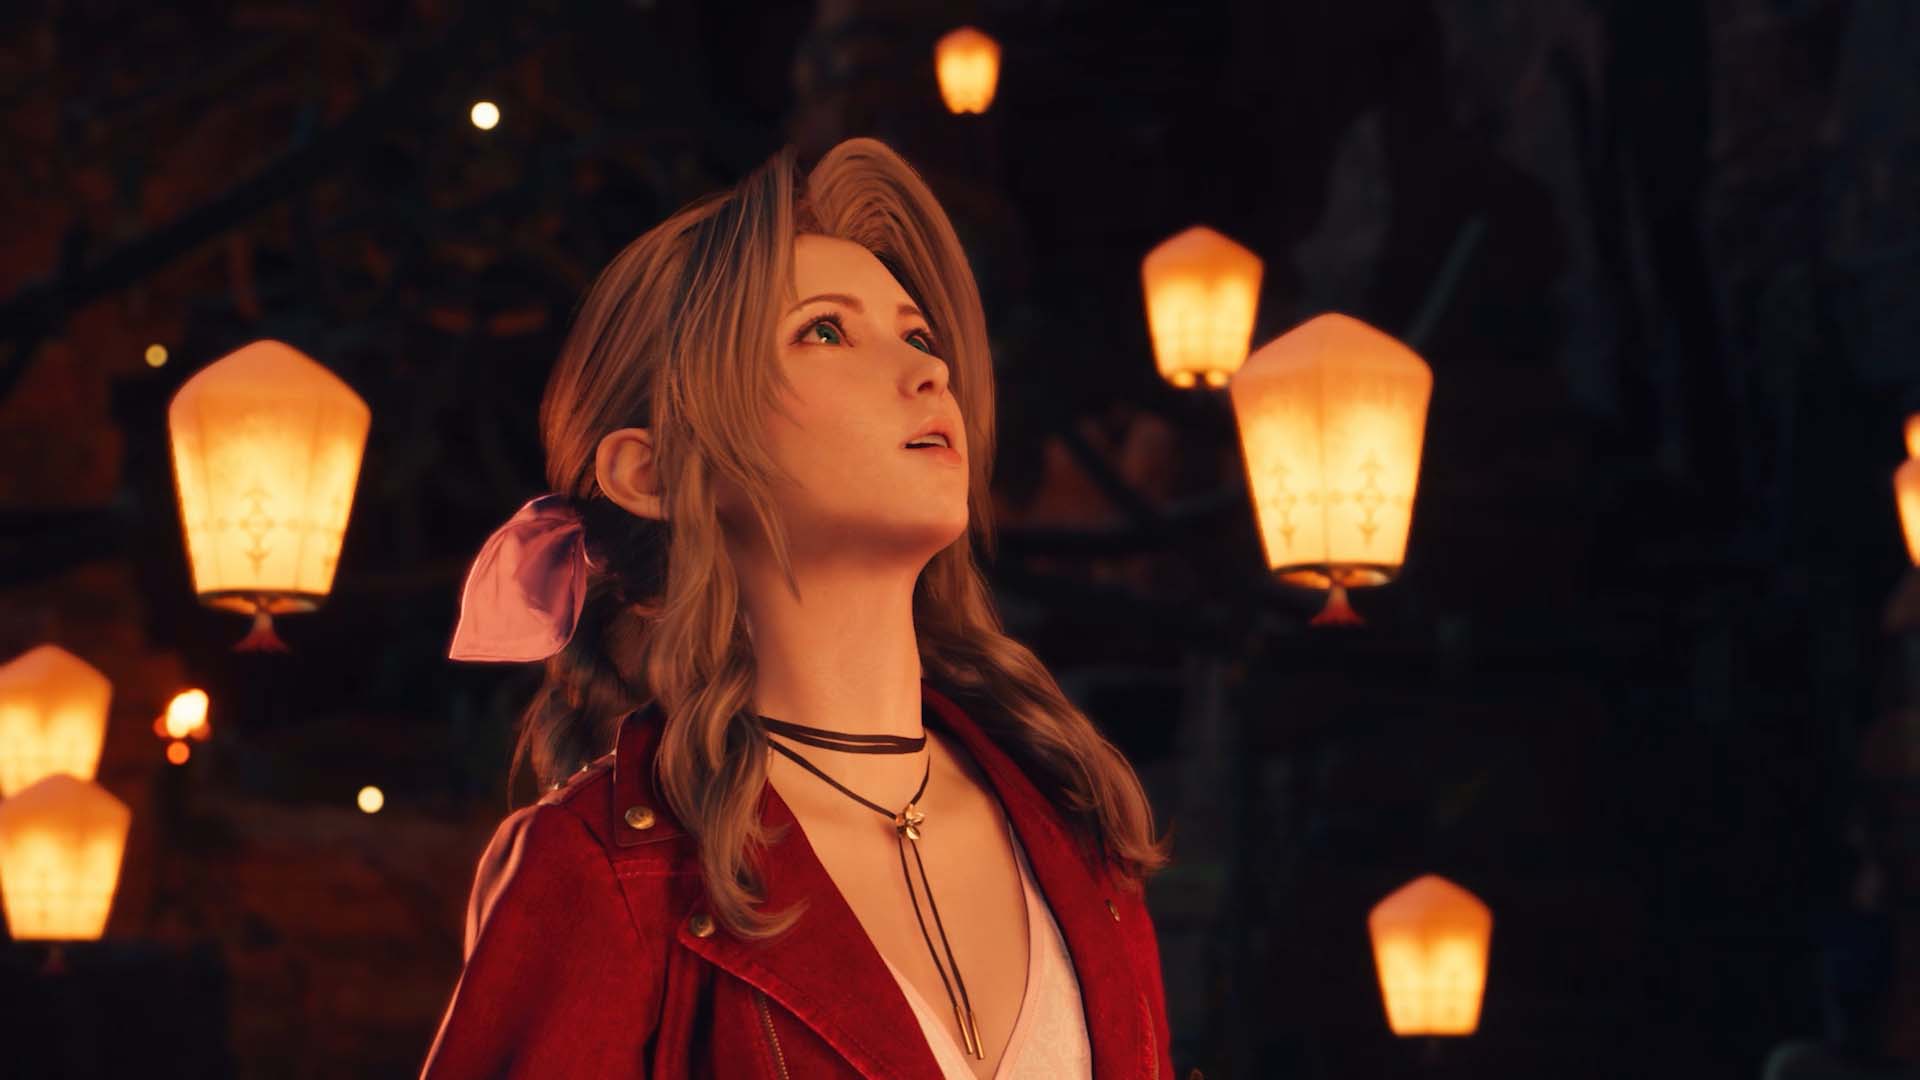
Final Fantasy VII Rebirth Weapons: The best weapons for every character and where to find them
Weapons are key to the combat styles of every playable character in Final Fantasy VII Rebirth, and everyone in Cloud's world-traveling party has a healthy selection of weapons to choose from. But if you need some extra info on how to acquire each weapon and how best to use it, this page has you covered. This Final Fantasy VII Rebirth Weapon Guide covers the Locations and Weapon Abilities for every character in the game, and makes recommendations on the best weapons for each character.
FF7 Rebirth Weapons, Explained

Weapons in Final Fantasy VII Rebirth have changed significantly from the way they were handled in FF7 Remake. Instead of being the hub of sorts for upgrades like in Remake, most of the old perks and additions were folded into the Folio system. You also no longer have to buy extra Materia slots. Some of the more "unique" weapon styles like Cloud's Nail Bat or Barret's melee arms no longer show up in the game, either.
In FF7 Rebirth, weapons upgrade in a linear fashion as you gain SP from quests, manuscripts and party levels. Thus every weapon a character has is the same level, no matter when they acquire it. As a character raises their weapon level, all the weapons they posses earn new Weapon Skills, which are like perks or stat boosts that can be equipped to slots. An auto-upgrade system can be used to emphasize certain stat leans and have the computer handle allocation.
The main differences between weapons are in their general stat lean (whether they emphasize Physical or Magic attack), their Weapon Abilities, their Weapon Skills, and their Materia slots, which upgrade automatically as a character's weapon level grows.
- For the purposes of this guide, we'll speak about each weapon generally as they pertain to how they affect and alter a character's style.
- We'll also list the stats of each weapon at Weapon Level 7, which is roughly where you'll be at the conclusion of a relatively thorough first playthrough.
- These stats include the weapon's Materia slots and Weapon Skills. Some Weapon Skills appear multiple times, as they can stack.
- Like our Final Fantasy VII Remake Weapon Guide, linked Materia slots will be represented in the following format
- 1x2 = 1 paired set of Materia slots
- 2x1 = 2 single Materia slots
- The maximum number of Materia Slots on a Weapon is 6 total, so a weapon might have 6x1 (6 single materia) or 3x2 (3 linked pairs), for example.
Consider these recommendations as guidelines rather than absolute statements on a weapon's utility.
Most new Weapons in FF7 Rebirth are acquired by looting them from chests in specific areas of the world. Don't worry about missing a weapon, though. Any chest-acquired weapons you miss will show up in weapon stores, purchasable for Gil. That said, a few weapons are earned from challenges, so failing those challenges can keep the weapon from you, though you can return to them in the post-game via Chapter Select.
Weapons for Cloud Strife in Final Fantasy VII Rebirth
Cloud continues to fight with his massive greatsword, and has a goodly selection of models to choose from, some using new designs and others based on ones seen in the original game.
Buster Sword
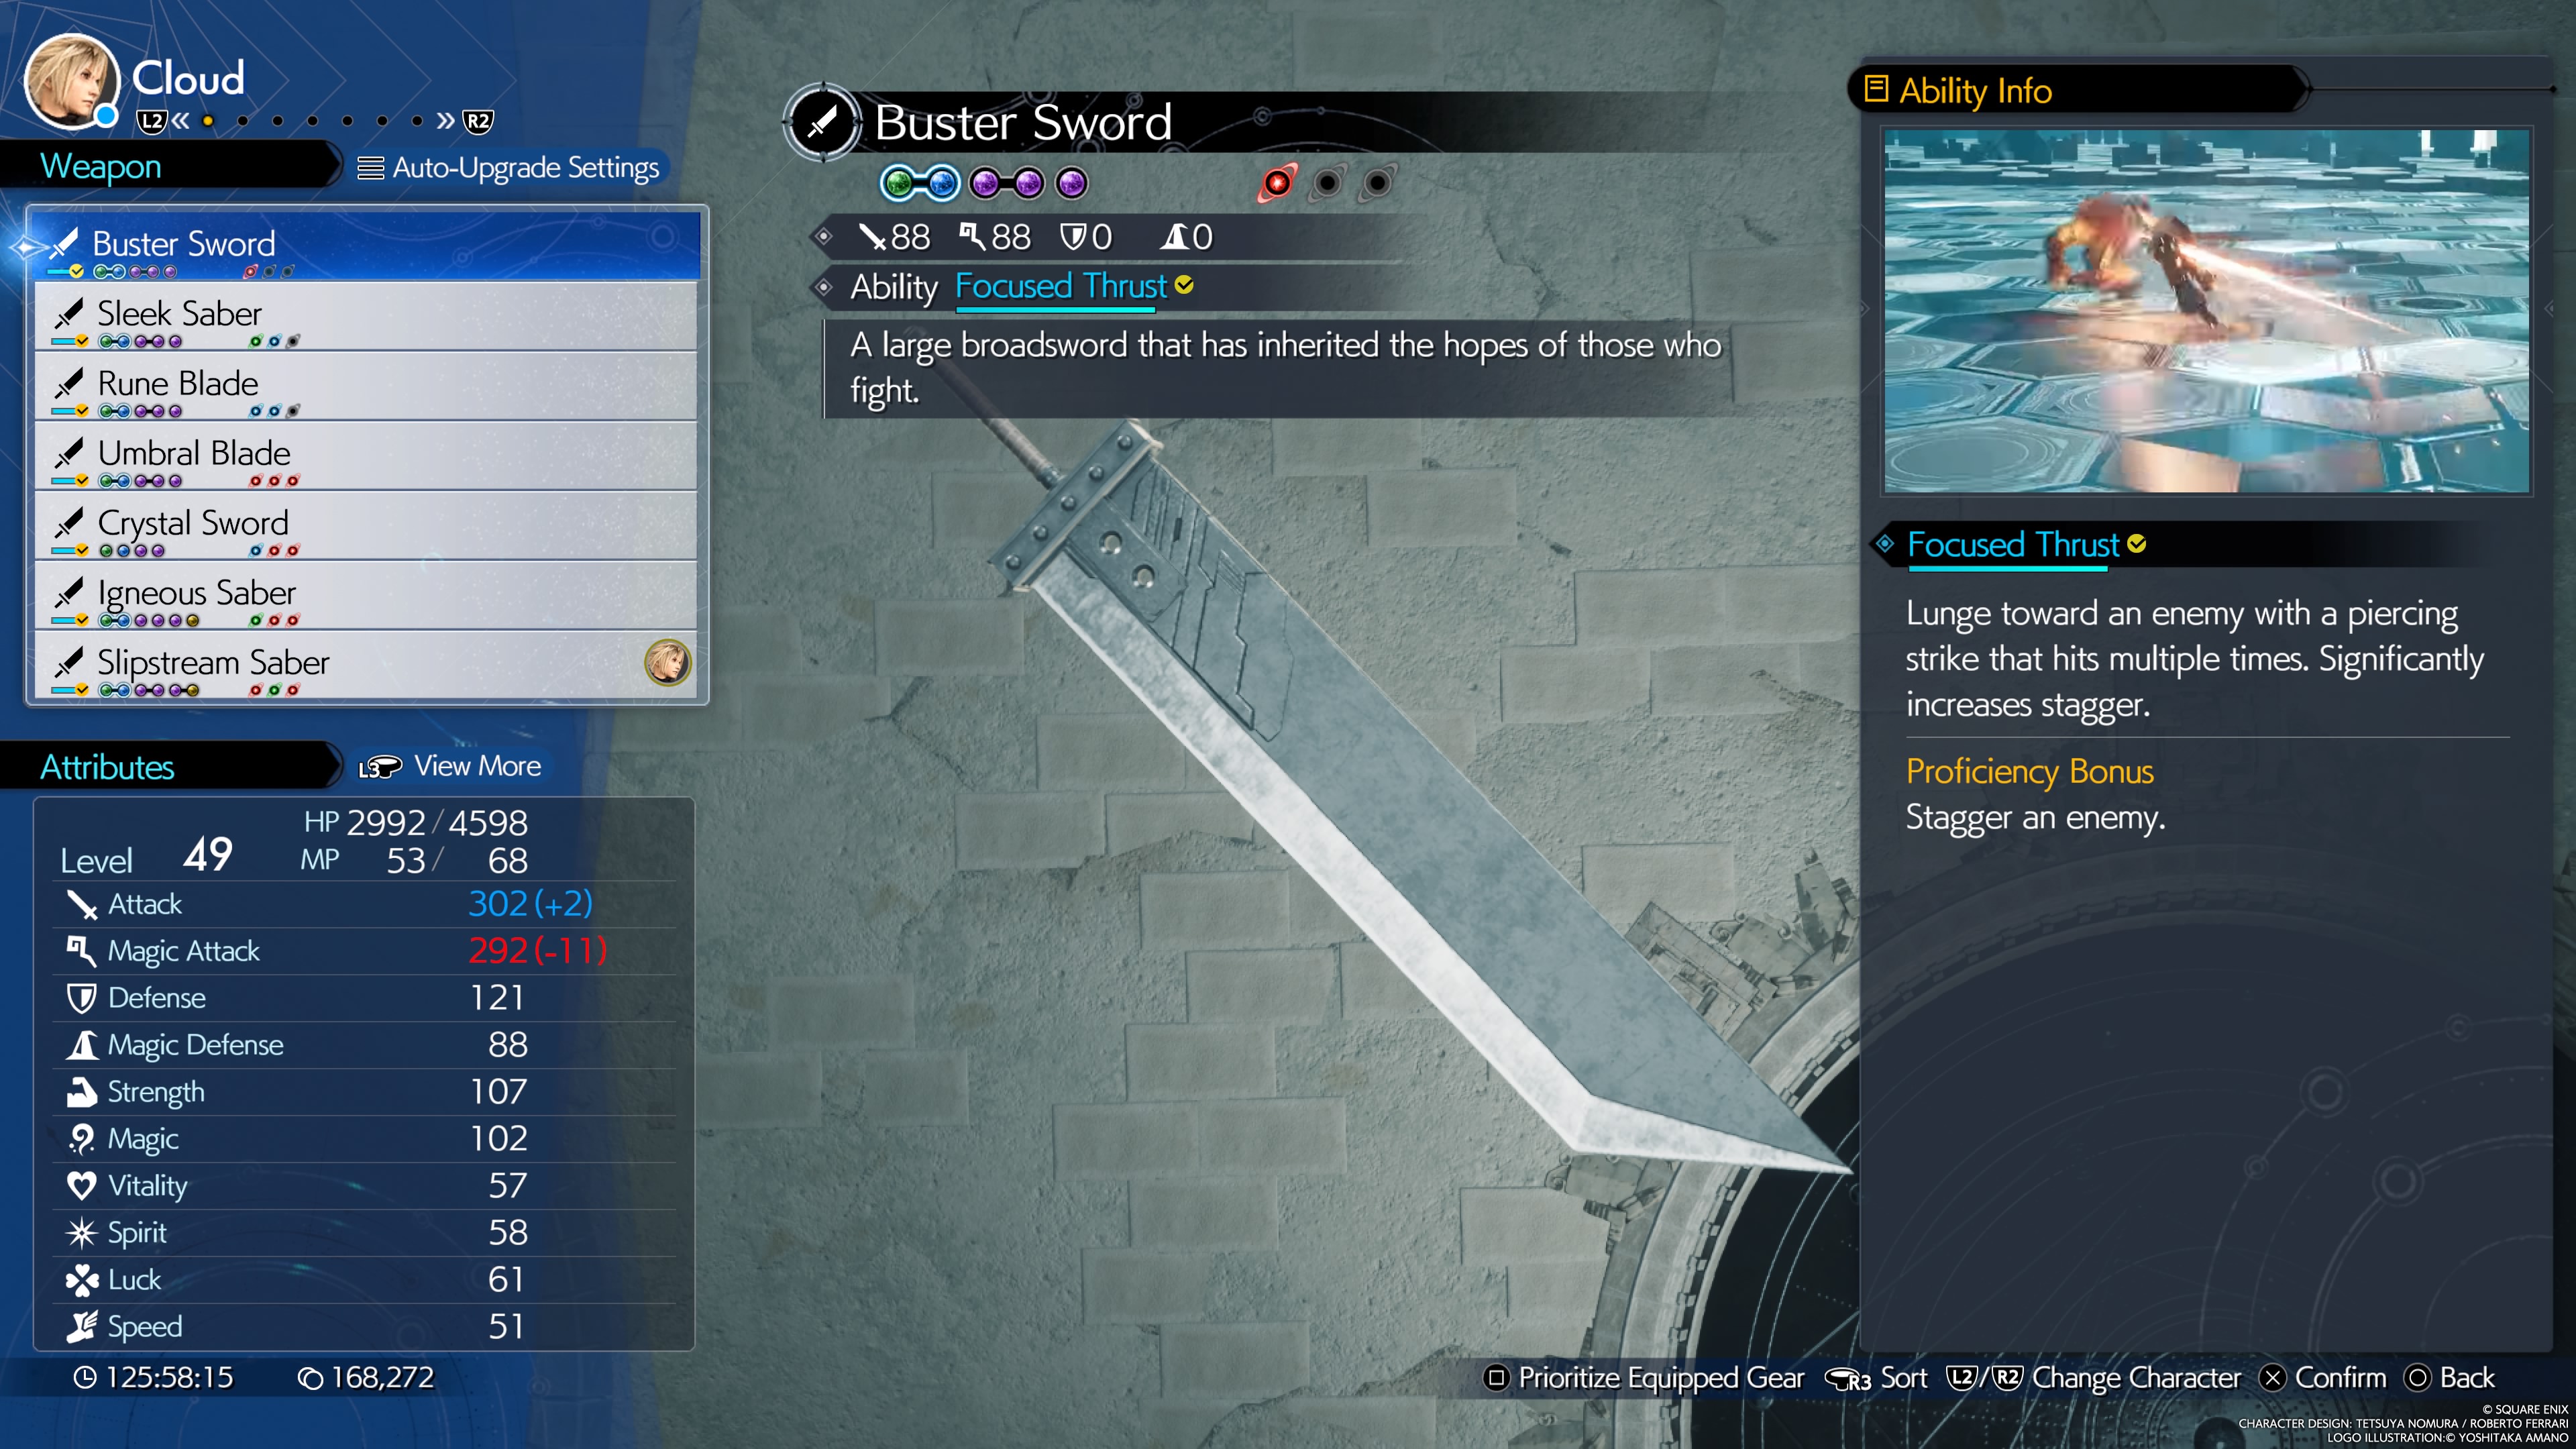
A large broadsword that has inherited the hopes of those who fight.
- Stats (Weapon Lv. 7): 88 Attack, 88 Magic
- Materia Slots (Weapon Lv. 7): 2x2, 1x1
- Weapon Ability: Focused Thrust - A piercing multi-hit lunge that significantly increases stagger.
- Proficiency Bonus: Stagger an enemy.
- Location: Cloud starts with this weapon.
- Weapon Skills (Weapon Lv. 7):
- Weapon Ability Damage +5% x2
- Max HP +200
- Improved Punisher (Punisher mode strong attack damage +10%)
- MP Recovery Rate Up (Increased MP regeneration in combat)
- Enhanced Physical Guard (Physical damage -5% when guarding)
- Max MP +3
- Reprieve (Prevents incapacitation once per battle, except instant death and when HP is 1)
Sleek Saber
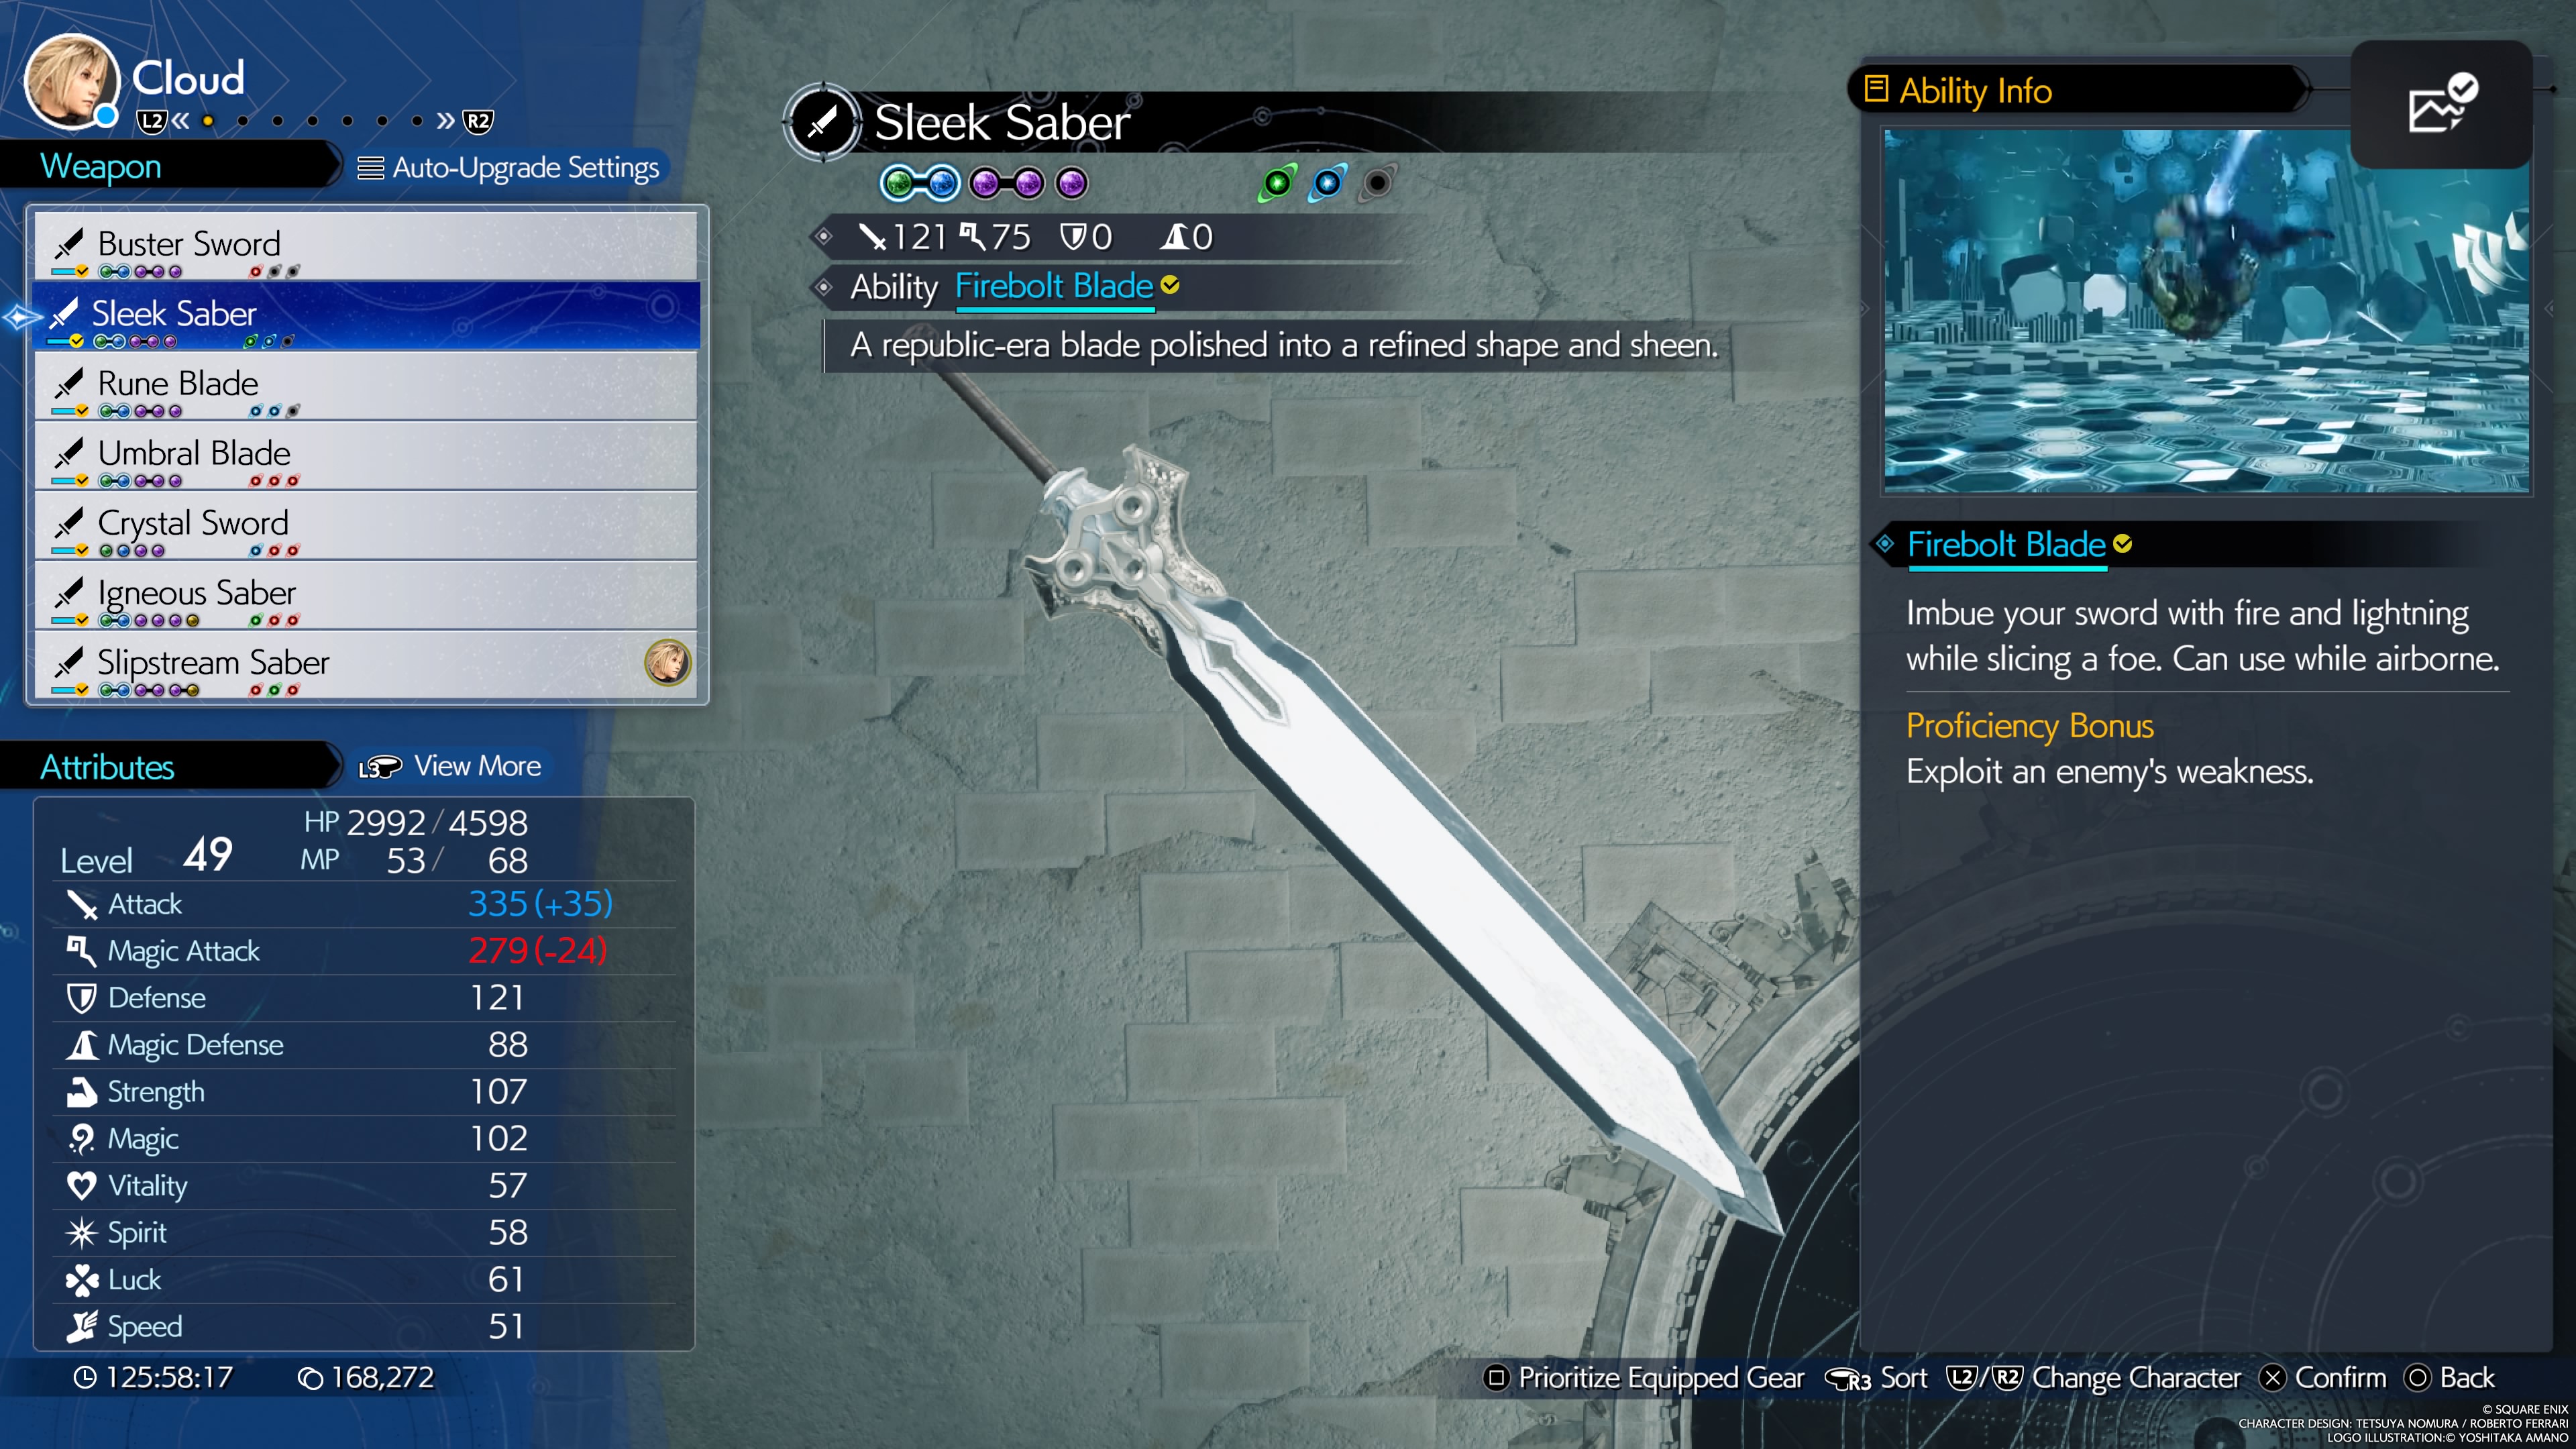
A republic-era blade polished into a refined shape and sheen.
- Stats (Weapon Lv. 7): 121 Attack, 75 Magic
- Materia Slots (Weapon Lv. 7): 2x2, 1x1
- Weapon Ability: Firebolt Blade - An airborne slashing attack imbued with fire and lightning.
- Proficiency Bonus: Exploit an enemy's weakness while equipped.
- Location: Found in a chest at the Abandoned Dock location in the Grasslands.
- Weapon Skills (Weapon Lv. 7):
- ATB Charge Rate Up x2 (ATB gain from actions +10%)
- Unrelenting Punisher x2 (Increase hit count from punisher attacks)
- Magic Attack Power +20
- Weapon Ability ATB Recovery (5% ATB recharge from abilities)
- Attack Power +20
- Selfish Buff Up (Received buff duration +25%)
Rune Blade
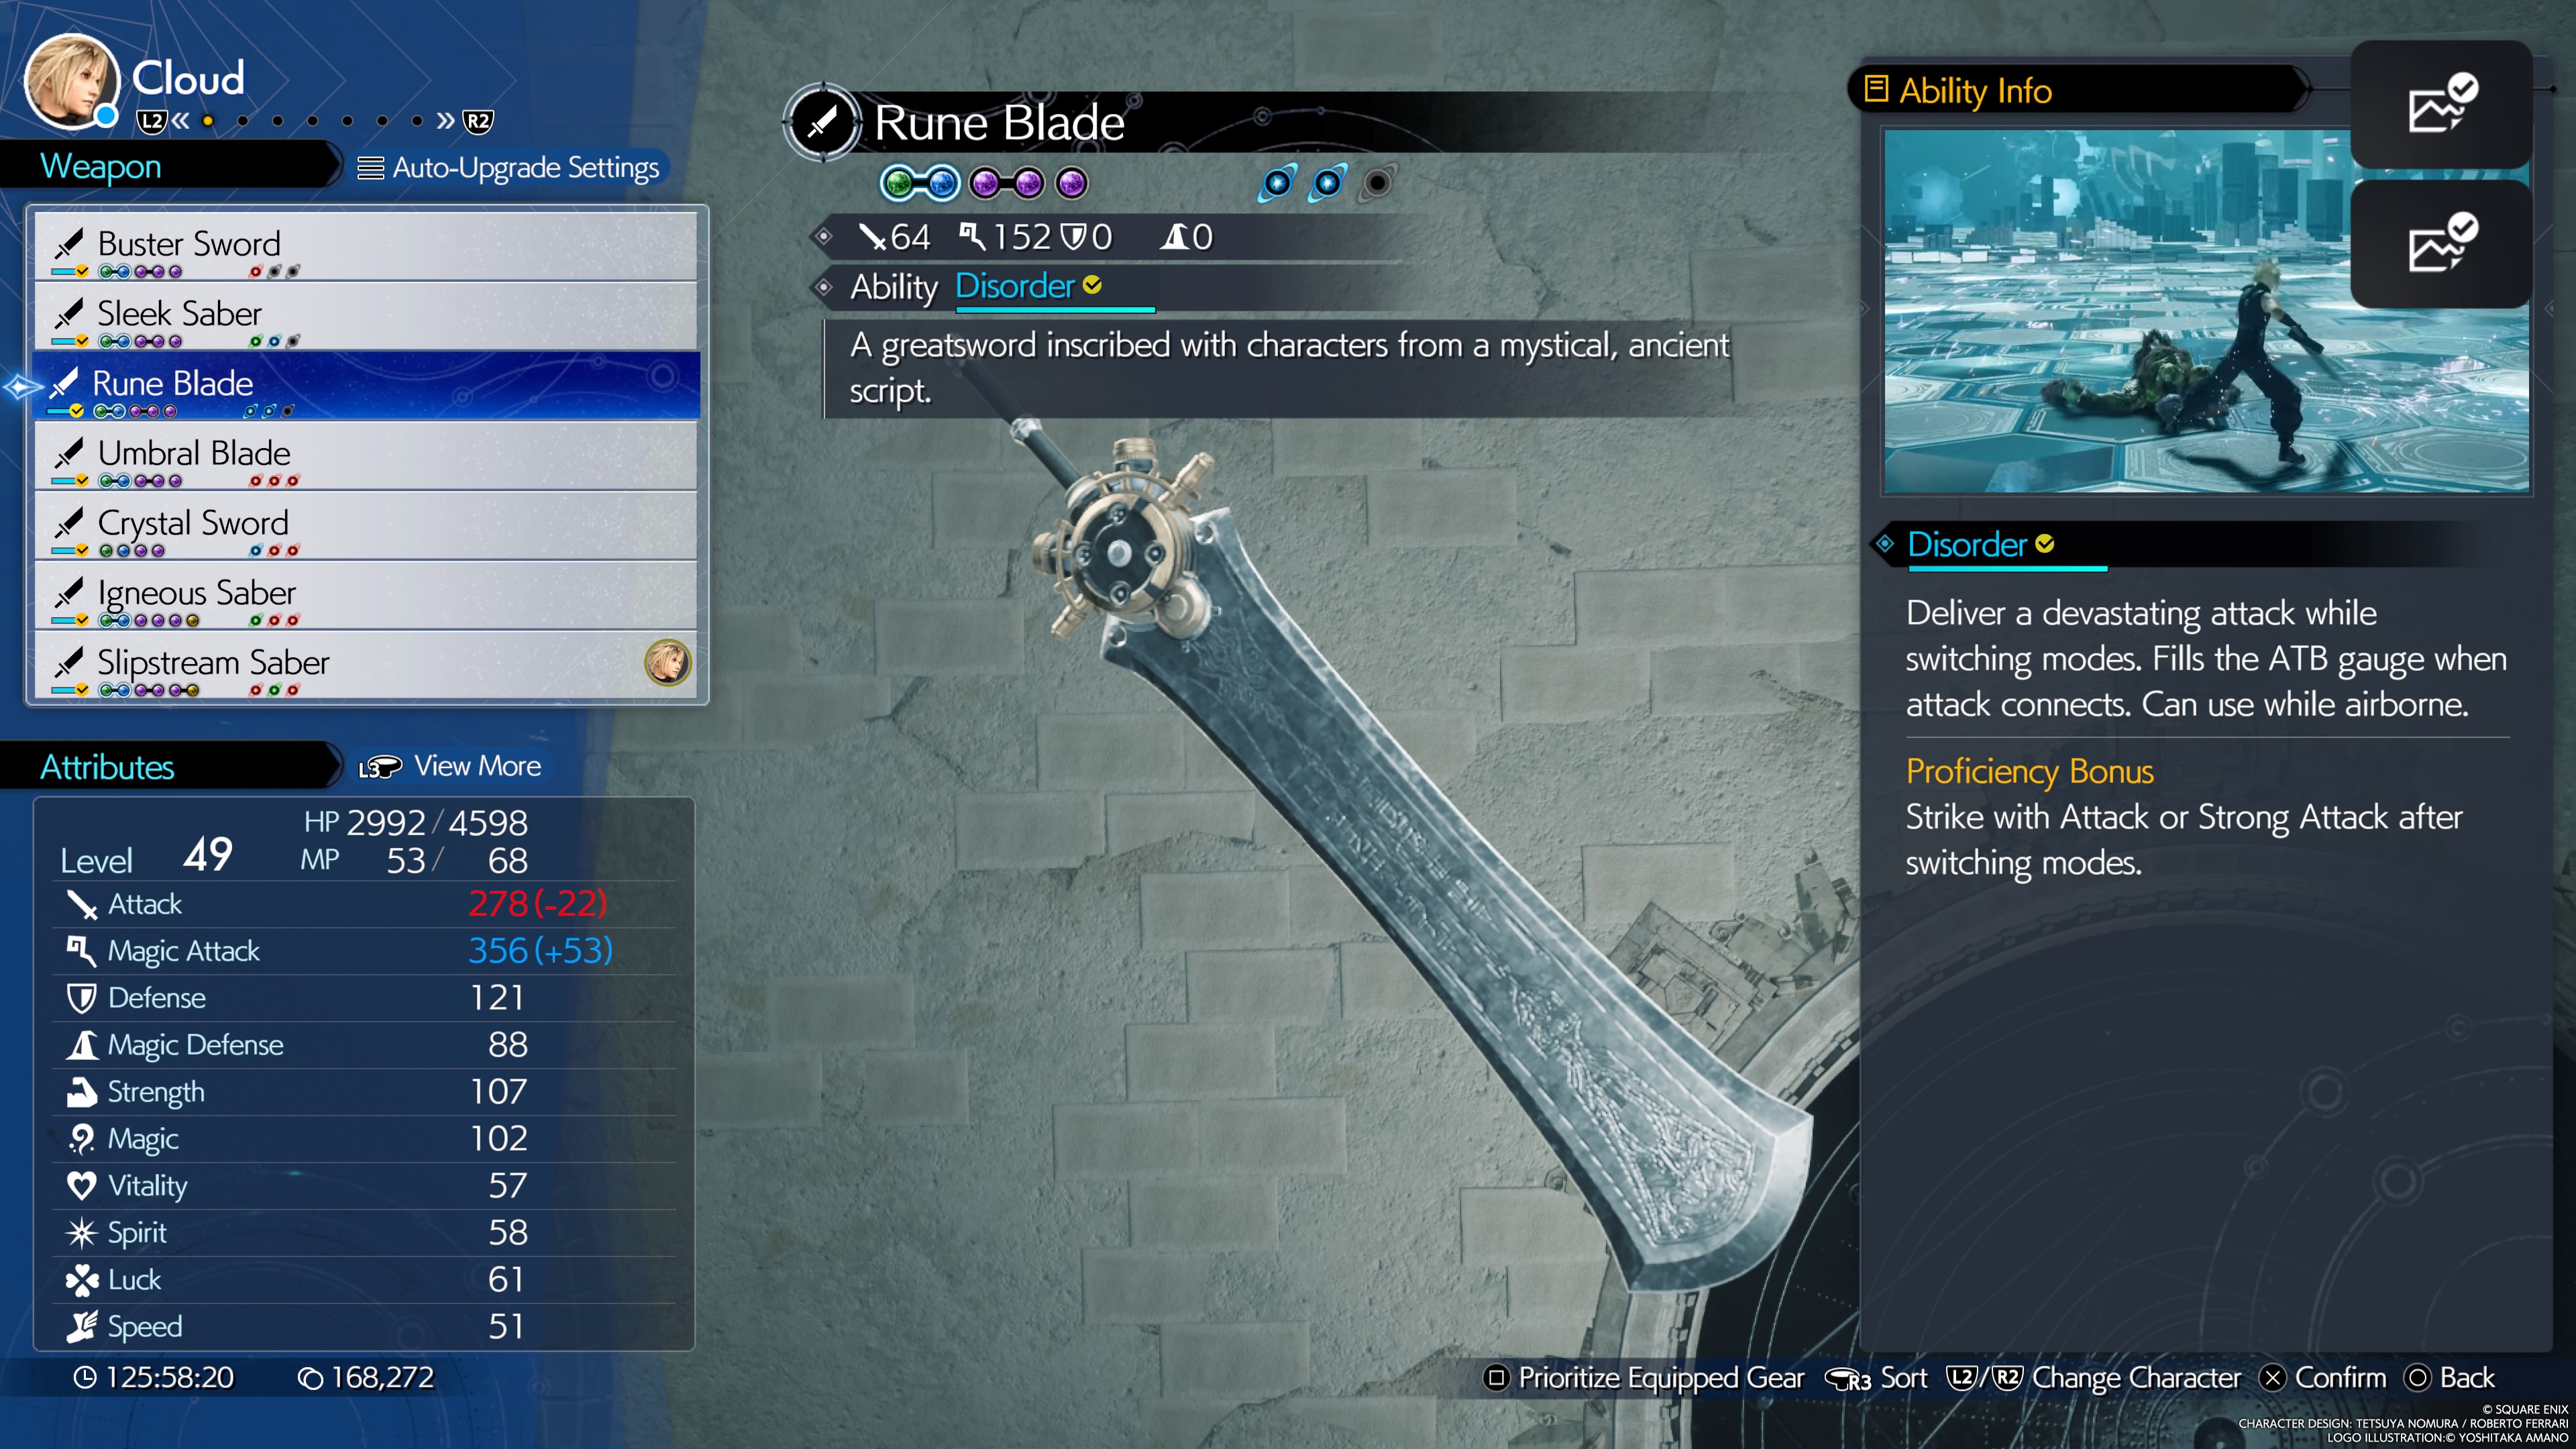
A greatsword inscribed with characters from a mystical, ancient script.
- Stats (Weapon Lv. 7): 64 Attack, 121 Magic
- Materia Slots (Weapon Lv. 7): 2x2, 1x1
- Weapon Ability: Disorder - A powerful attack that switches between Operator and Punisher modes and fills the ATB gauge when it connects.
- Proficiency Bonus: Strike with attack or strong attack after Disorder's mode switch.
- Location: Found in a chest shortly after the Junon Military Parade.
- Weapon Skills (Weapon Lv. 7):
- Enemy Parts Damage Up +5%
- Synergy Damage Up +10%
- Magic Attack Power +20
- Stagger Recovery (Recover HP and MP when staggering foes)
- Attack Power +20
- Improved Punisher (Punisher mode strong attack damage +10%)
- ATB Charge Rate Up (ATB gain from actions +10%)
- Full-Power Magic (MP-consuming attacks +10% when at max MP)
Umbral Blade
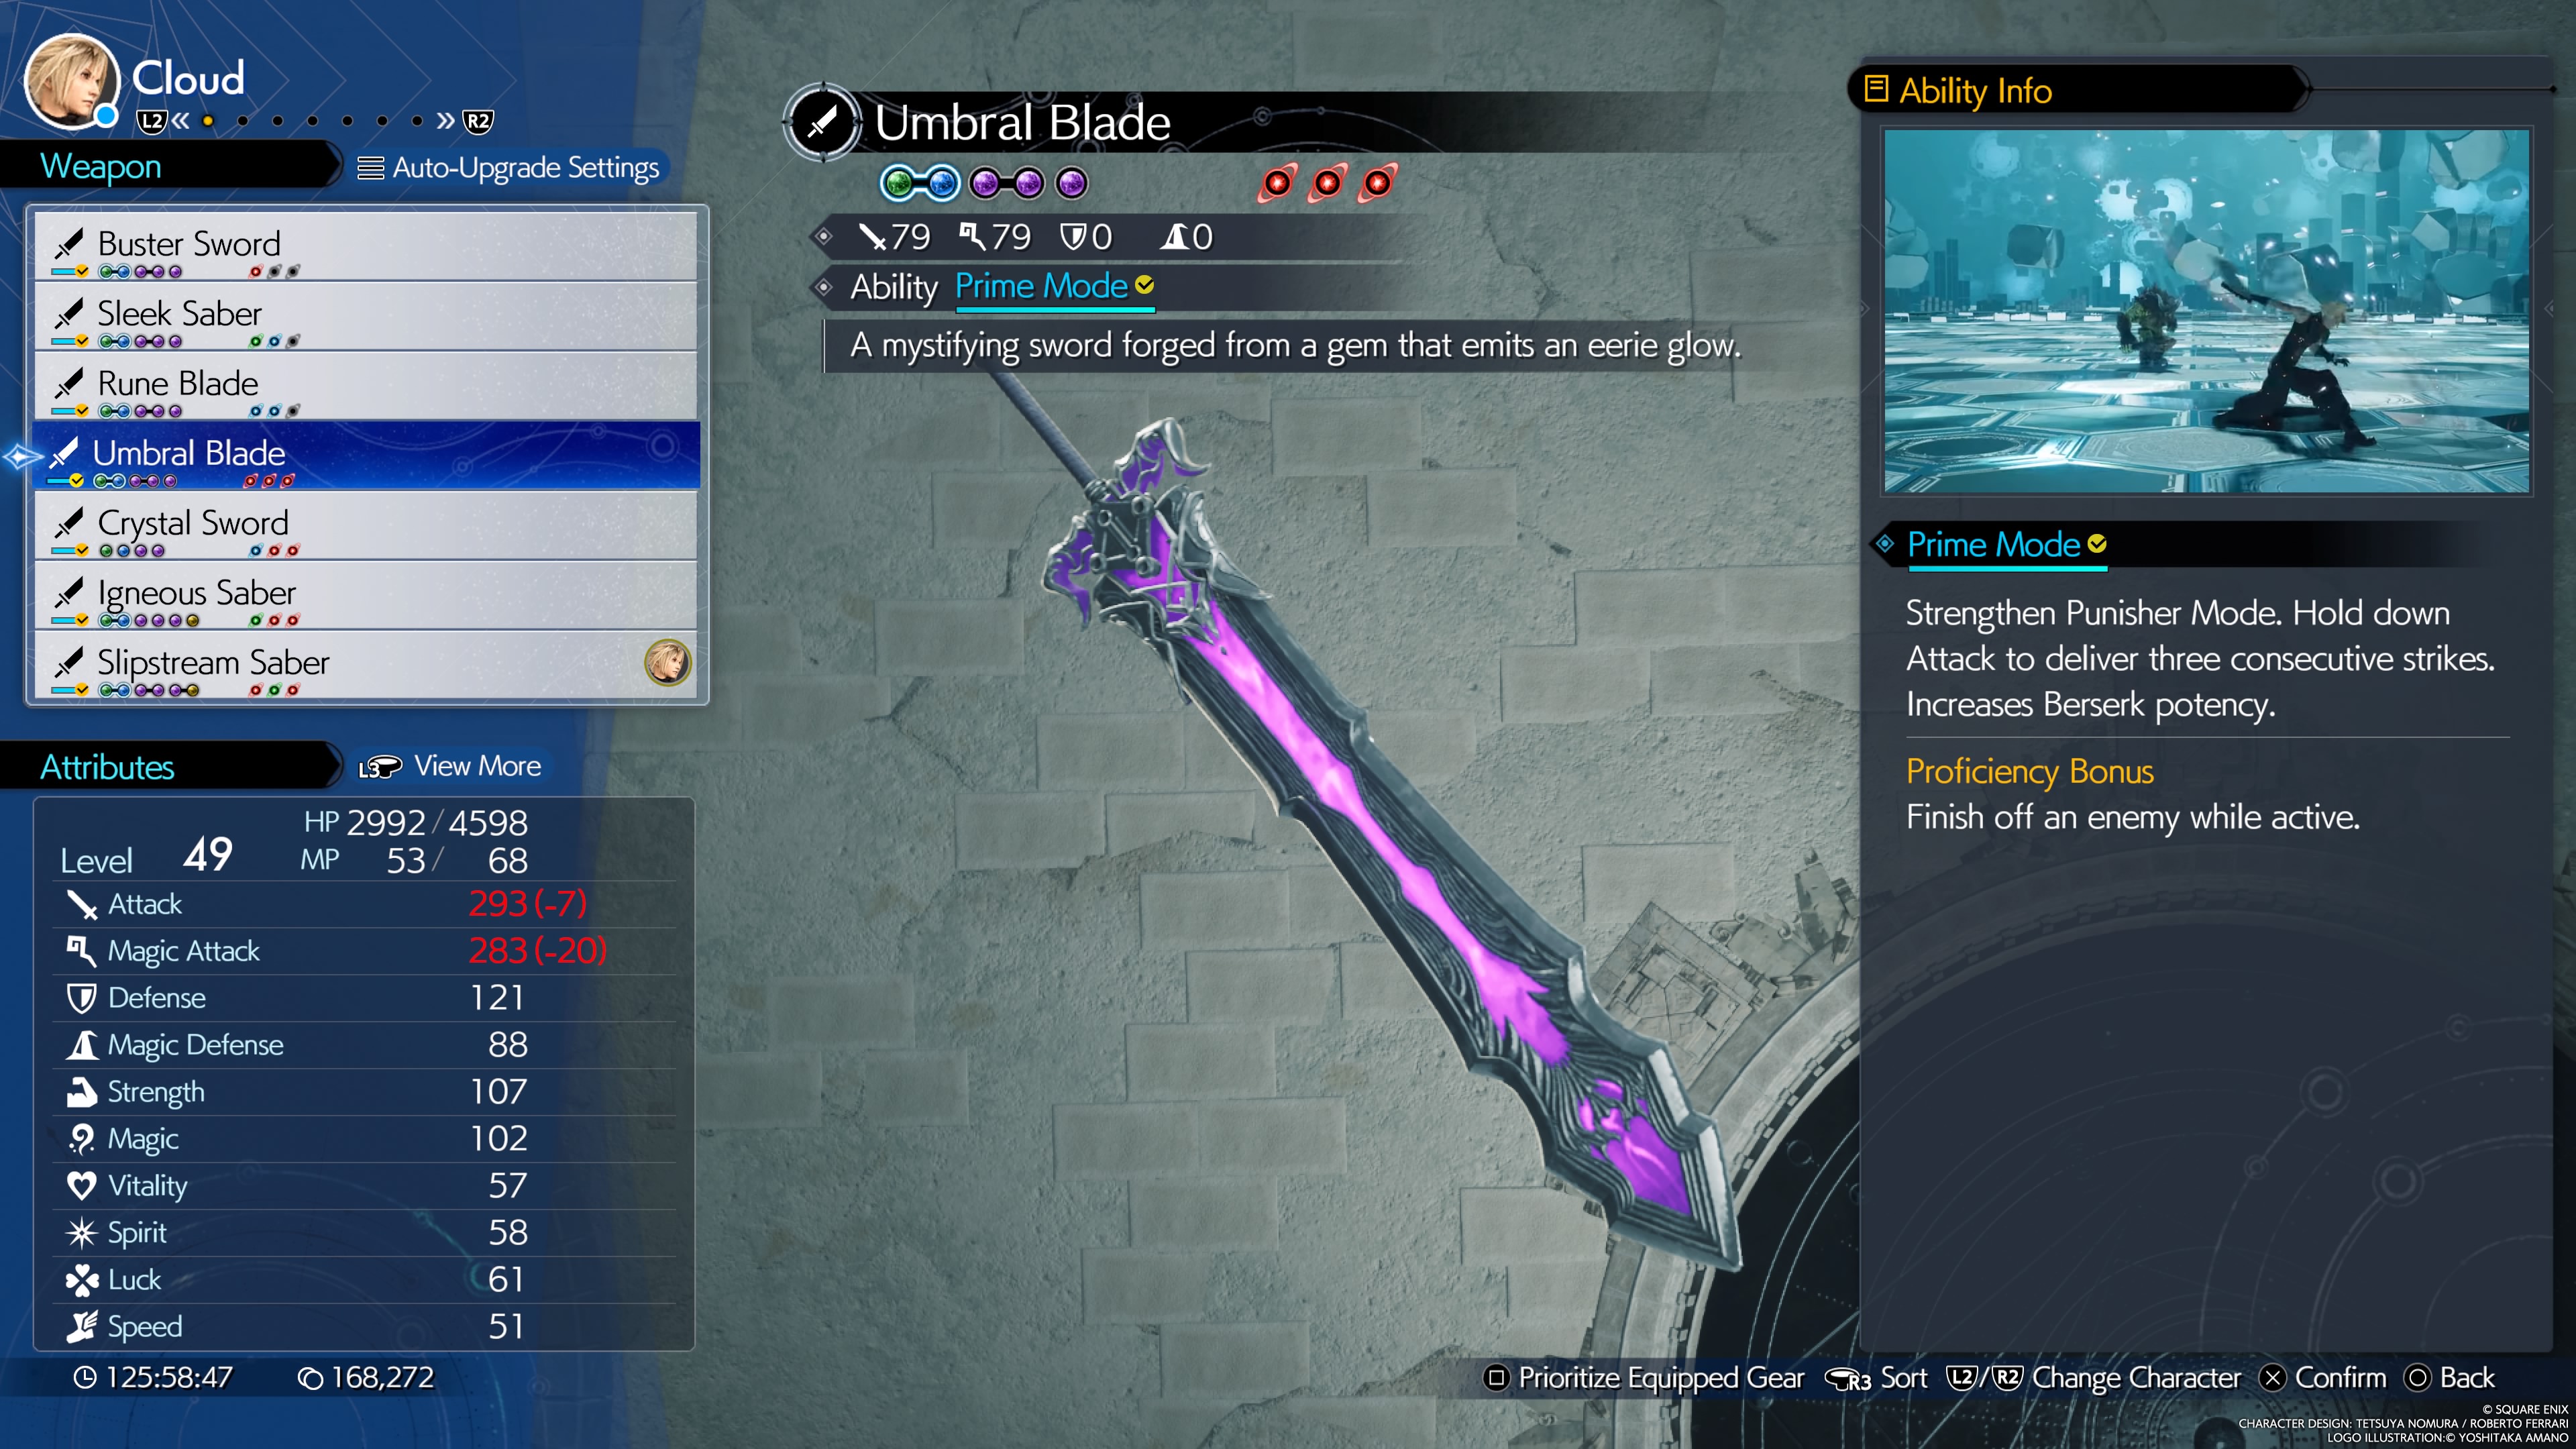
A mystifying sword forged from a gem that emits an eerie glow
- Stats (Weapon Lv. 7): 79 Attack, 79 Magic
- Materia Slots (Weapon Lv. 7): 2x2, 1x1
- Weapon Ability: Prime Mode - Activates an enhanced Punisher Mode with greater damage and multi-hit strong attack.
- Proficiency Bonus: Finish off an enemy while Prime Mode is active.
- Location: Found in a chest in the Corel Dustbowl, after a meeting with Gus
- Weapon Skills (Weapon Lv. 7):
- Formidable Counter (Punisher Mode counter damage +15%)
- Max HP +200
- Restorative MP Saver (reduces MP cost of healing spells -10%)
- Bloodsucker (restores 5% HP on defeating enemies)
- Enhanced Physical Guard (Physical damage -5% when guarding)
- Stalwart Punisher (defense up +10% in Punisher Mode)
- Defense +50
Crystal Sword
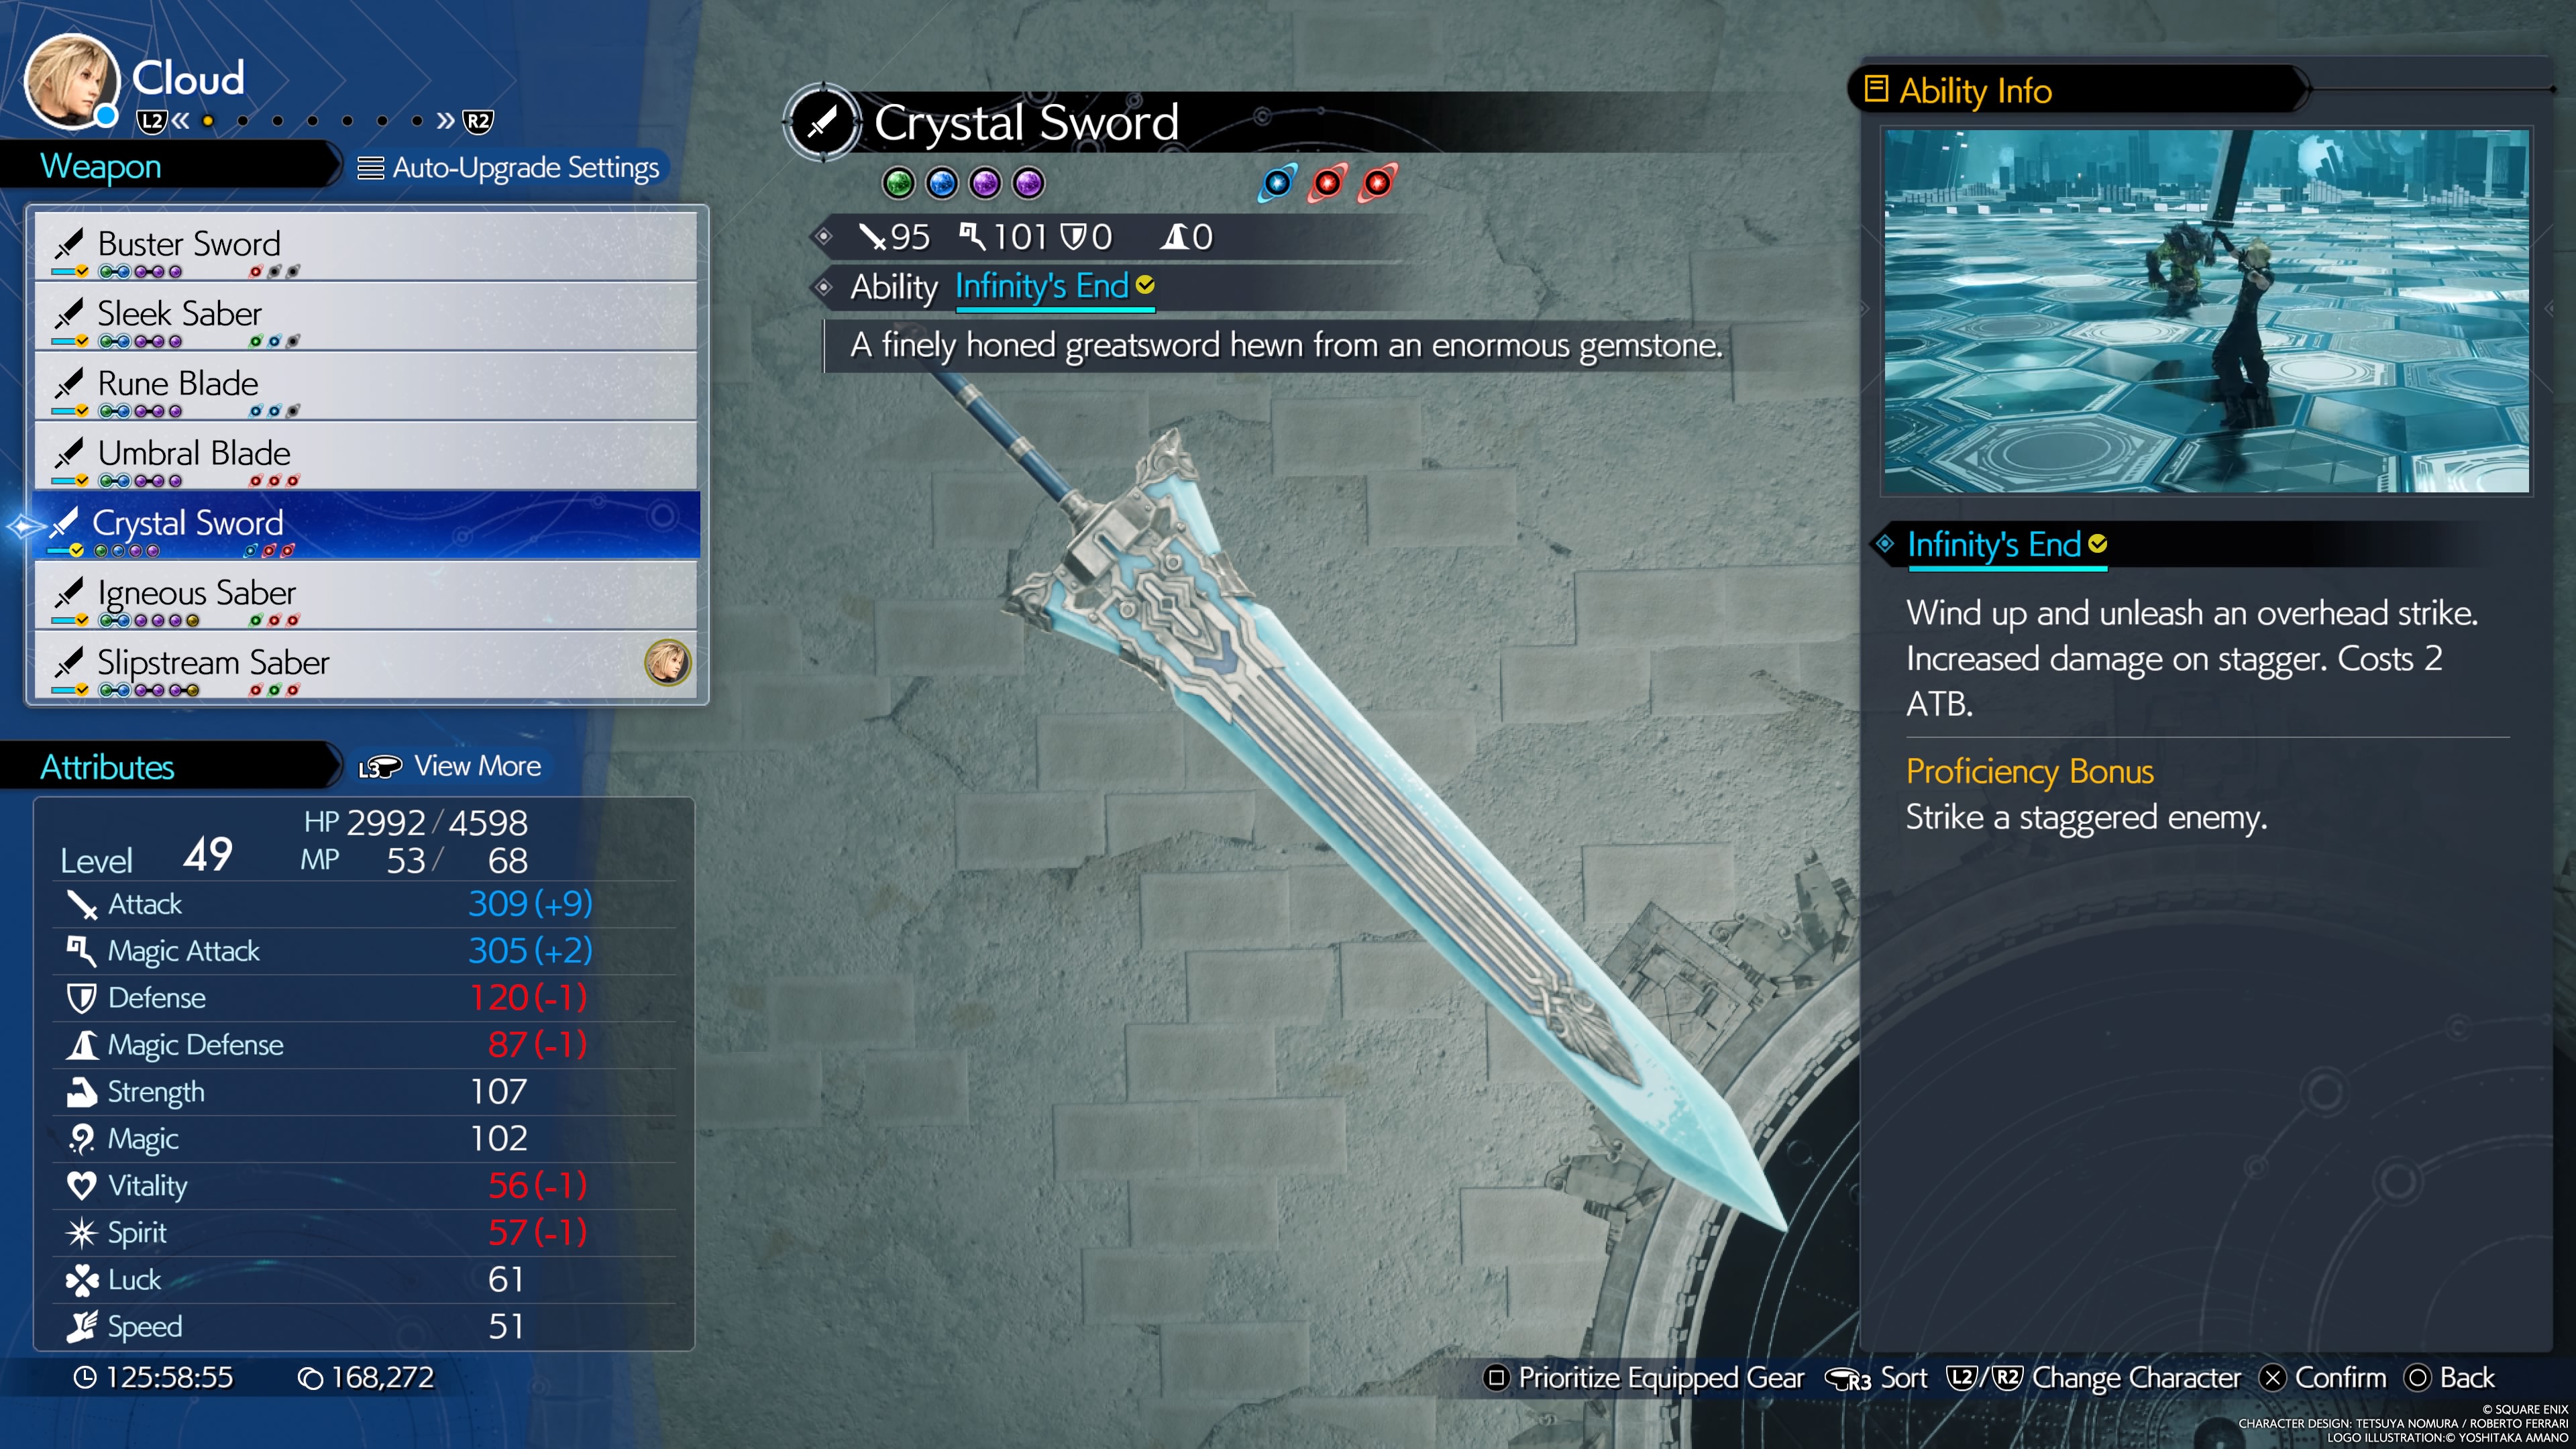
A finely honed greatsword hewn from an enomous gemstone.
- Stats (Weapon Lv. 7): 95 Attack, 101 Magic
- Materia Slots (Weapon Lv. 7): 4x1
- Weapon Ability: Infinity's End - Powerful 2-ATB charge attack, does increased damage on stagger.
- Proficiency Bonus: Strike a staggered enemy with the ability.
- Location: Found in a chest inside the Gongaga Reactor.
- Weapon Skills (Weapon Lv. 7):
- Critical Hit Rate +5%
- Critical Hit Damage +10% x2
- Magic Attack Power +20
- Weapon Ability Damage +5%
- Attack Power +20
- Ability Critical Hit Rate Up 10% x2
Igneous Saber
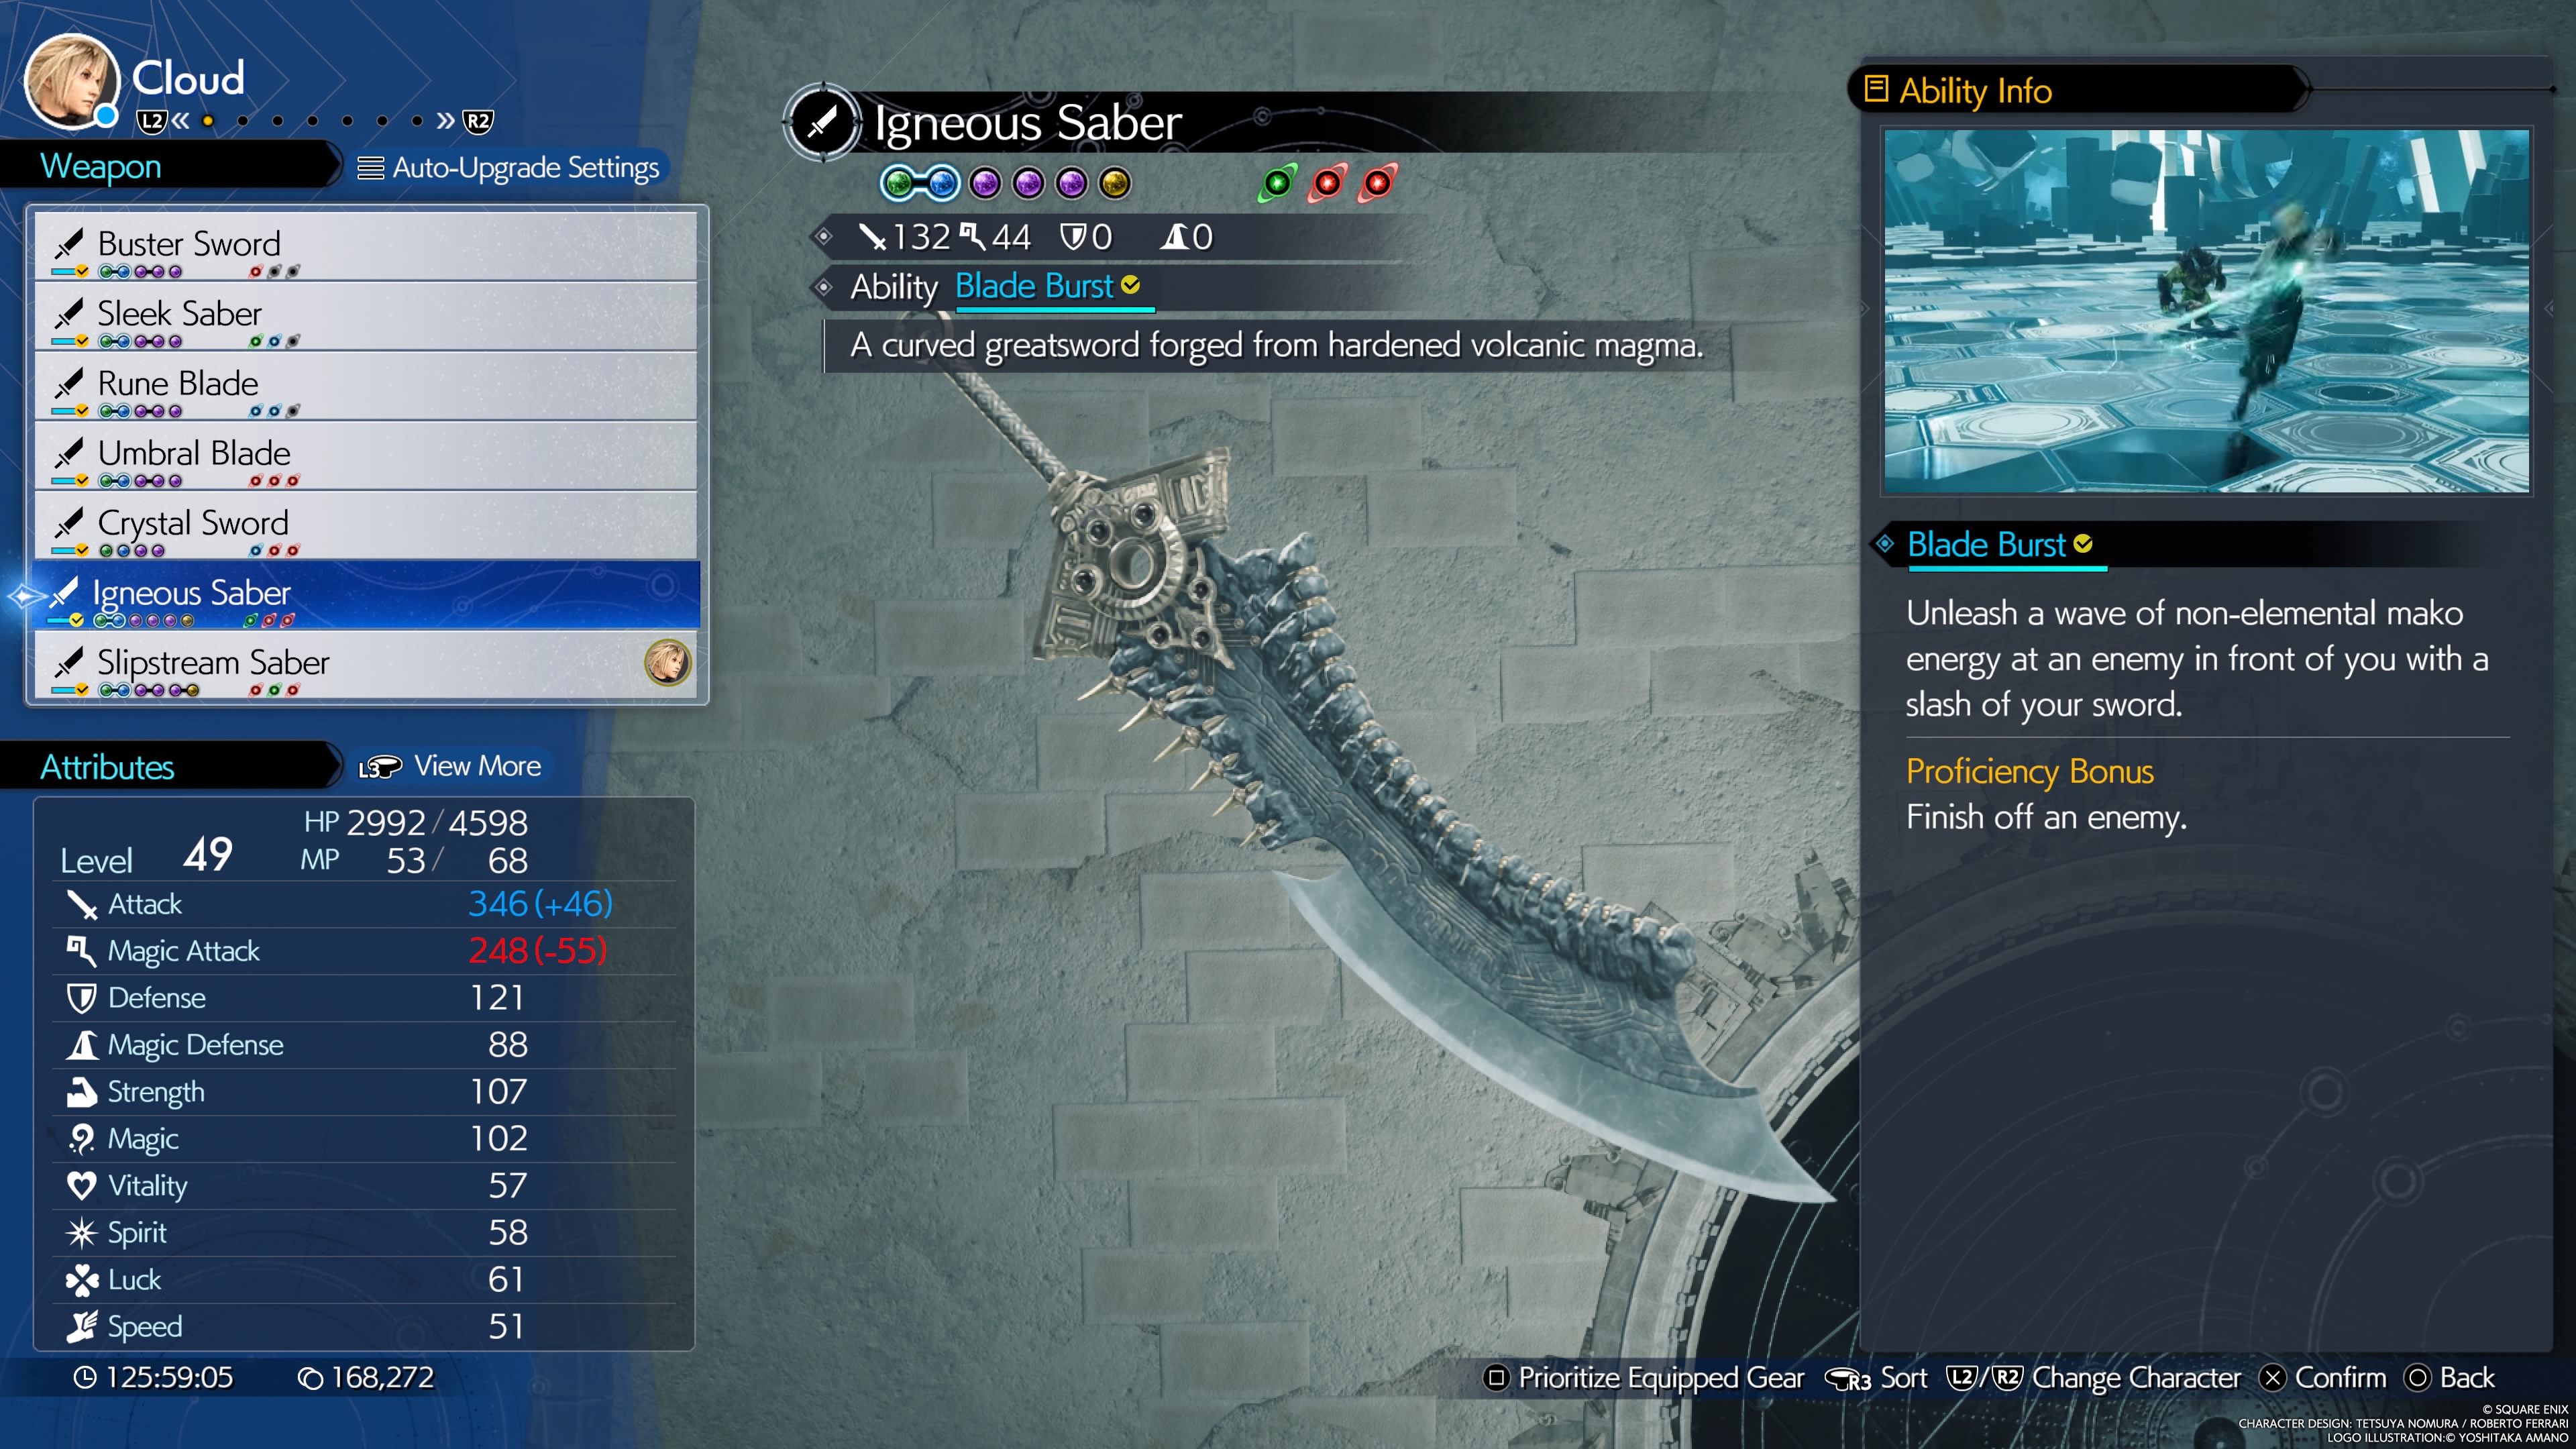
A curved greatsword forged from hardened volcanic magma
- Stats (Weapon Lv. 7): 132 Attack, 44 Magic
- Materia Slots (Weapon Lv. 7): 1x2, 4x1
- Weapon Ability: Blade Burst - A non-elemental AOE attack in a fan shape in front of Cloud
- Proficiency Bonus: Finish off an enemy with the ability.
- Location: Found in a chest on the large climbing wall sequence while ascending Mt. Nibel in the main game (not the flashback).
- Weapon Skills (Weapon Lv. 7):
- Enemy Parts Damage Up +5%
- Unrelenting Punisher (Increase hit count from punisher attacks)
- Stalwart Punisher (defense up +10% in Punisher Mode)
- Limit Gauge Stagger (increases limit gauge charge rate +10% when staggering foes)
- Magic Attack Power +20
- Altruistic Buff Up (buff duration +25% when applying buffs to others)
- Max HP +200
- Enhanced Magic Guard (Magic damage down -5% when guarding)
Slipstream Saber
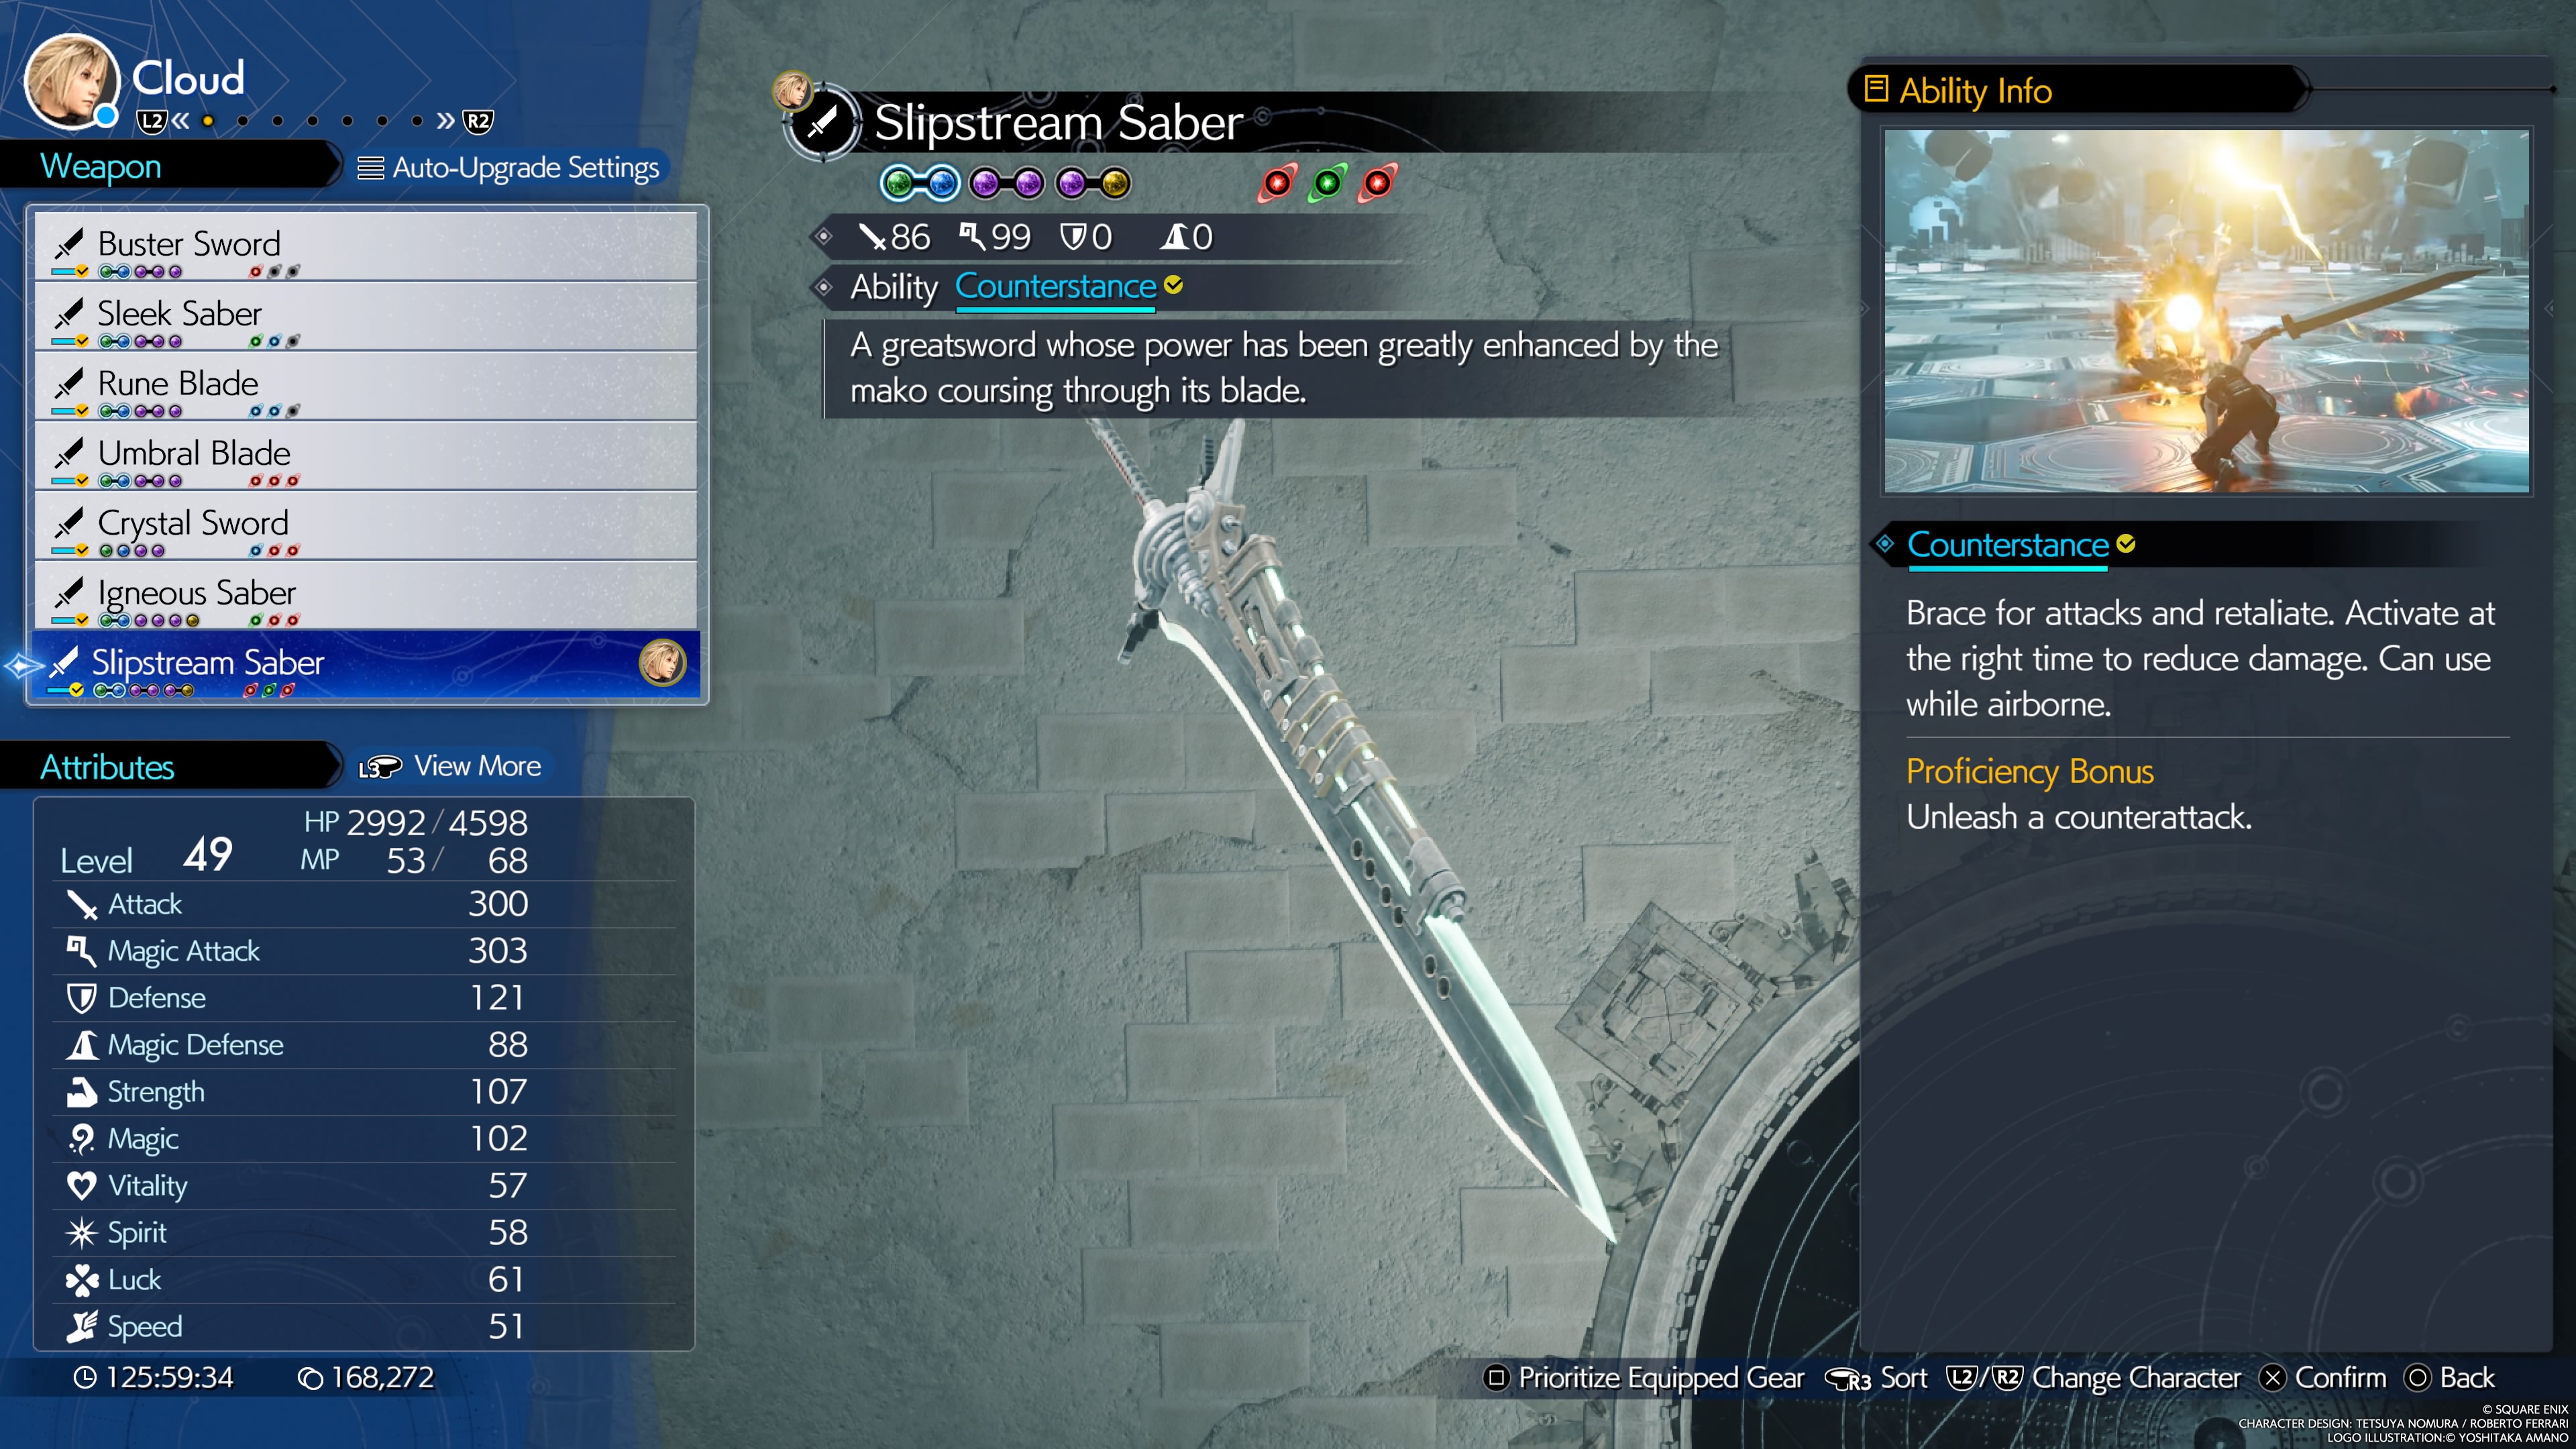
A greatsword whose power has been greatly enhanced by the mako coursing through its blade.
- Stats (Weapon Lv. 7): 86 Attack, 99 Magic
- Materia Slots (Weapon Lv. 7): 3x2
- Weapon Ability: Counterstance - Brace for an incoming attack and retaliate. Reduces damage with the right timing.
- Proficiency Bonus: Unleash a counterattack using the ability.
- Location: Found in a chest within the Temple of the Ancients Labyrinth section.
- Weapon Skills (Weapon Lv. 7):
- MP Recovery Rate Up (Increased MP regeneration in combat)
- Attack Damage +5% (improved damage from basic attacks)
- Unrelenting Punisher (Increase hit count from punisher attacks)
- Magic Attack Power +20
- Formidable Counter (Punisher Mode counter damage +15%)
- Max MP +3 x2
- Stagger Recovery (Recover HP and MP when staggering foes)
Weapons for Barret Wallace in Final Fantasy VII Rebirth

Barret continues the tradition of providing ranged fire support from his gun arm, with particular effectiveness against airborne enemies and foes with targetable parts. His weapons tend not to have the highest attack power, but typically augment Barret's proficiency at team support and tanking damage. Unlike Remake, Barret does not seem to have any melee-only weapons in his selection.
- Gatling Gun
- Hi-Caliber Rifle
- Barrage Blaster
- Vulcan Cannon
- Fafnir Rifle
- Calamitous Bazooka
- Battle Cry
Gatling Gun
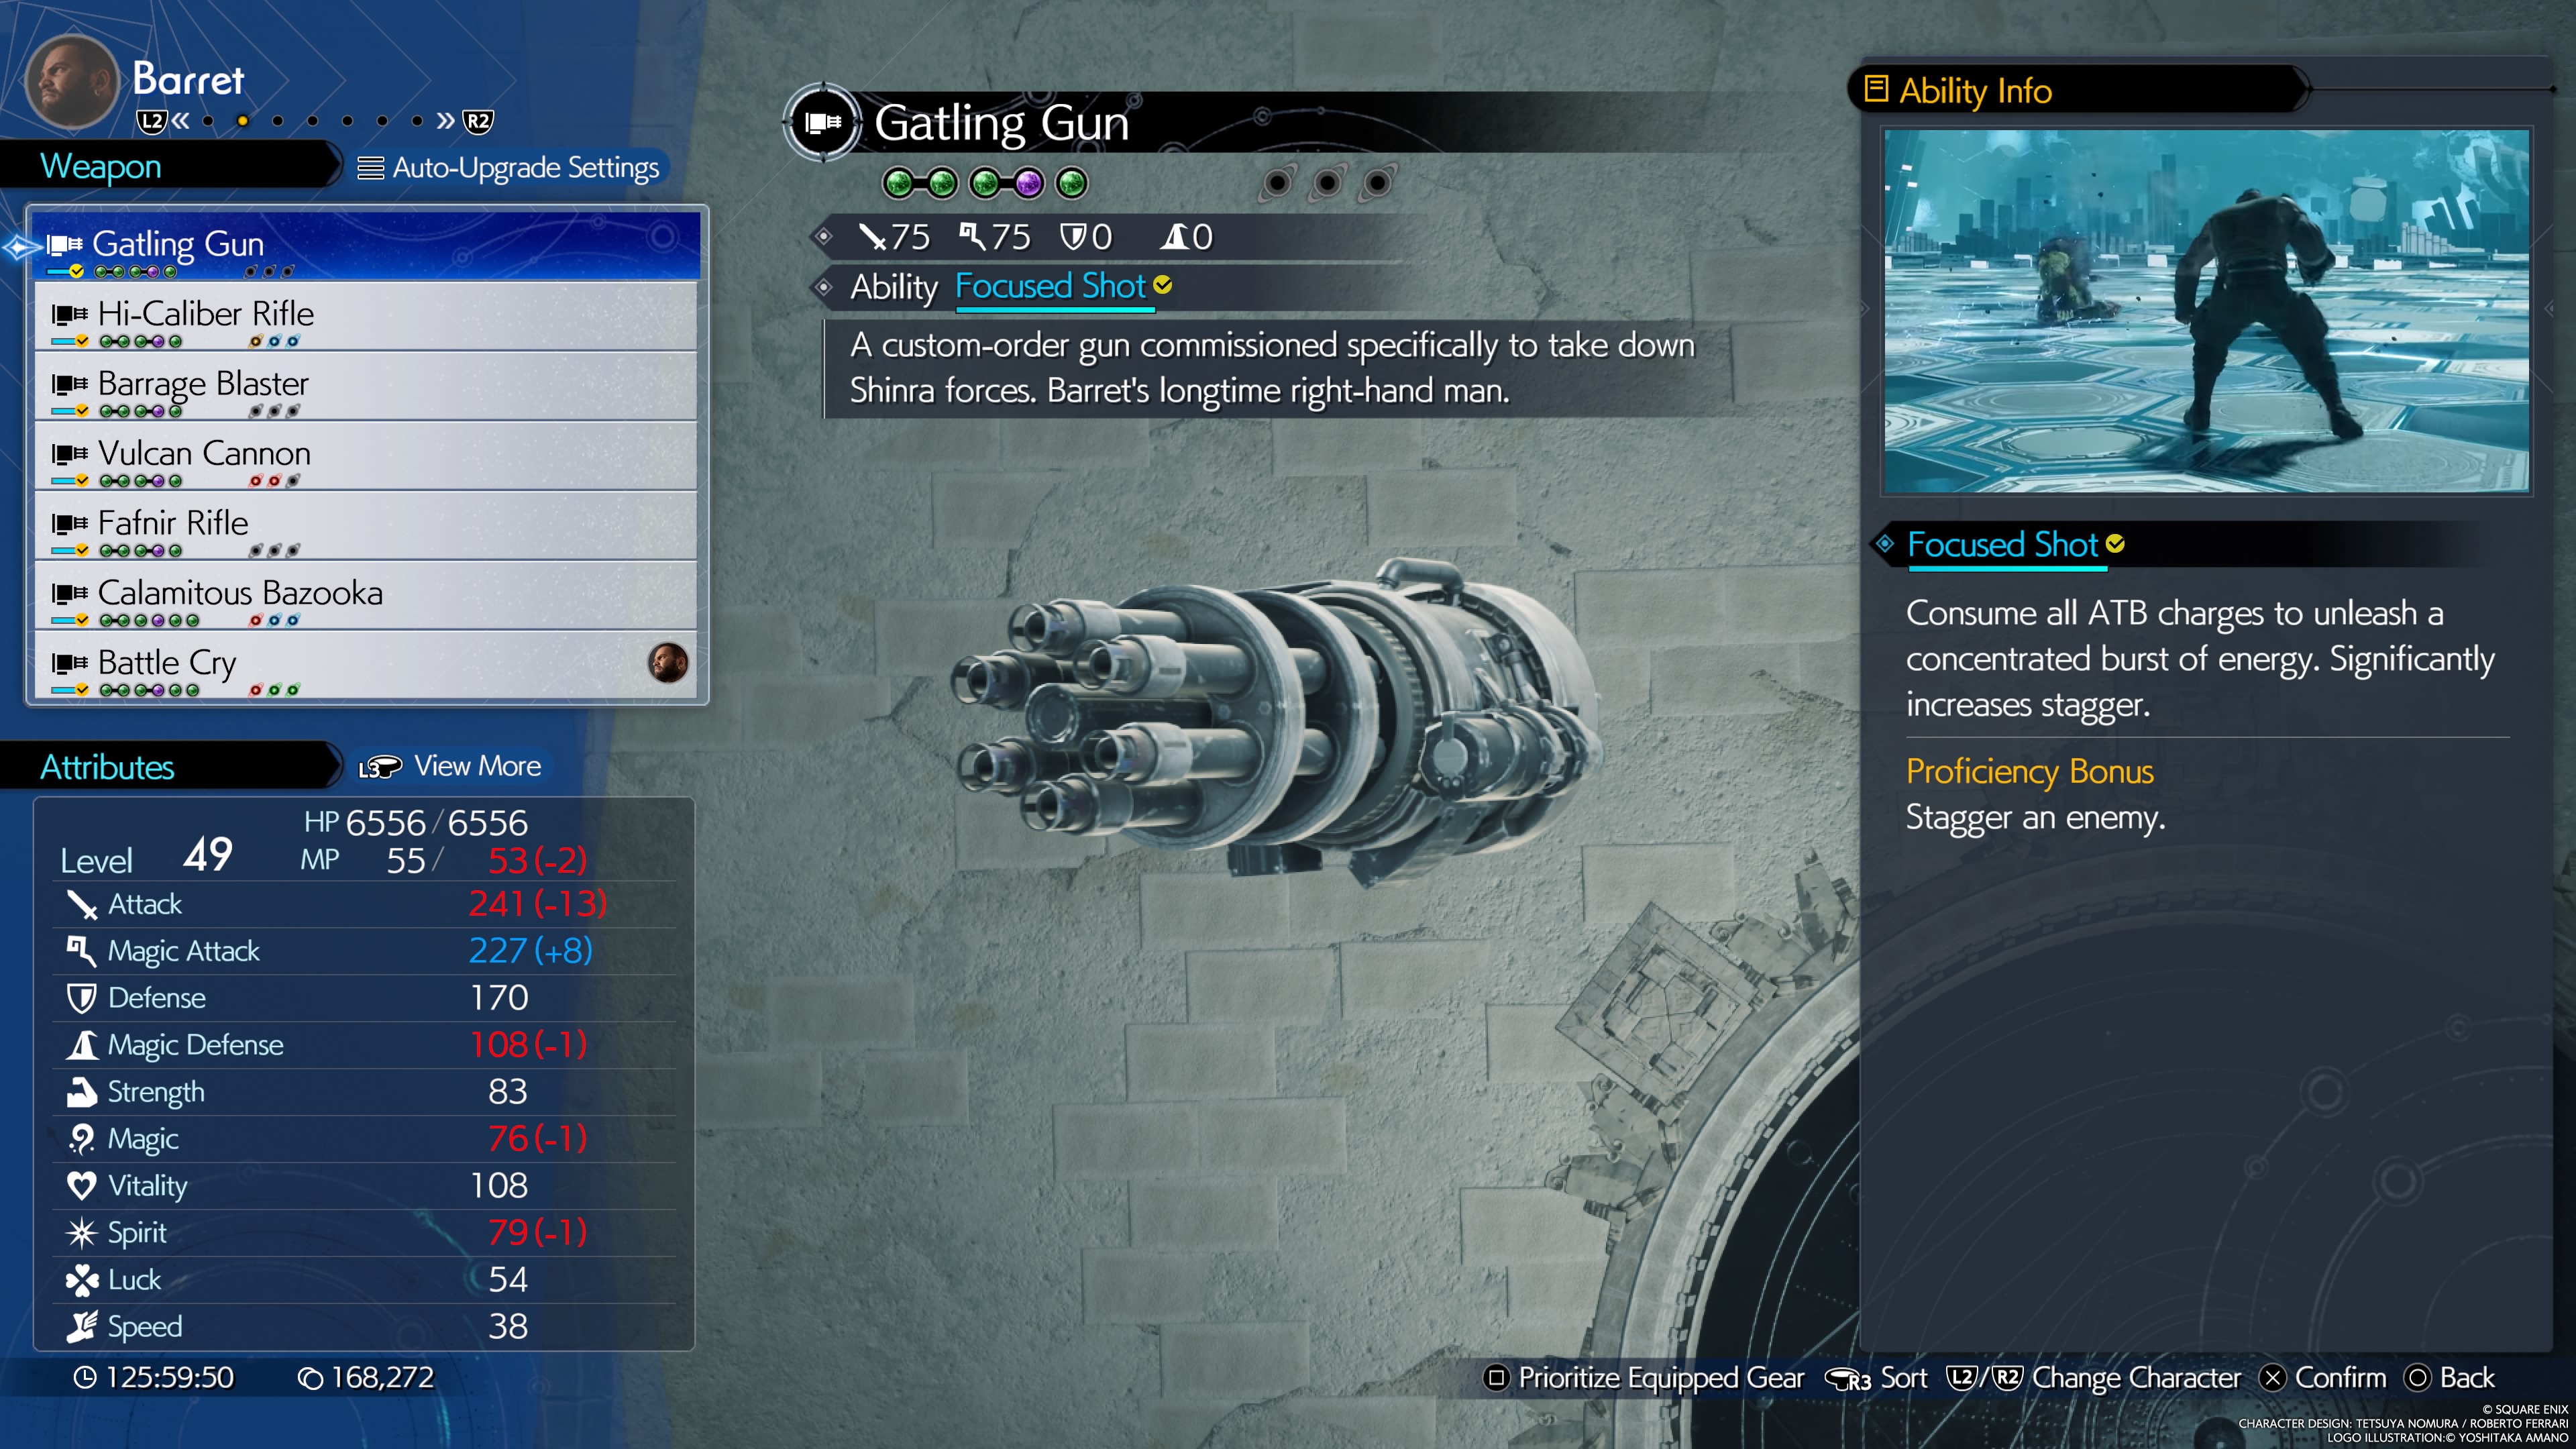
A custom-order gun commissioned specifically to take down Shinra forces. Barret's longtime right-hand man.
- Stats (Weapon Lv. 7): 75 Attack, 75 Magic
- Materia Slots (Weapon Lv. 7): 2x2, 1x1
- Weapon Ability: Focused Shot - Consume all ATB to unleash a shot that significantly increases Stagger.
- Proficiency Bonus: Stagger an enemy.
- Location: Barret starts with this weapon.
- Weapon Skills (Weapon Lv. 7):
- Unflinging Overcharge (harder to be stunned or interrupted when using Overcharge)
- Max HP +200
- Enhanced Overcharge (Overcharge damage +15%)
- Weapon Ability Damage +5%
- ATB Charge Rate Up 10%
- Massive Recharge (Increases energy gained when charging Overcharge)
- Magic Attack Power +20
- Overcharge Protection (Applies Protect after using Overcharge)
Hi-Caliber Rifle
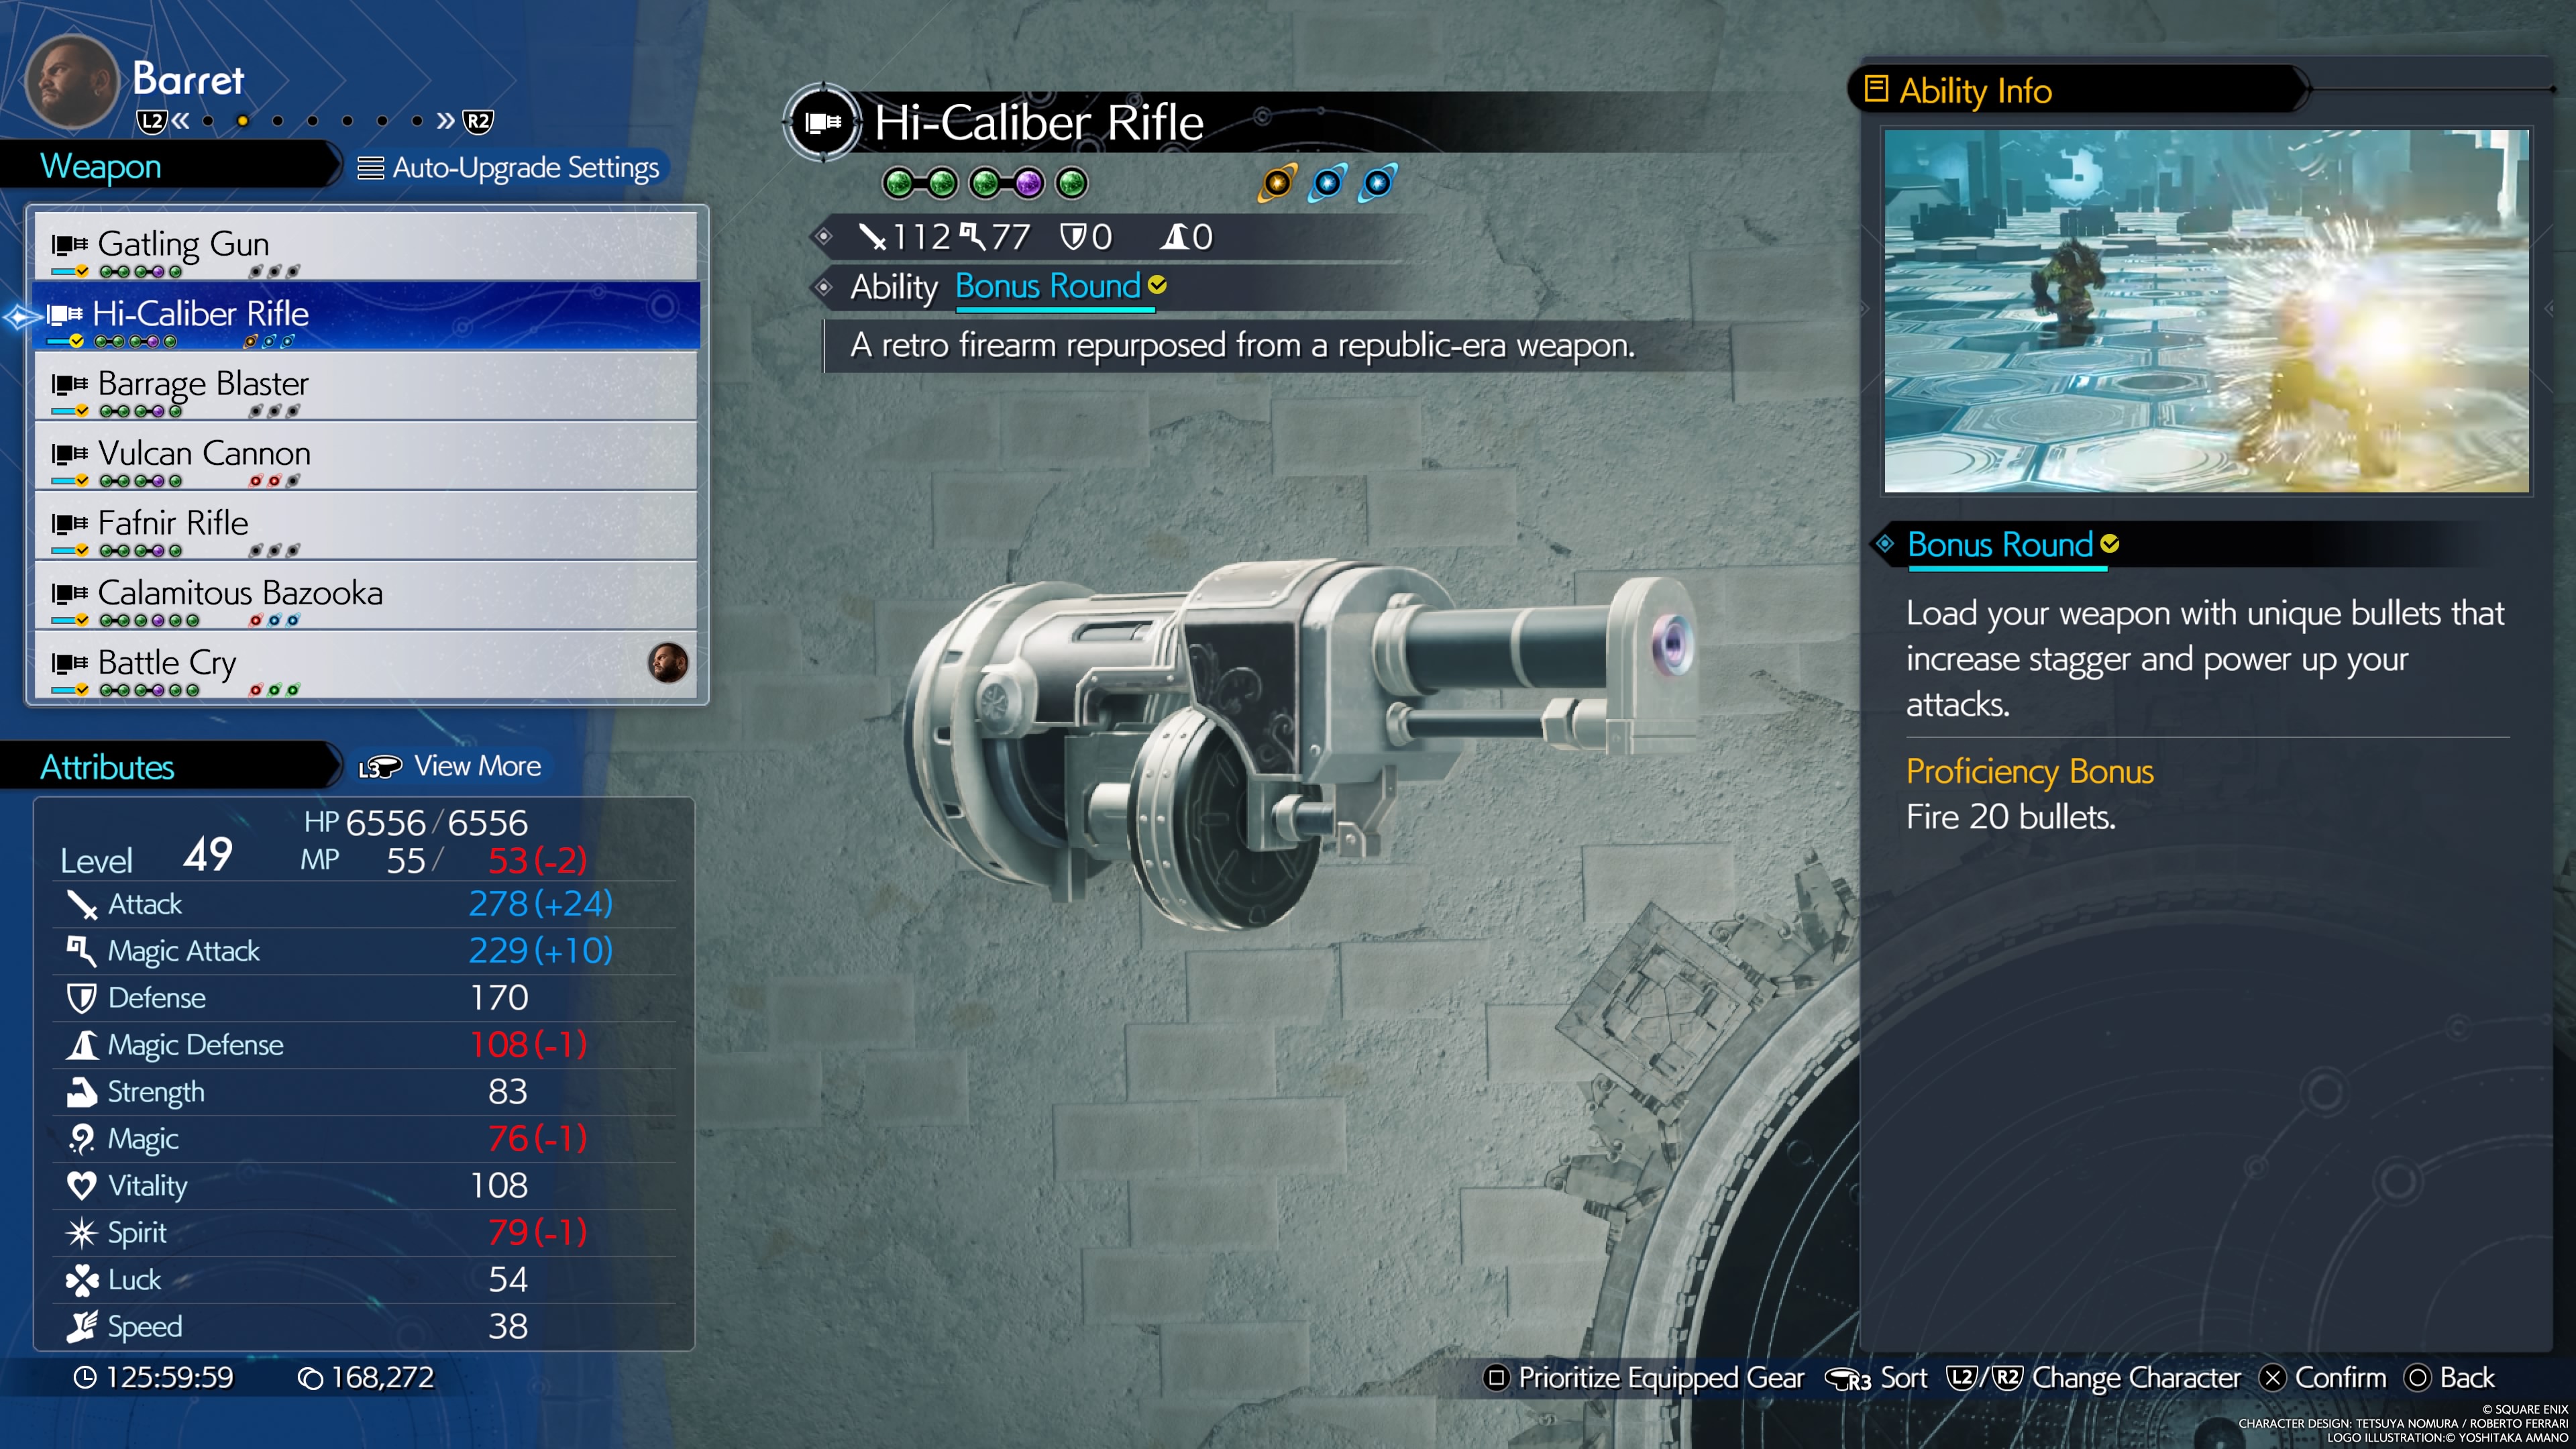
A retro firearm repurposed from a republic-era weapon.
- Stats (Weapon Lv. 7): 112 Attack, 77 Magic
- Materia Slots (Weapon Lv. 7): 2x2, 1x1
- Weapon Ability: Bonus Round - Loads weapon with bullets that increase stagger and damage output.
- Proficiency Bonus: Use the ability and fire 20 bullets.
- Location: Found in a chest in the Grasslands Swamp near the lair of Midgarsormr.
- Weapon Skills (Weapon Lv. 7):
- Staggering Charge (Overcharge reload increased when staggering foes)
- Max HP +200
- Magic Attack Power +20 x2
- Opening ATB Bonus (Slight ATB Bonus at battle start)
- Unflinging Overcharge (harder to be stunned or interrupted when using Overcharge)
- Synergy Damage Up +10%
- Overload Overcharge (reduces Overcharge charge time)
Barrage Blaster

A heavy-artillery firearm equipped with multiple barrels for maximum lethality.
- Stats (Weapon Lv. 7): 79 Attack, 71 Magic
- Materia Slots (Weapon Lv. 7): 2x2, 1x1
- Weapon Ability: Lifesaver - Increases Barret's HP and intercepts incoming damage on party members.
- Proficiency Bonus: Activate the ability and use Barret's HP to heal allies (meaning if allies get hit while Lifesaver is active).
- Location: Found inside a chest in the Mt. Corel Coal Mine
- Weapon Skills (Weapon Lv. 7):
- Overcharge Protection (Applies Protect after using Overcharge)
- Max HP +200 x2
- Enhanced Physical Guard
- Selfish Recovery +25% (when receiving healing get +25% more restoration)
- Overload Overcharge
- Limit Gauge Guard
- Selfish Buff Up
Vulcan Cannon
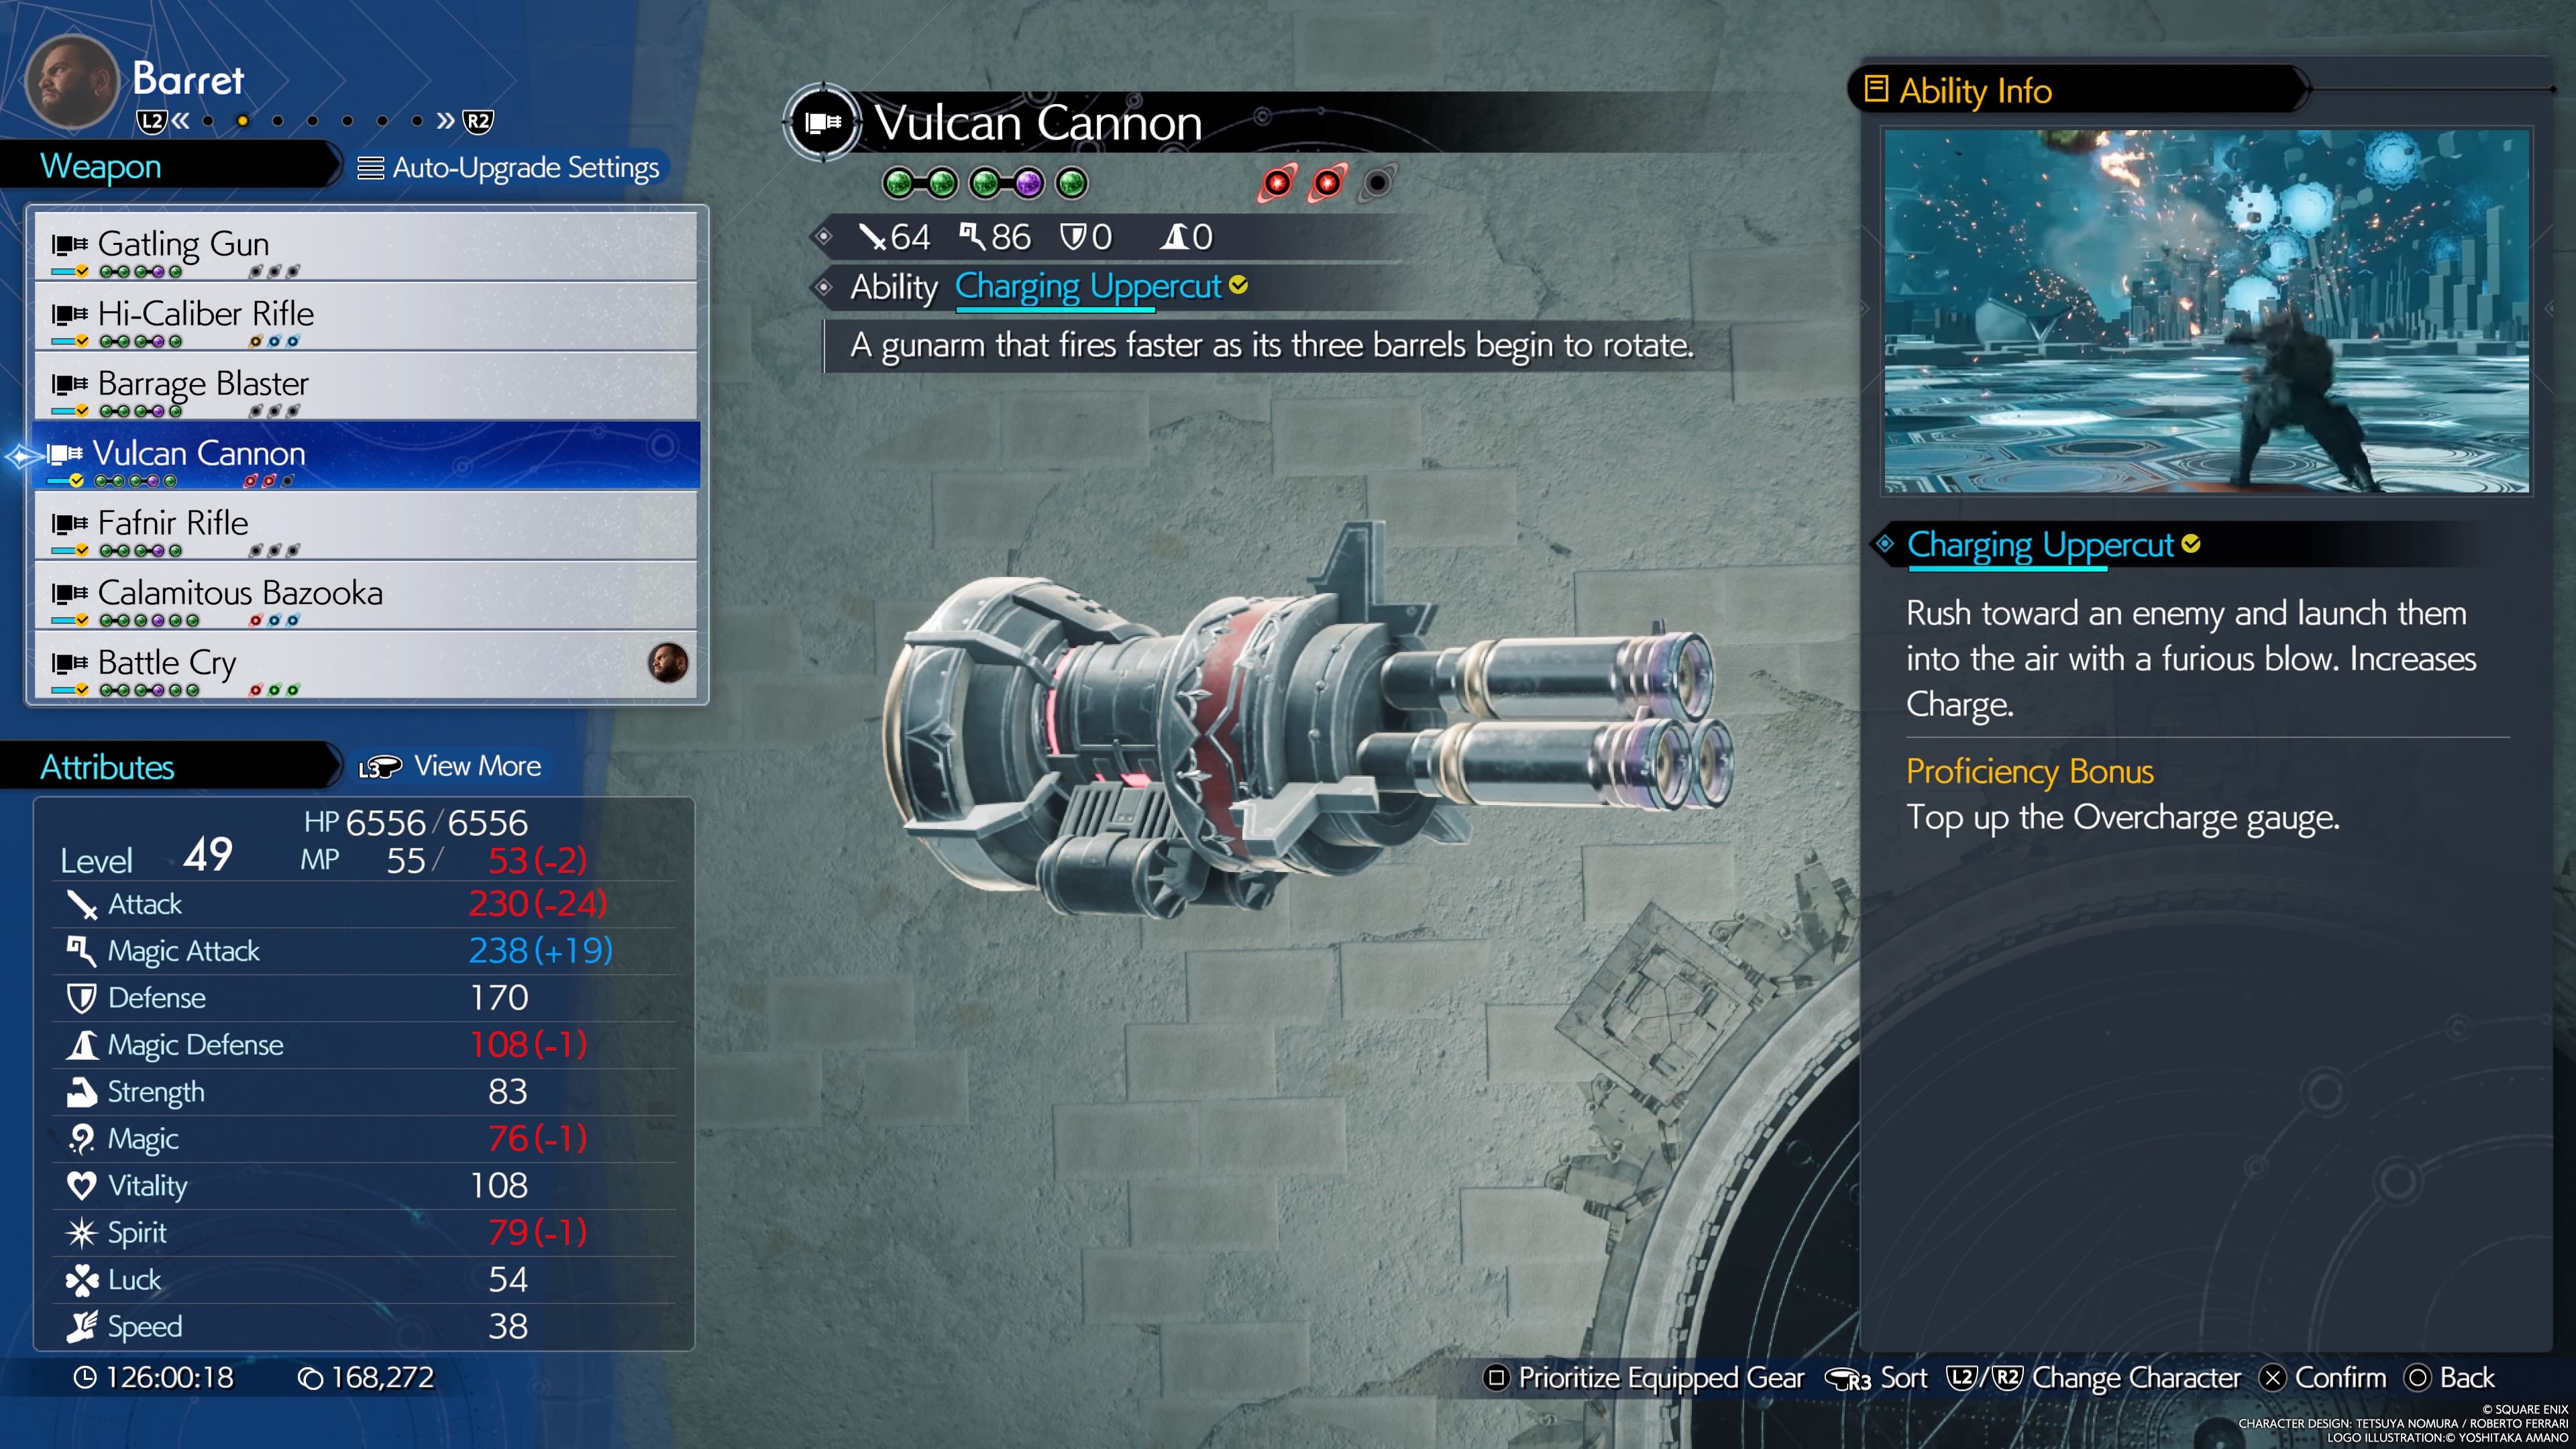
A gunarm that fires faster as its three barrels begin to rotate.
- Stats (Weapon Lv. 7): 64 Attack, 86 Magic
- Materia Slots (Weapon Lv. 7): 2x2, 1x1
- Weapon Ability: Charging Uppercut - Rushes an enemy and launches them into the air, charging Overcharge.
- Proficiency Bonus: Use the ability to top up the Overcharge gauge.
- Location: Found in a chest at the start of the Corel Scrapyard
- Weapon Skills (Weapon Lv. 7):
- Enhanced Overcharge
- Synergy Damage Up
- Weapon Ability ATB Recovery
- Max MP +3
- Max HP +200
- Attack Damage +5%
- Attack Power +20
- Offensive MP Saver (attack spells 10% cheaper)
Fafnir Rifle
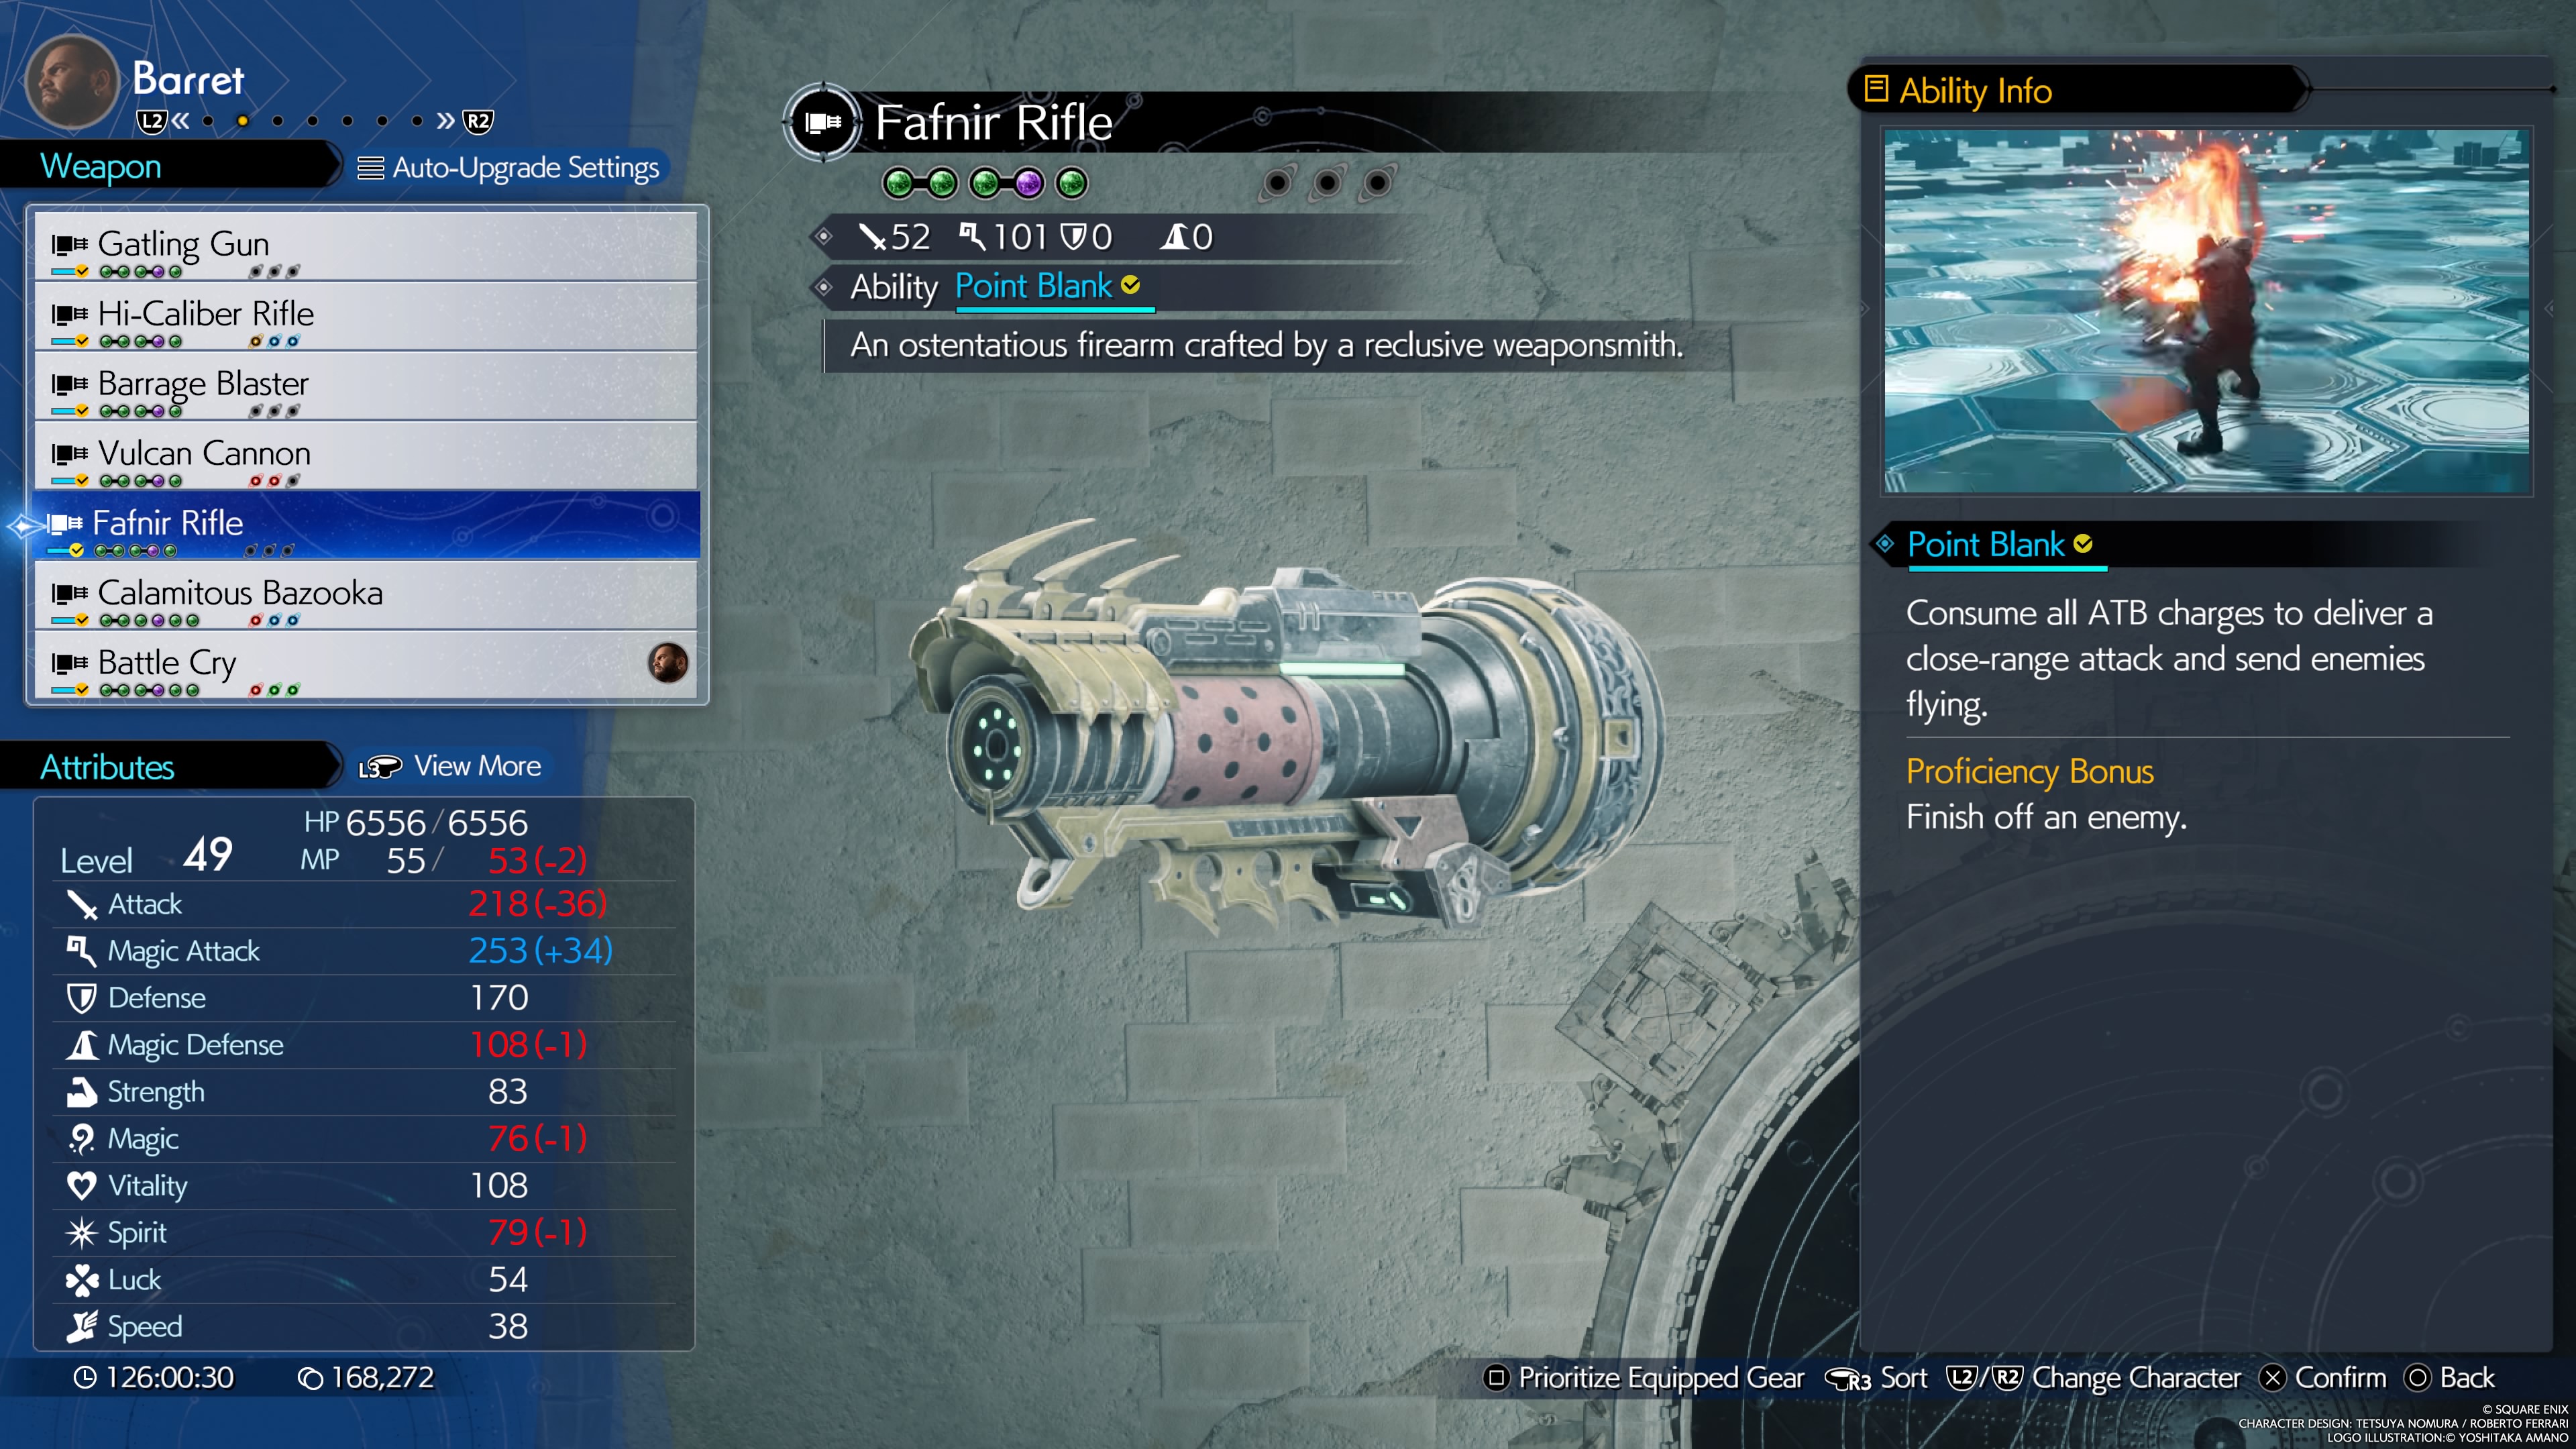
An ostentatious firearm crafted by a reclusive weaponsmith.
- Stats (Weapon Lv. 7): 52 Attack, 101 Magic
- Materia Slots (Weapon Lv. 7): 2x2, 1x1
- Weapon Ability: Point Blank - Consume all ATB and knock back an enemy from close range.
- Proficiency Bonus: Finish off an enemy with the ability.
- Location: Awarded from the Gongaga Region Side Quest "The Pursuit of Perfection."
- Weapon Skills (Weapon Lv. 7):
- Enhanced Overcharge
- Max MP +3 x2
- Enhanced Magic Guard
- Attack Power +20
- Staggering Charge
- Limit Break Damage +10%
- Enhanced Elements (elemental materia damage boosted)
Calamitous Bazooka
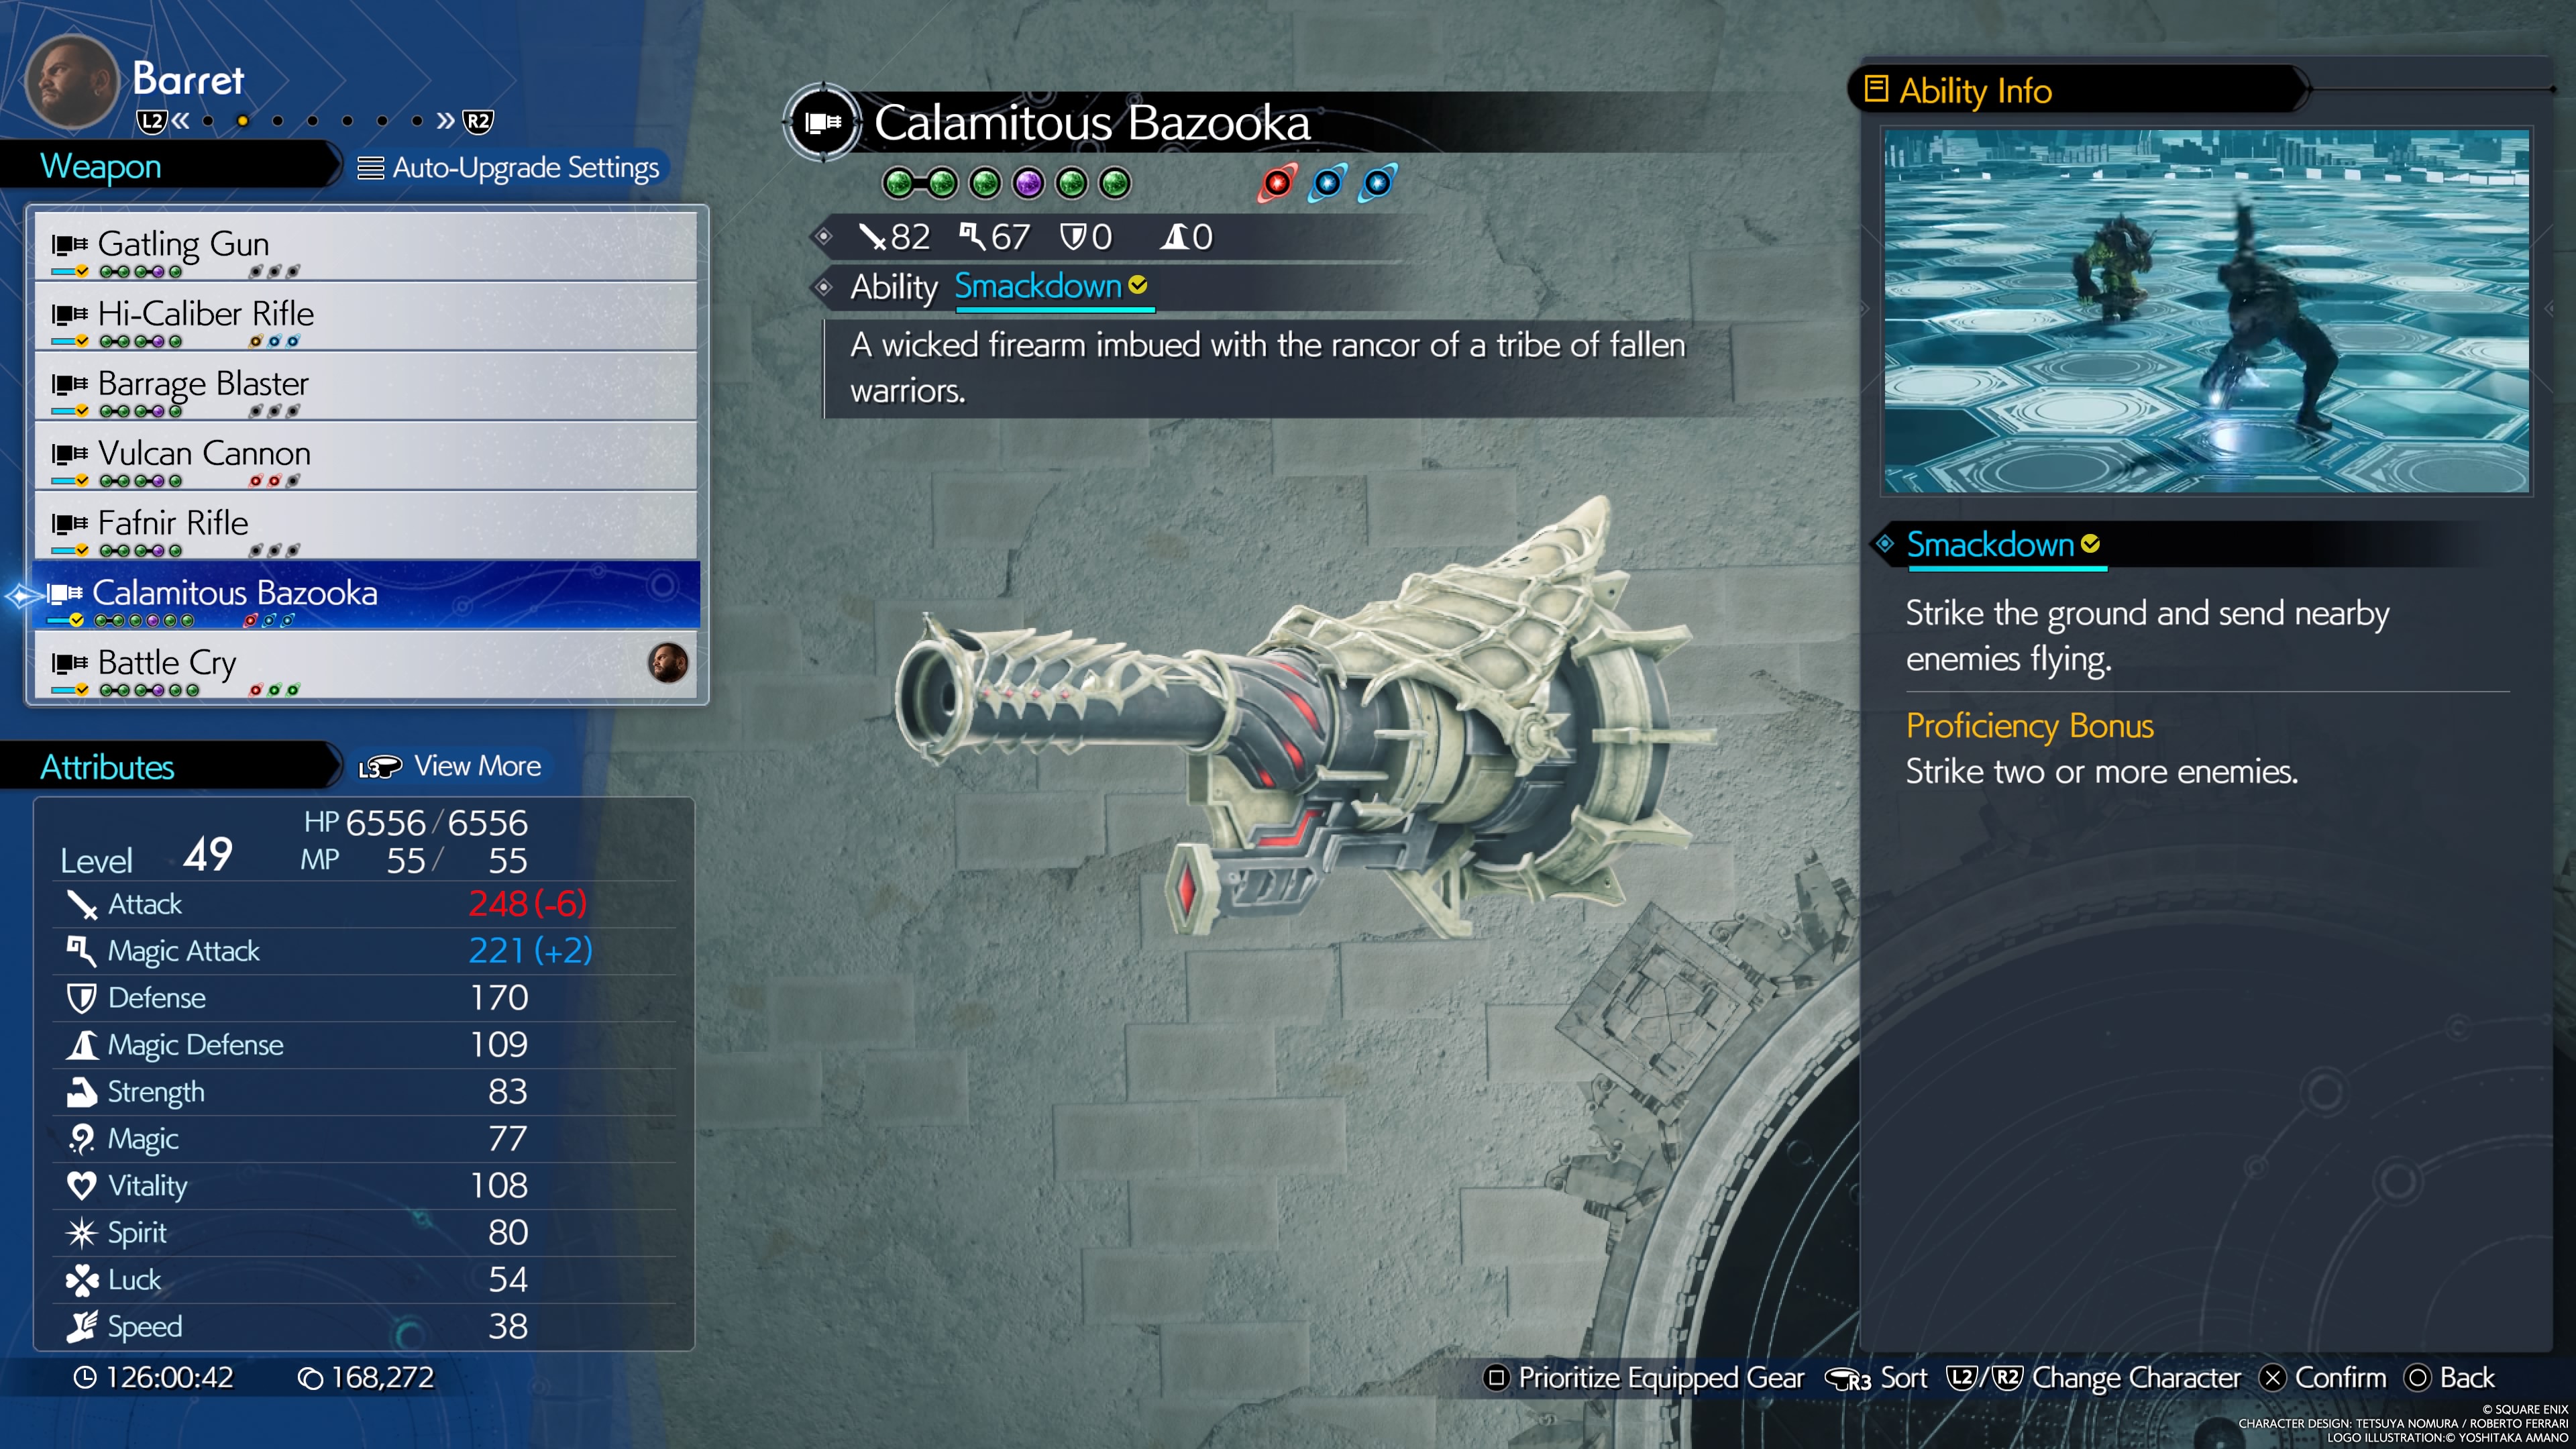
A wicked firearm imbued with the rancor of a tribe of fallen warriors.
- Stats (Weapon Lv. 7): 82 Attack, 67 Magic
- Materia Slots (Weapon Lv. 7): 1x2, 4x1
- Weapon Ability: Smackdown - A melee-range AOE attack that launches nearby enemies.
- Proficiency Bonus: Hit 2 or more enemies with the ability.
- Location: Found in a chest in Cosmo Canyon's Cave of the Gi
- Weapon Skills (Weapon Lv. 7):
- Unflinching Overcharge
- Massive Recharge
- Critical Hit Damage +10%
- Critical Hit Rate +5% x2
- Attack Damage +5%
- Overcharge Stagger Siphon
- Ability Critical Hit Rate Up
Battle Cry
A destiny-defying firearm imbued with the power of the planet.
- Stats (Weapon Lv. 7): 88 Attack, 65 Magic
- Materia Slots (Weapon Lv. 7): 2x2, 2x1
- Weapon Ability: Turbulent Spirit - Temporarily boost ATB recharge rate.
- Proficiency Bonus: Use the ability to fill 2 ATB charges.
- Location: Found in a chest in the Hall of Life area of the Temple of the Ancients
- Weapon Skills (Weapon Lv. 7):
- Overload Overcharge
- Massive Recharge
- Staggering Charge
- Enhanced Elements
- Weapon ATB Recovery
- ATB Charge Rate
- Opening ATB Bonus
- Attack Power +20
Weapons for Tifa Lockhart in Final Fantasy VII Rebirth

Tifa returns in her capacity as an agile and devastating close-range combo master. Though her anti-air capabilities have been nerfed somewhat, she can output rapid damage in melee better than almost any other character through proper mastery of her unique mechanics.
Leather Gloves
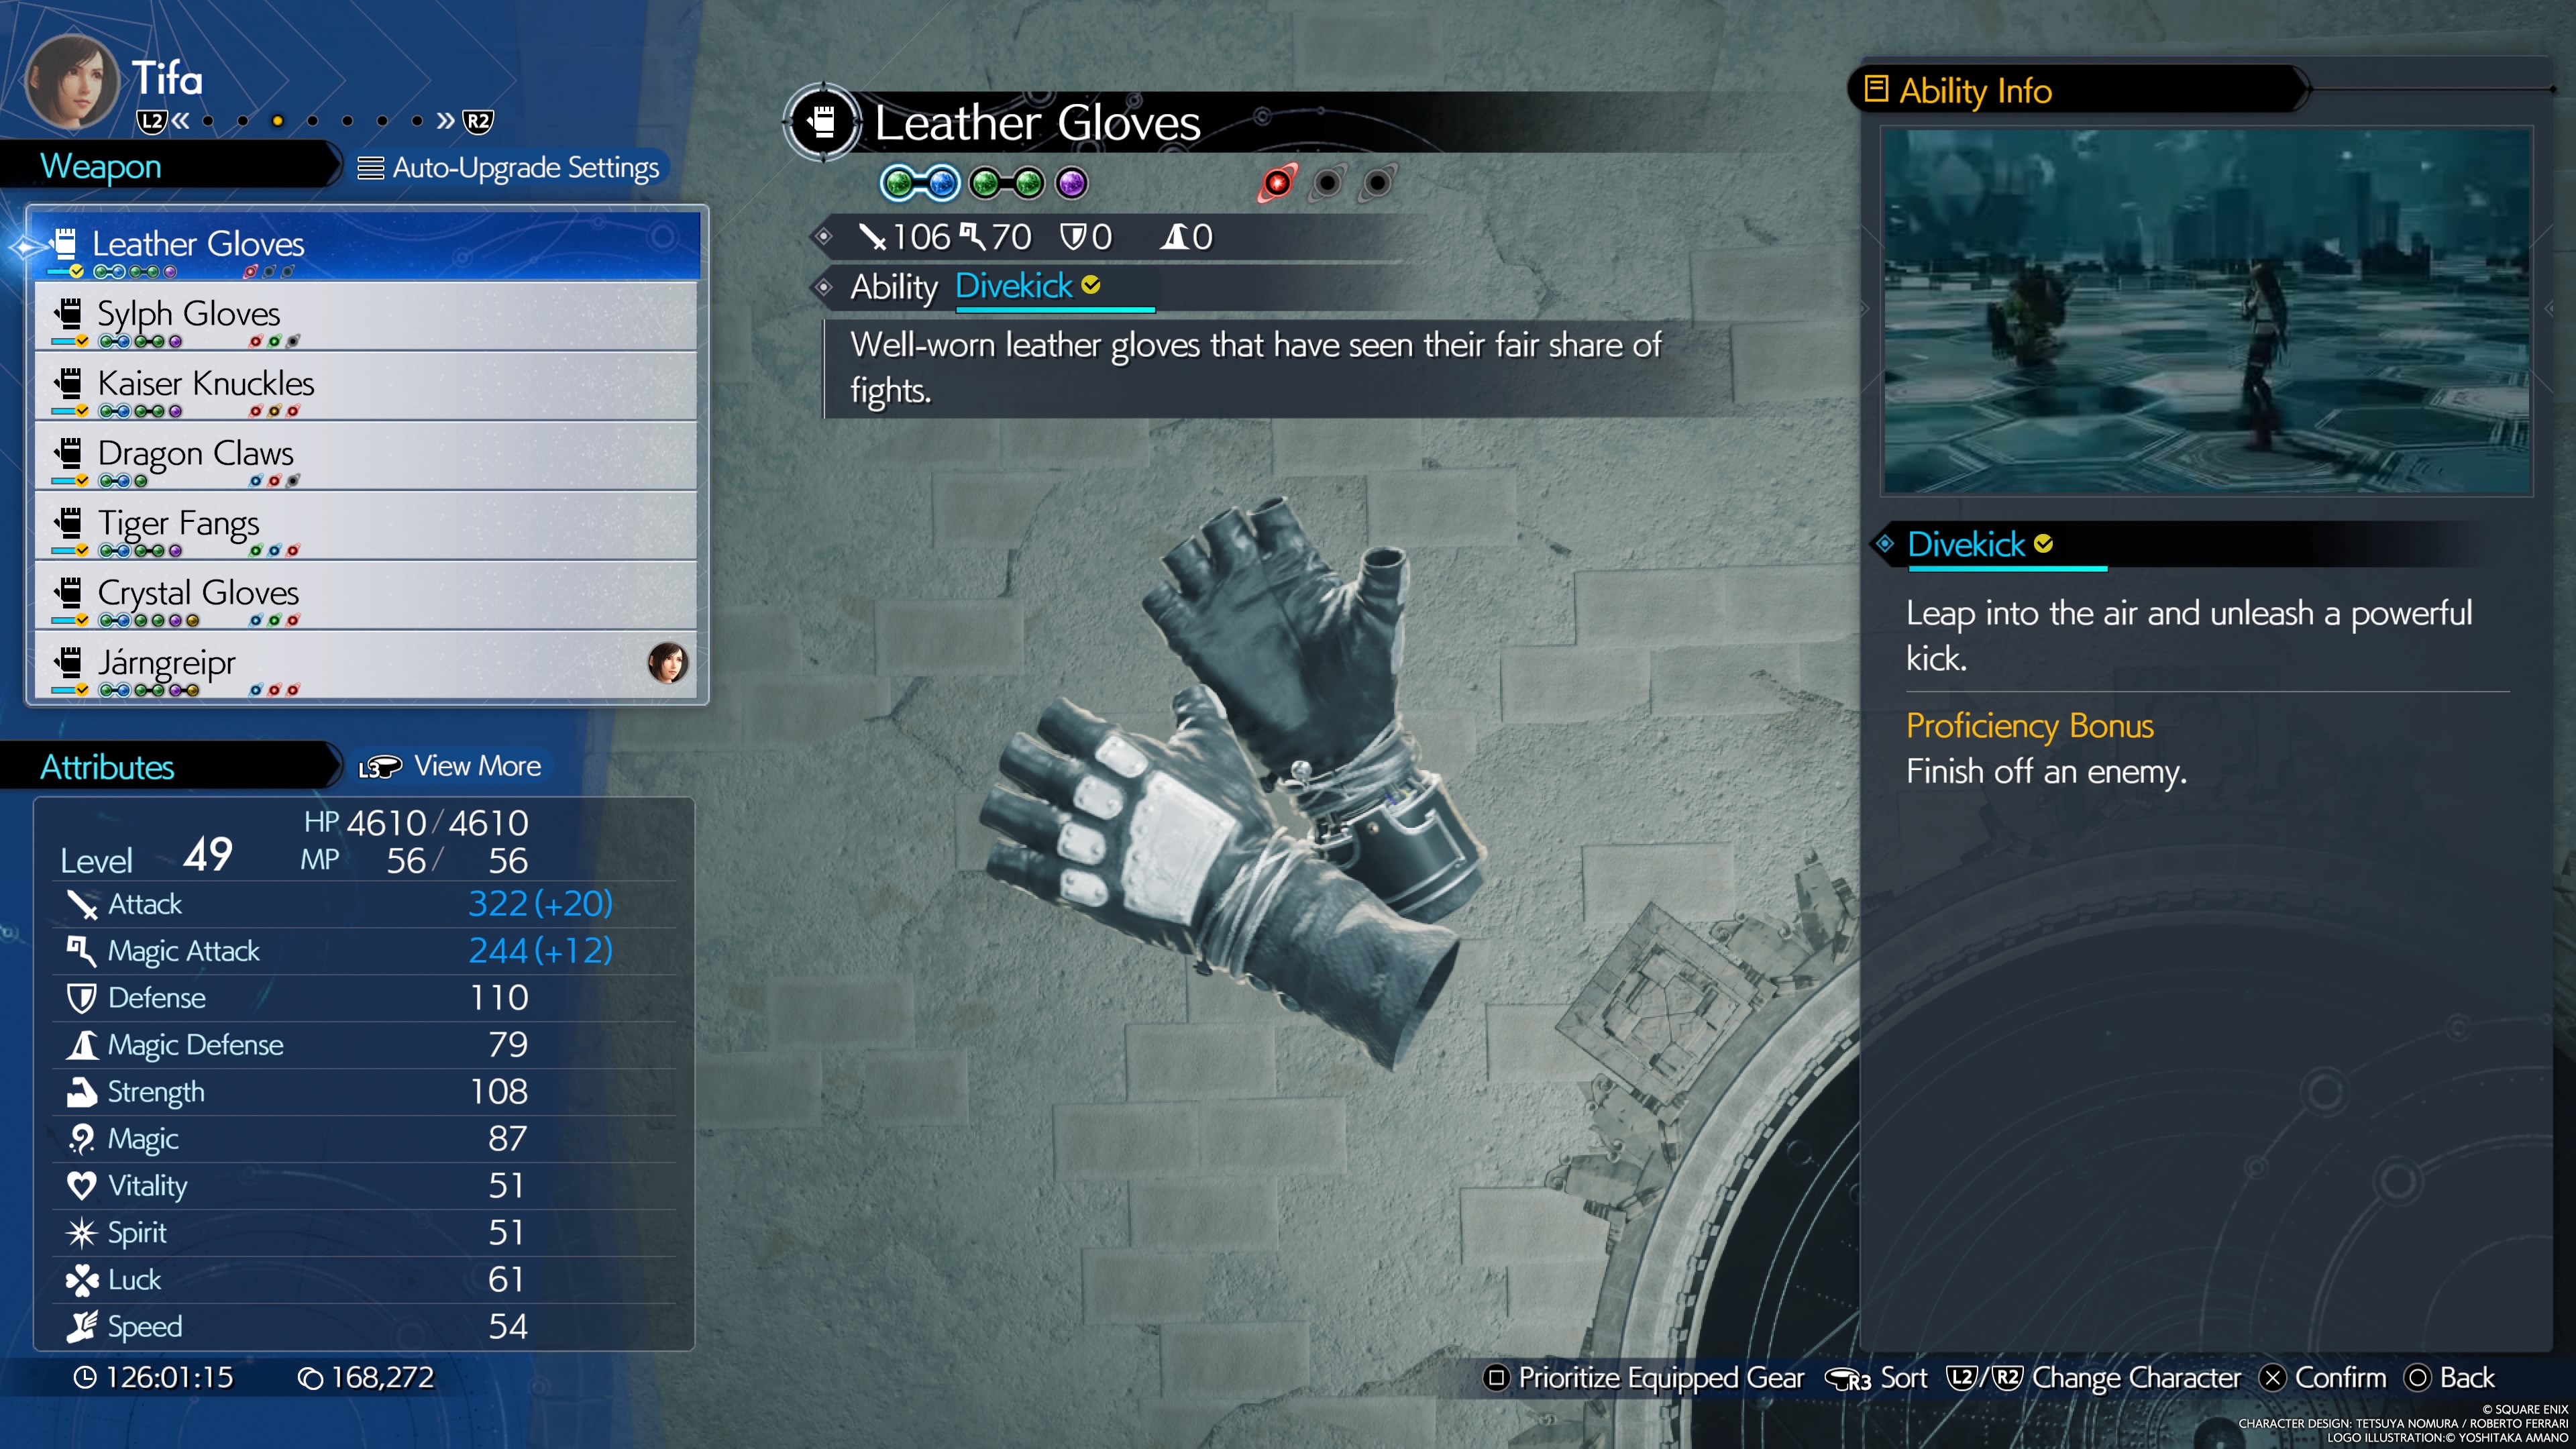
Well-worn leather gloves that have seen their fair share of fights.
- Stats (Weapon Lv. 7): 106 Attack, 70 Magic
- Materia Slots (Weapon Lv. 7): 2x2, 1x1
- Weapon Ability: Divekick - A powerful kick attack from the air.
- Proficiency Bonus: Use the ability to finish off an enemy.
- Location: Tifa starts with this weapon.
- Weapon Skills (Weapon Lv. 7):
- Martial Arts Mastery (Unbridled Strength duration +50%)
- Utterly Unbridled Strength (+5% Attack Power at Chi level 1, +10% at chi level 2)
- Weapon Ability Damage +5%
- Max HP +200
- MP Recovery Rate Up
- Attack Power +20
- Attack Damage +5%
- Magic attack Power +20
Sylph Gloves
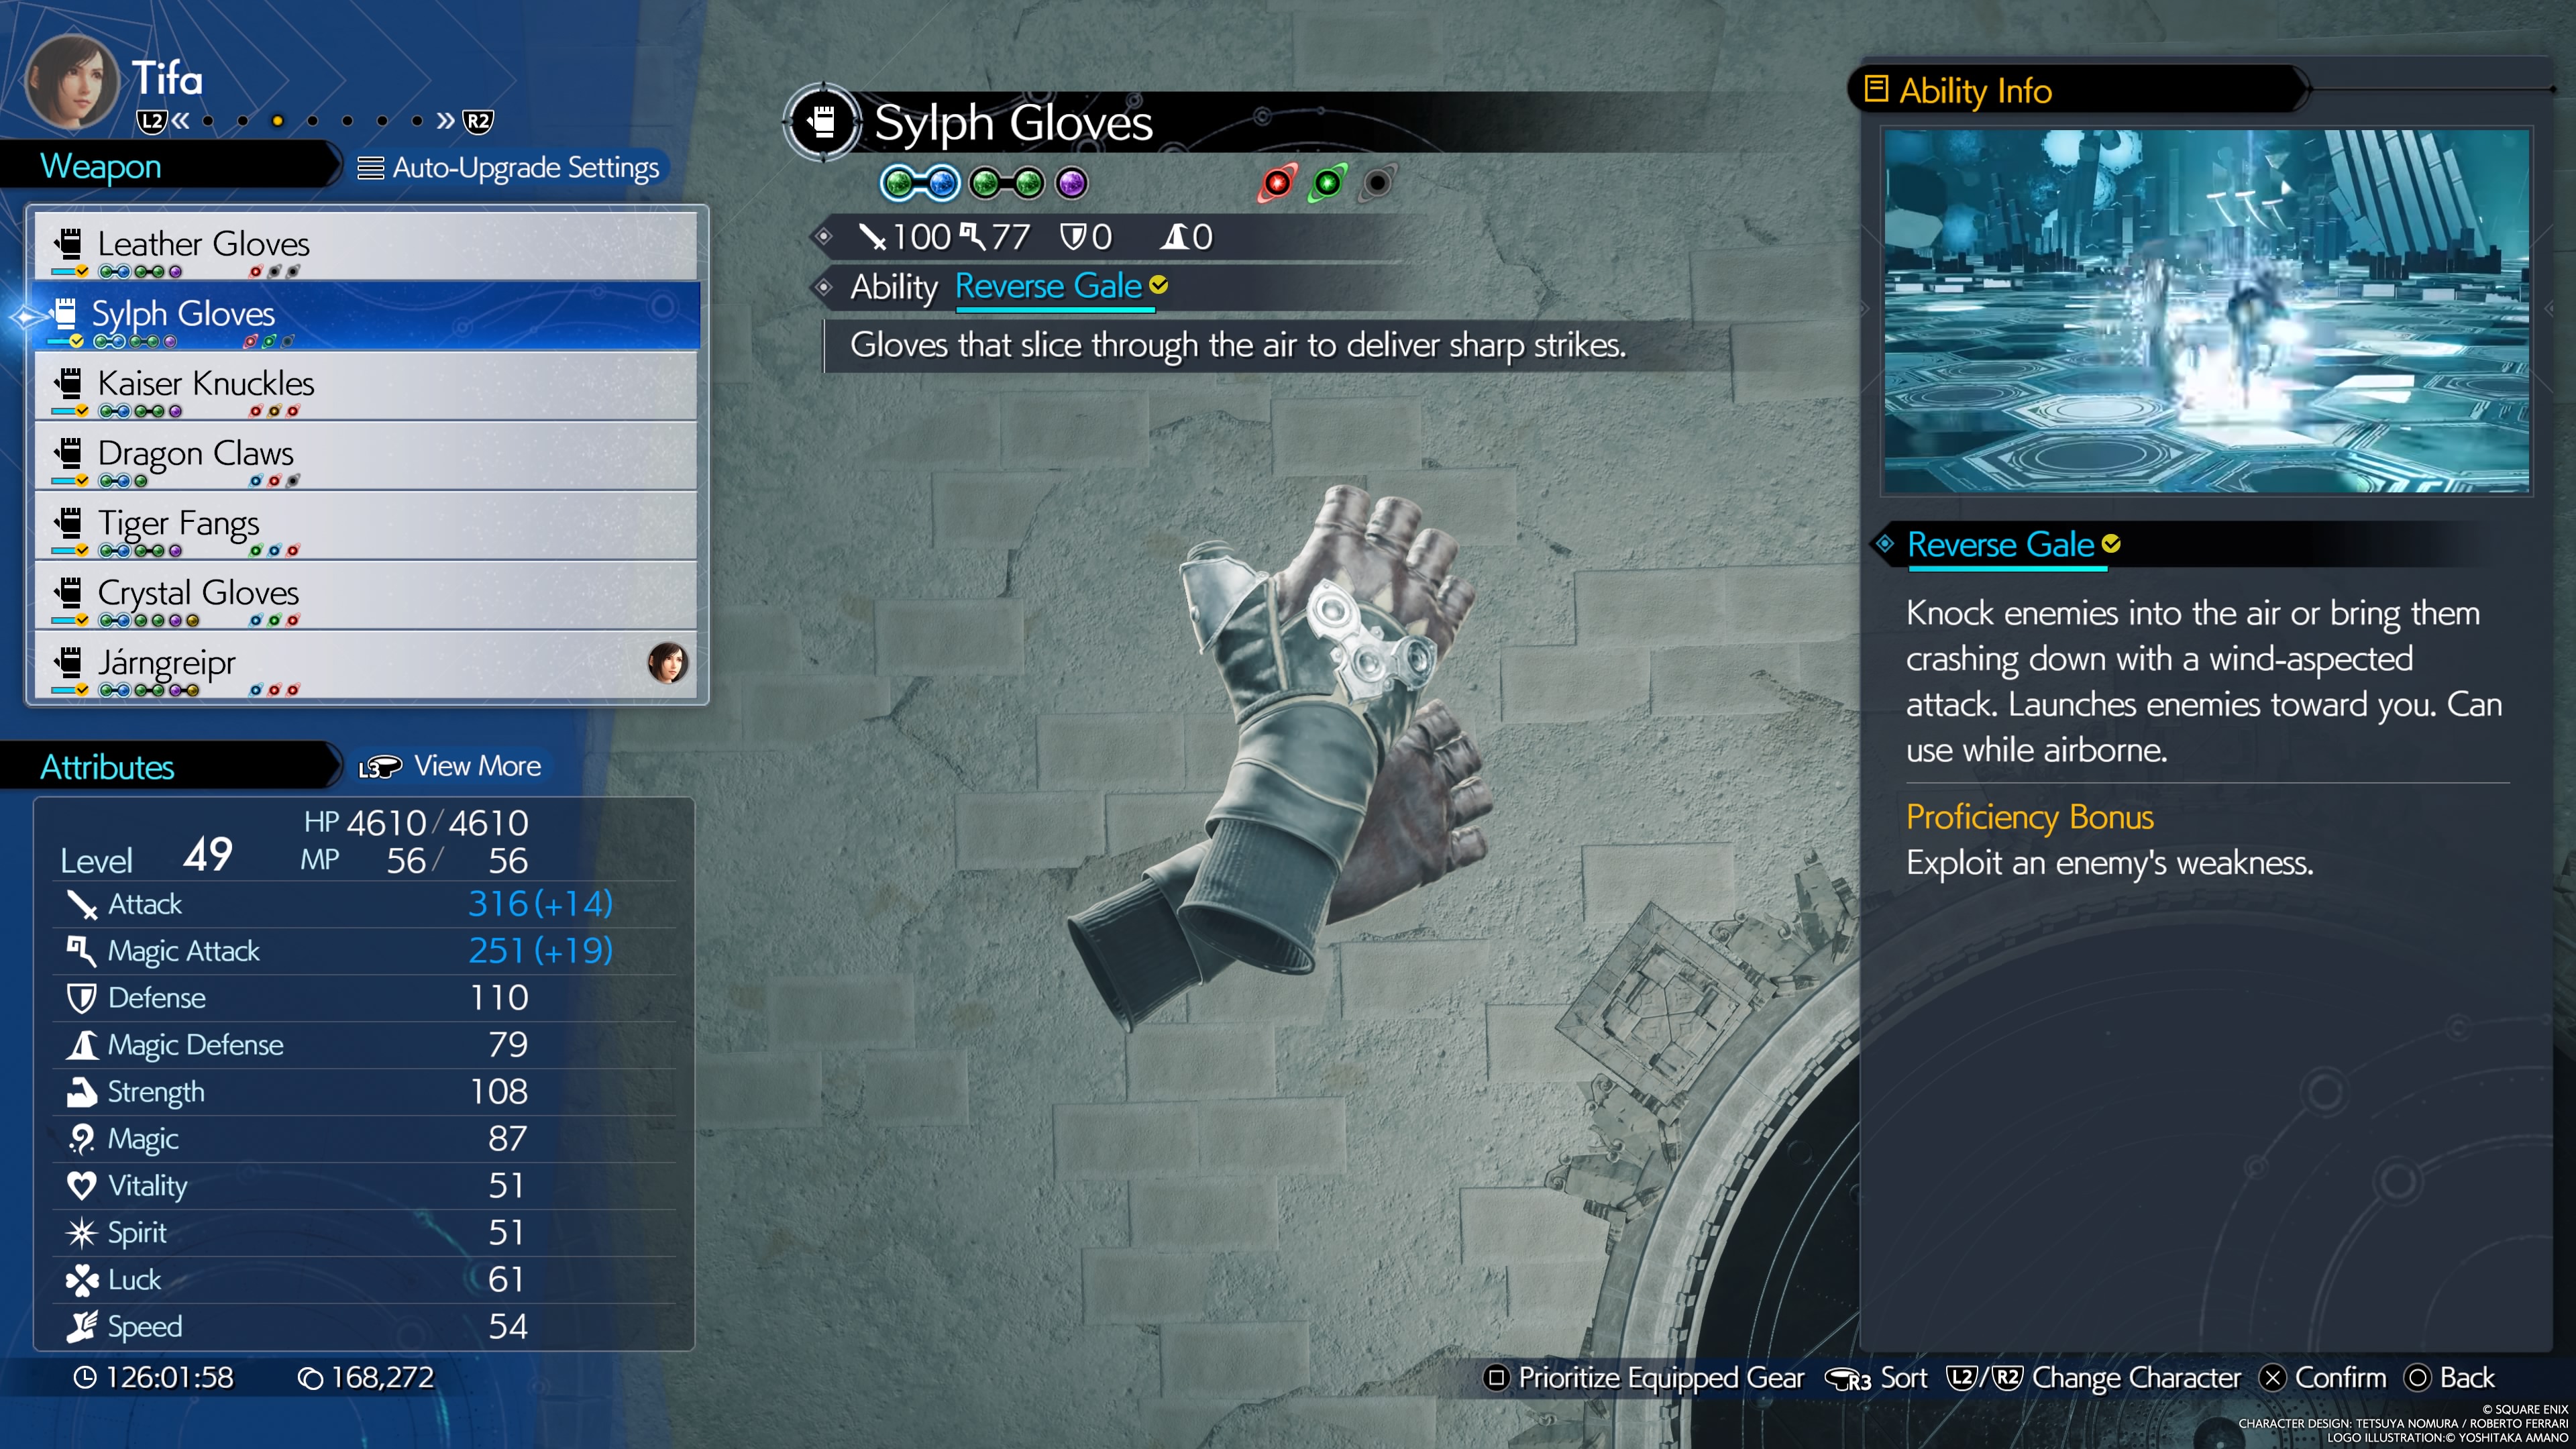
Gloves that slice through the air to deliver sharp strikes.
- Stats (Weapon Lv. 7): 100 Attack, 77 Magic
- Materia Slots (Weapon Lv. 7): 2x2, 1x1
- Weapon Ability: Reverse Gale - Wind-element launcher attack that transitions to airborne.
- Proficiency Bonus: Use the ability to exploit an enemy's weakness.
- Location: Found in a chest within the Mythril Mines between Grasslands and Junon.
- Weapon Skills (Weapon Lv. 7):
- ATB Charge Rate Up
- Enhanced Techniques (+15% damage from unique abilities)
- MP Recovery Rate Up
- Steadfast Concentration (Activates Concentration after being revived)
- Attack Damage +5%
- Restorative MP Saver (Healing spells 10% less MP)
- Max MP +3
- Attack Power +20
Kaiser Knuckles
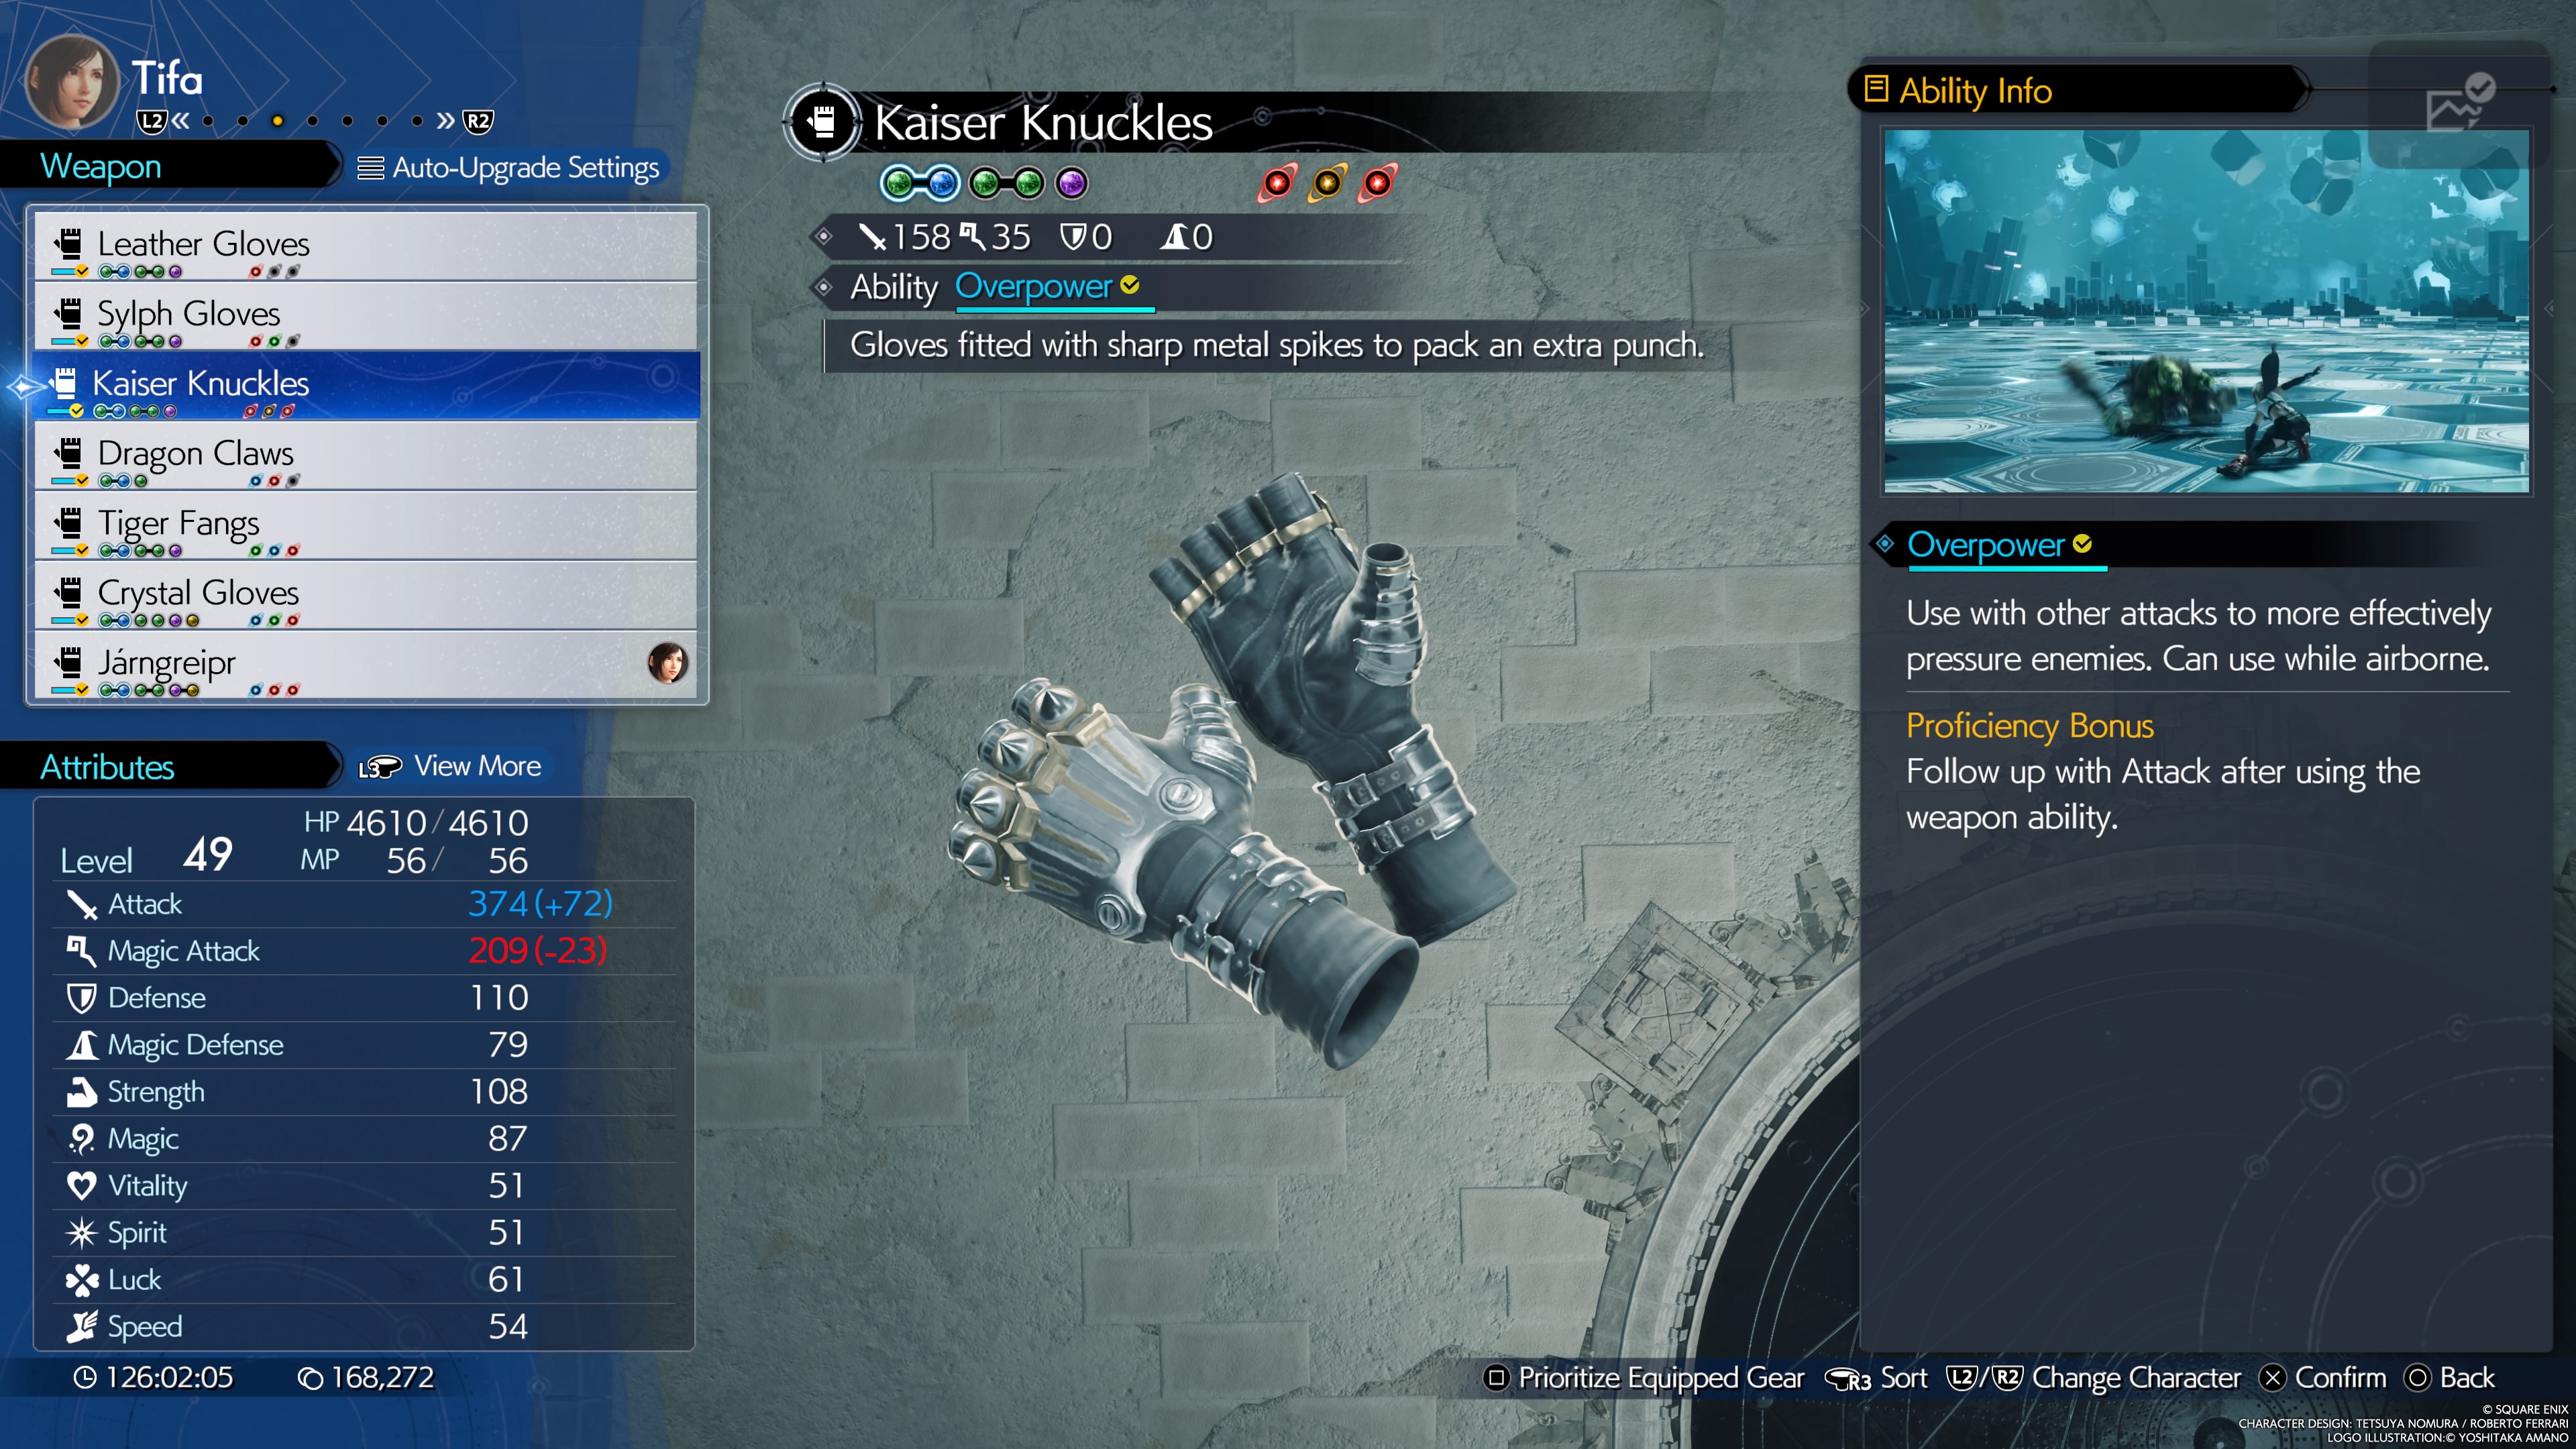
Gloves fitted with sharp metal spikes to pack an extra punch.
- Stats (Weapon Lv. 7): 158 Attack, 35 Magic
- Materia Slots (Weapon Lv. 7): 2x2, 1x1
- Weapon Ability: Overpower - A hard strike that can be chained into basic and other attacks.
- Proficiency Bonus: Follow up with Attack after using the ability.
- Location: Found in the cargo hold of the Shinra-8, after the ship is attacked.
- Weapon Skills (Weapon Lv. 7):
- Martial Arts Mastery
- Concentration (50% chance of activating Unbridled Strength on entering combat)
- Magic Attack Power +20 x2
- Max HP +200
- Enhanced Magic Guard
- Synergy Damage Up
- Max MP +3
Dragon Claws
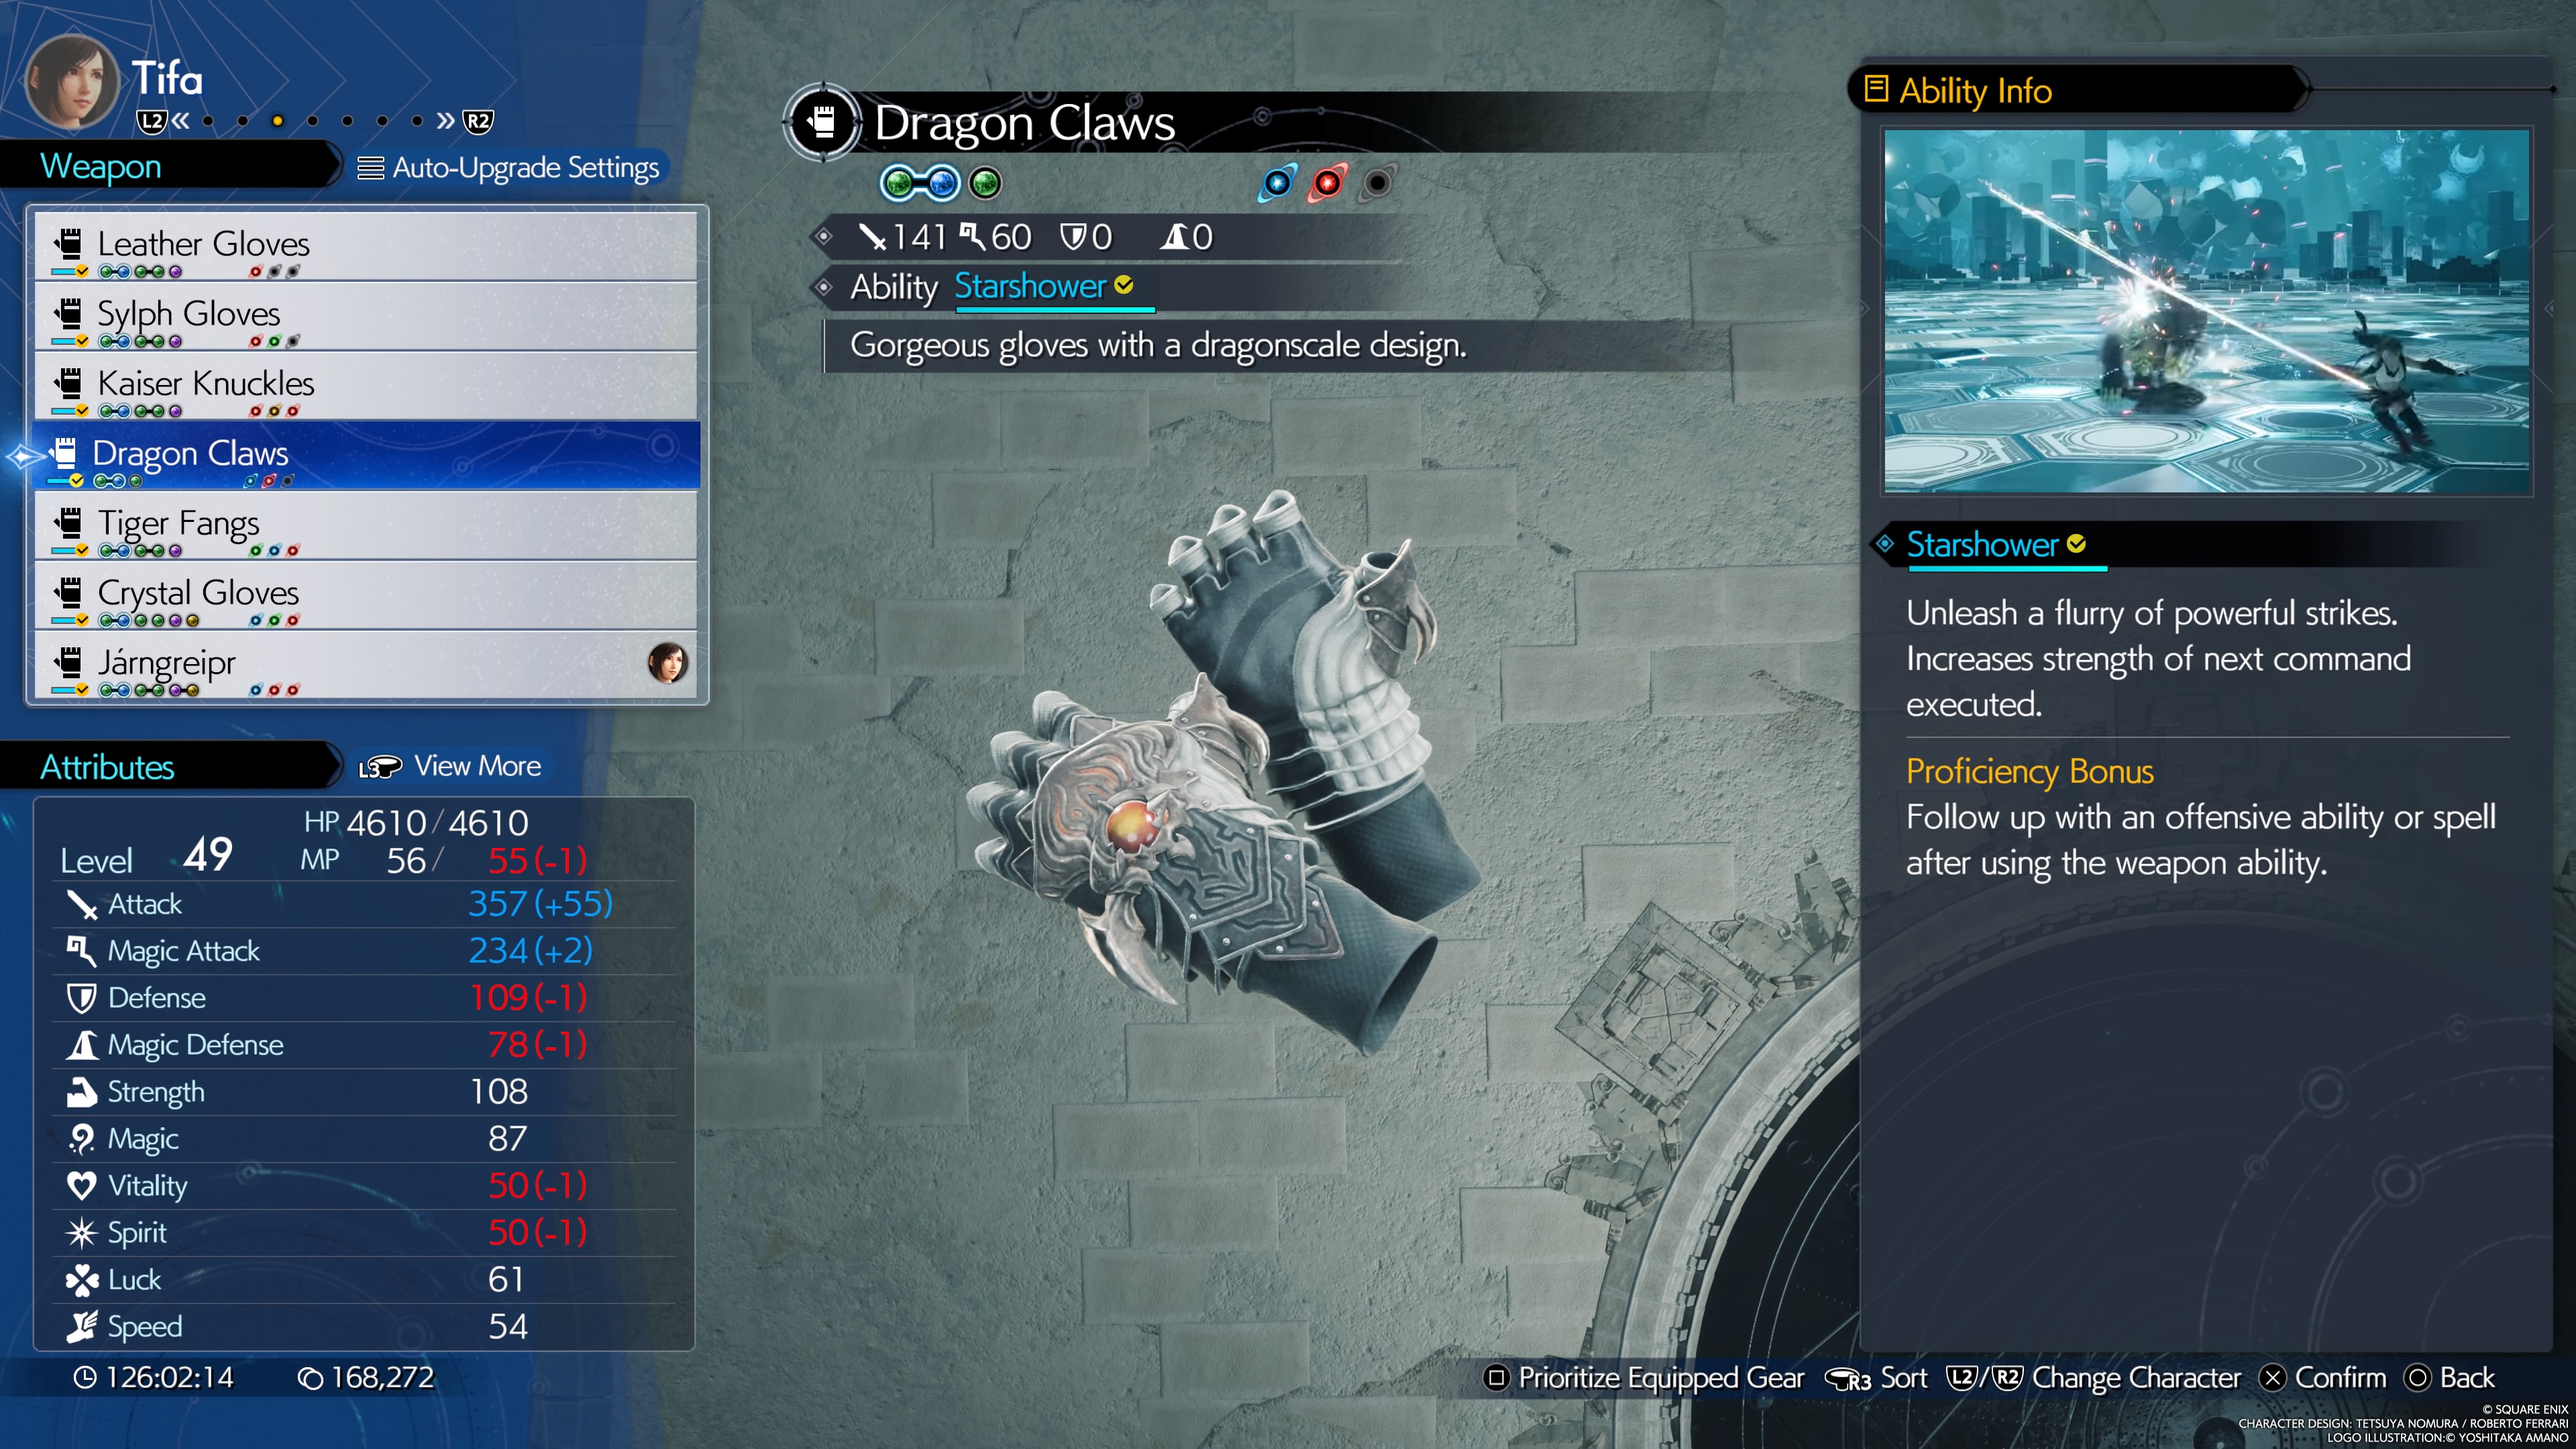
Gorgeous Gloves with a dragonscale design.
- Stats (Weapon Lv. 7): 141 Attack, 60 Magic
- Materia Slots (Weapon Lv. 7): 1x2, 1x1
- Weapon Ability: Starshower - A multi-hit attack that boosts the strength of the next command used.
- Proficiency Bonus: Follow up with an offensive spell or ability after using Starshower.
- Location: Earned in the Corel Dustbowl prison by achieving the Rank 3 score in the Desert Rush standard mode minigame.
- Weapon Skills (Weapon Lv. 7):
- Martial Arts Mastery x2
- Enhanced Techniques
- Attack Power +5%
- Magic Attack POwer +20
- Weapon Ability Damage +5%
- ATB Charge Rate Up
Tiger Fangs
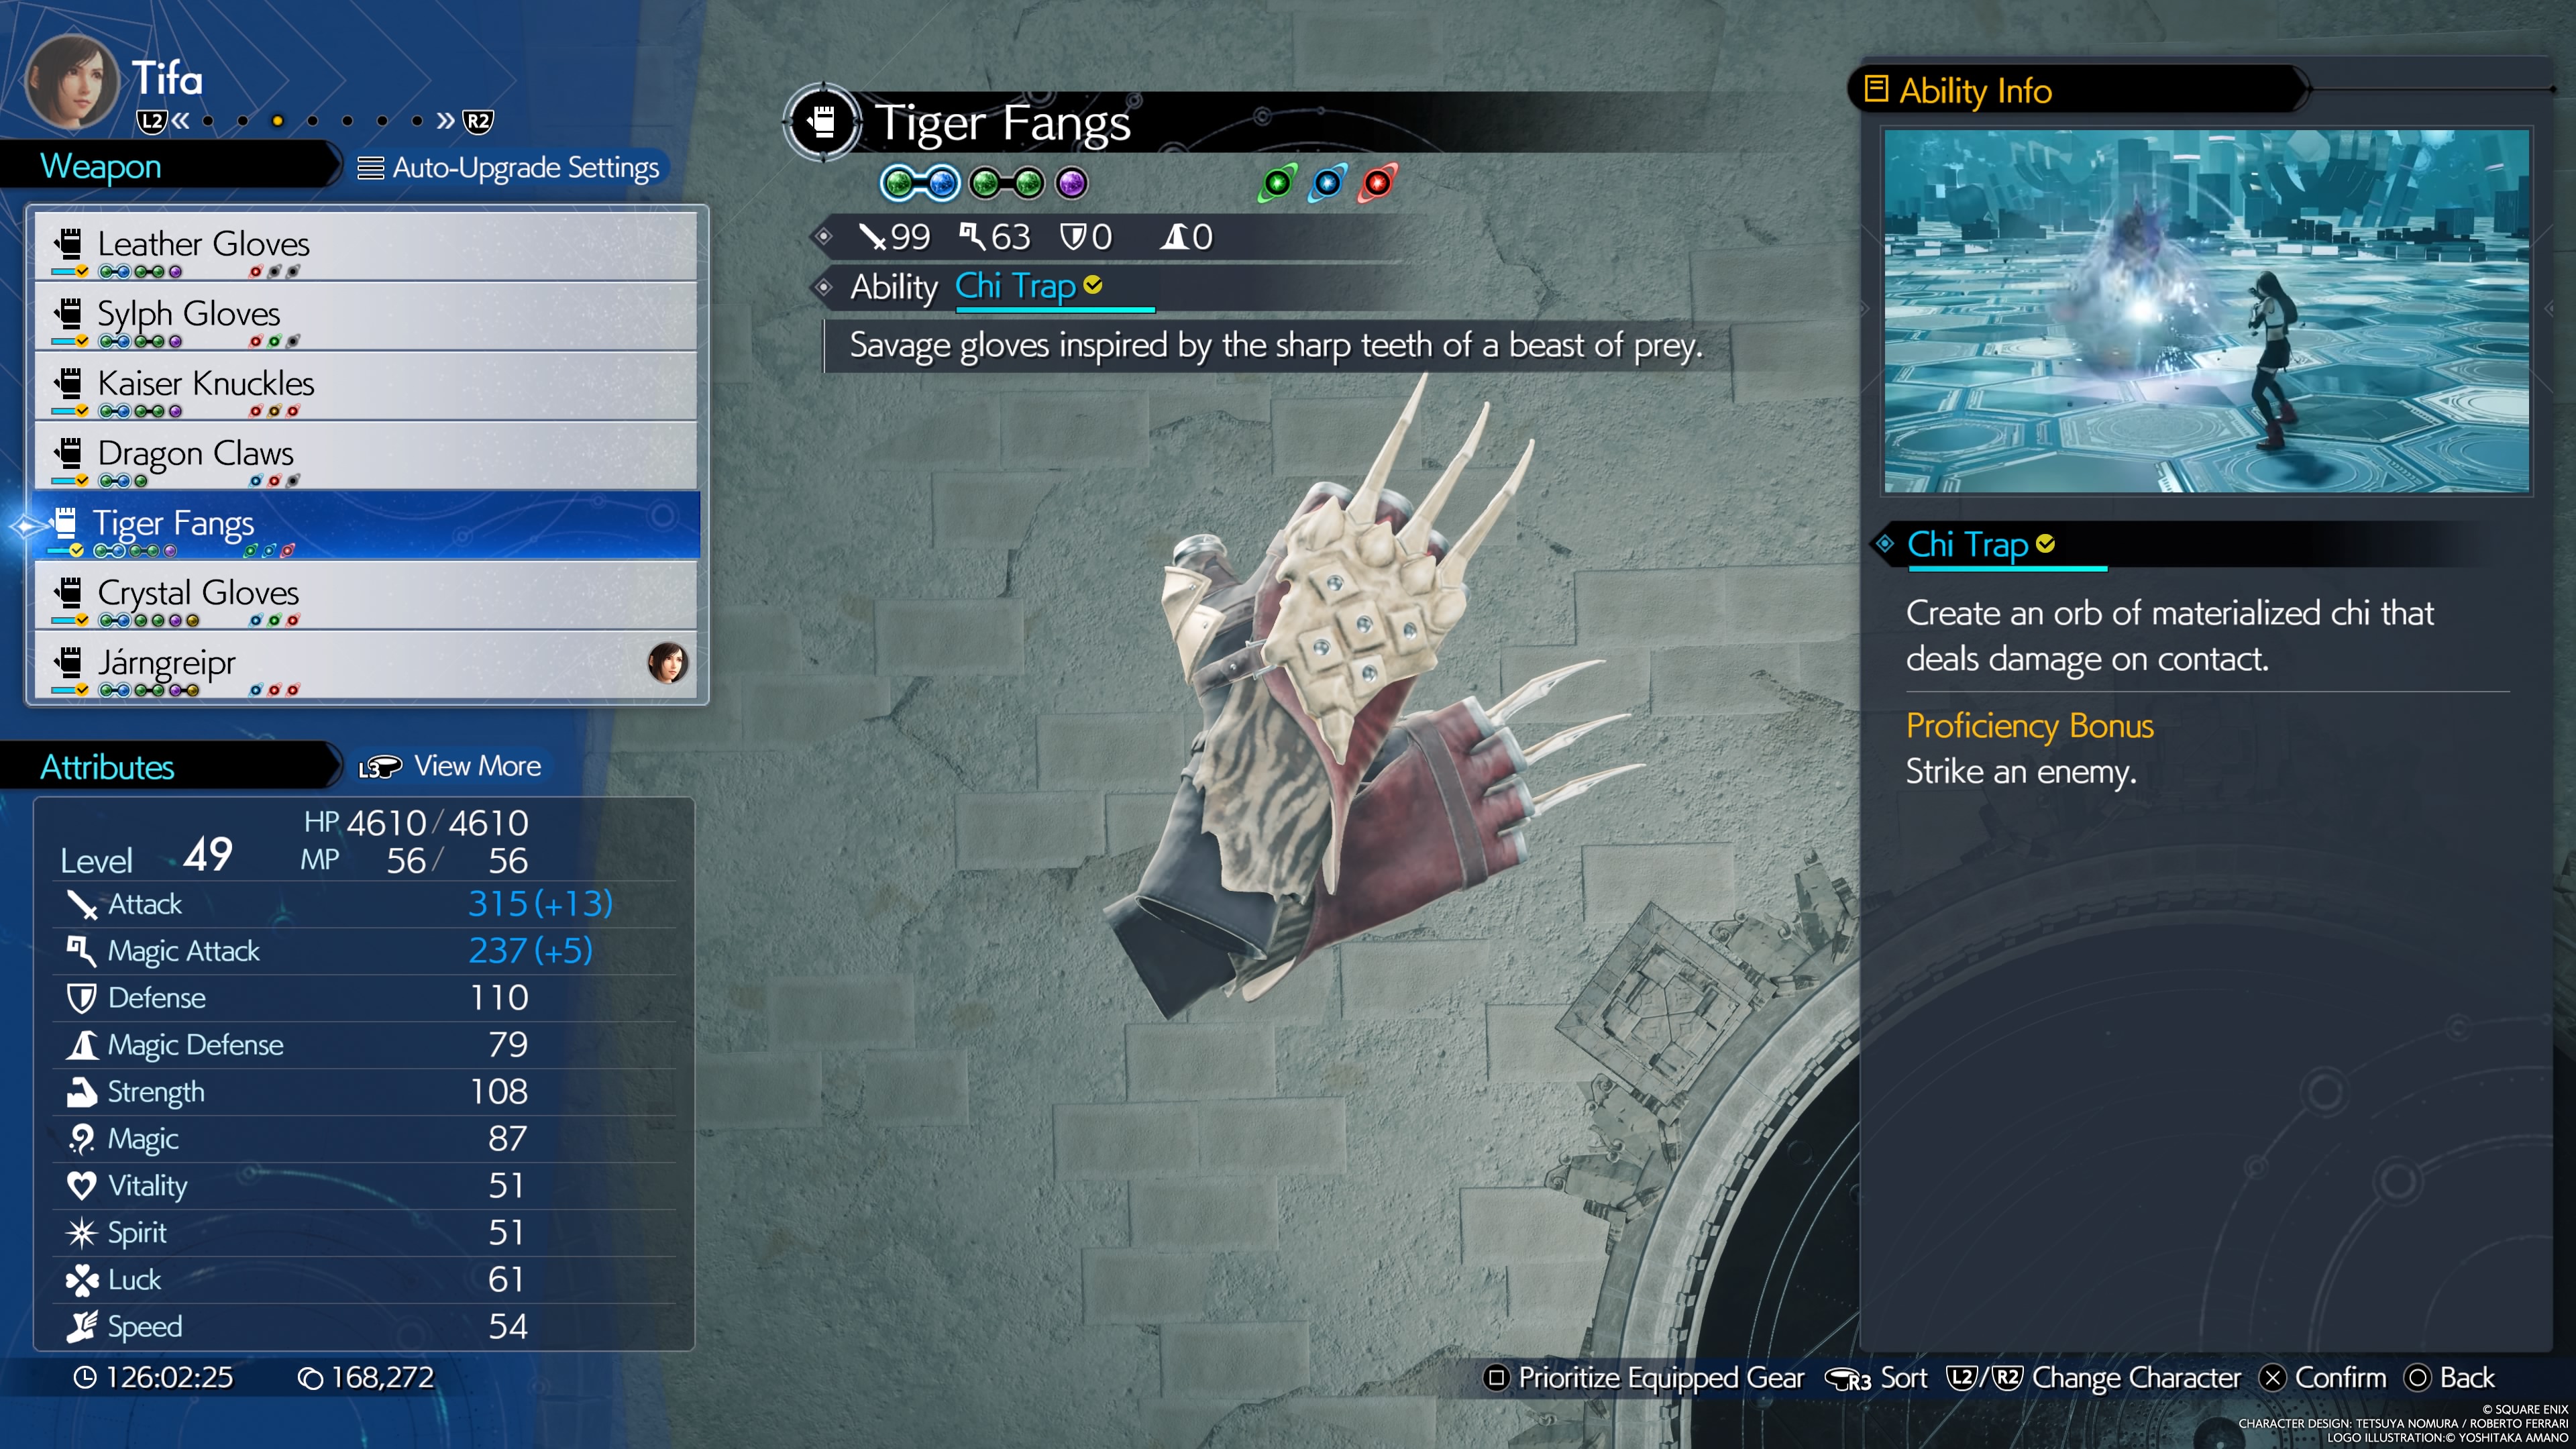
Savage gloves inspired by the sharp teeth of a beast of prey
- Stats (Weapon Lv. 7): 99 Attack, 63 Magic
- Materia Slots (Weapon Lv. 7): 2x2, 1x1
- Weapon Ability: Chi Trap - Spawns an orb of chi that damages enemies.
- Proficiency Bonus: Strike an enemy with the Chi Trap.
- Location: Found when Tifa and her team arrives at the Gongaga Reactor.
- Weapon Skills (Weapon Lv. 7):
- Utterly Unbridled Strength
- Steadfast Concentration
- Max HP +200
- Altruistic Recovery +10%
- Attack Power +20
- MP Recovery Rate U
- Selfish Buff Up
- Enhanced Physical Guard
Crystal Gloves
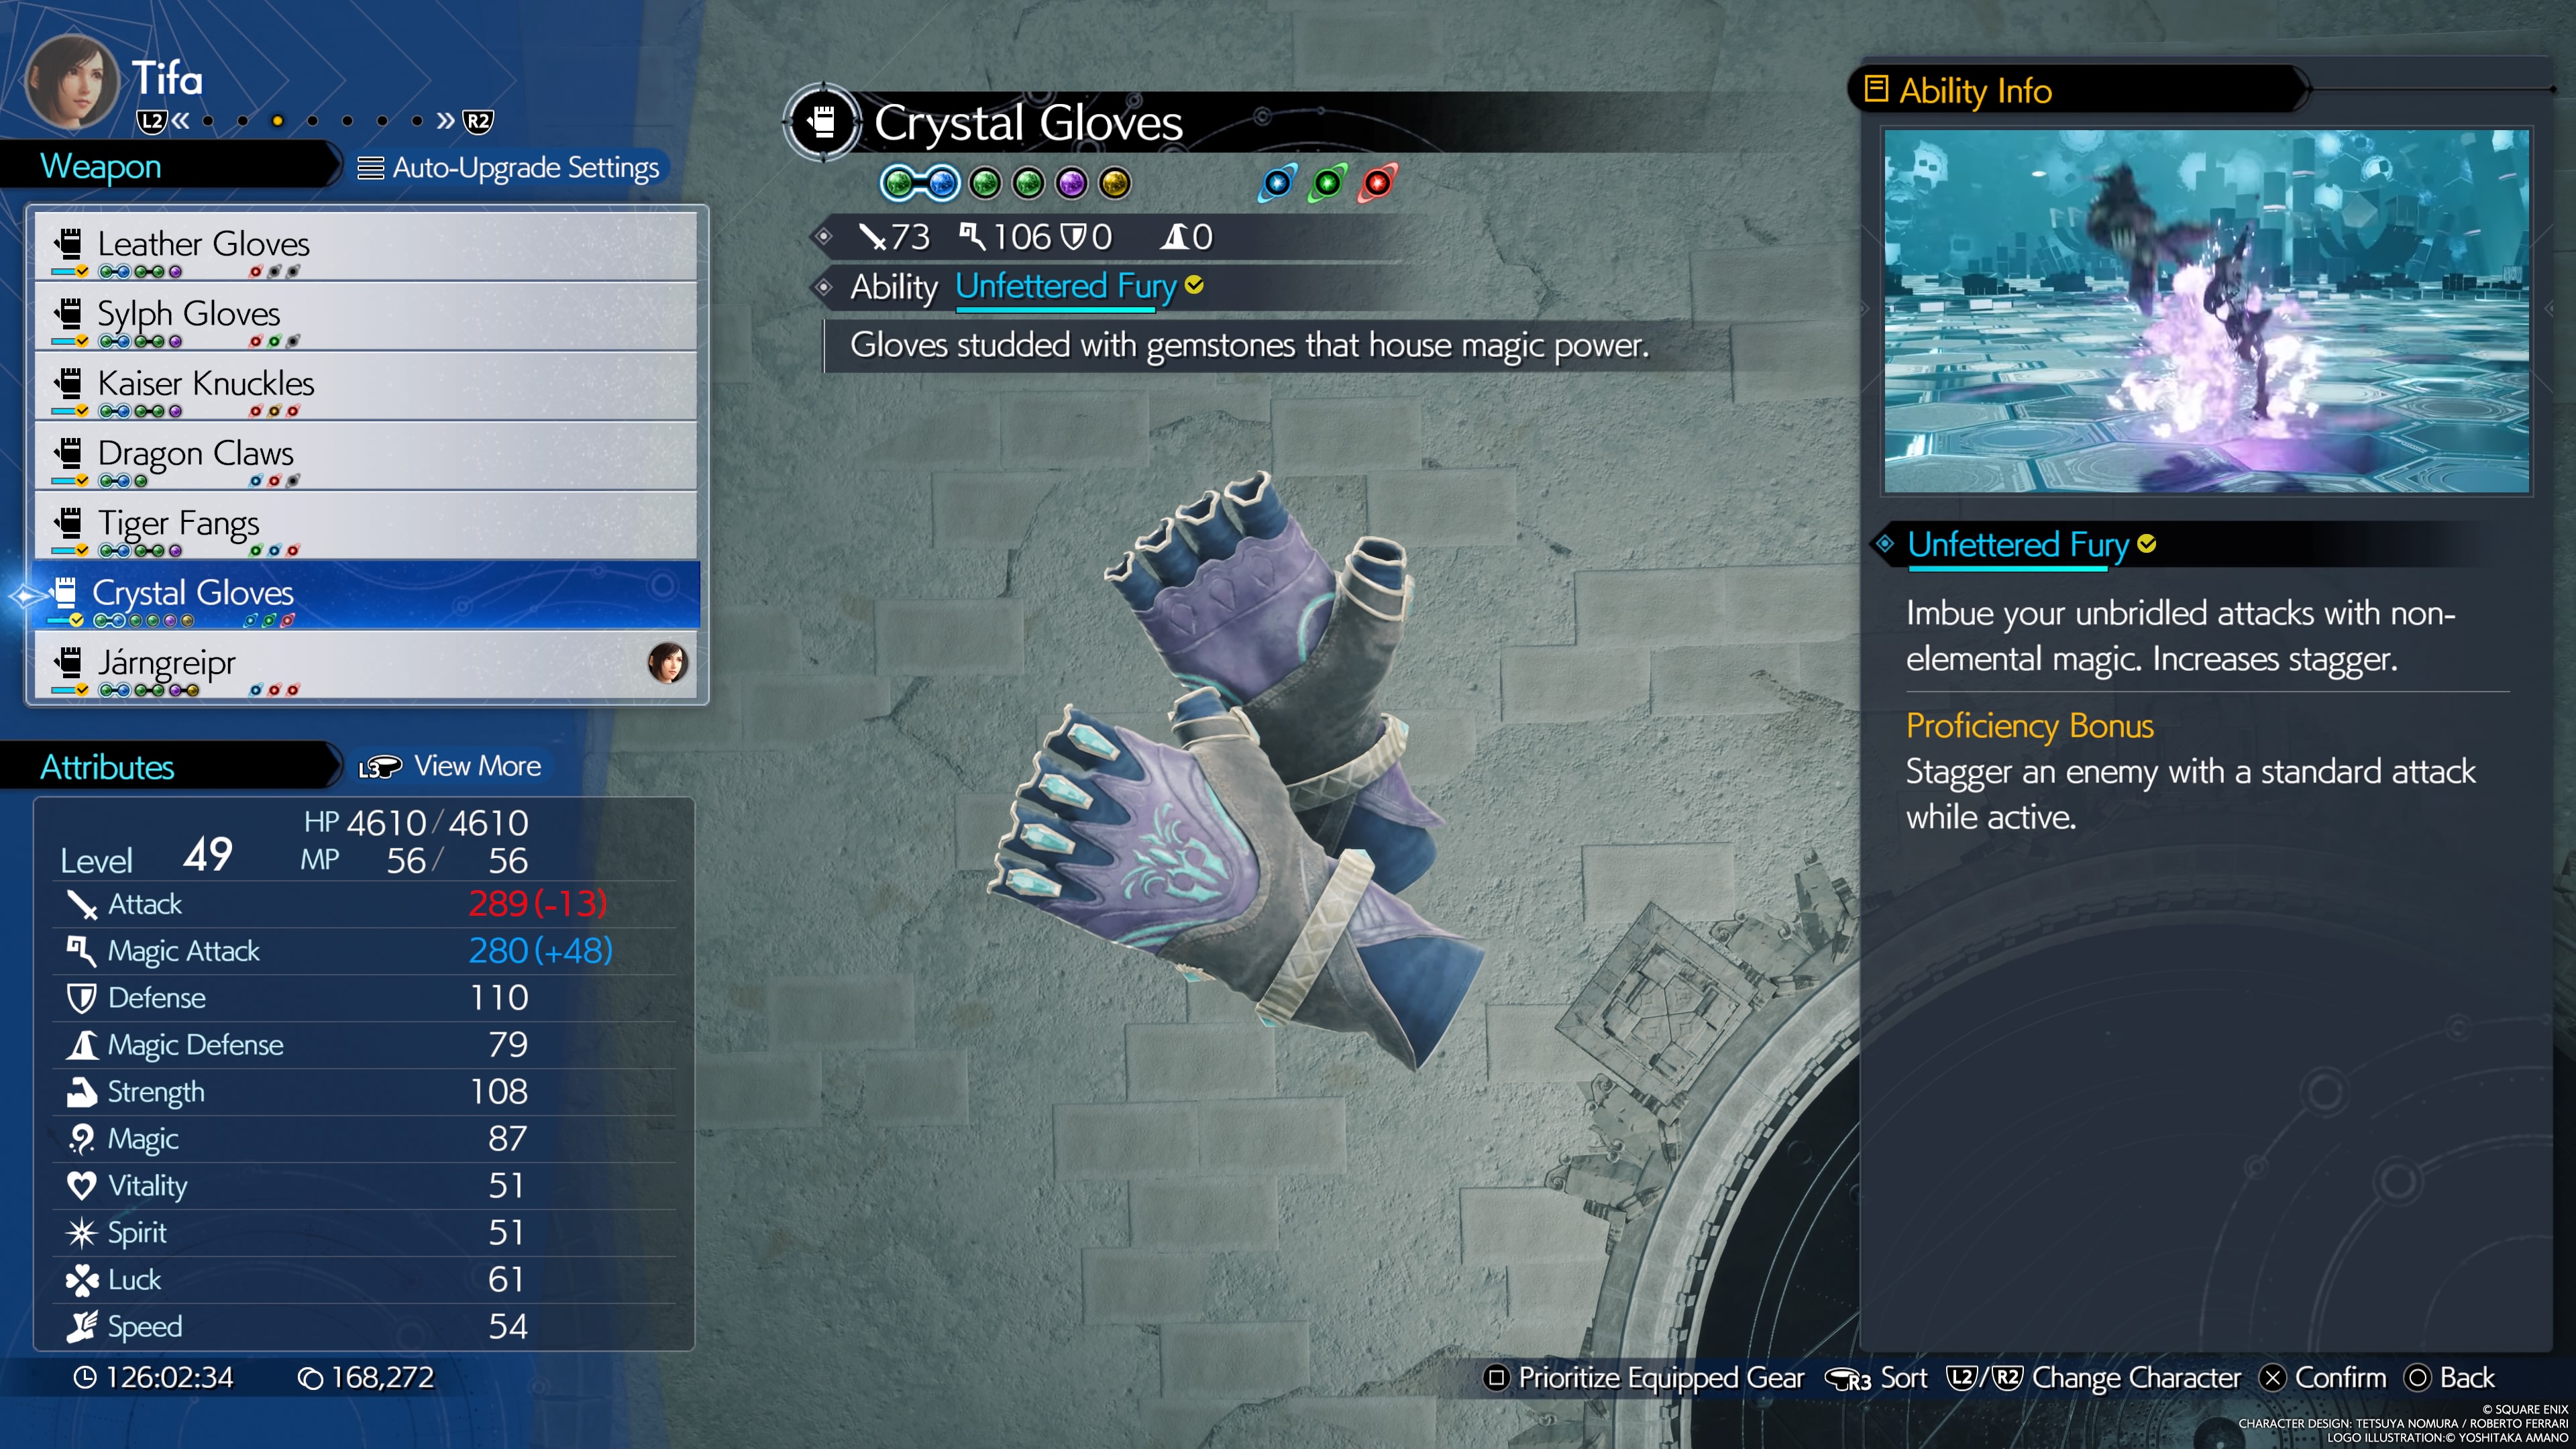
Gloves studded with gemstones that house magic power.
- Stats (Weapon Lv. 7): 73 Attack, 106 Magic
- Materia Slots (Weapon Lv. 7): 1x2, 4x1
- Weapon Ability: Unfettered Fury - Imbue attacks with non-elemental damage, increases stagger damage.
- Proficiency Bonus: Stagger an enemy with a standard attack after using Unfettered Fury.
- Location: Found at the entrance to the Nibelheim Mako Reactor
- Weapon Skills (Weapon Lv. 7):
- Enhanced Techniques (+15% damage from unique abilities)
- Attack Power +20
- Enhanced Elements
- Limit Break Damage +10%
- Opening ATB Bonrus
- Max MP +3 x2
Jarngreipr
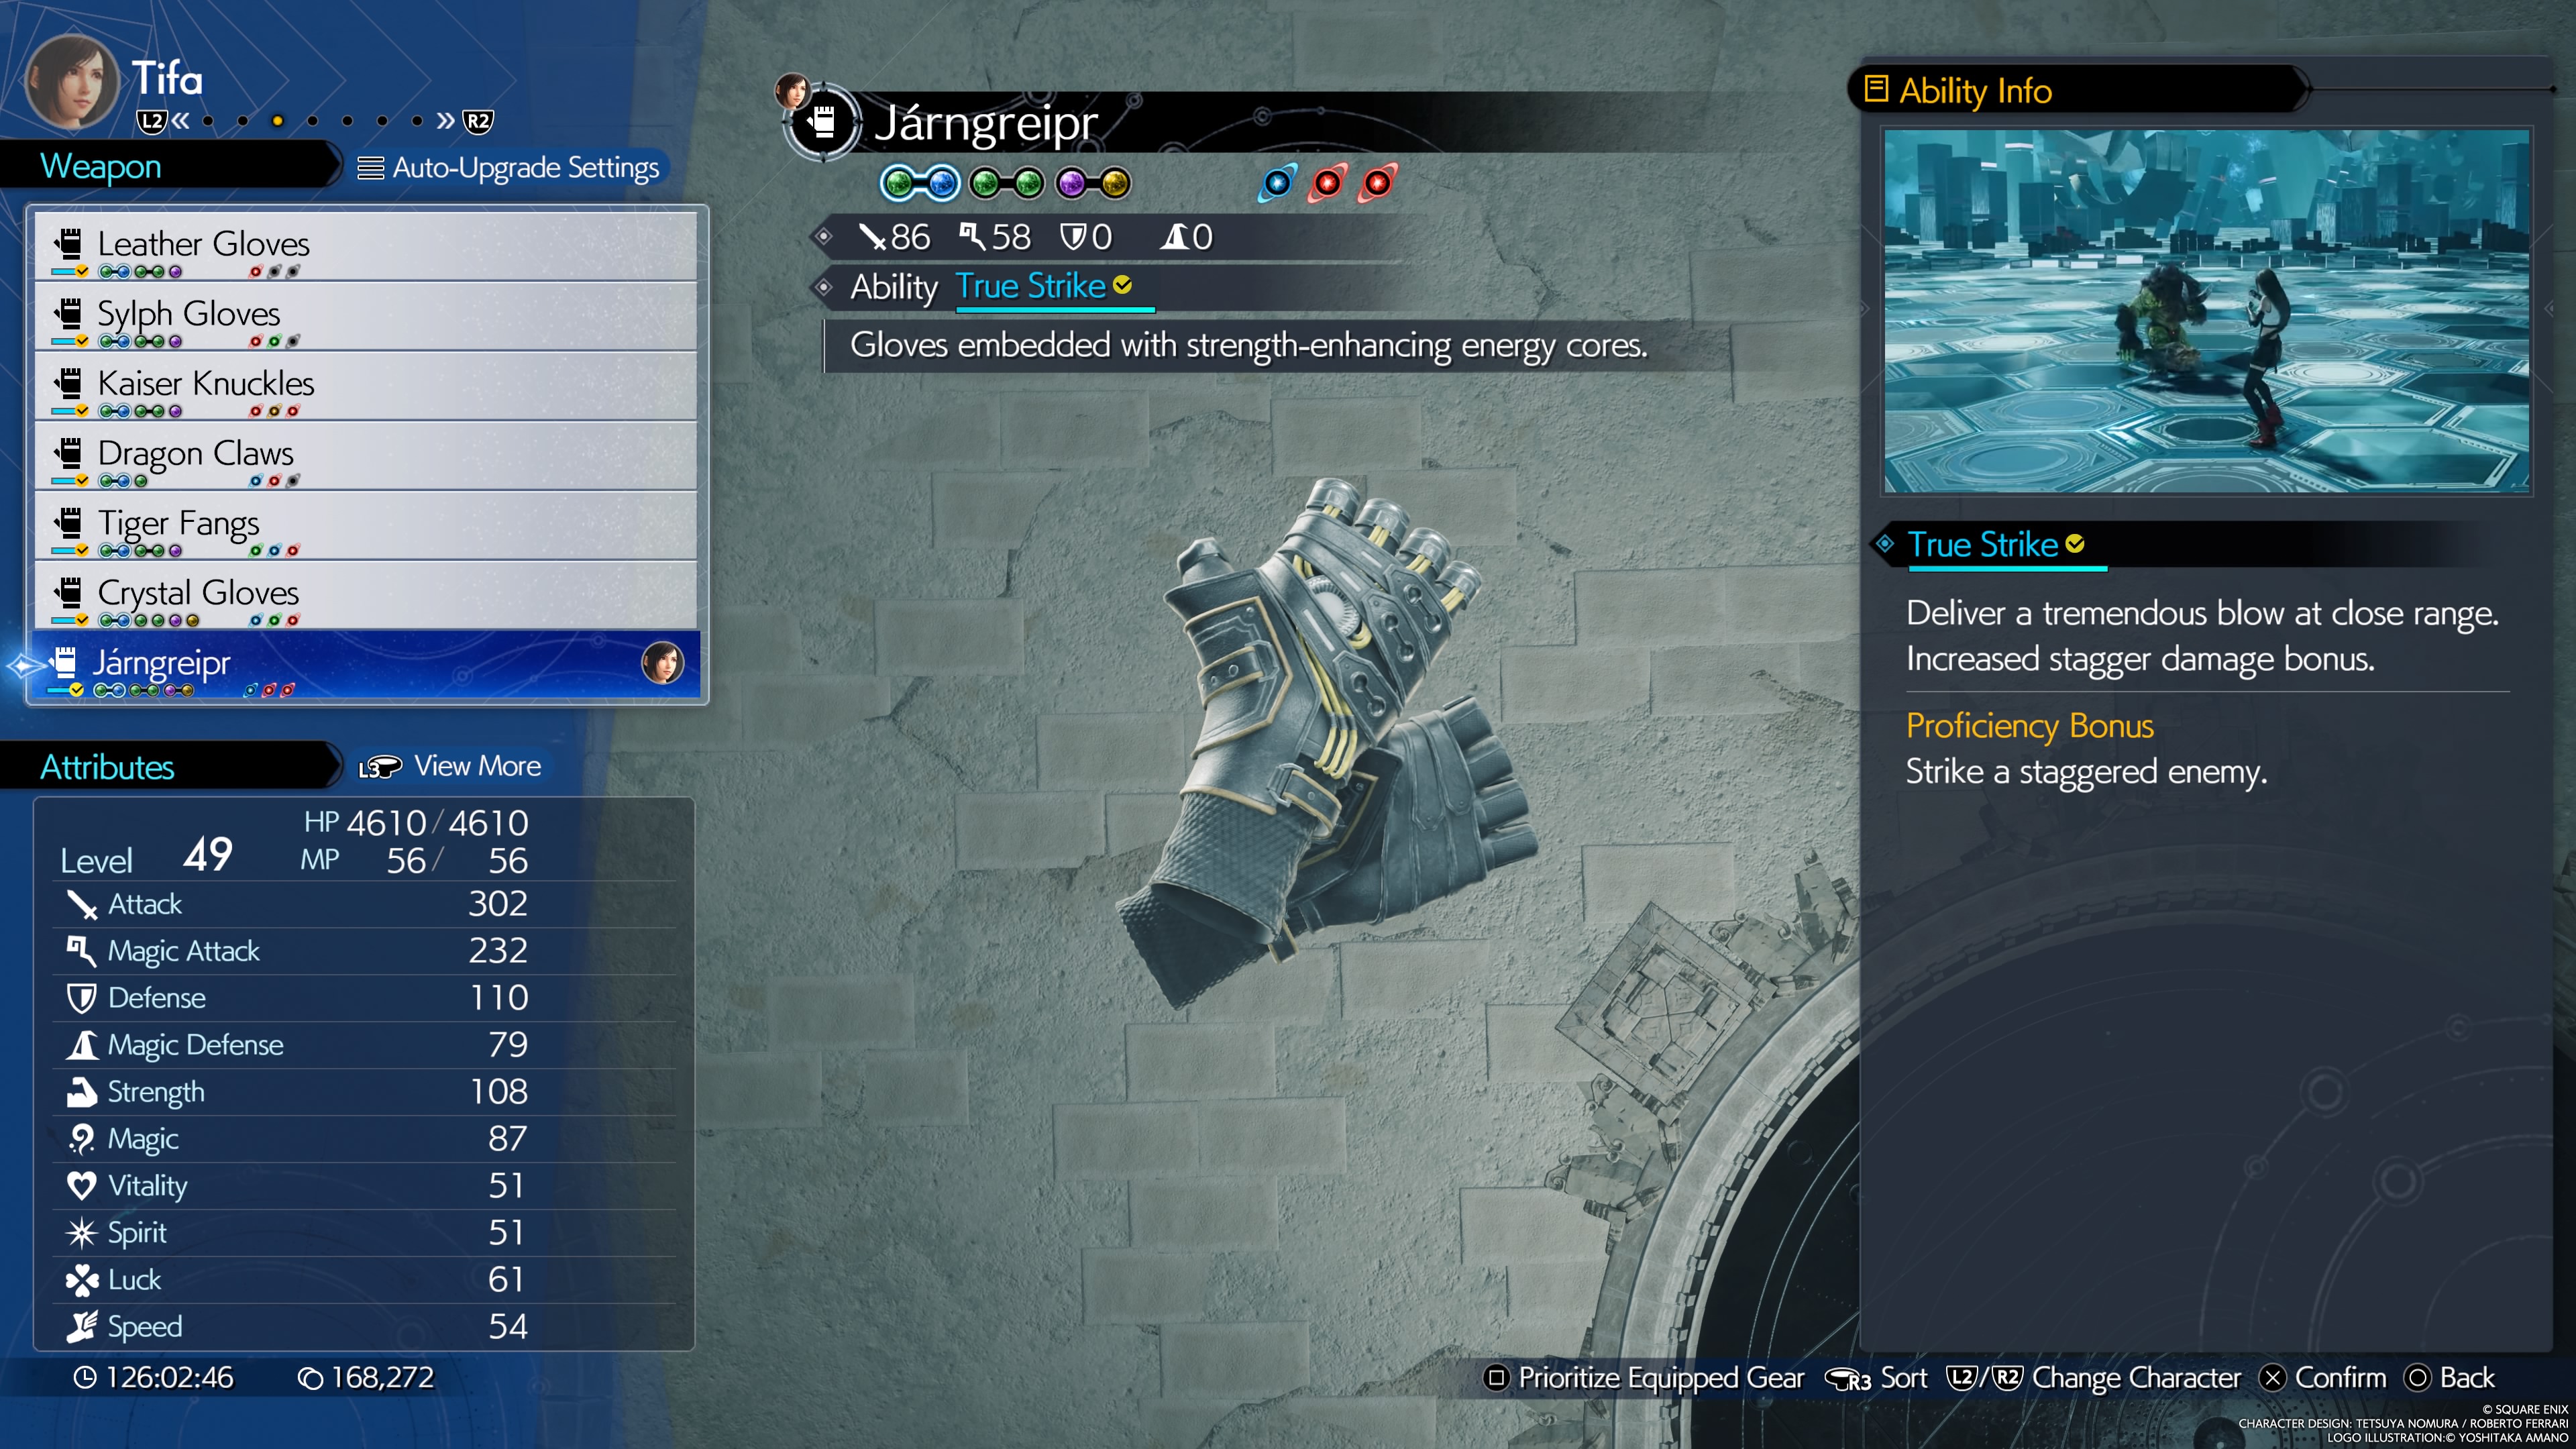
Gloves embedded with strength-enhancing energy cores.
- Stats (Weapon Lv. 7): 86 Attack, 58 Magic
- Materia Slots (Weapon Lv. 7): 3x2
- Weapon Ability: True Strike - powerful close-range attack that does a lot of stagger damage
- Proficiency Bonus: Strike a staggered enemy.
- Location: Found in a chest in the Temple of the Ancients.
- Weapon Skills (Weapon Lv. 7):
- Utterly Unbridled Strength
- Steadfast Concentration
- Crttical Hit Rate +5% x2
- Critical Hit Damage +10% x2
- Weapon Ability Damage +5%
- Limit Break Damage +10%
Weapons for Aerith Gainsborough in Final Fantasy VII Rebirth
With nearly unmatched magical potential, Aerith remains the magician extraordinaire of FF7 Rebirth, as she was in Remake. Her selection of staves and poles generally augment her casting-oriented play style and her unlocked Weapon Abilities also at potency to her basic attack and charged Tempest attack.
Guard Stick
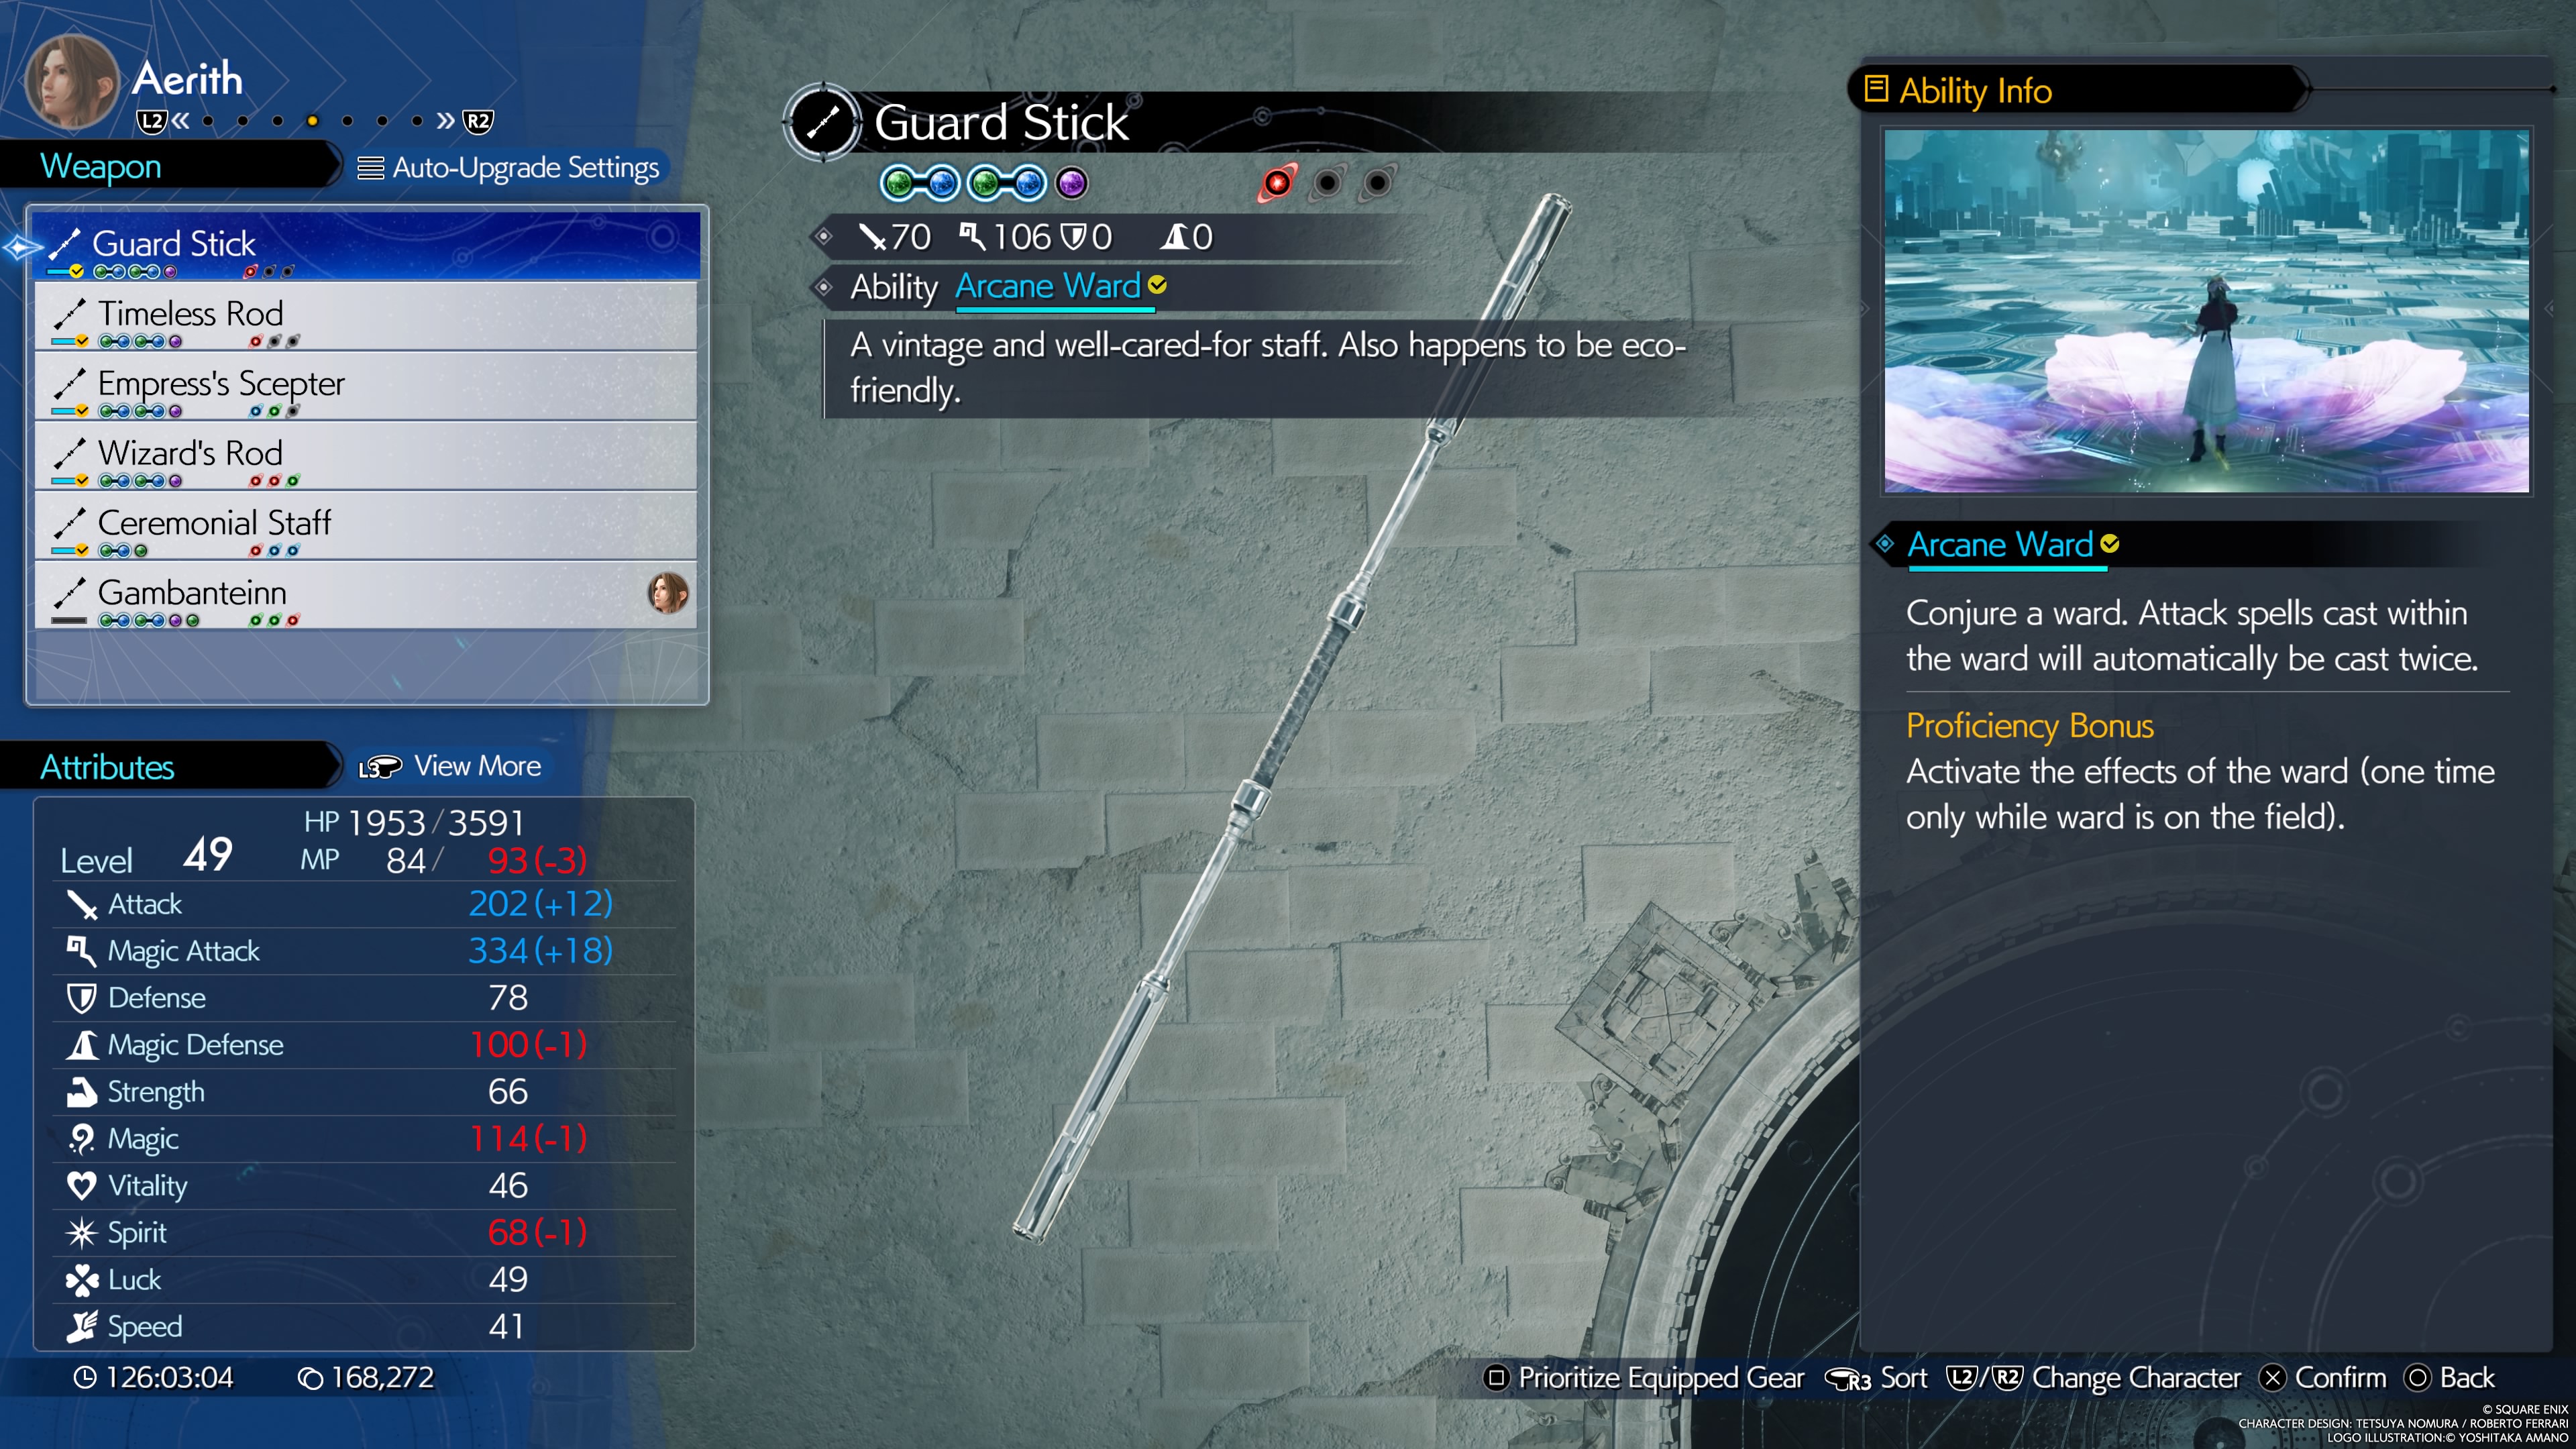
A vintage and well-cared-for staff. Also happens to be eco-friendly.
- Stats (Weapon Lv. 7): 70 Attack, 106 Magic
- Materia Slots (Weapon Lv. 7): 2x2, 1x1
- Weapon Ability: Arcane Ward - Conjures a ward that causes attack spells cast within it to hit twice.
- Proficiency Bonus: Activate the effects of the ward.
- Location: Aerith starts with this weapon.
- Weapon Skills (Weapon Lv. 7):
- Wind Damage Up +10% x2
- Not-So-Fleeting Familiar (Fleeting Familiar summoned by Tempest lasts 25% longer)
- Enhanced Tempest (+15% Tempest damage)
- Spiritual Harvest (+25% MP absorbed by Soul Drain)
- Enduring Ward (Ward duration +25%)
- Altruistic Buff Up (Buffs cast on others duration +25%)
- Max MP +3
Timeless Rod
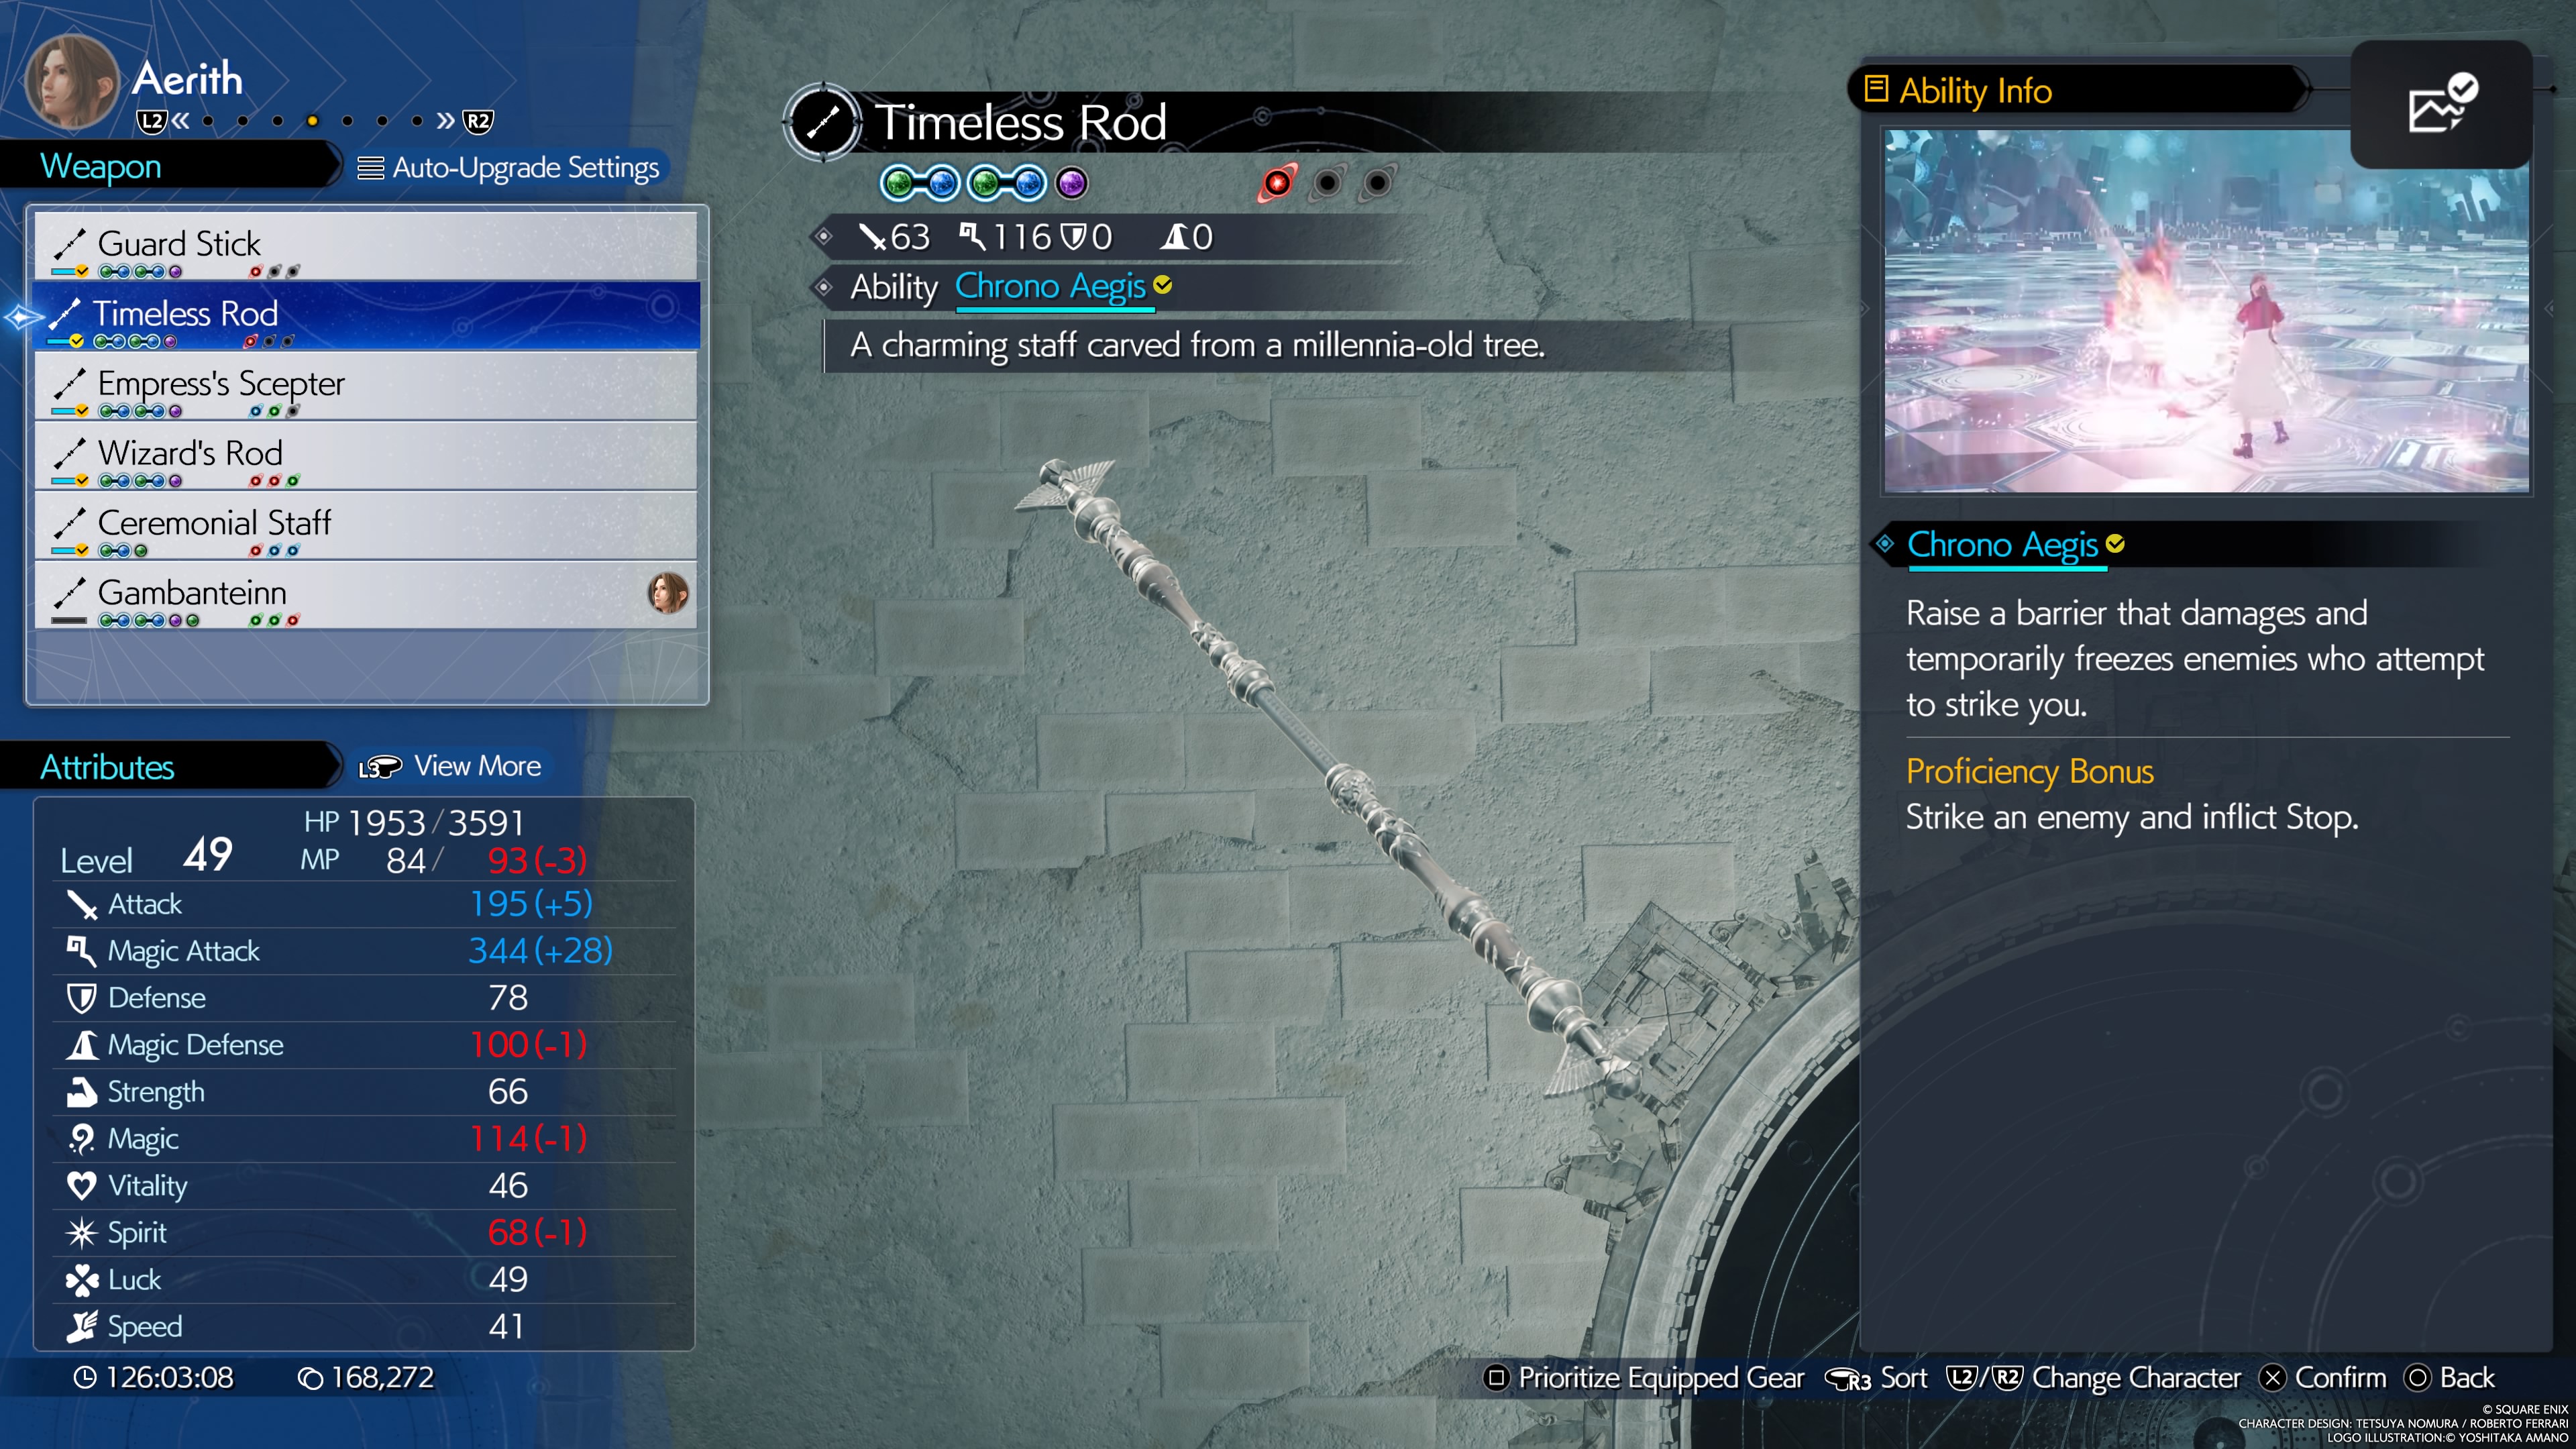
A charming staff carved from a millennia-old tree.
- Stats (Weapon Lv. 7): 63 Attack, 116 Magic
- Materia Slots (Weapon Lv. 7): 2x2, 1x1
- Weapon Ability: Chrono Aegis - Raises a barrier that damages and temporarily freezes enemies who attempt to strike you.
- Proficiency Bonus: Strike an enemy and inflict Stop using the ability.
- Location: Found in a chest at the Chocobo Ranch in the Grasslands.
- Weapon Skills (Weapon Lv. 7):
- Fire Damage Up +10%
- Ice Damage Up +10%
- Altruistic Recovery +10% (cast heals heal 10% more)
- Debuff Extension (inflicted debuffs duration +25%)
- Ward Shift Mastery (Ward Shift cooldown -2 sec)
- Enduring Ward (Ward duration +25%)
- MP Recovery Rate Up
- Max HP +200
Empress's Scepter
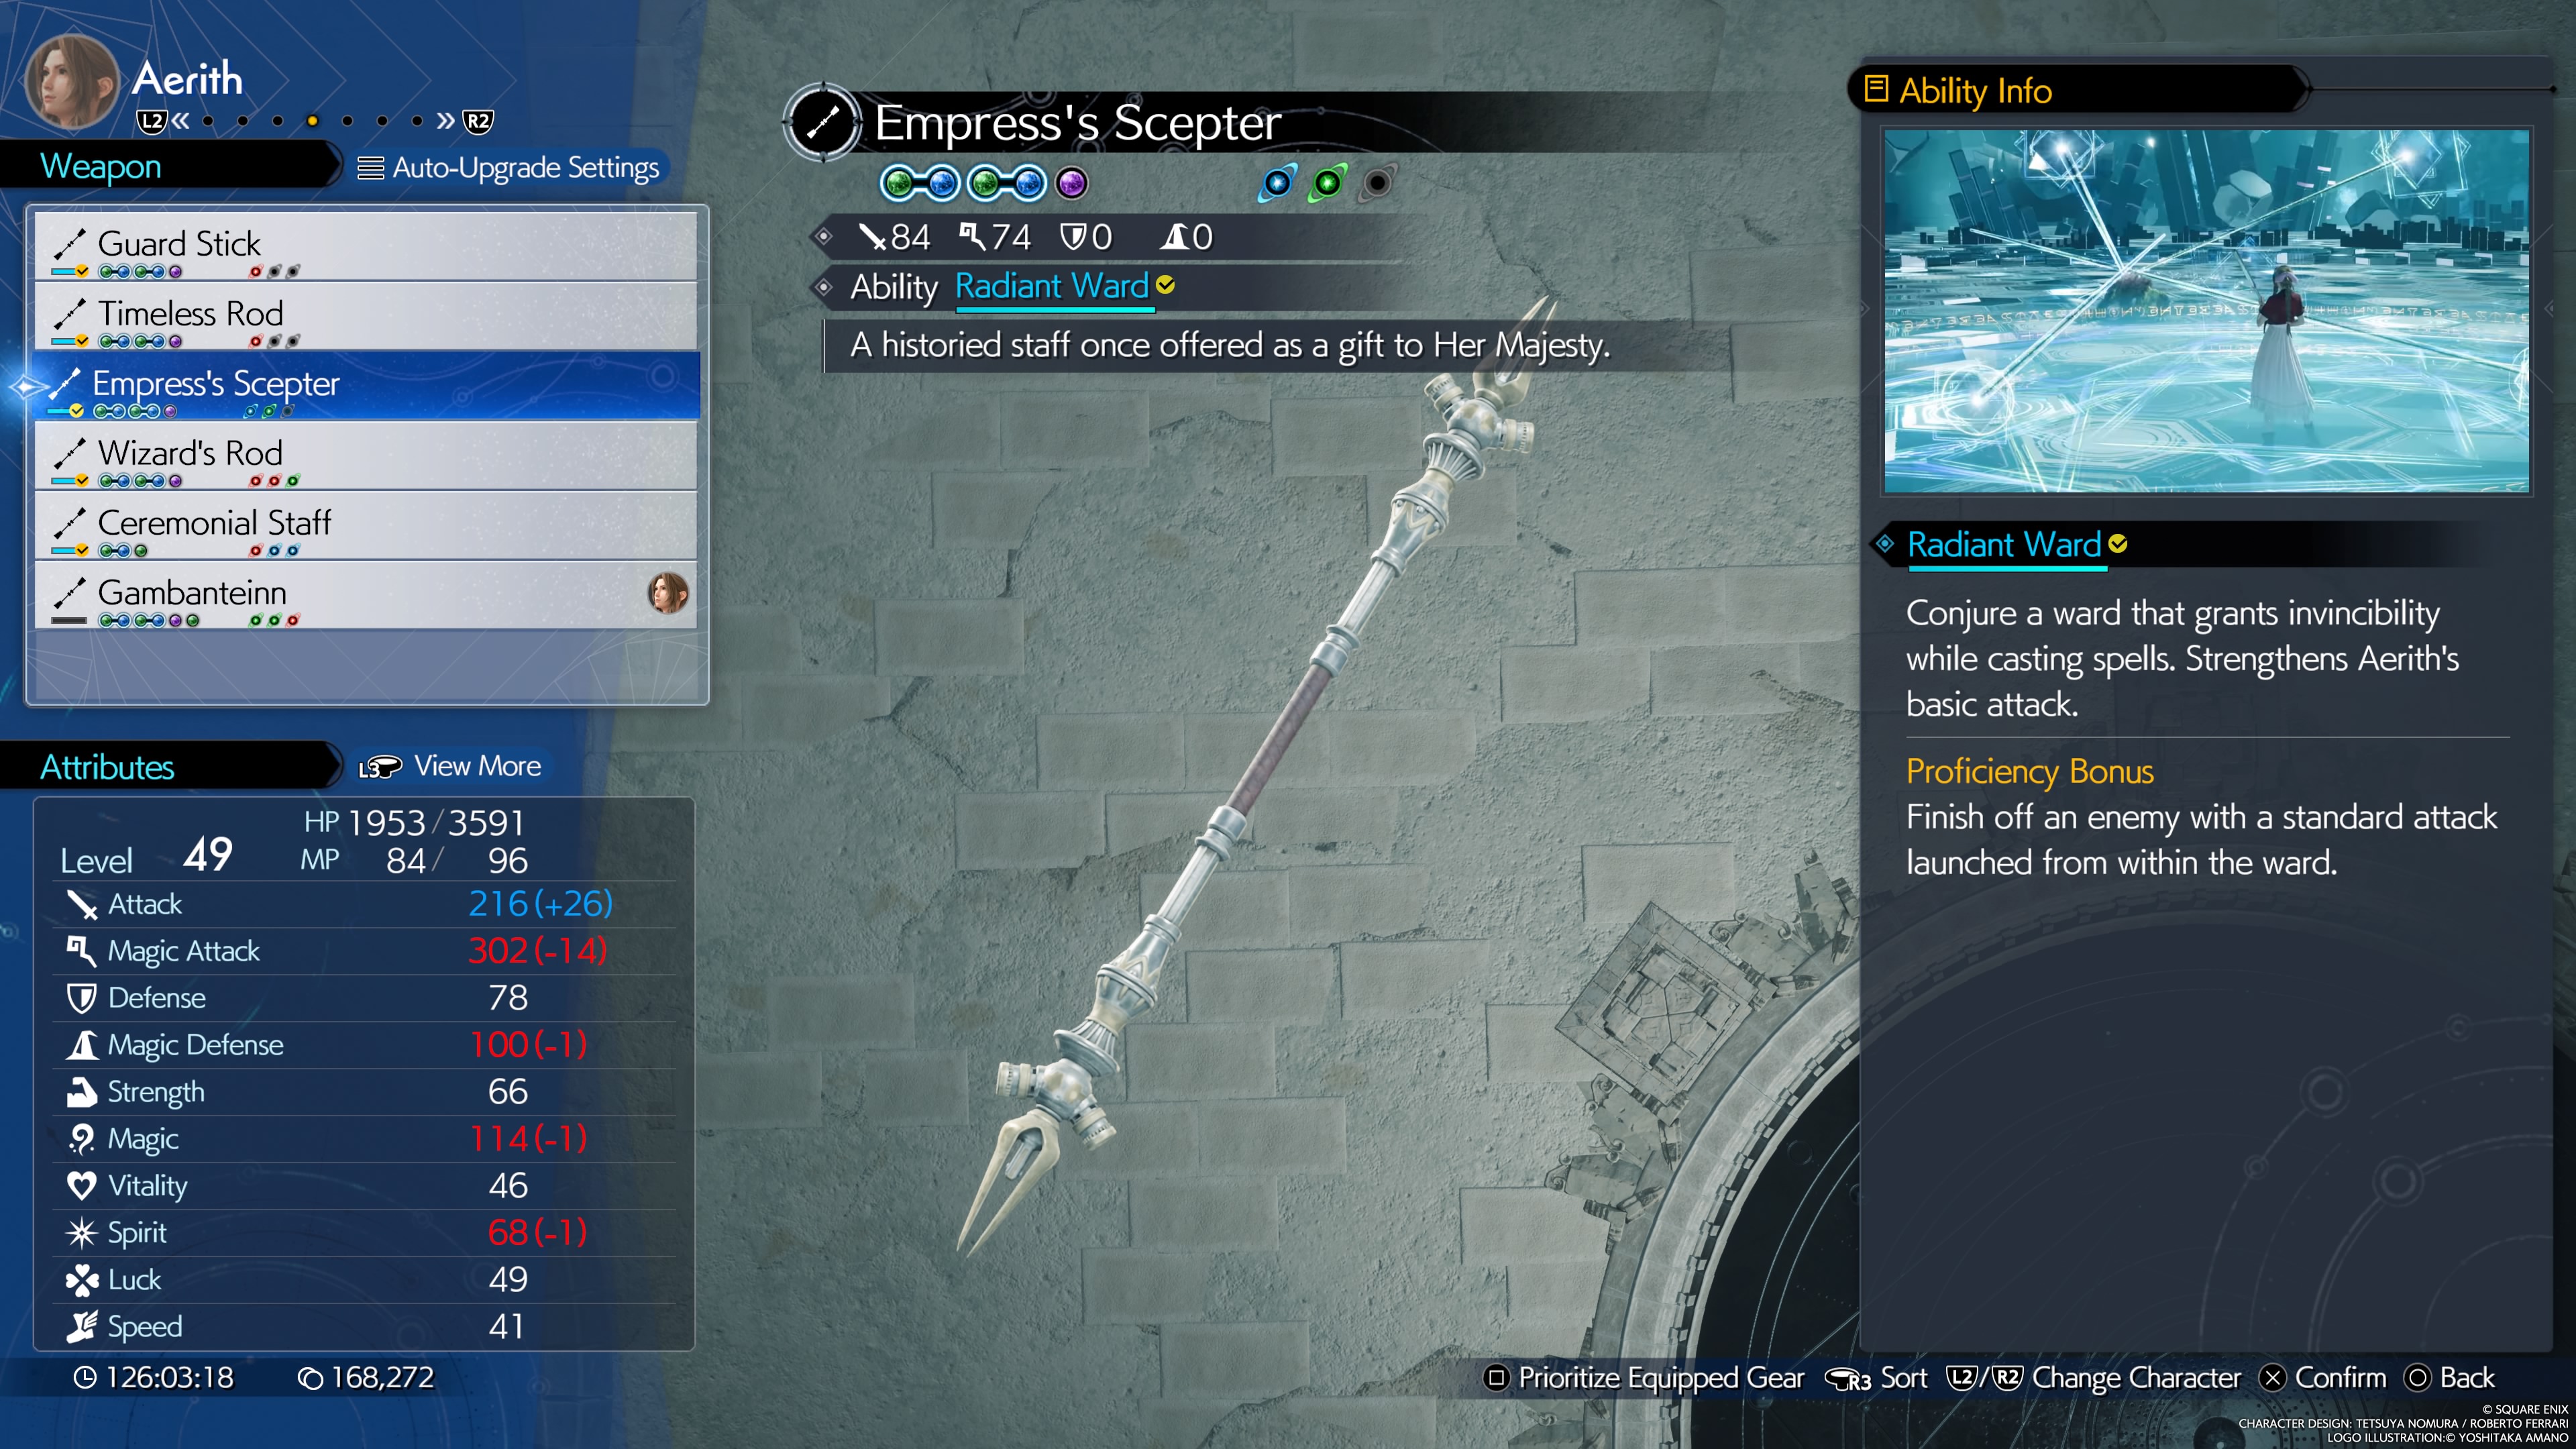
A historied staff once offered as a gift to Her Majesty.
- Stats (Weapon Lv. 7): 84 Attack, 74 Magic
- Materia Slots (Weapon Lv. 7): 2x2, 1x1
- Weapon Ability: Radiant Ward - Casts a ward that makes it harder to be stunned while casting, and augments Aerith's basic attack.
- Proficiency Bonus: Finish off an enemy with a standard attack launched from within the ward.
- Location: Found in a chest in Aerith's inn room in Under Junon.
- Weapon Skills (Weapon Lv. 7):
- Lightning Damage Up +10%
- Enduring Ward
- Spiritual Harvest
- MP Recovery Rate Up
- Max HP +200
- ATB Charge Rate Up
- Ice Damage Up +10%
Wizard's Rod
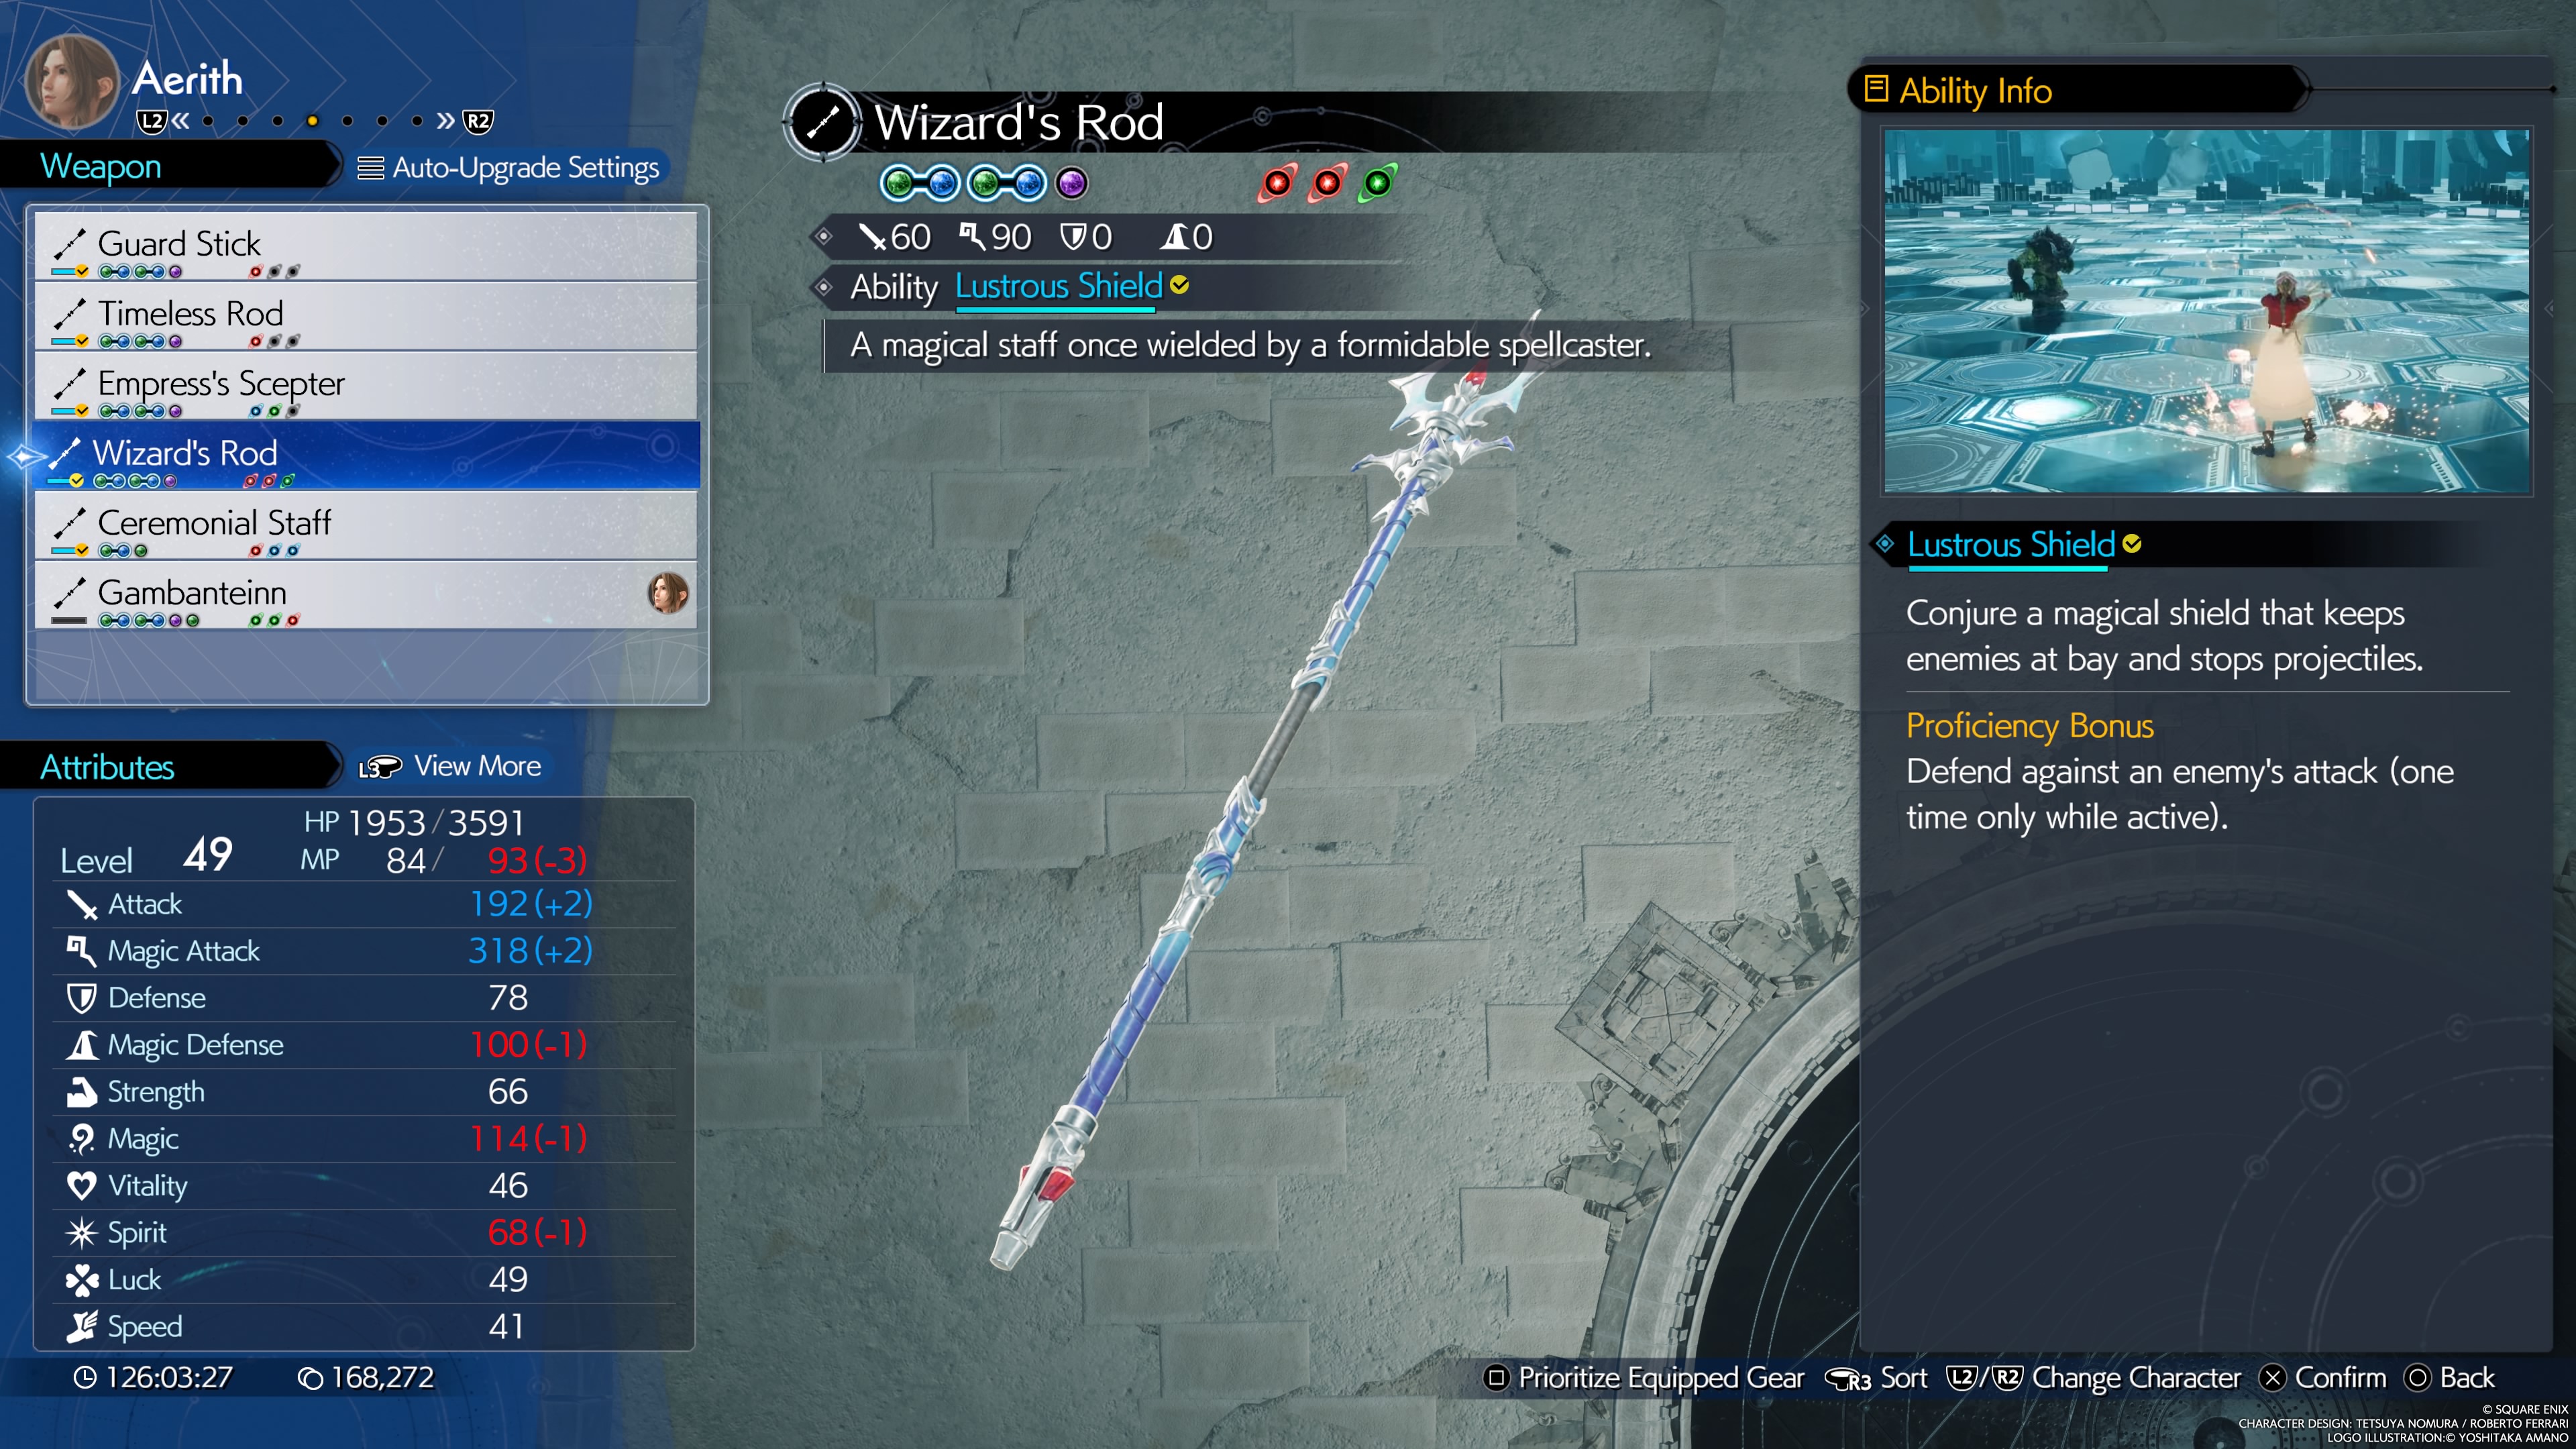
A magical staff once wielded by a formidable spellcaster
- Stats (Weapon Lv. 7): 60 Attack, 90 Magic
- Materia Slots (Weapon Lv. 7): 2x2, 1x1
- Weapon Ability: Lustrous Shield - Stationary magical shield that stops enemies approaching and blocks projectiles
- Proficiency Bonus: Use the shield to block an enemy's attack.
- Location: Found in a chest at the first rest stop while hiking up Mt. Corel.
- Weapon Skills (Weapon Lv. 7):
- Wind Damage Up +10%
- Not-So-Fleeting Familiar (Fleeting Familiar summoned by Tempest lasts 25% longer)
- Enhanced Tempest (+15% Tempest damage)
- Max HP +200
- Critical Hit Rate +5%
- Critical Hit Damage +10%
- MP Recovery Rate Up
- Ward Shift Mastery
Ceremonial Staff
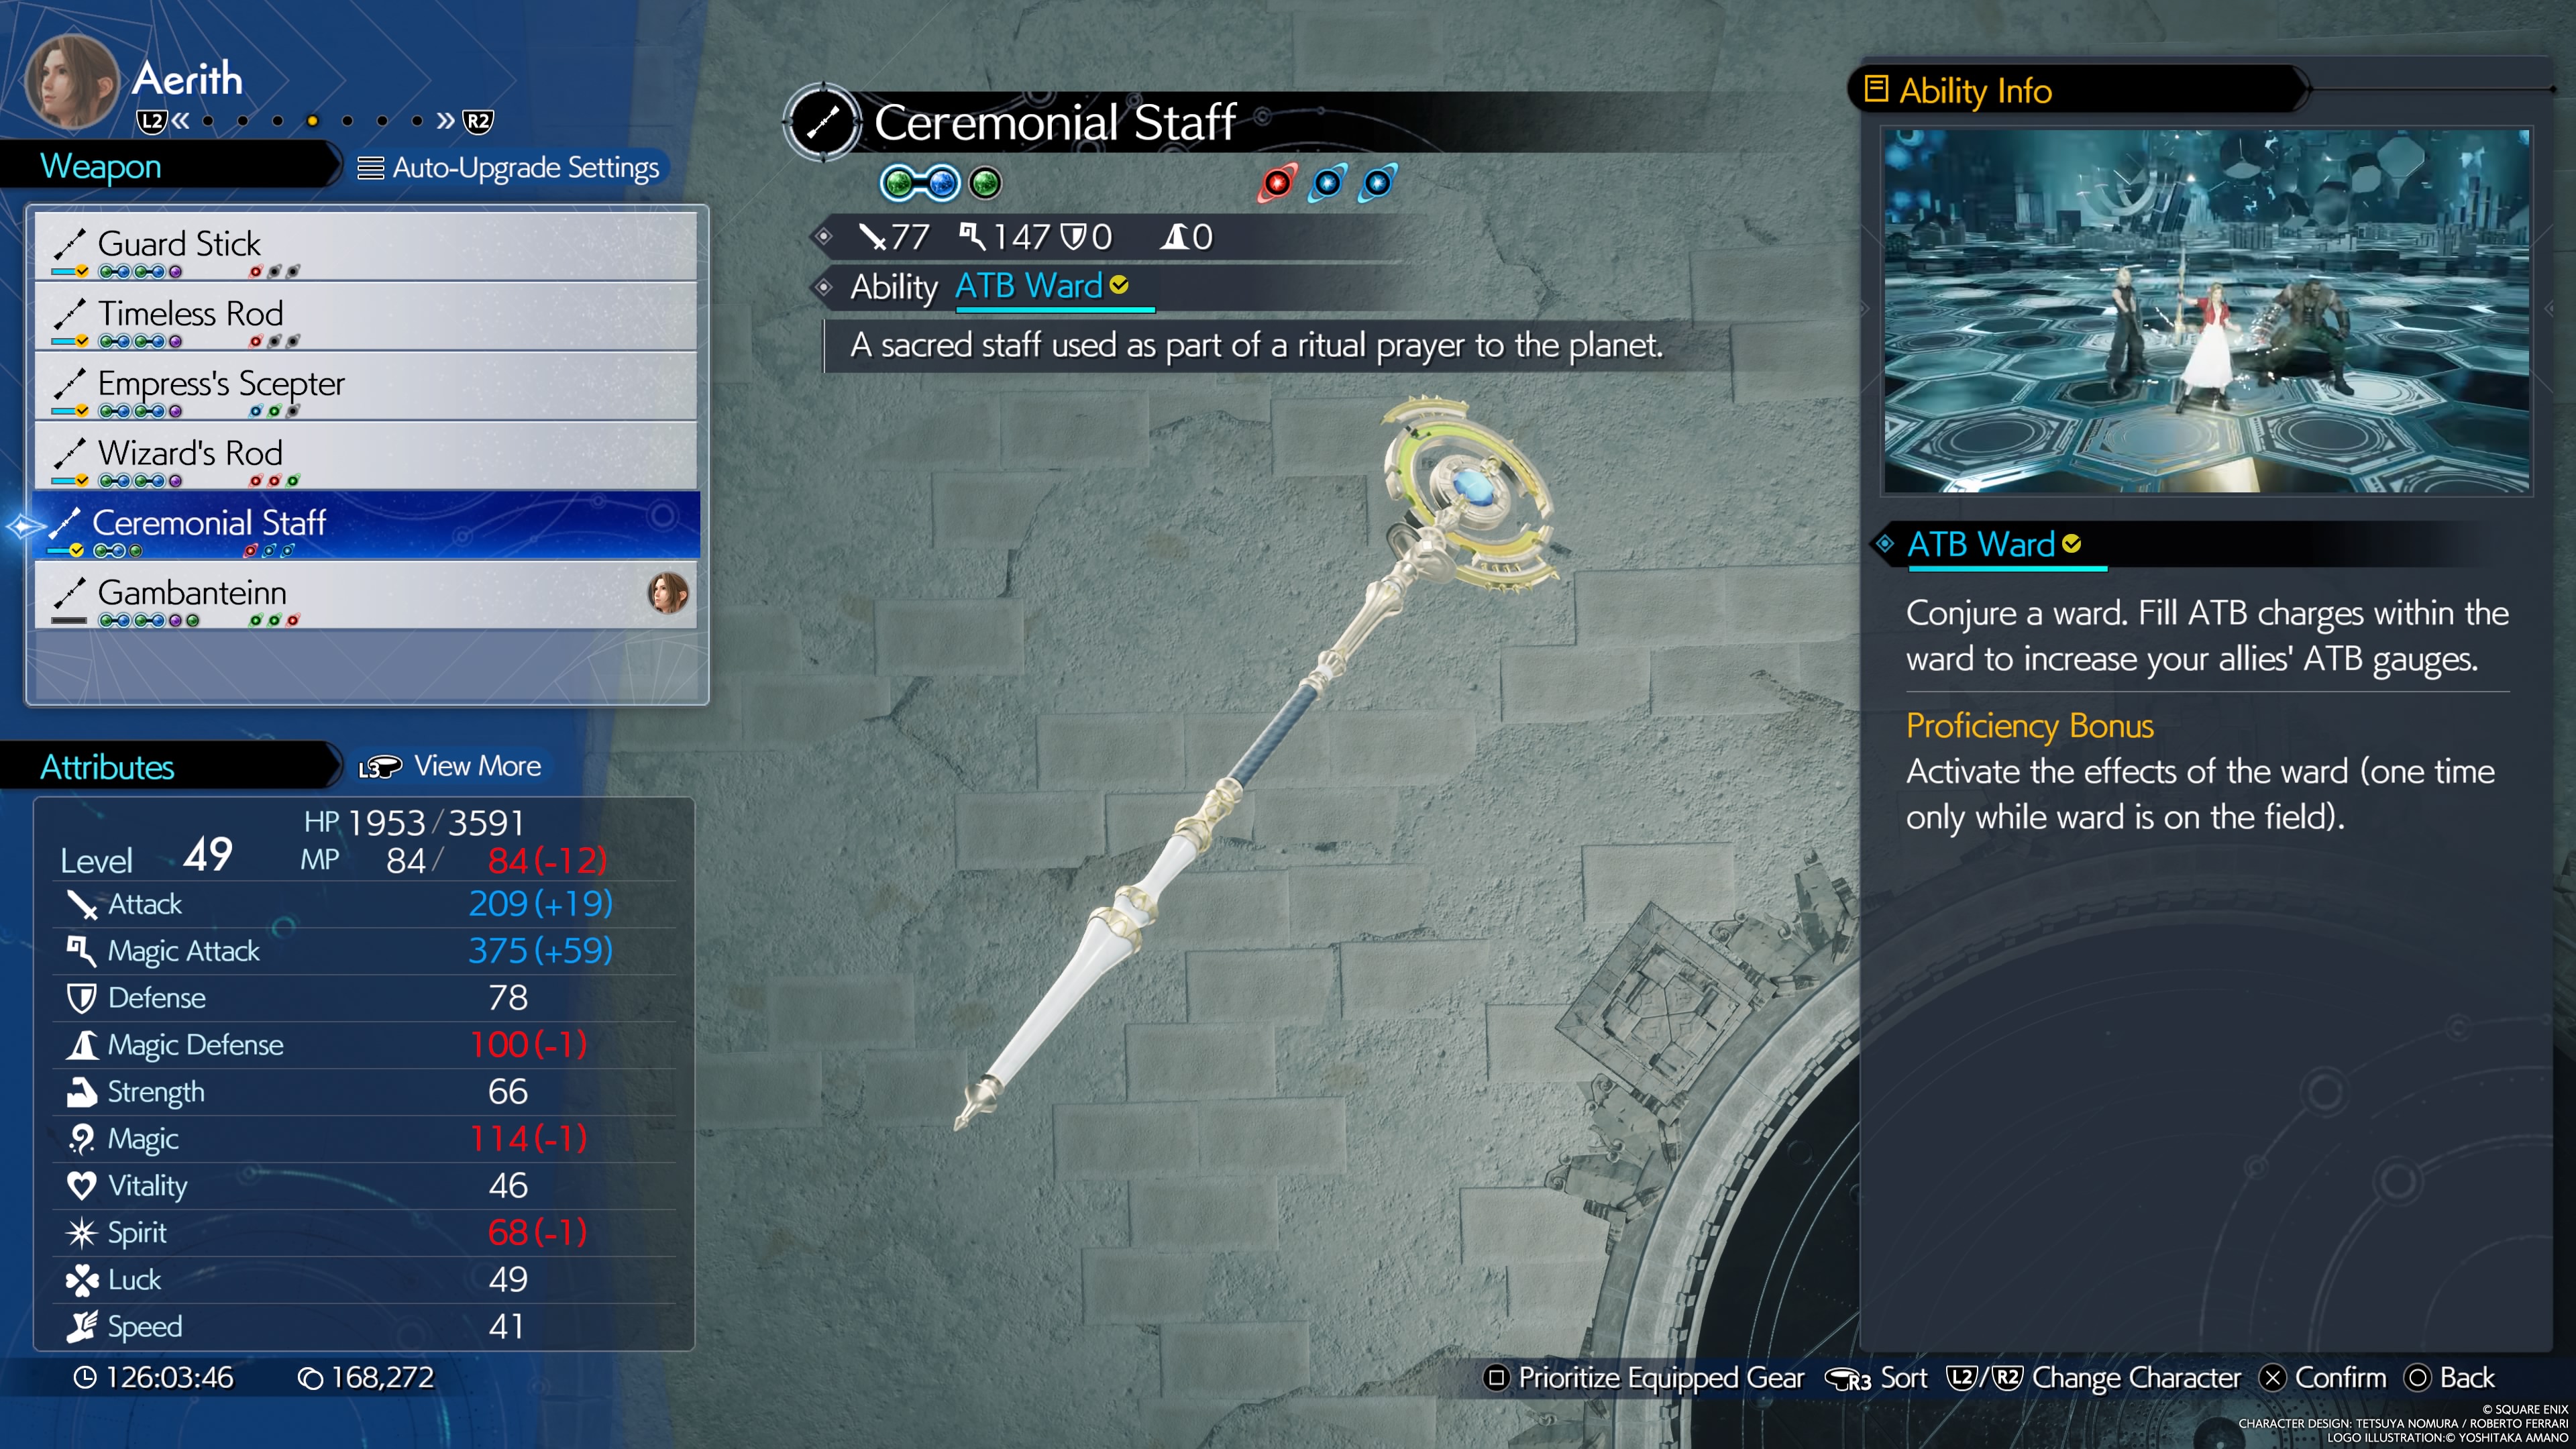
A sacred staff used as part of a ritual prayer to the planet.
- Stats (Weapon Lv. 7): 77 Attack, 147 Magic
- Materia Slots (Weapon Lv. 7): 2x1, 1x1
- Weapon Ability: ATB Ward - Ward that increases ally ATB gauge as you fill ATB within it.
- Proficiency Bonus: Activate the effects of the ward.
- Location: Find in Cosmo Canyon's Village of the Gi area.
- Weapon Skills (Weapon Lv. 7):
- Fire Damage Up +10%
- Enduring Ward
- Spiritual Harvest
- Magic Attack Power +20
- Altruistic Buff Up
- Max MP +3
- Reprieve
- Lightning Damage Up +10%
Plumose Rod
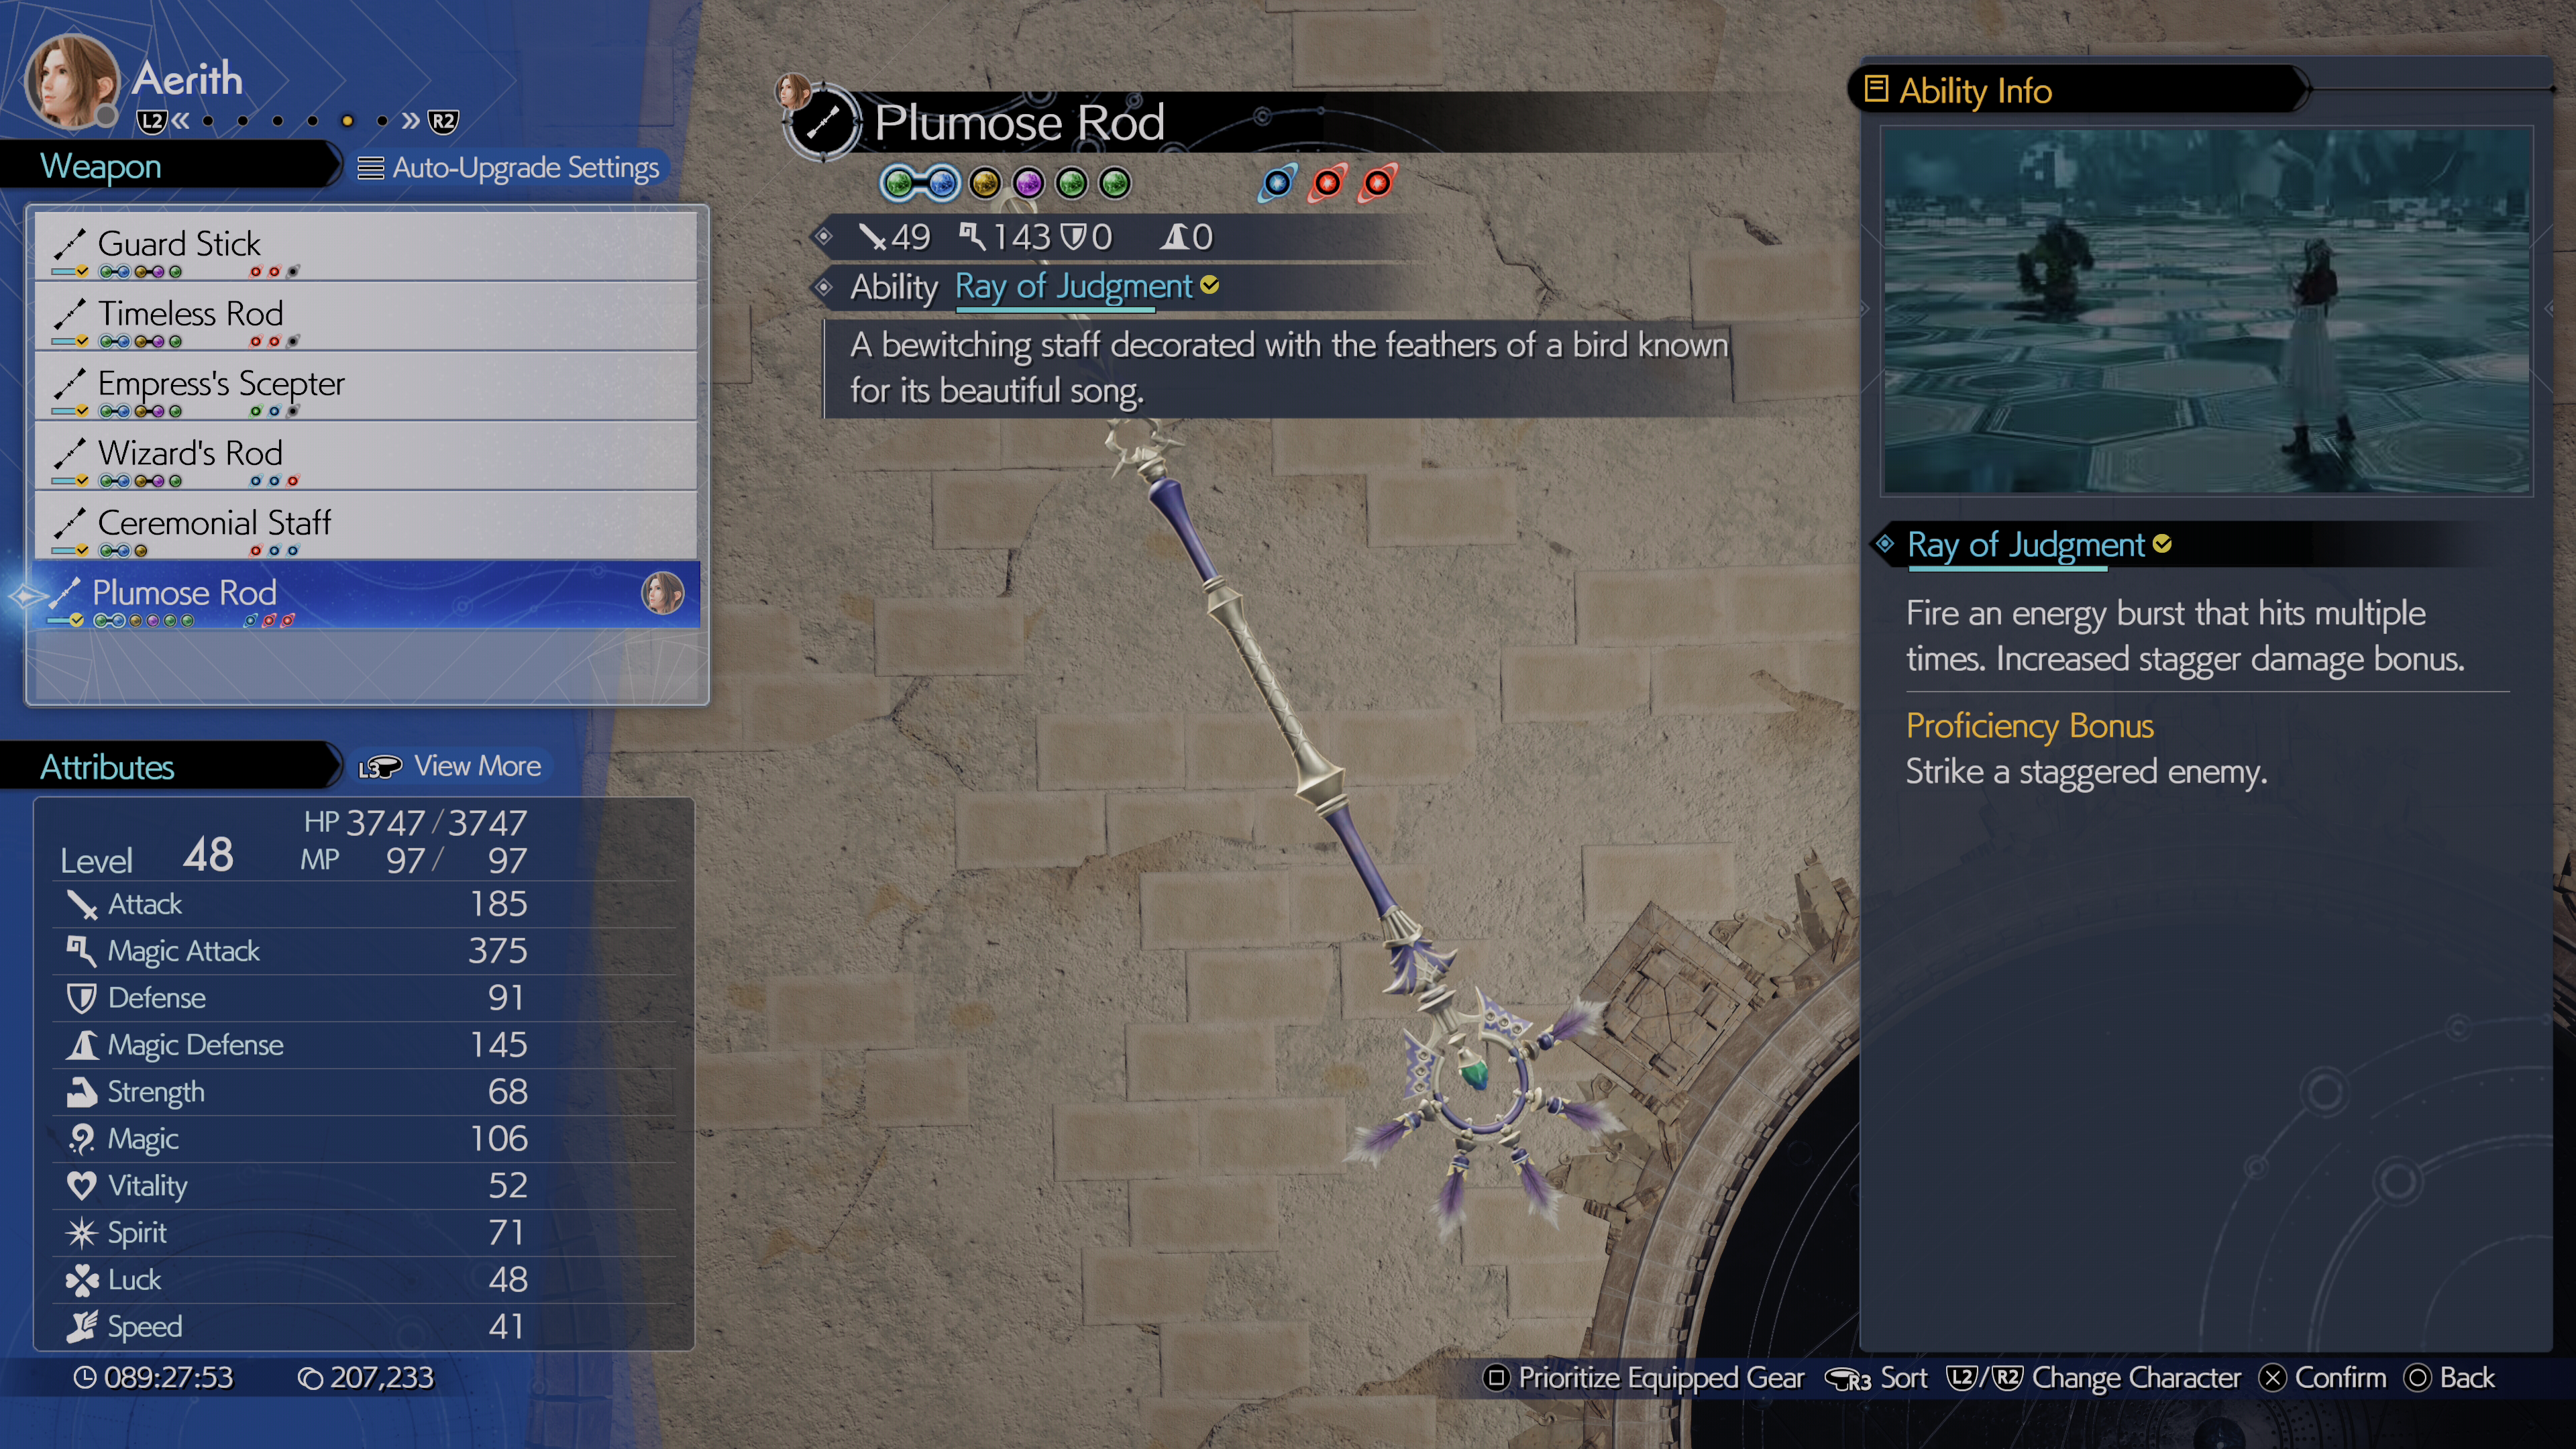
A bewitching staff decorated with the feathers of a bird known for its beautiful song.
- Stats (Weapon Lv. 7): 49 Attack, 143 Magic
- Materia Slots (Weapon Lv. 7): 2x2, 4x1
- Weapon Ability: Ray of Judgment - Fire an energy burst that hits multiple times. Increased stagger damage bonus.
- Proficiency Bonus: Strike a staggered enemy with the ability.
- Location: Obtained from a chest in Shinra Manor after clearing all of the Hojo Combat Simulator challenges.
- Weapon Skills (Weapon Lv. 7):
- Not-So-Fleeting Familiar x3
- Enhanced Tempest
- Enduring Ward
- Max HP +200
- Ward Shift Mastery
- Limit Break Damage +10%
Gambanteinn
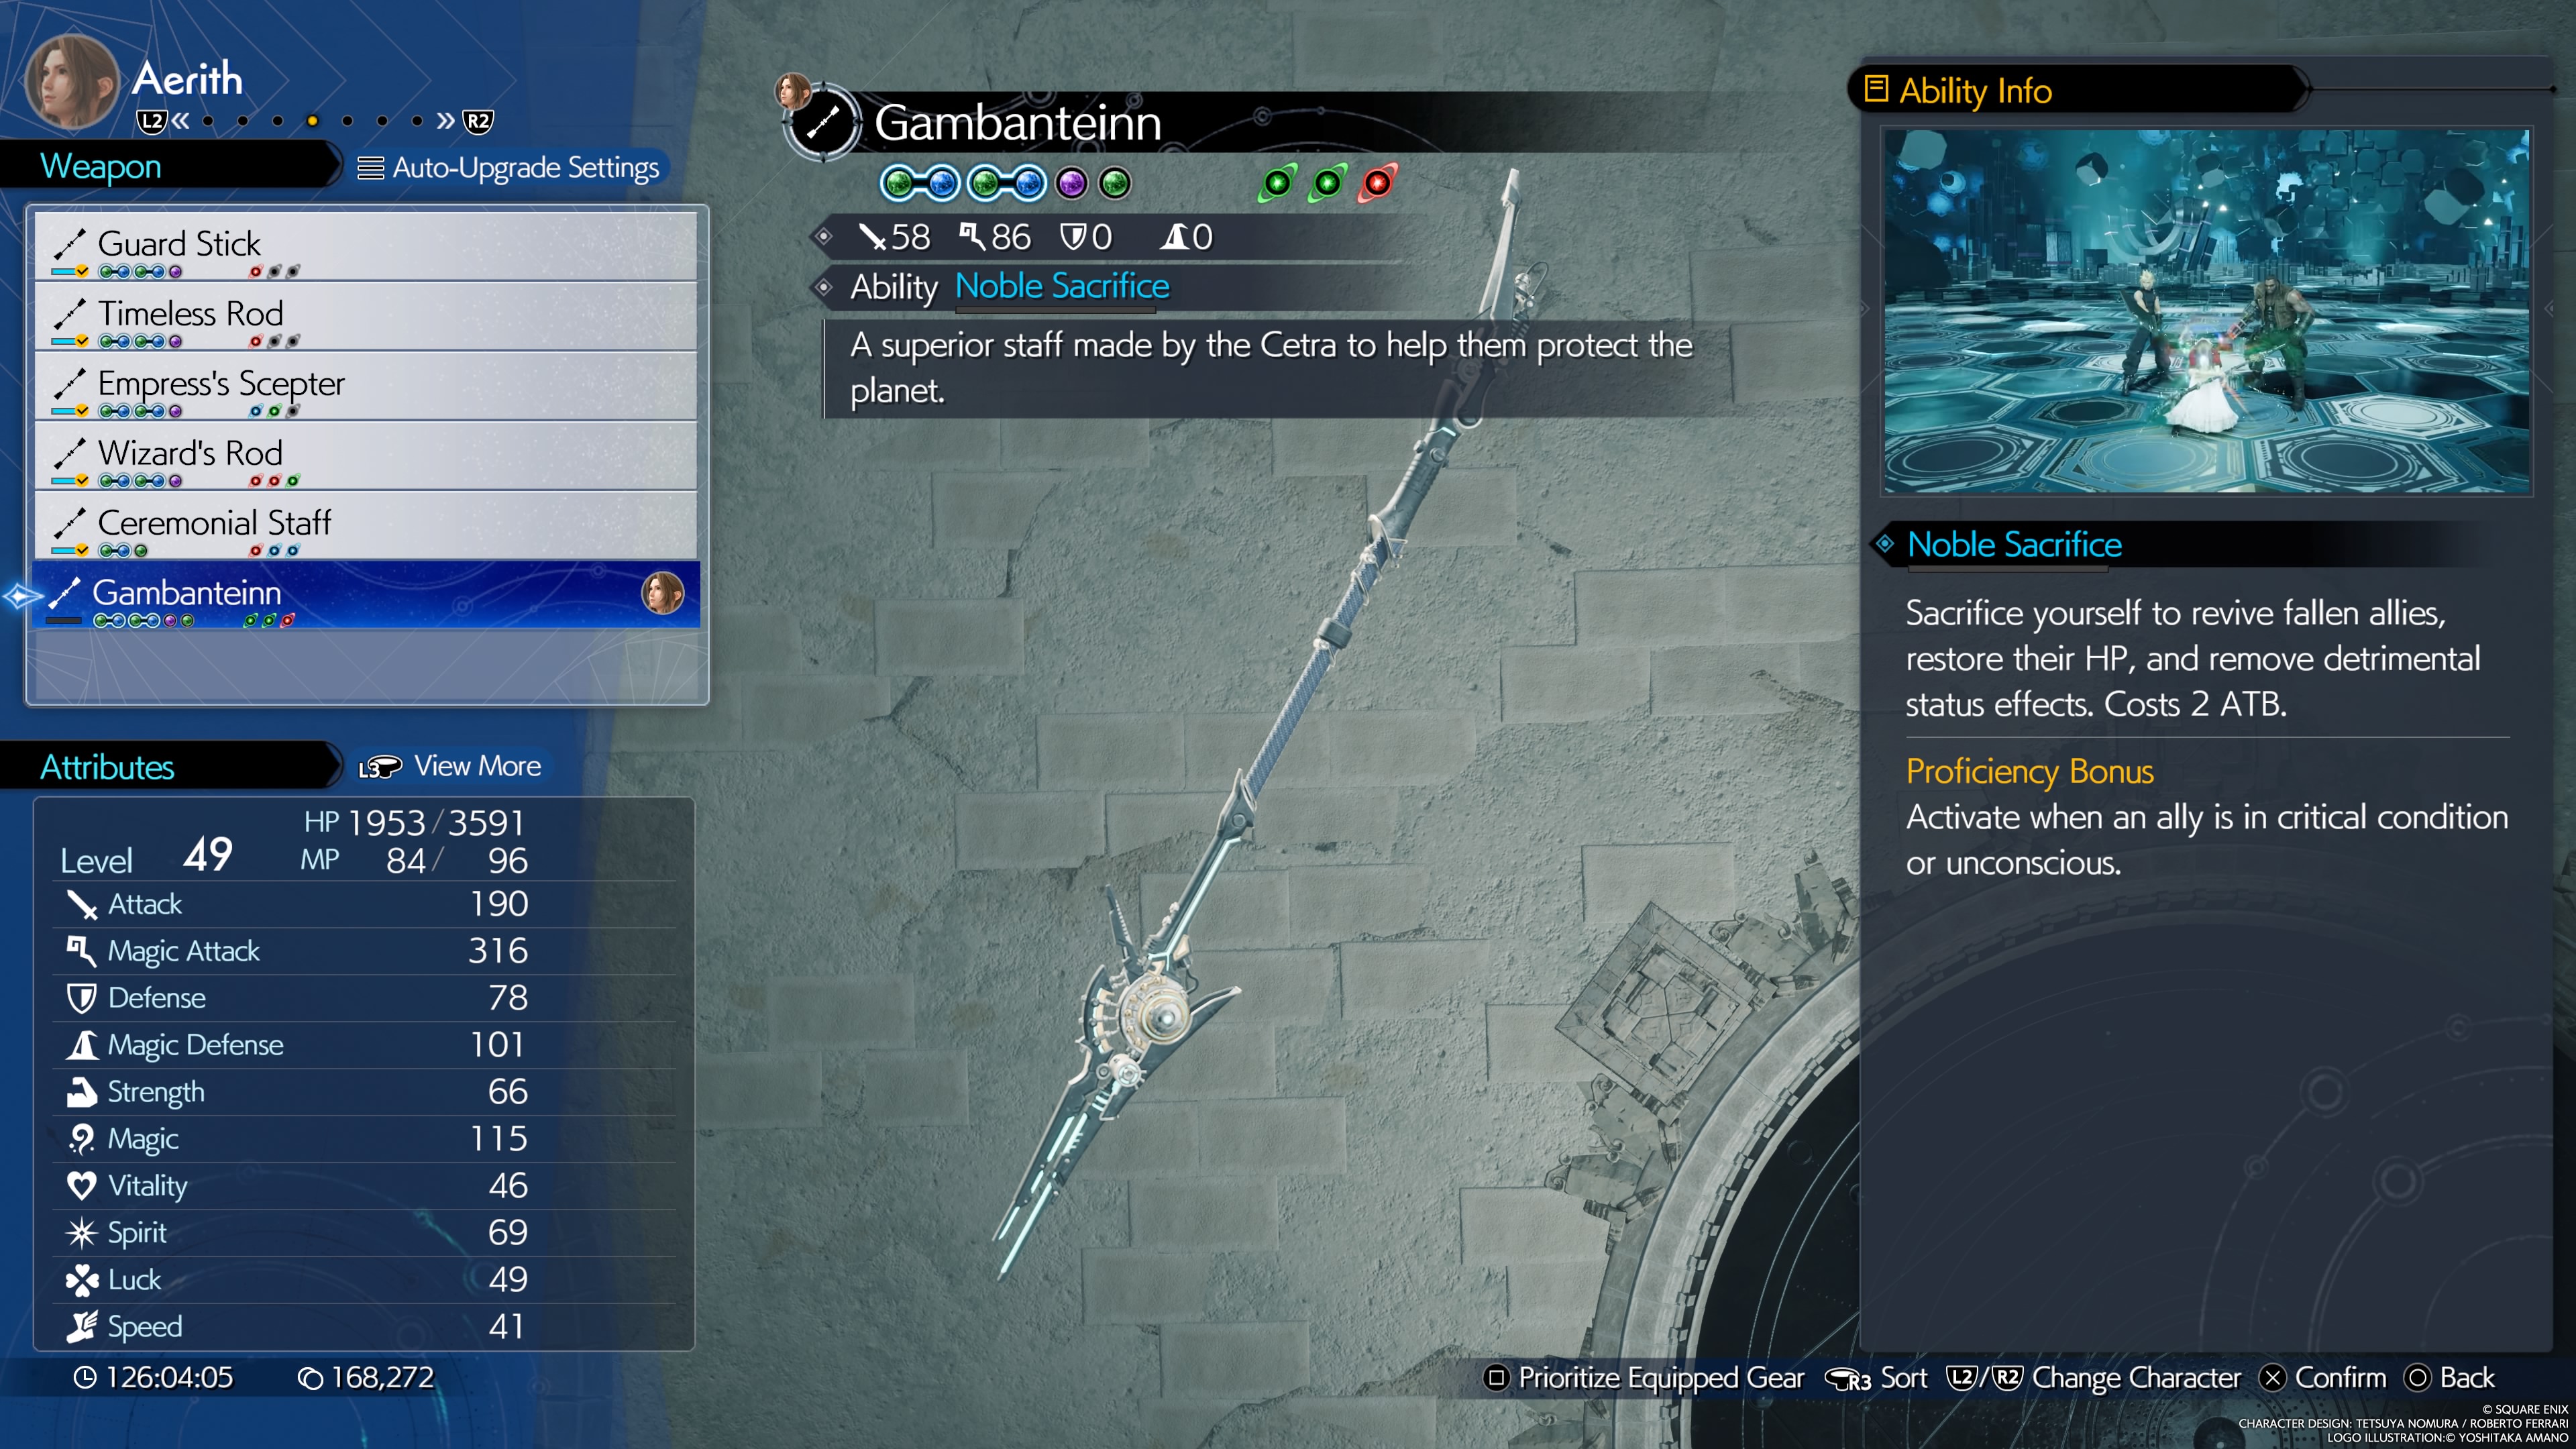
A superiod staff made by the Cetra to help them protect the planet.
- Stats (Weapon Lv. 7): 58 Attack, 86 Magic
- Materia Slots (Weapon Lv. 7): 2x2, 2x1
- Weapon Ability: Noble Sacrifice - KO Aerith to revive fallen allies, heal them, and clear status ailments for 2 ATB.
- Proficiency Bonus: Activate when an ally is at critical health or unconscious.
- Location: Found in a chest in the Temple of the Ancients during Aerith's party sequence.
- Weapon Skills (Weapon Lv. 7):
- Ice Damage Up +10%
- Not-So-Fleeting Familiar
- Spiritual Harvest
- Attack Damage +5%
- ATB Charge Rate Up
- Magic Attack Power +20
- Max MP +3
- Reprieve
Weapons for Red XIII in Final Fantasy VII Rebirth
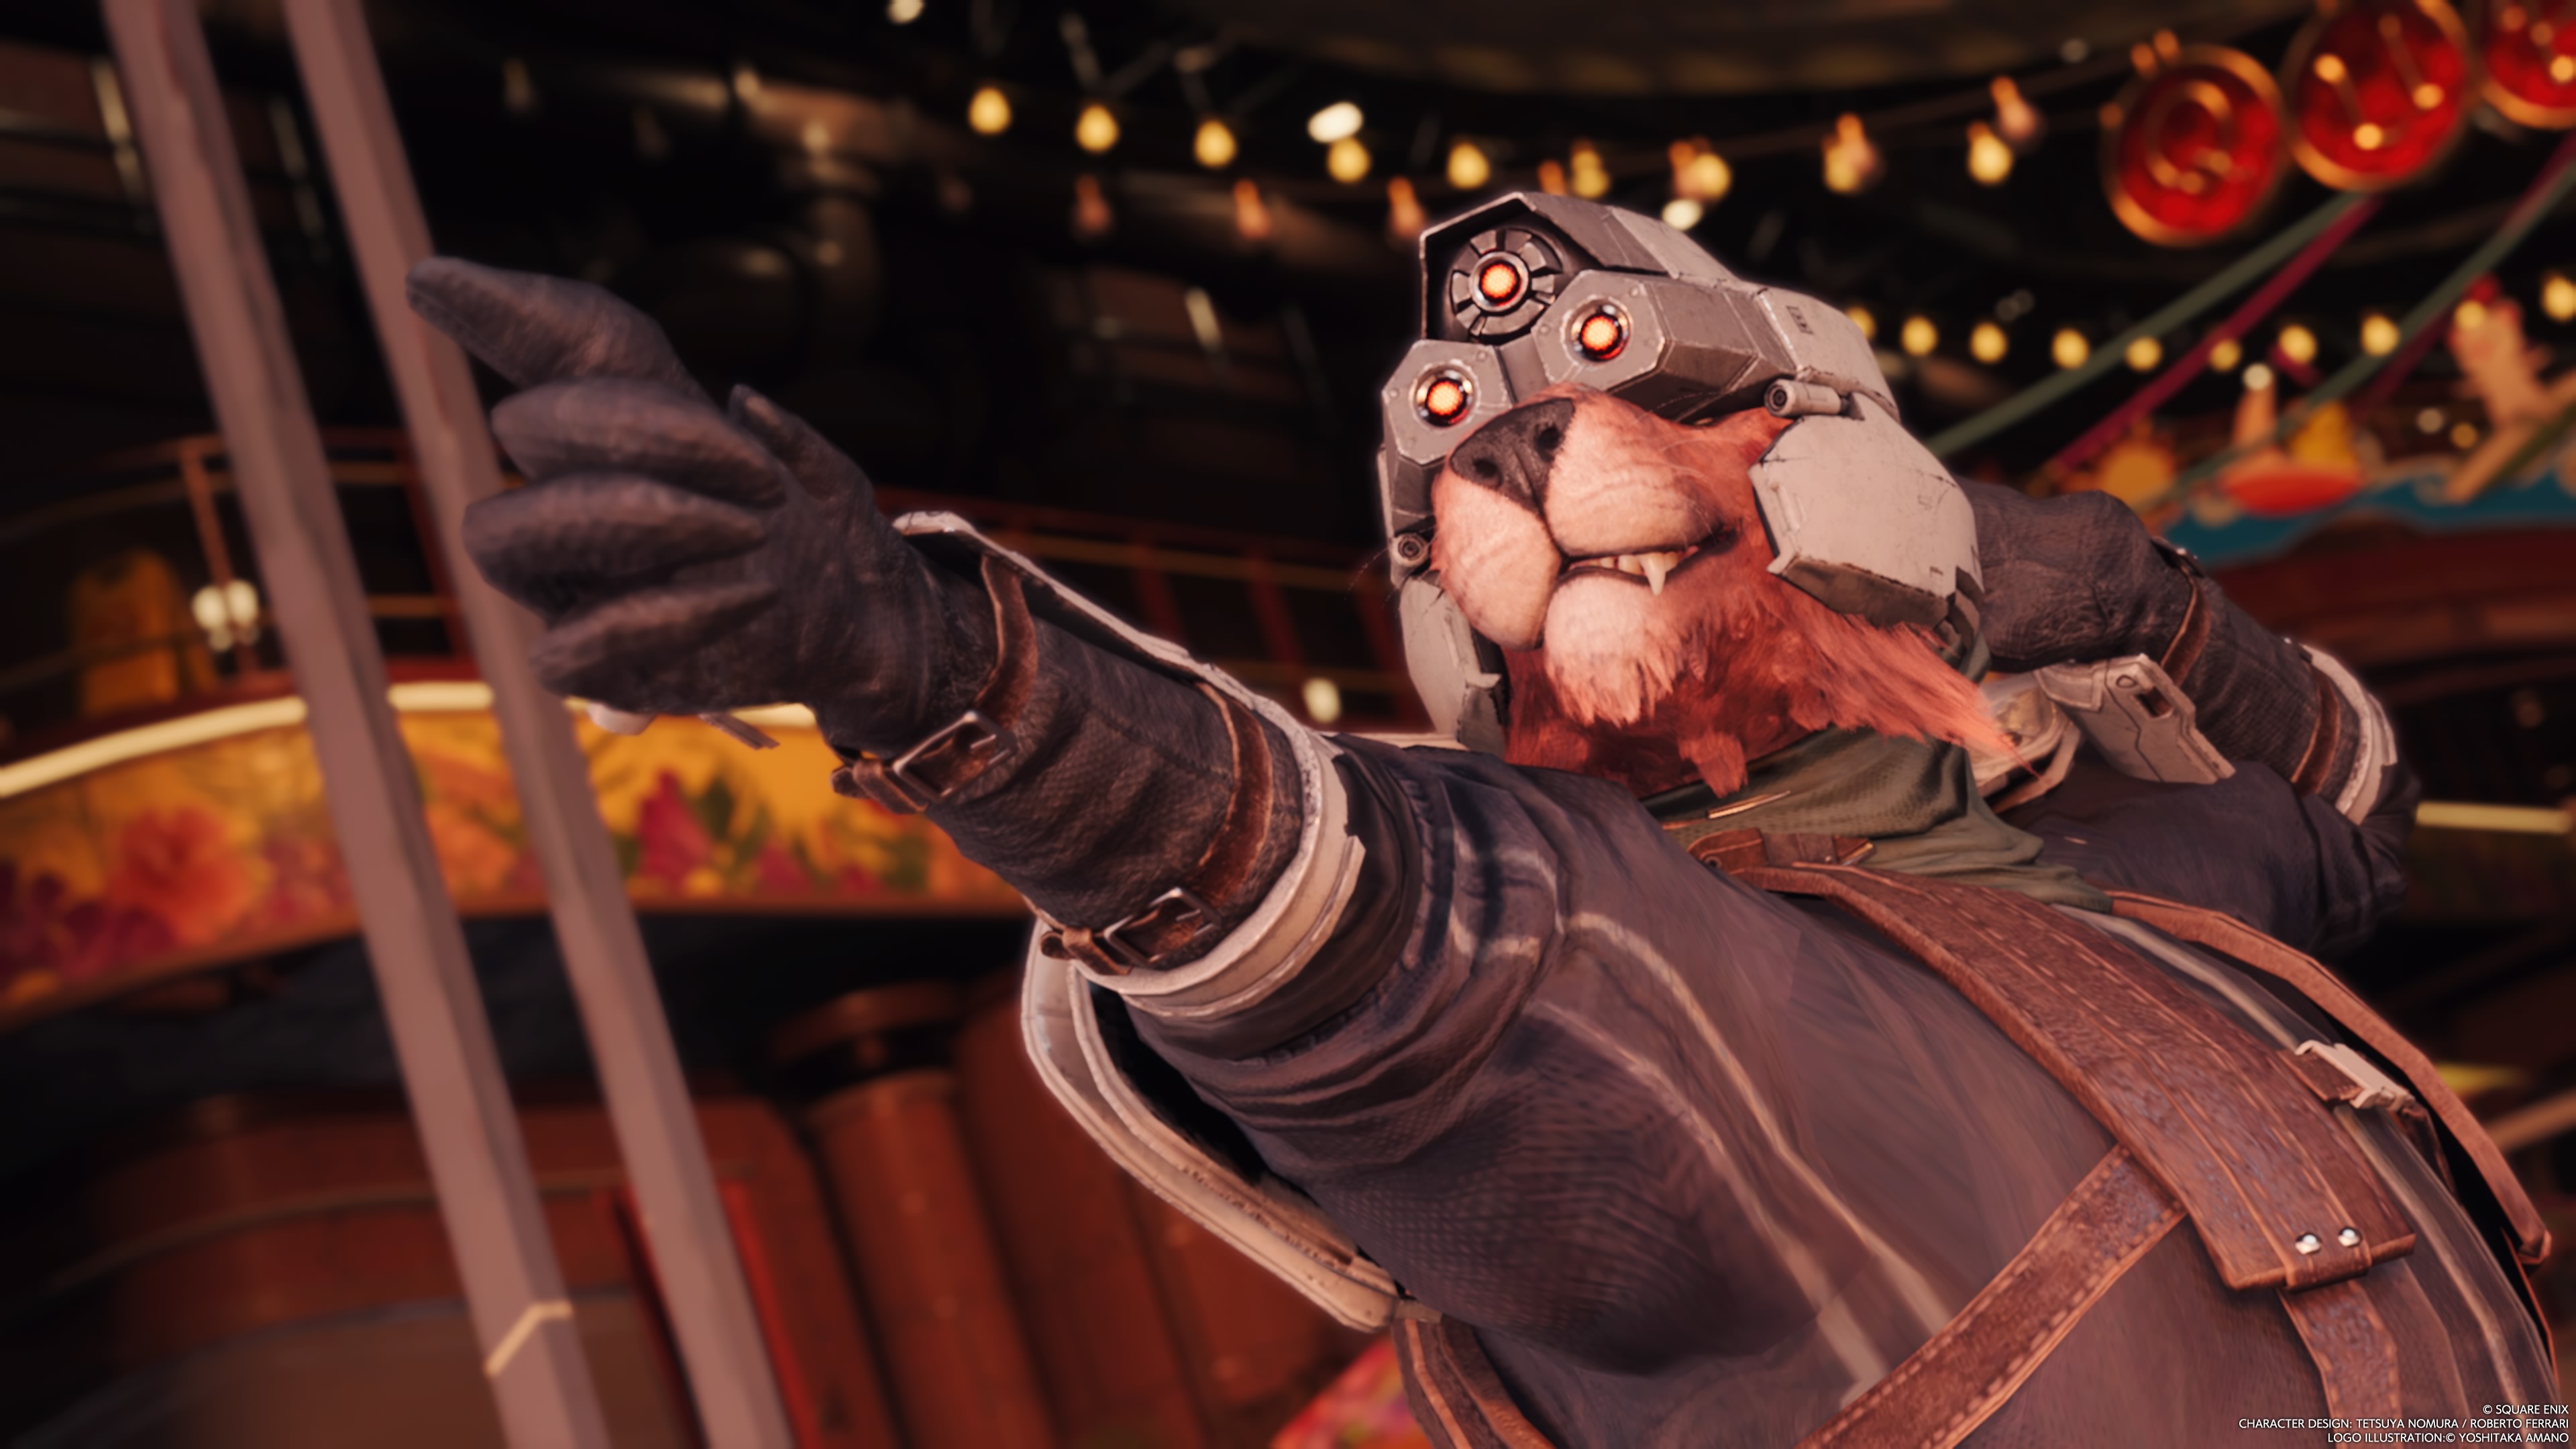
Red XIII enters the playable roster in Rebirth as a strikingly powerful melee fighter, with a blocking-centered fighting style and high AOE melee damage potential. His collars augment his natural affinity for physical damage output and his weapon skills enhance his potent Vengeance mode moves.
- Mythril Collar
- Renegade's Collar
- Silver Collar
- Amethyst Collar
- Golden Collar
- Mystic Collar
- Brisingamen
Mythril Collar
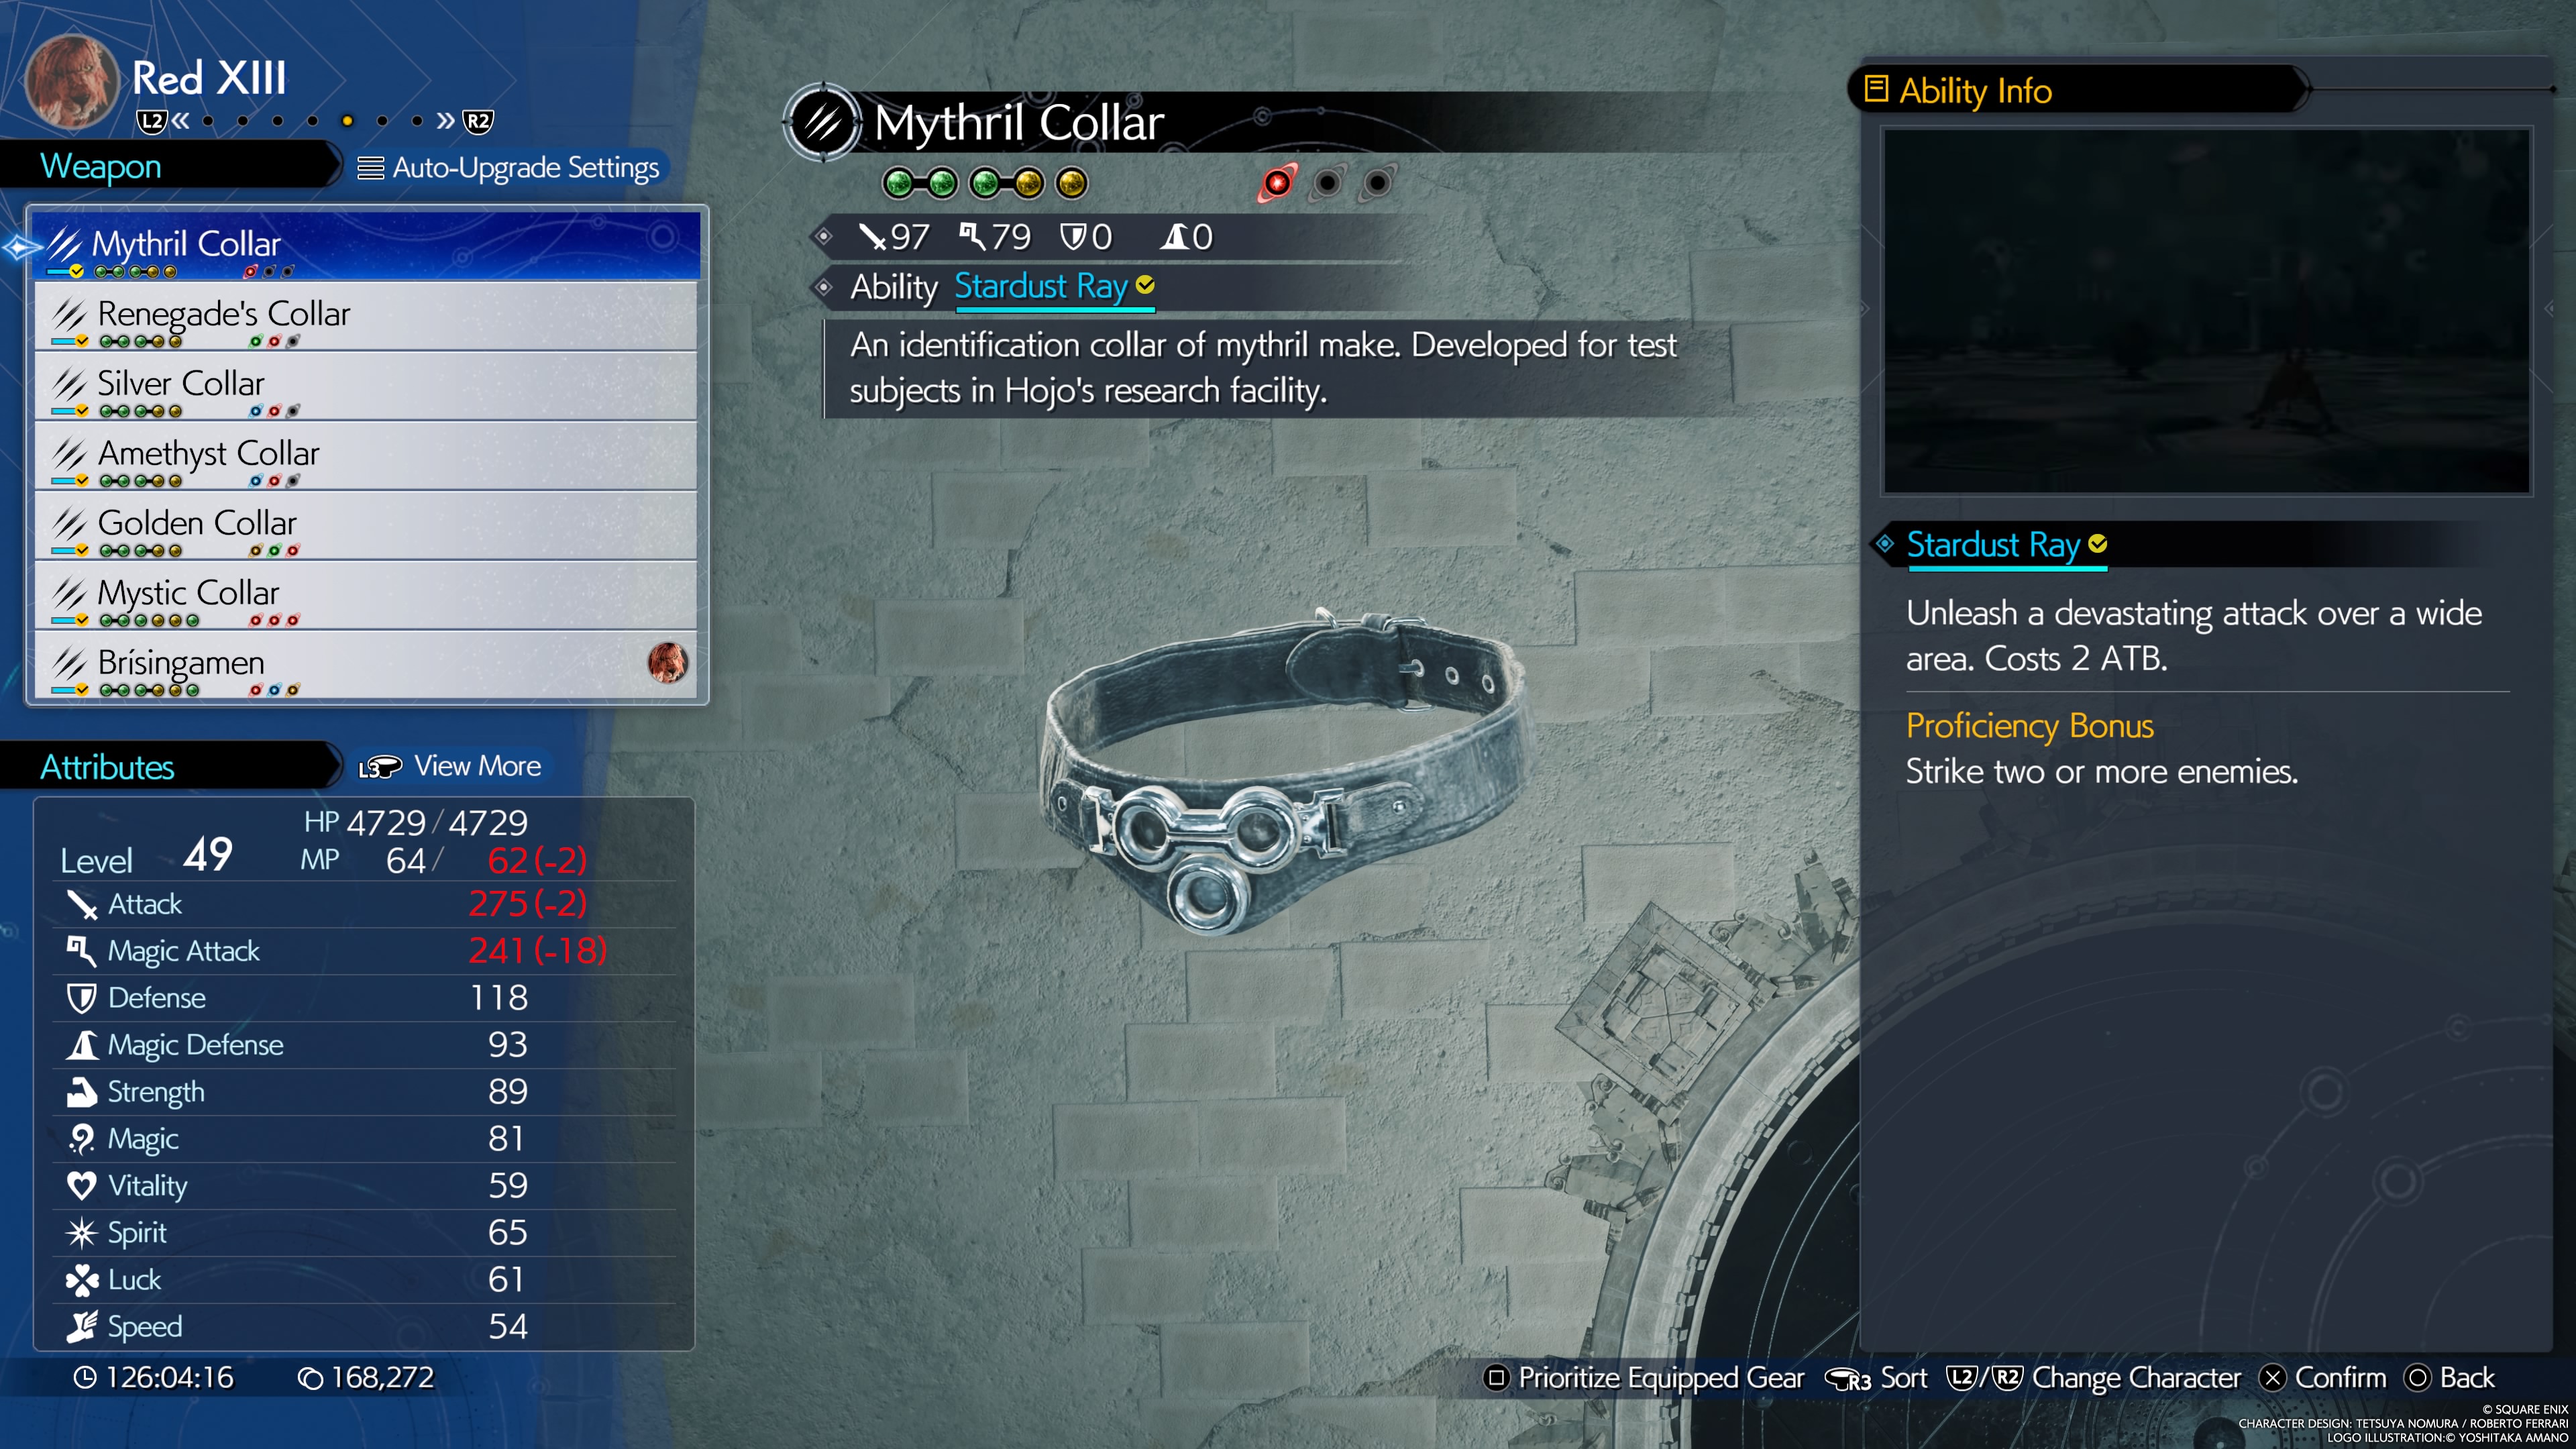
An identification collar of mythril make. Developed for test subjects in Hojo's research facility.
- Stats (Weapon Lv. 7): 97 Attack, 79 Magic
- Materia Slots (Weapon Lv. 7): 2x2, 1x1
- Weapon Ability: Stardust Ray - 2 ATB high-power AOE.
- Proficiency Bonus: Strike two or more enemies with the ability.
- Location: Red XIII starts with this weapon.
- Weapon Skills (Weapon Lv. 7):
- Invigorating Vengeance (restores HP when activating Vengeance Mode)
- Enhanced Counterspin (increased Counterspin potency)
- Weapon Ability Damage +5% x2
- Enduring Vengeance (+20% Vengeance Mode duration)
- MP Recovery Rate Up
- Siphon Fang HP Up (+30% HP absorbed by Siphon Fang)
- Max HP +200
Renegade's Collar
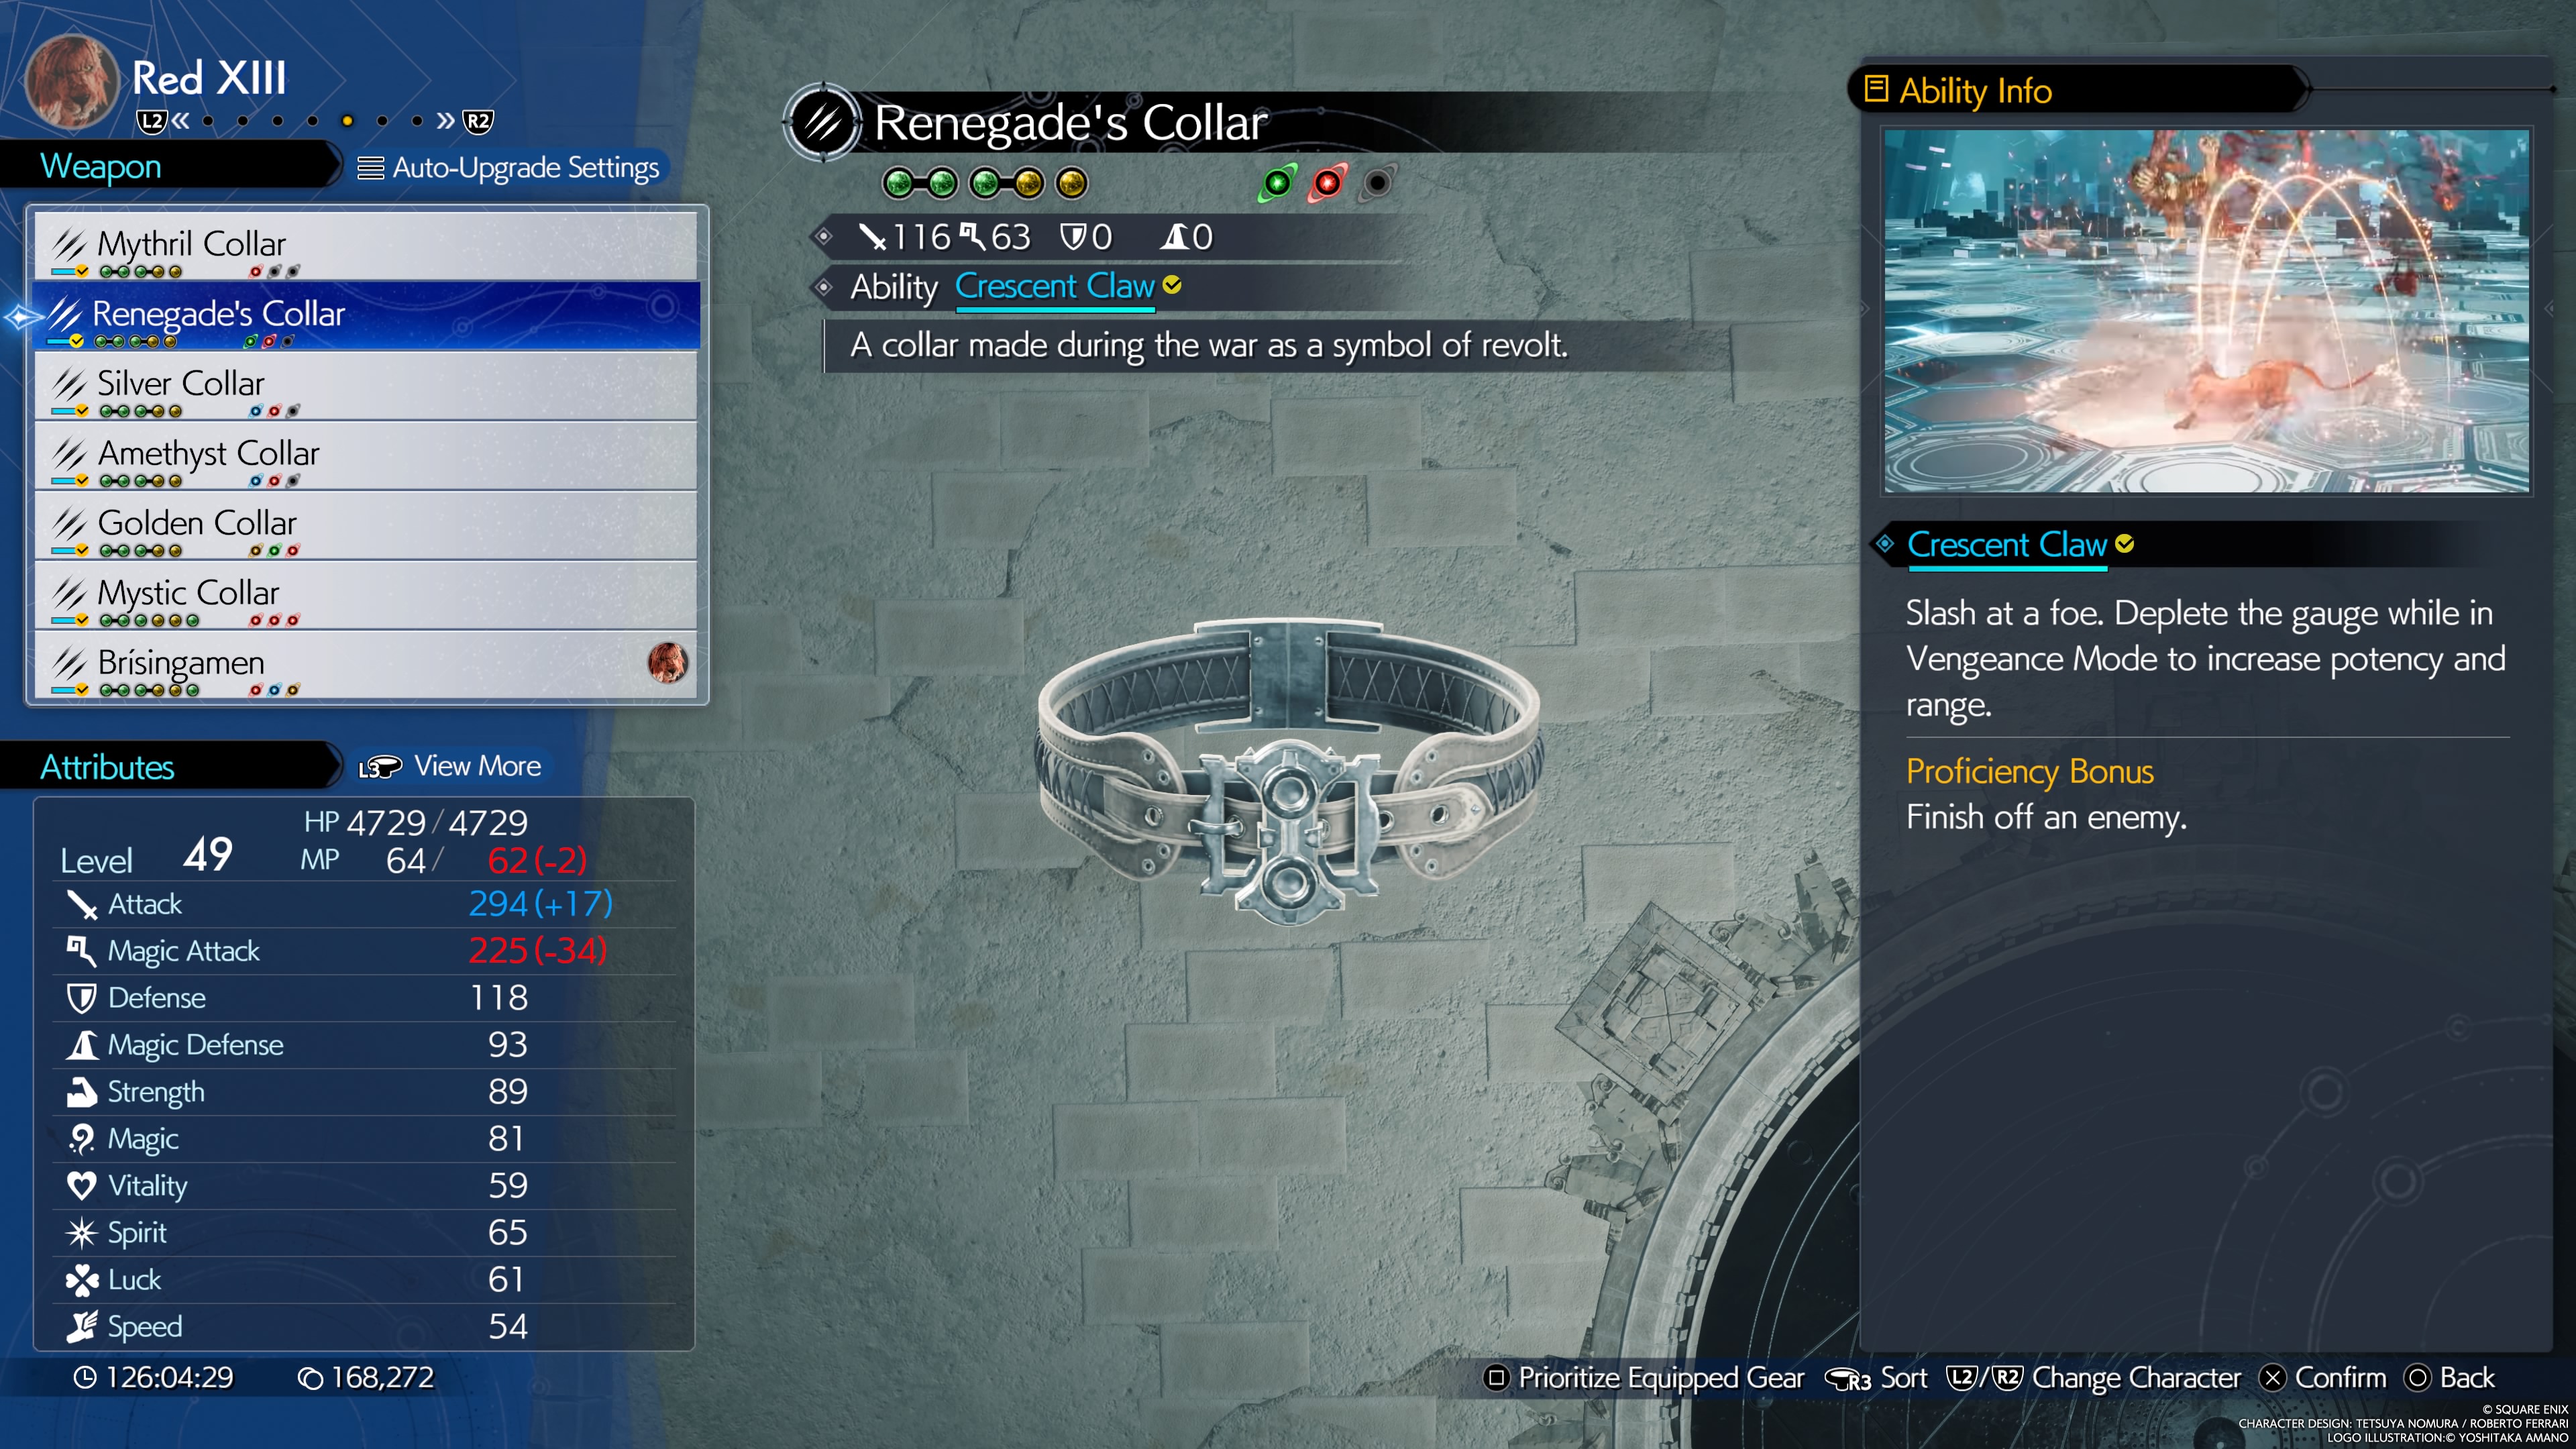
A collar made during the war as a symbol of revolt.
- Stats (Weapon Lv. 7): 116 Attack, 63 Magic
- Materia Slots (Weapon Lv. 7): 2x2, 1x1
- Weapon Ability: Cresent Claw - A powerful slash. When activated in Vengeance Mode, it depletes the gauge to increase potency and range.
- Proficiency Bonus: Finish off an enemy with the ability.
- Location: Available from a chest in the Mythril Mine, during Barret's section.
- Weapon Skills (Weapon Lv. 7):
- Enduring Vengeance
- ATB Charge Rate Up
- Vengeful Revenant (increases Vengeance Gauge after revival)
- Siphon Fang HP Up
- Invigorating Vengeance
- Selfish Recovery +25%
- Enhanced Physical Guard
- Max HP +200
Silver Collar
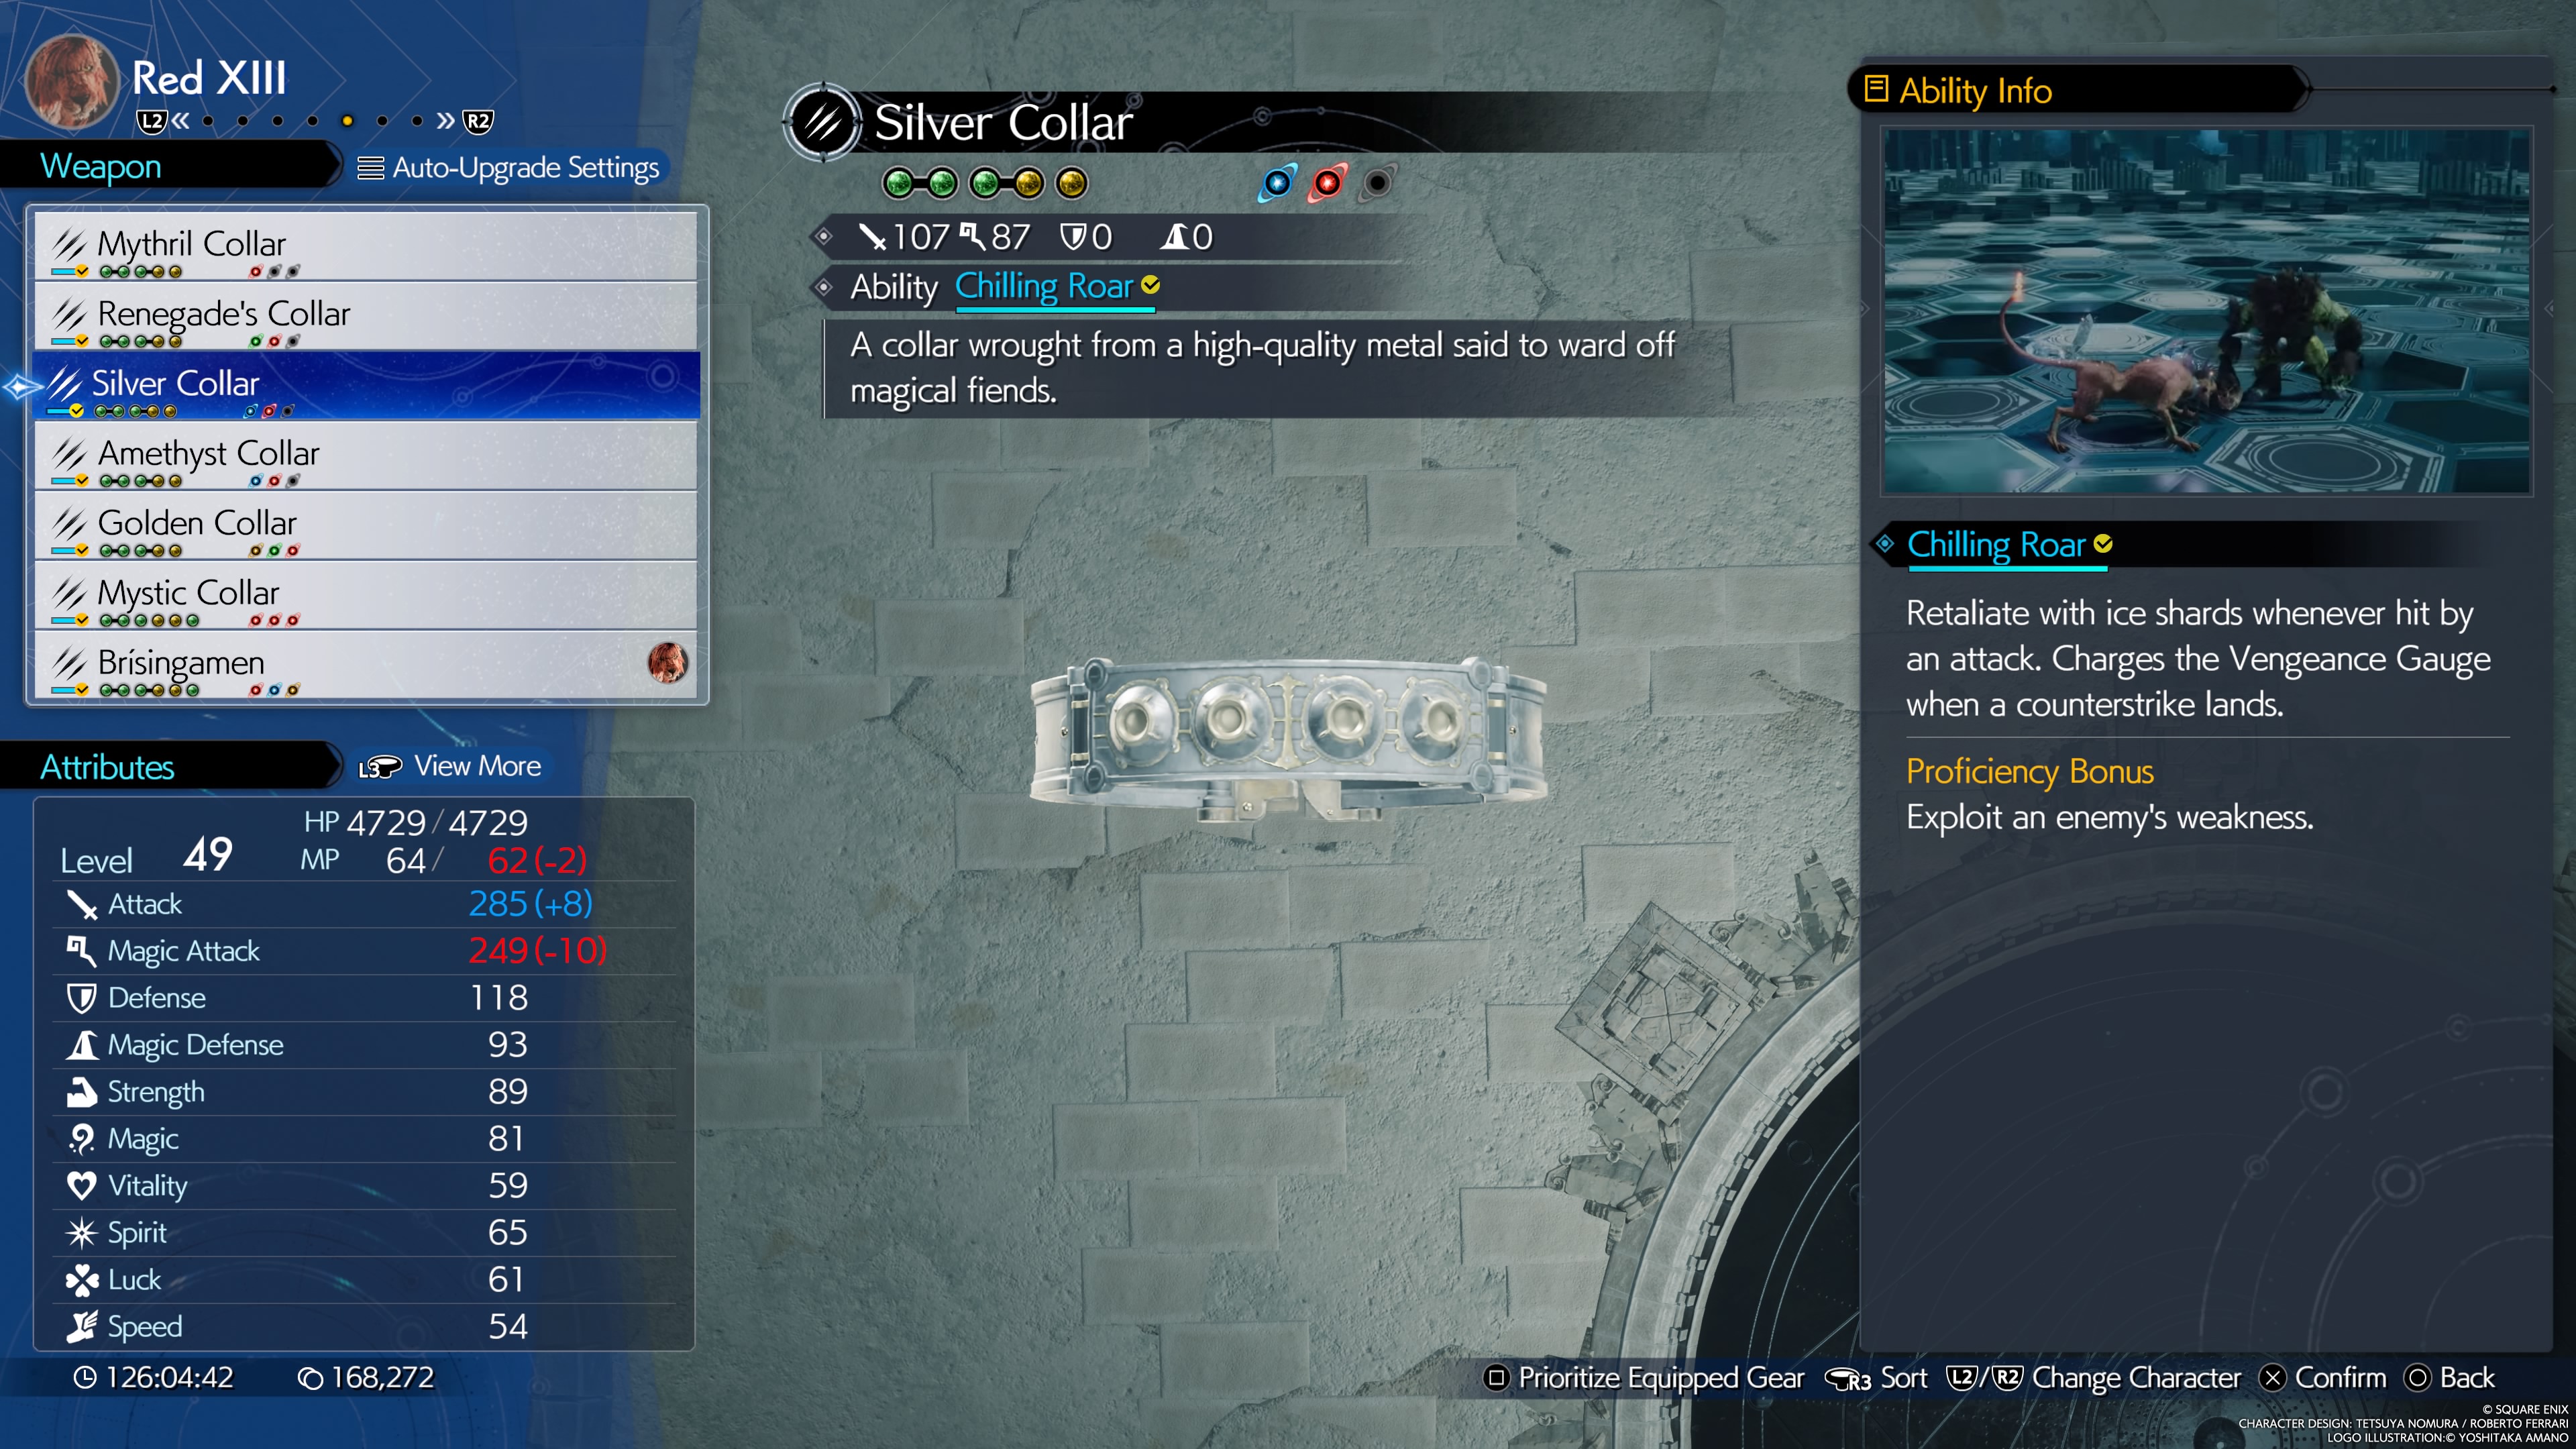
A collar wrought from a high-quality metal said to ward off magical fiends.
- Stats (Weapon Lv. 7): 107 Attack, 87 Magic
- Materia Slots (Weapon Lv. 7): 2x2, 1x1
- Weapon Ability: Chilling Roar - Aura that attacks enemies that strike you with ice shards and charges the Vengeance Gauge.
- Proficiency Bonus: Use the ice shards to exploit an enemy's weakness.
- Location: Achieve the top score in the Costa Del Sol Run Wild minigame activity.
- Weapon Skills (Weapon Lv. 7):
- Vengeance Gauge Charge Rate Up x2 (increases Vengeance charge rate on successful block)
- MP Recovery Rate Up
- Attack Damage +5%
- Offensive MP Saver
- Attack Power +20
- Max MP +3
- Restorative MP Saver
Amethyst Collar
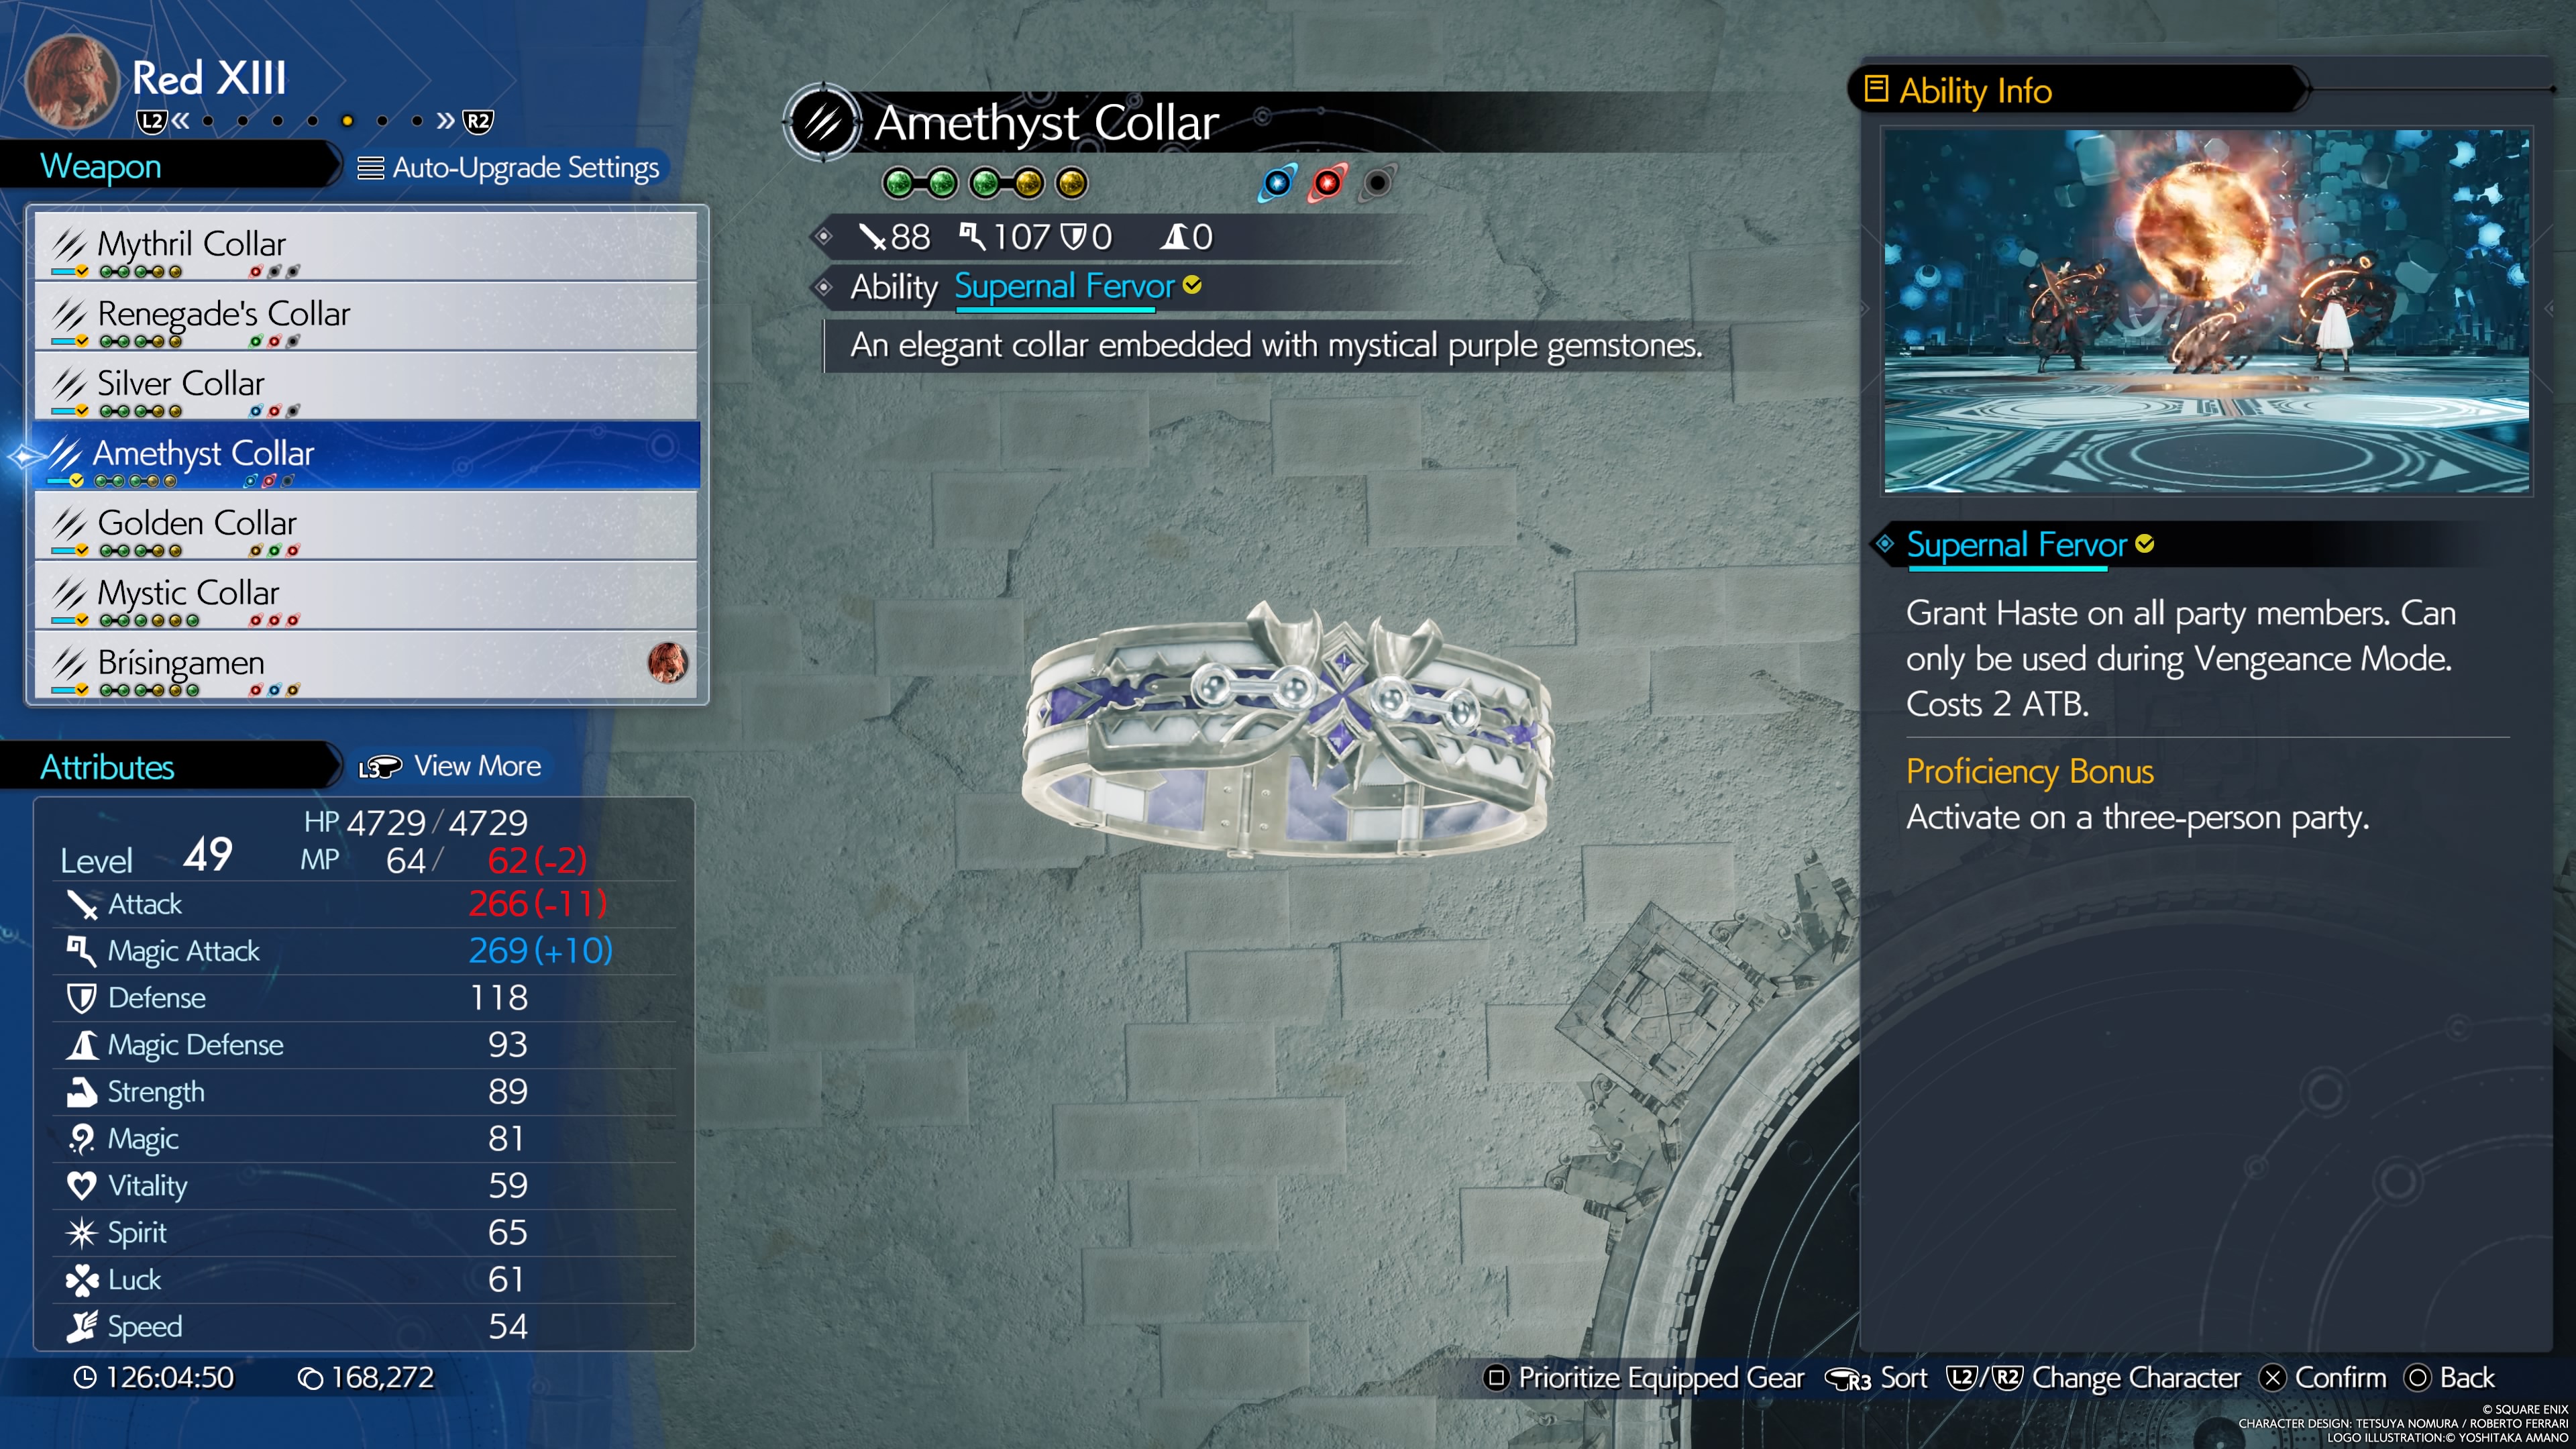
An elegant collar embedded with mystical purple gemstones.
- Stats (Weapon Lv. 7): 88 Attack, 107 Magic
- Materia Slots (Weapon Lv. 7): 2x2, 1x1
- Weapon Ability: Supernal Fervor - Casts Haste on the party, can only be activated in vengeance mode for 2 ATB
- Proficiency Bonus: Strike two or more enemies with the ability.
- Location: Find in the Old South Corel Mine during the Corel Region Side Quest "Of Robed Men and Ransoms."
- Weapon Skills (Weapon Lv. 7):
- Enduring Vengeance
- Enhanced Counterspin
- Attack Power +20
- Max HP +200
- Limit Break Damage +10%
- Max MP +3
- Attack Power +20
- ATB Charge Rate Up
Golden Collar

An opulent collar forged from gold found in a forest stream.
- Stats (Weapon Lv. 7): 145 Attack, 40 Magic
- Materia Slots (Weapon Lv. 7): 2x2, 1x1
- Weapon Ability: Watcher's Respite - Spends Vengeance gauge to heal the party.
- Proficiency Bonus: Activate when the Vengeance gauge is full.
- Location: Obtained in the Gongaga Reactor.
- Weapon Skills (Weapon Lv. 7):
- Vengeance Gauge Charge Rate Up
- Invigorating Vengeance
- Vengeful Revenant
- Magic Attack Power +20 x2
- Opening ATB Bonus
- Max MP +3
- Enemy Parts Damage Up
Mystic Collar
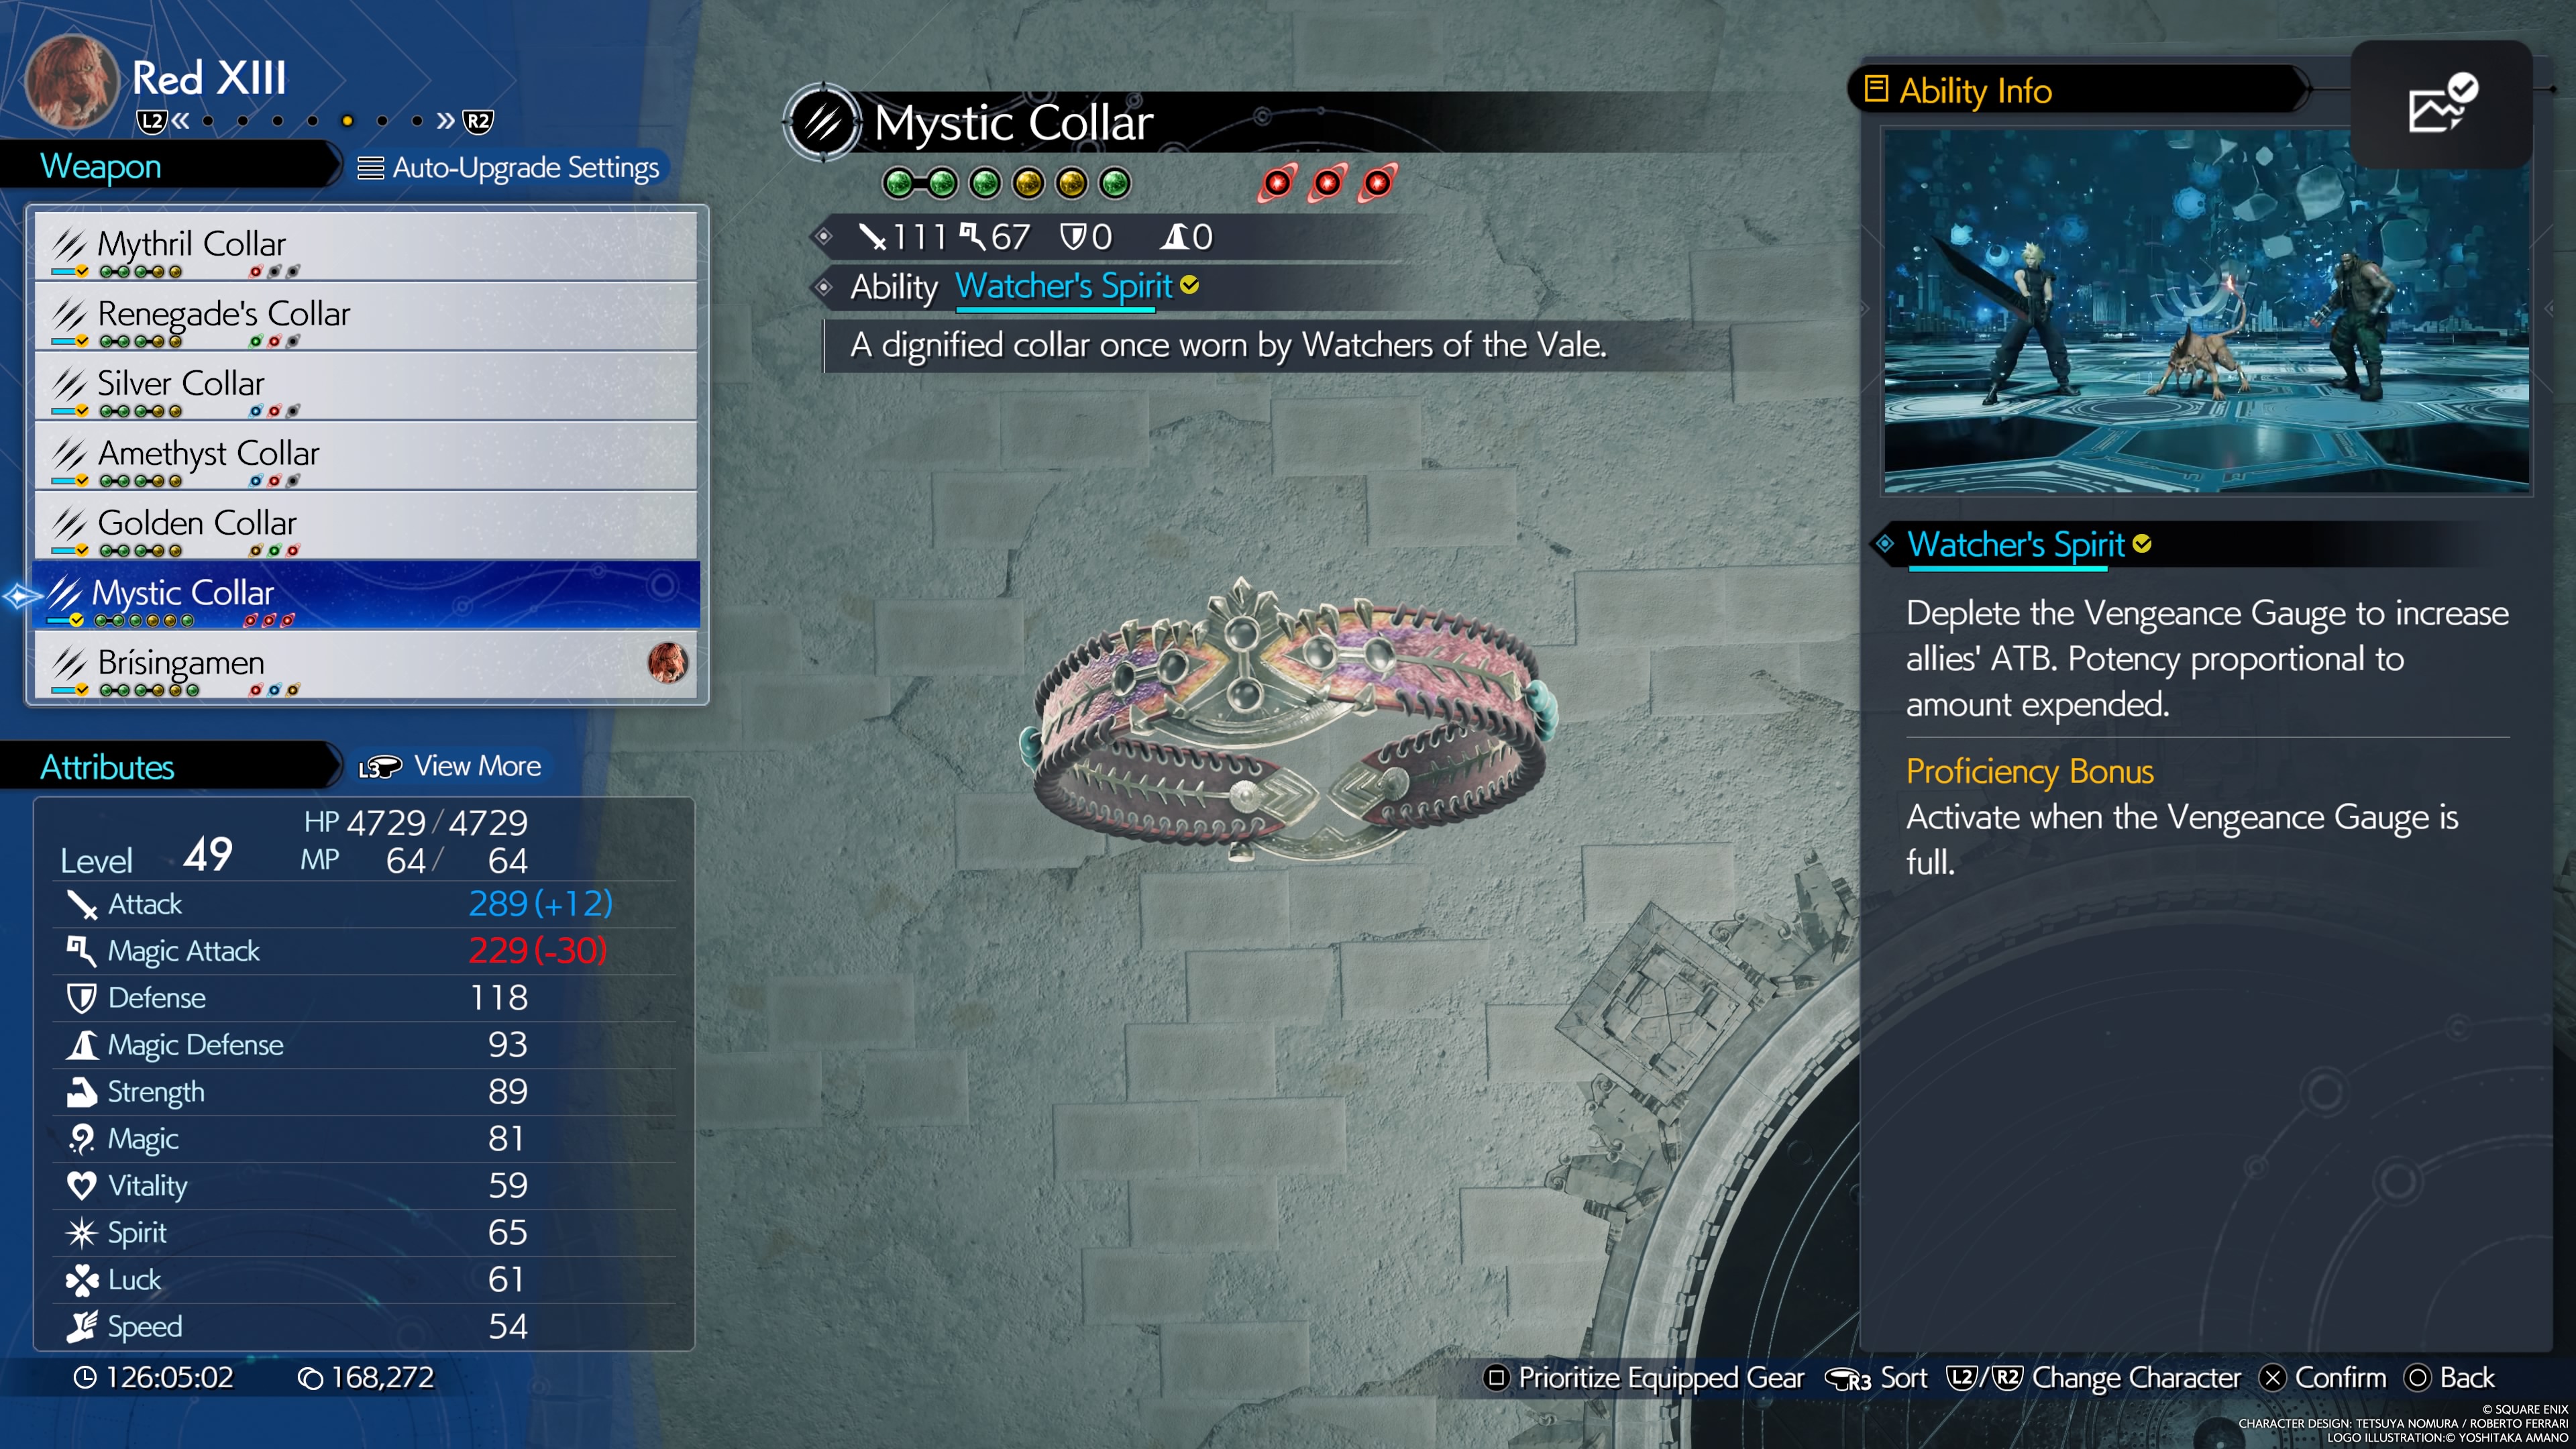
A dignified collar once worn by Watchers of the Vale.
- Stats (Weapon Lv. 7): 111 Attack, 67 Magic
- Materia Slots (Weapon Lv. 7): 1x2, 4x1
- Weapon Ability: Watcher's Spirit - Spend Vengeance Gauge to charge the party's ATB.
- Proficiency Bonus: Activate when Vengeance Gauge is full.
- Location: Obtained from a chest in Cosmo Canyon's Cave of the Gi, during the 1st Trial.
- Weapon Skills (Weapon Lv. 7):
- Siphon Fang HP Up
- Enduring Vengeance
- Invigorating Vengeance
- Weapon Ability Damage +5%
- Attack Damage +5%
- Magic Attack Power +20
- Weapon Ability ATB Recovery (charges ATB 5% when using weapon ability)
- Stagger Recovery (recover HP and MP when staggering foes)
Brisingamen
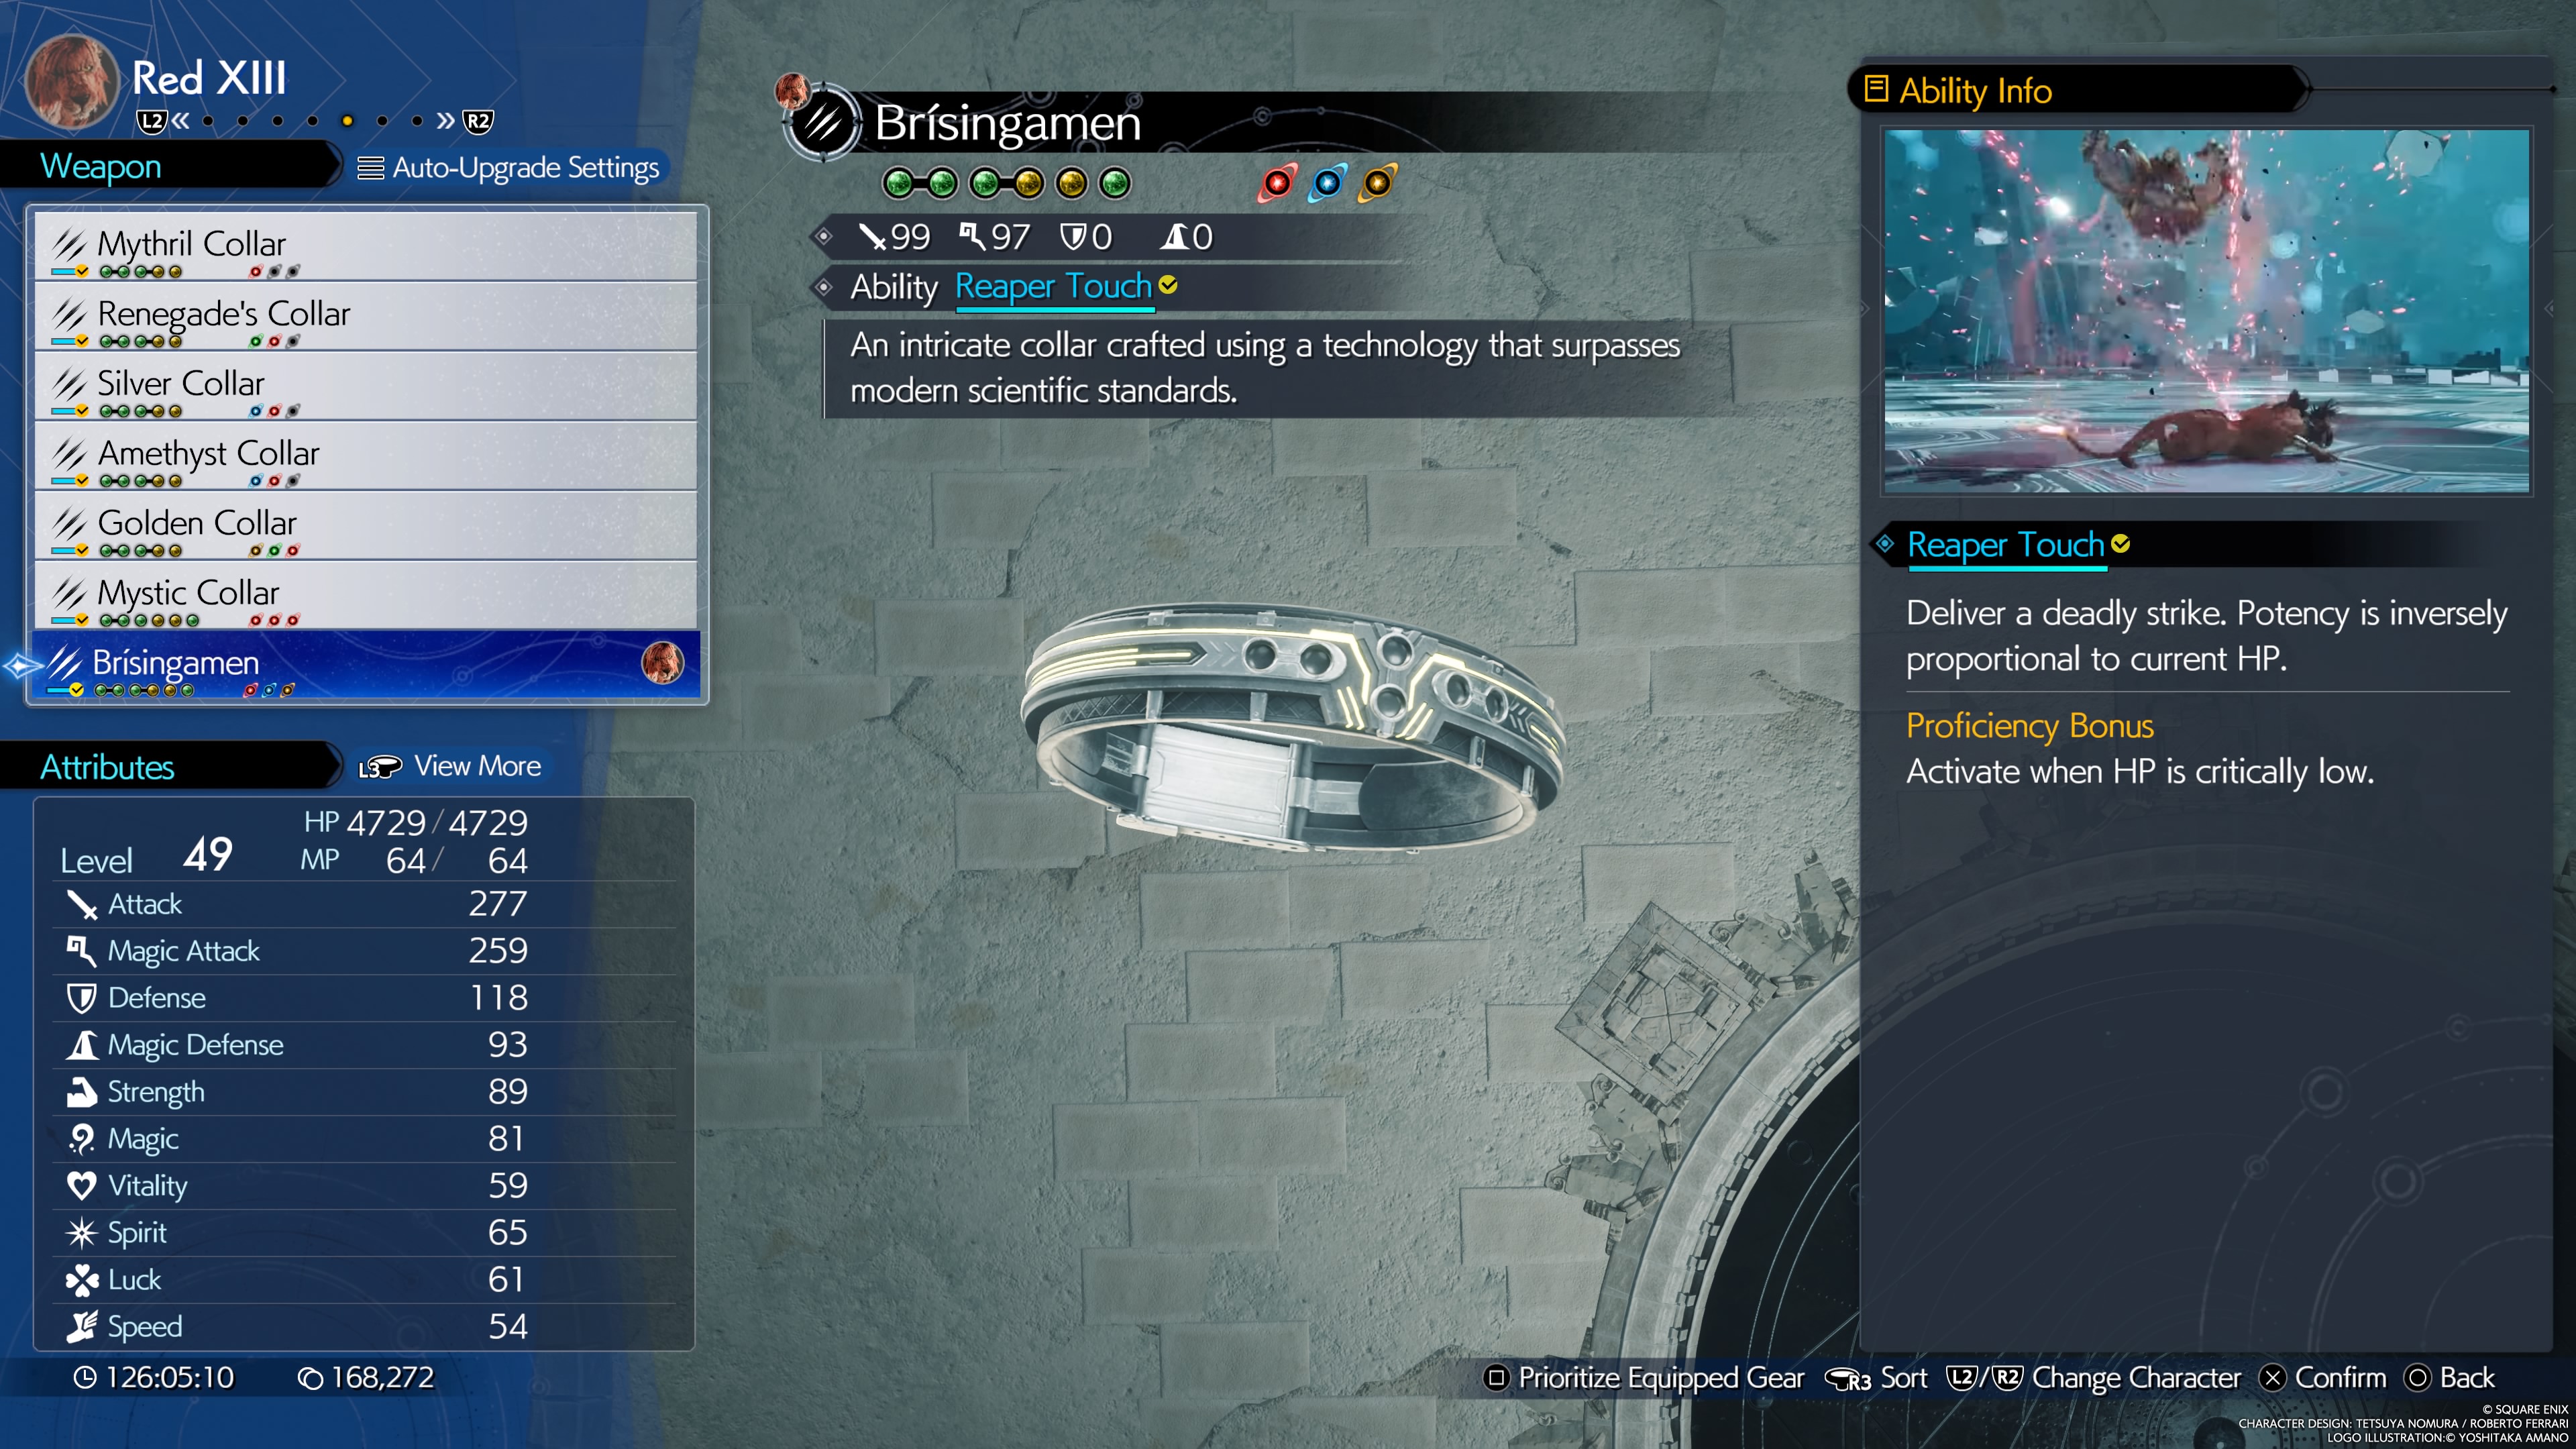
An intricate collar crafted using a technology that surpasses modern scientific standards.
- Stats (Weapon Lv. 7): 99 Attack, 97 Magic
- Materia Slots (Weapon Lv. 7): 2x2, 2x1
- Weapon Ability: Reaper Touch - Powerful attack that increases in potency as HP goes down.
- Proficiency Bonus: Use the ability when at critical health.
- Location: Obtained from a chest in the Temple of the Ancients.
- Weapon Skills (Weapon Lv. 7):
- Vengeance Gauge Charge Rate Up
- Enhanced Counterspin
- Attack Damage +5%
- MP Recovery Rate Up
- Max MP +3 x2
- Attack Power +20
- Altruistic Buff Up
Weapons for Yuffie Kisaragi in Final Fantasy VII Rebirth

Yuffie is one of Final Fantasy VII Rebirth's most versatile characters thanks to her ninja skills, and is able to whip out physical and magical damage at almost any range, and without much need for elemental spell Materia.
- 4-Point Shuriken
- Savage Dagger
- Twin Viper
- Bird of Prey
- Crescent Sickle
- Crystalline Cross
- Fuma Shuriken
4-Point Shuriken

An oversized throwing star used by ninjas from Wutai.
- Stats (Weapon Lv. 7): 79 Attack, 79 Magic
- Materia Slots (Weapon Lv. 7): 2x2, 1x1
- Weapon Ability: Elemental Ninjutsu - Set an element for Yuffie's Ninjutsu attacks.
- Proficiency Bonus: Exploit an enemy's weakness with Elemental Ninjutsu.
- Location: Yuffie starts with this weapon.
- Weapon Skills (Weapon Lv. 7):
- Fire Damage Up +10%
- Lightning Damage Up +10%
- Brave Thief (Applies Bravery after successful steal)
- Max HP +200
- Weapon Ability Damage +5%
- Shuriken Mastery (throw duration +25 sec.)
- Max MP +3
- MP Recovery Rate Up
Savage Dagger
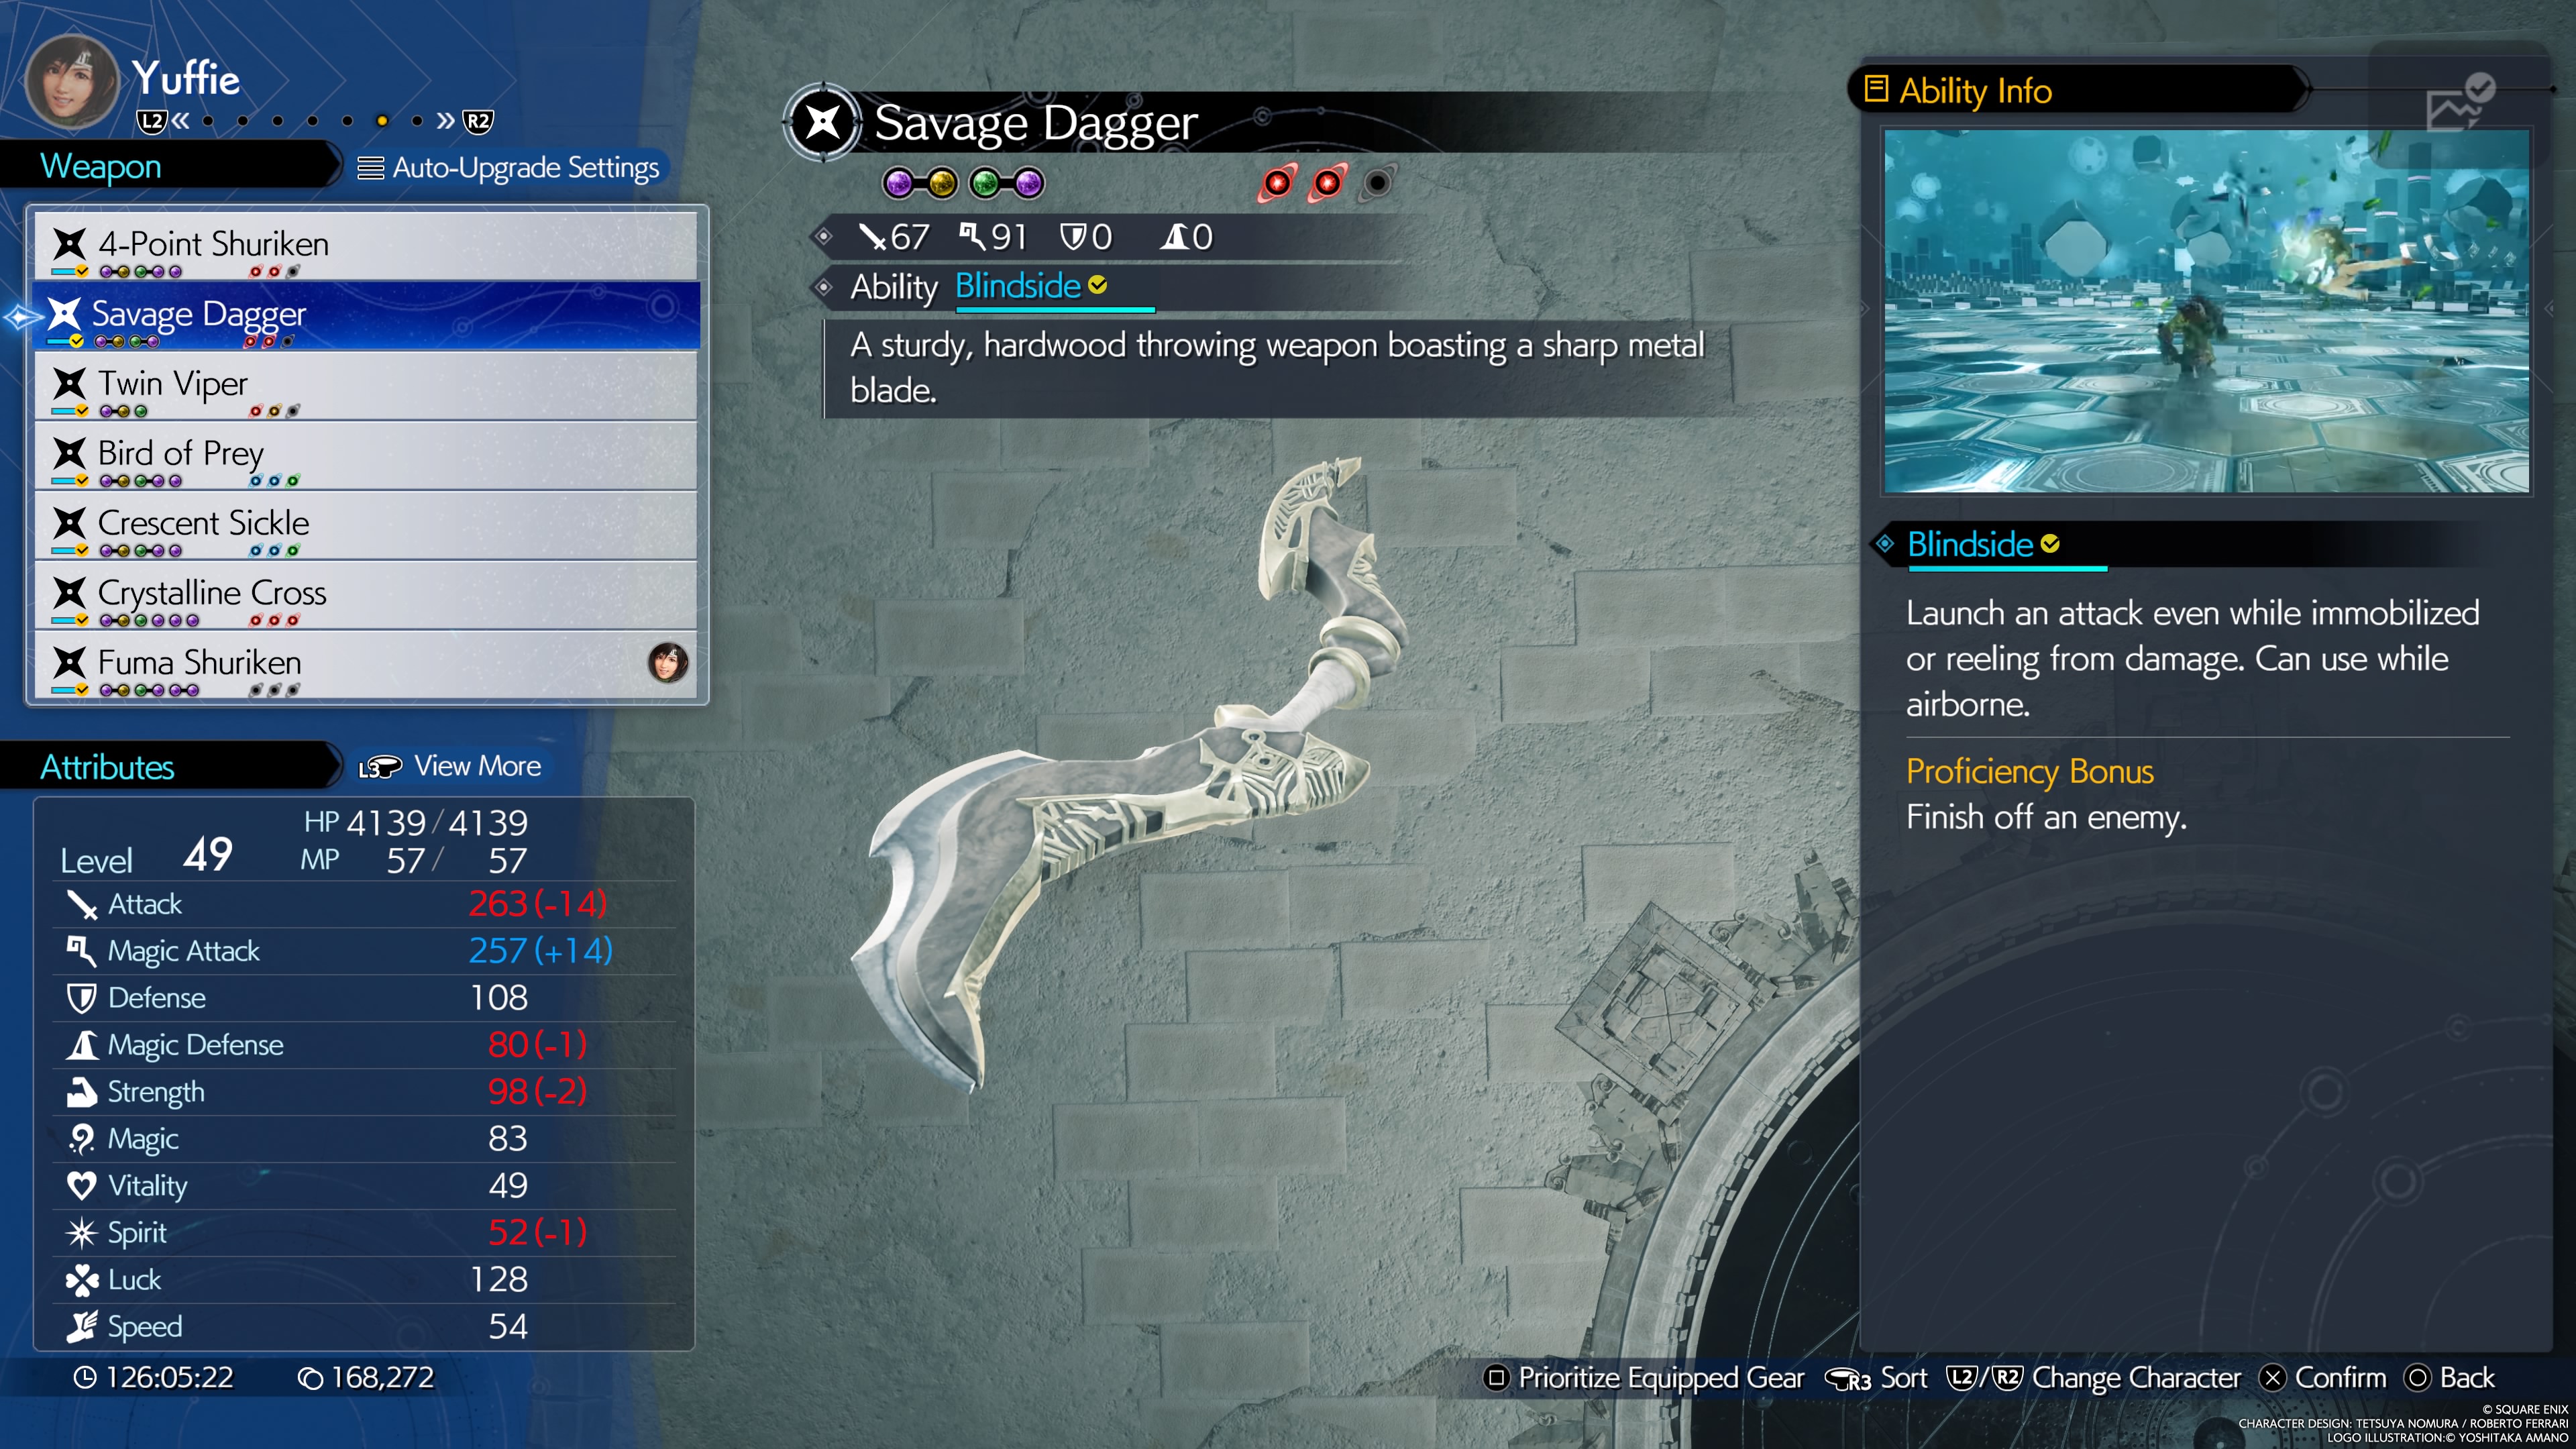
A sturdy, hardwood throwing weapon boasting a sharp metal blade.
- Stats (Weapon Lv. 7): 67 Attack, 91 Magic
- Materia Slots (Weapon Lv. 7): 2x2
- Weapon Ability: Blindside - Teleport attack, can be used while stunned or launched.
- Proficiency Bonus: Use the ability to finish off an enemy.
- Location: Yuffie's second starter weapon.
- Weapon Skills (Weapon Lv. 7):
- Ice Damage Up +10%
- Wind Damage Up +10%
- Precision Defense ATB (fills ATB when blocking with perfect timing)
- Precision Defense Regen (applies Regen when blocking with perfect timing)
- Enhanced Magic Guard
- MP Recovery Rate Up
- Selfish Buff Up
- Max HP +200
Twin Viper
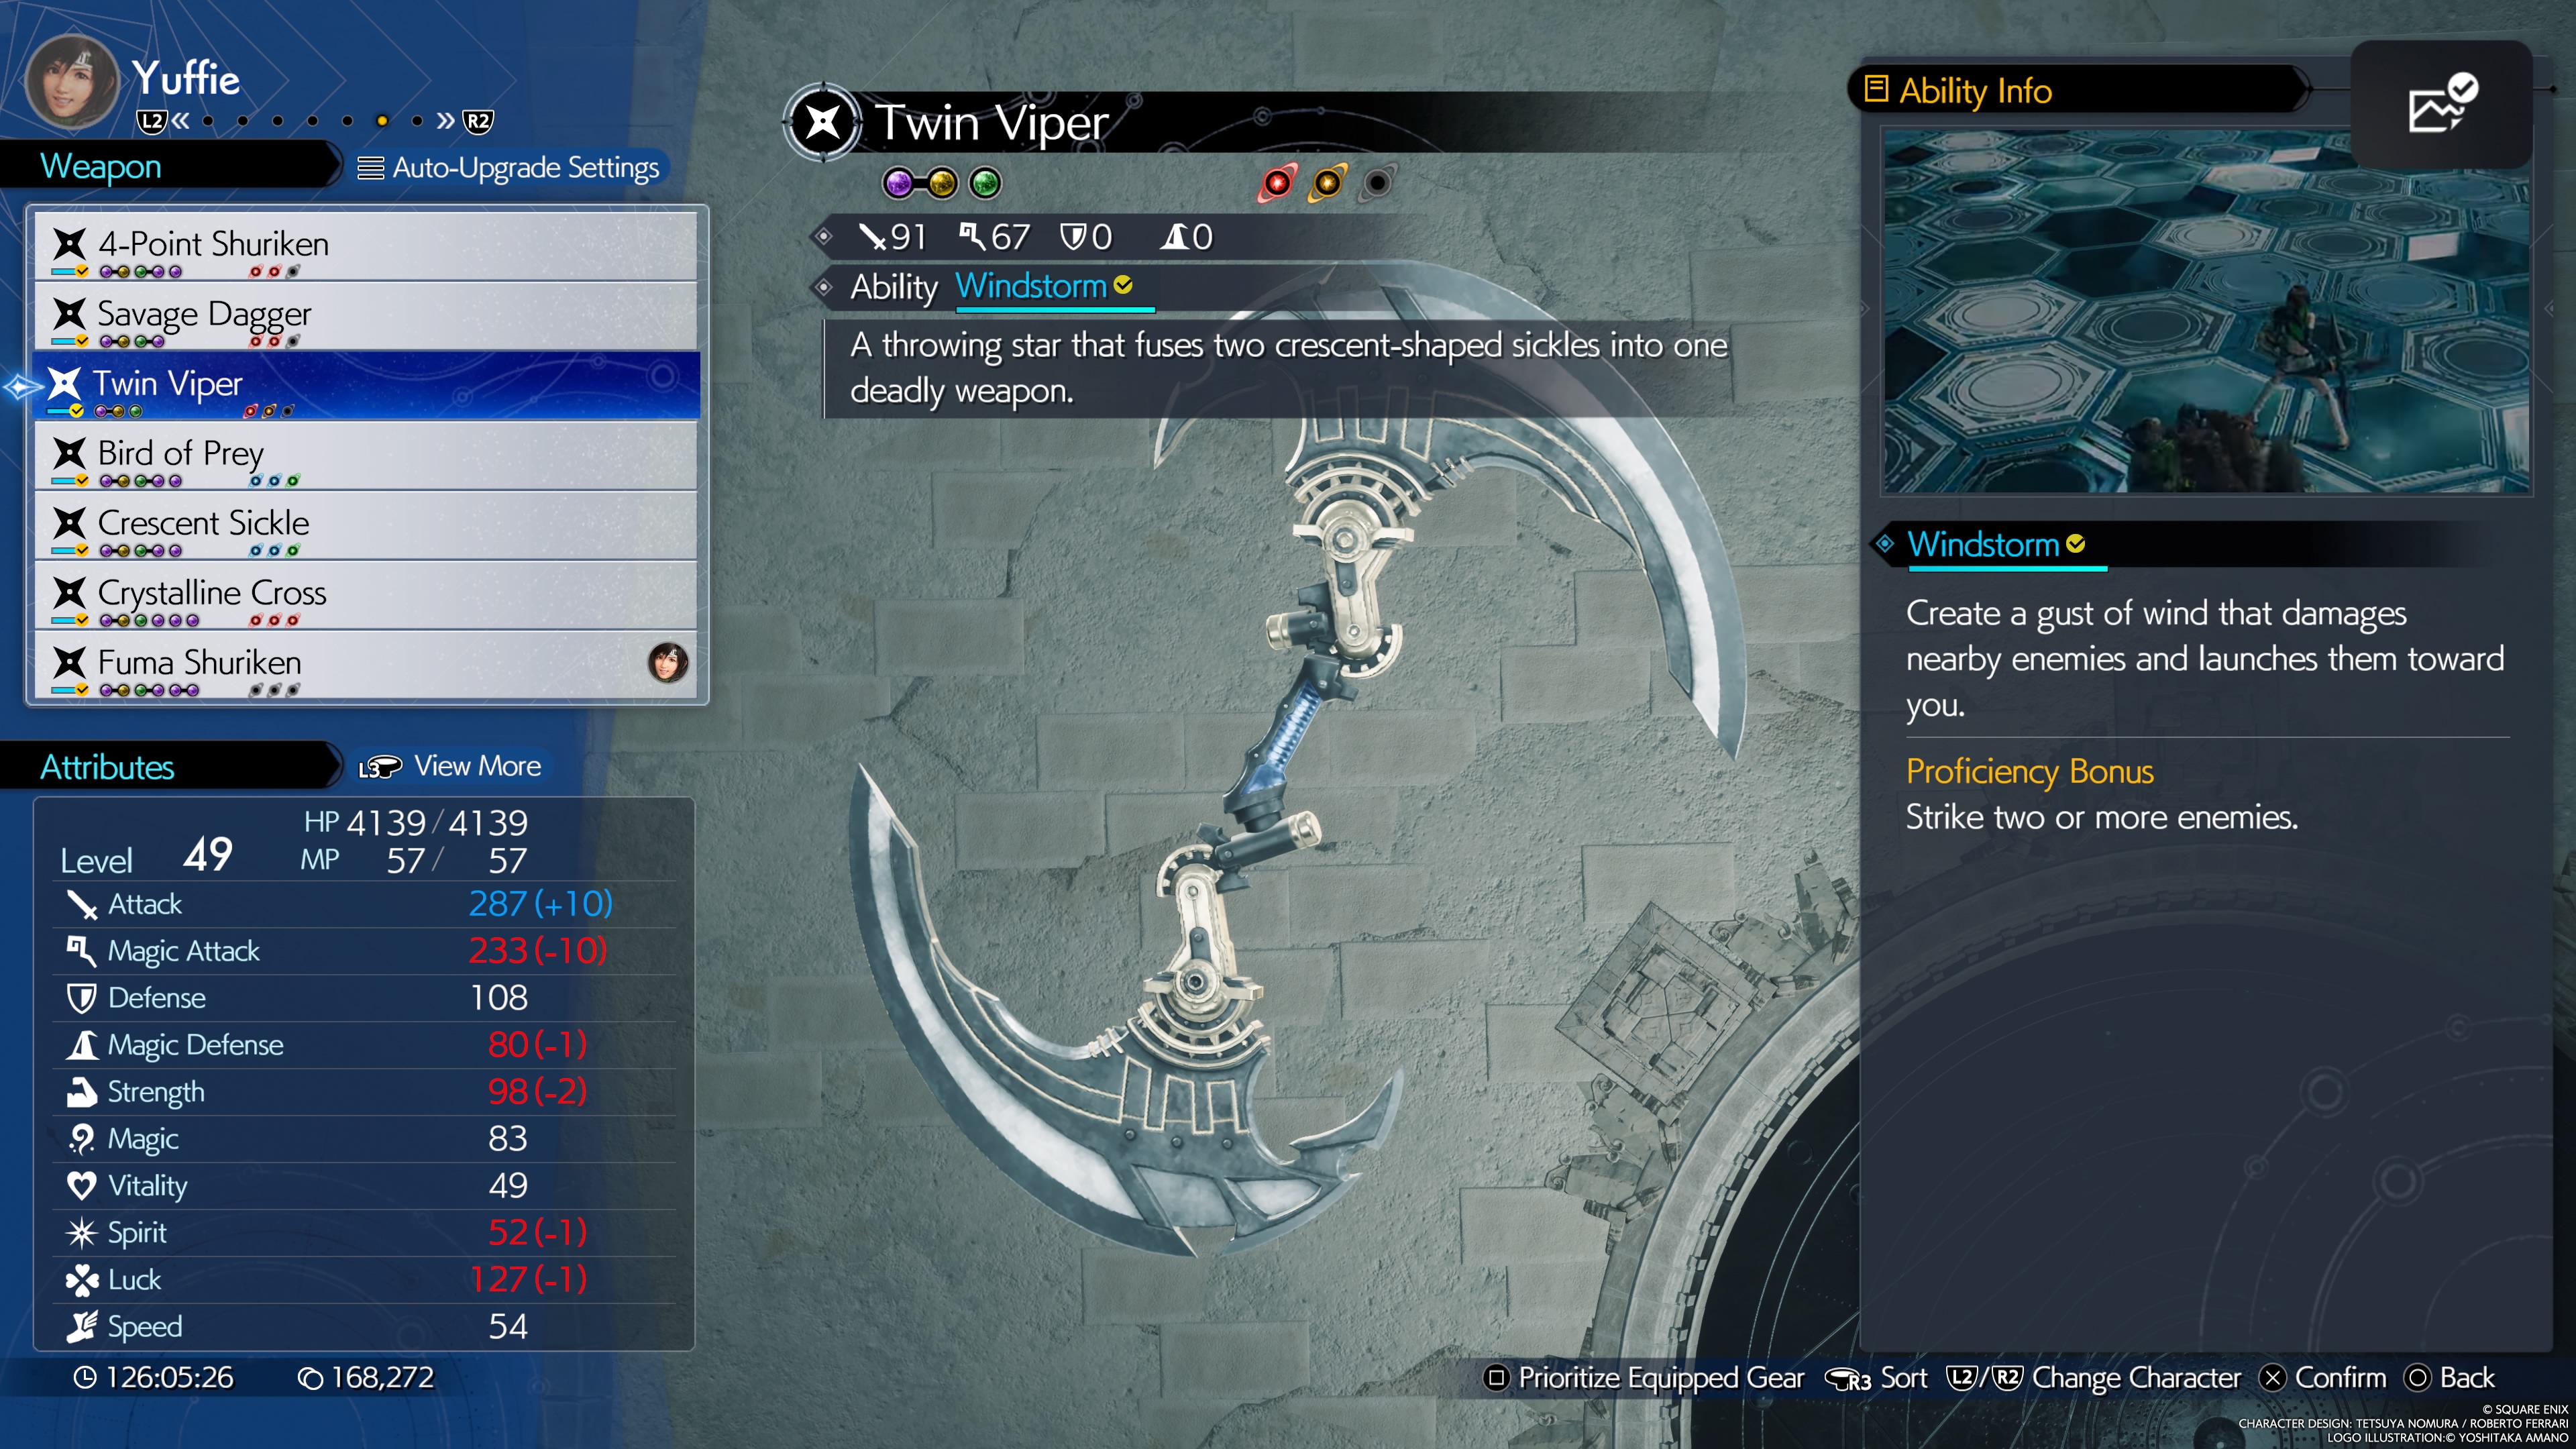
A throwing star that fuses two crescent-shaped sickles into one deadly weapon.
- Stats (Weapon Lv. 7): 91 Attack, 67 Magic
- Materia Slots (Weapon Lv. 7): 2x1, 1x1
- Weapon Ability: Windstorm - A wind-element gust that damages enemies and draws them toward you.
- Proficiency Bonus: Strike 2 or more enemies with the ability.
- Location: Found in a chest within the Corel Mines
- Weapon Skills (Weapon Lv. 7):
- Fire Damage Up +10%
- Wind Damage Up +10%
- Shuriken Mastery
- Weapon Ability Damage +5%
- Attack Damage +5%
- Selfish Buff Up
- Max MP +3
- Debuff Extension
Bird of Prey
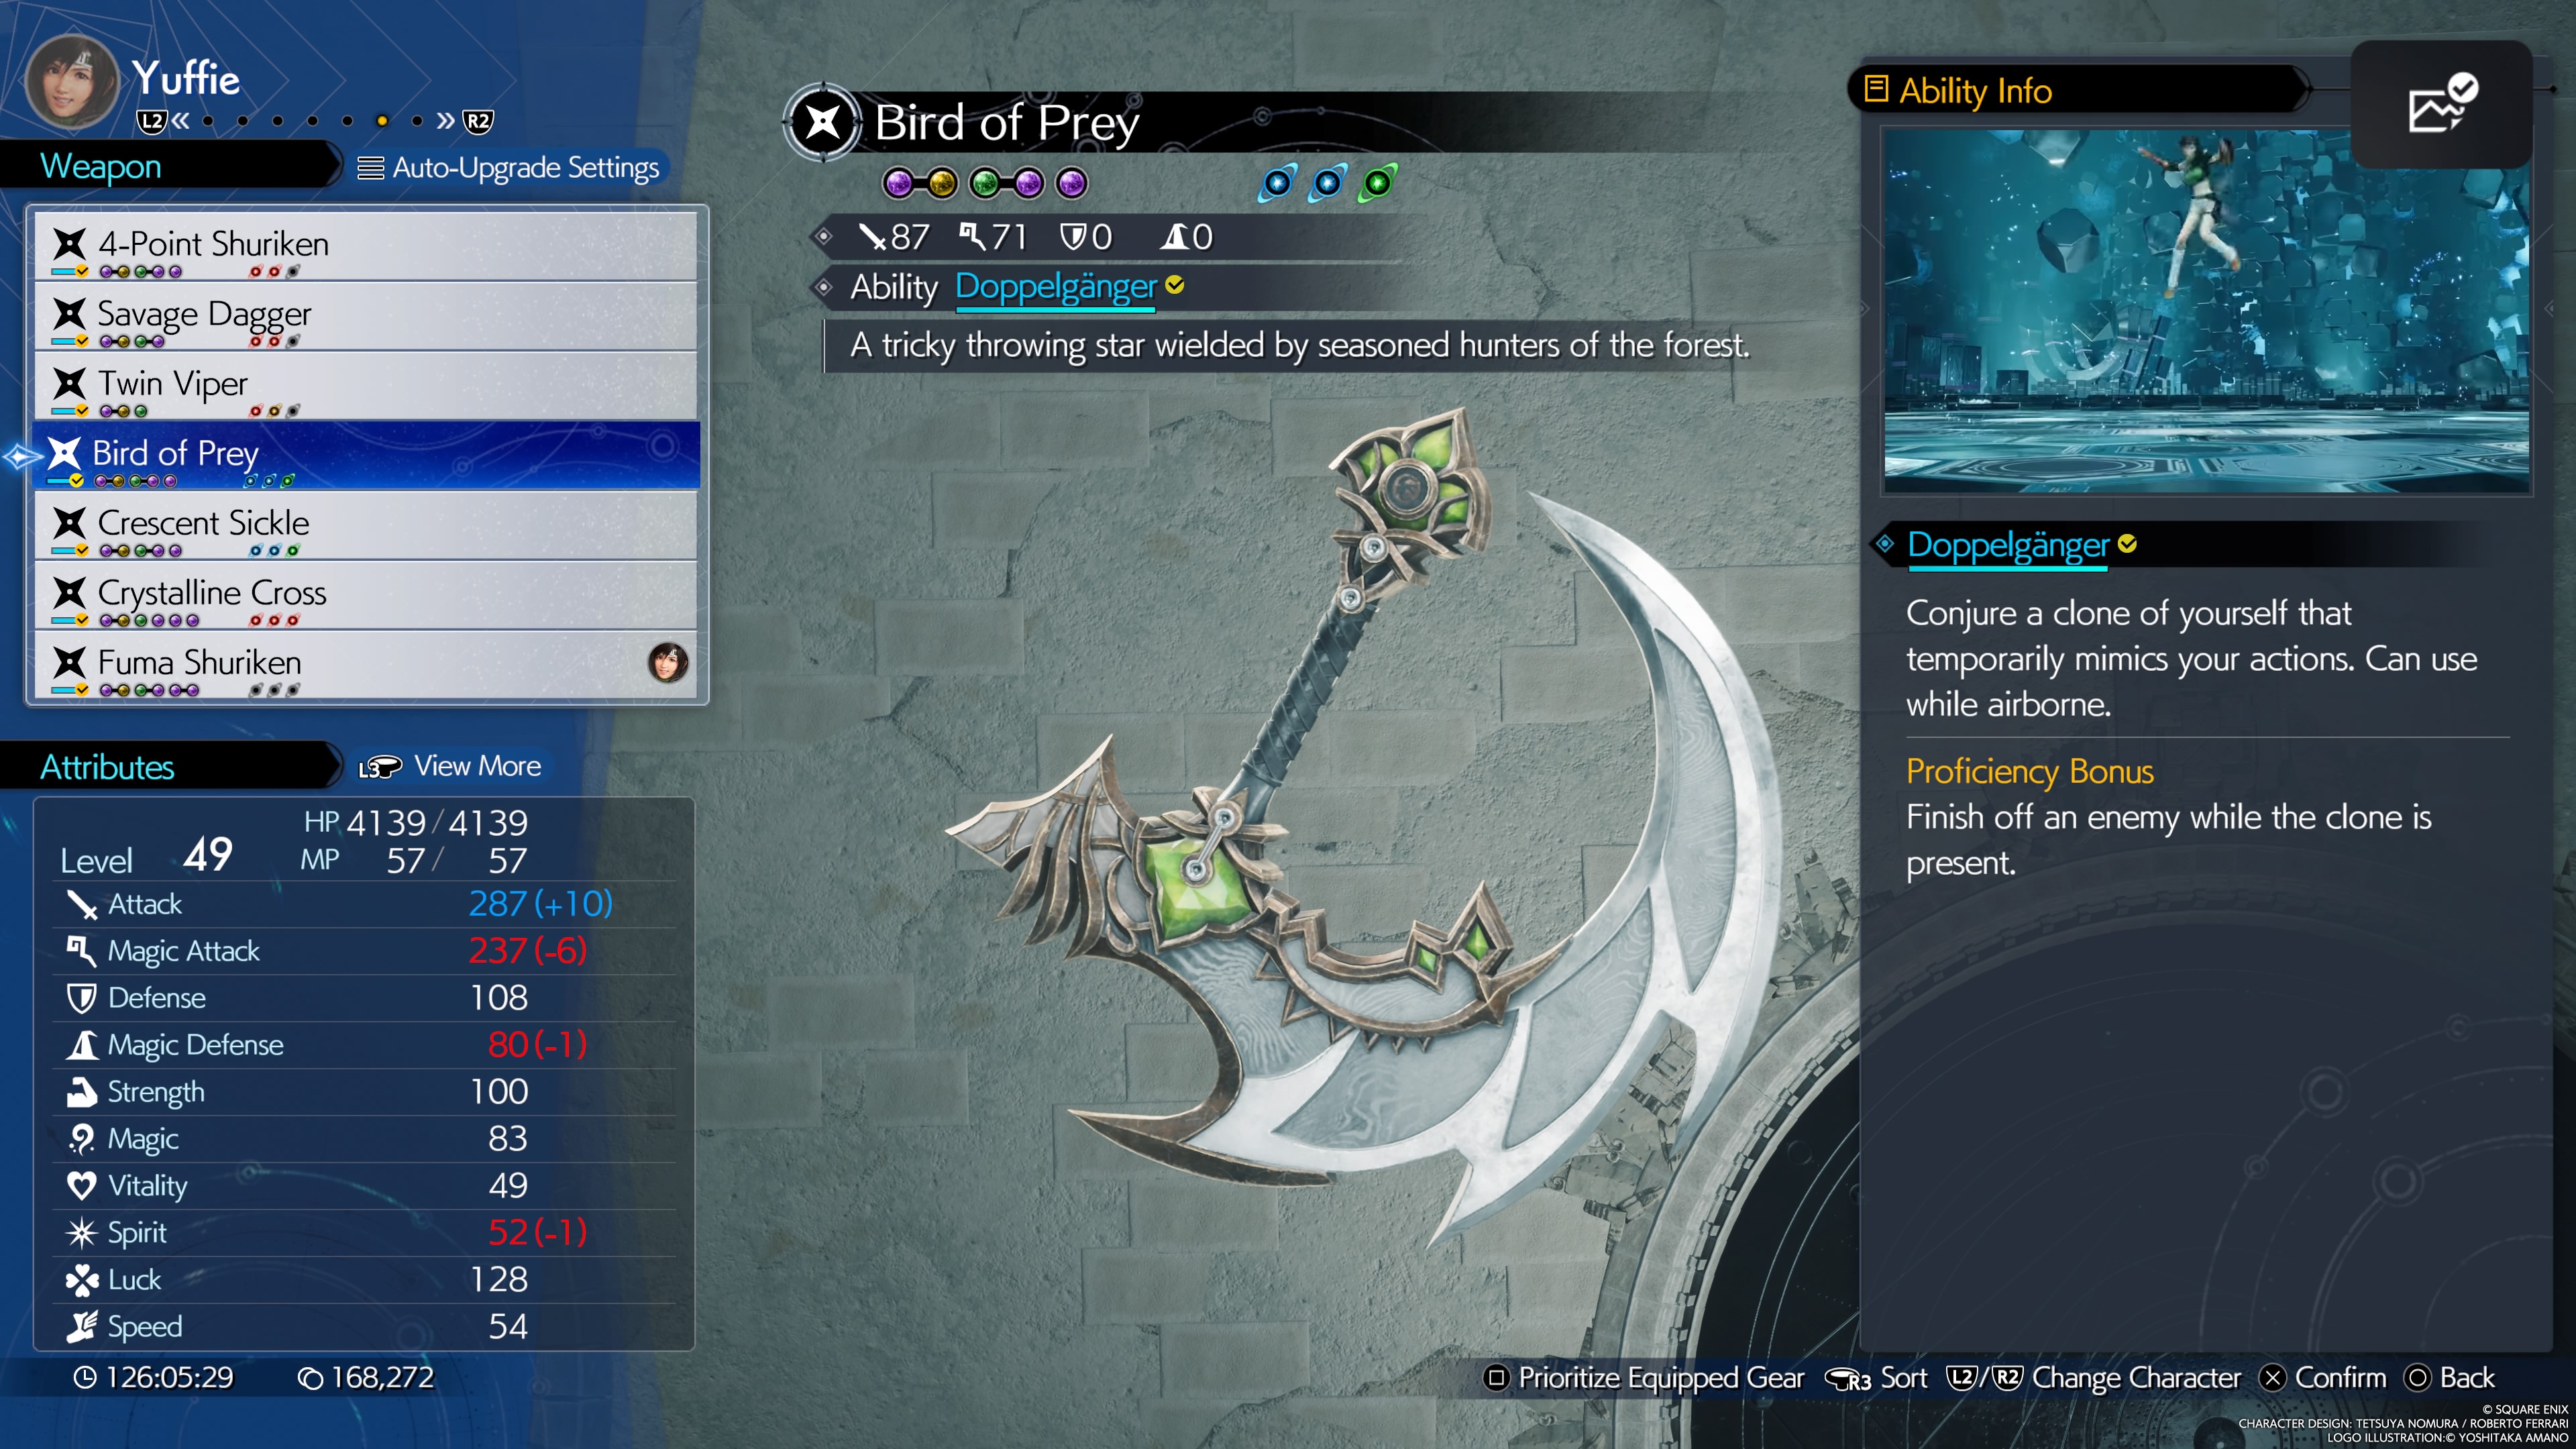
A trick throwing star wielded by seasoned hunters of the forest.
- Stats (Weapon Lv. 7): 87 Attack, 71 Magic
- Materia Slots (Weapon Lv. 7): 2x2, 1x1
- Weapon Ability: Doppelganger - Summon a clone of Yuffie that mimics her actions.
- Proficiency Bonus: Finish off an enemy while the clone is present.
- Location: Found in a chest within Cissnei's house in Gongaga village.
- Weapon Skills (Weapon Lv. 7):
- Ice Damage Up +10%
- Lightning Damage Up +10%
- MP Recovery Rate Up
- Critical Hit Rate +5% x2
- Critical Hit Damage +10% x2
- Limit Break Damage +10%
Crescent Sickle
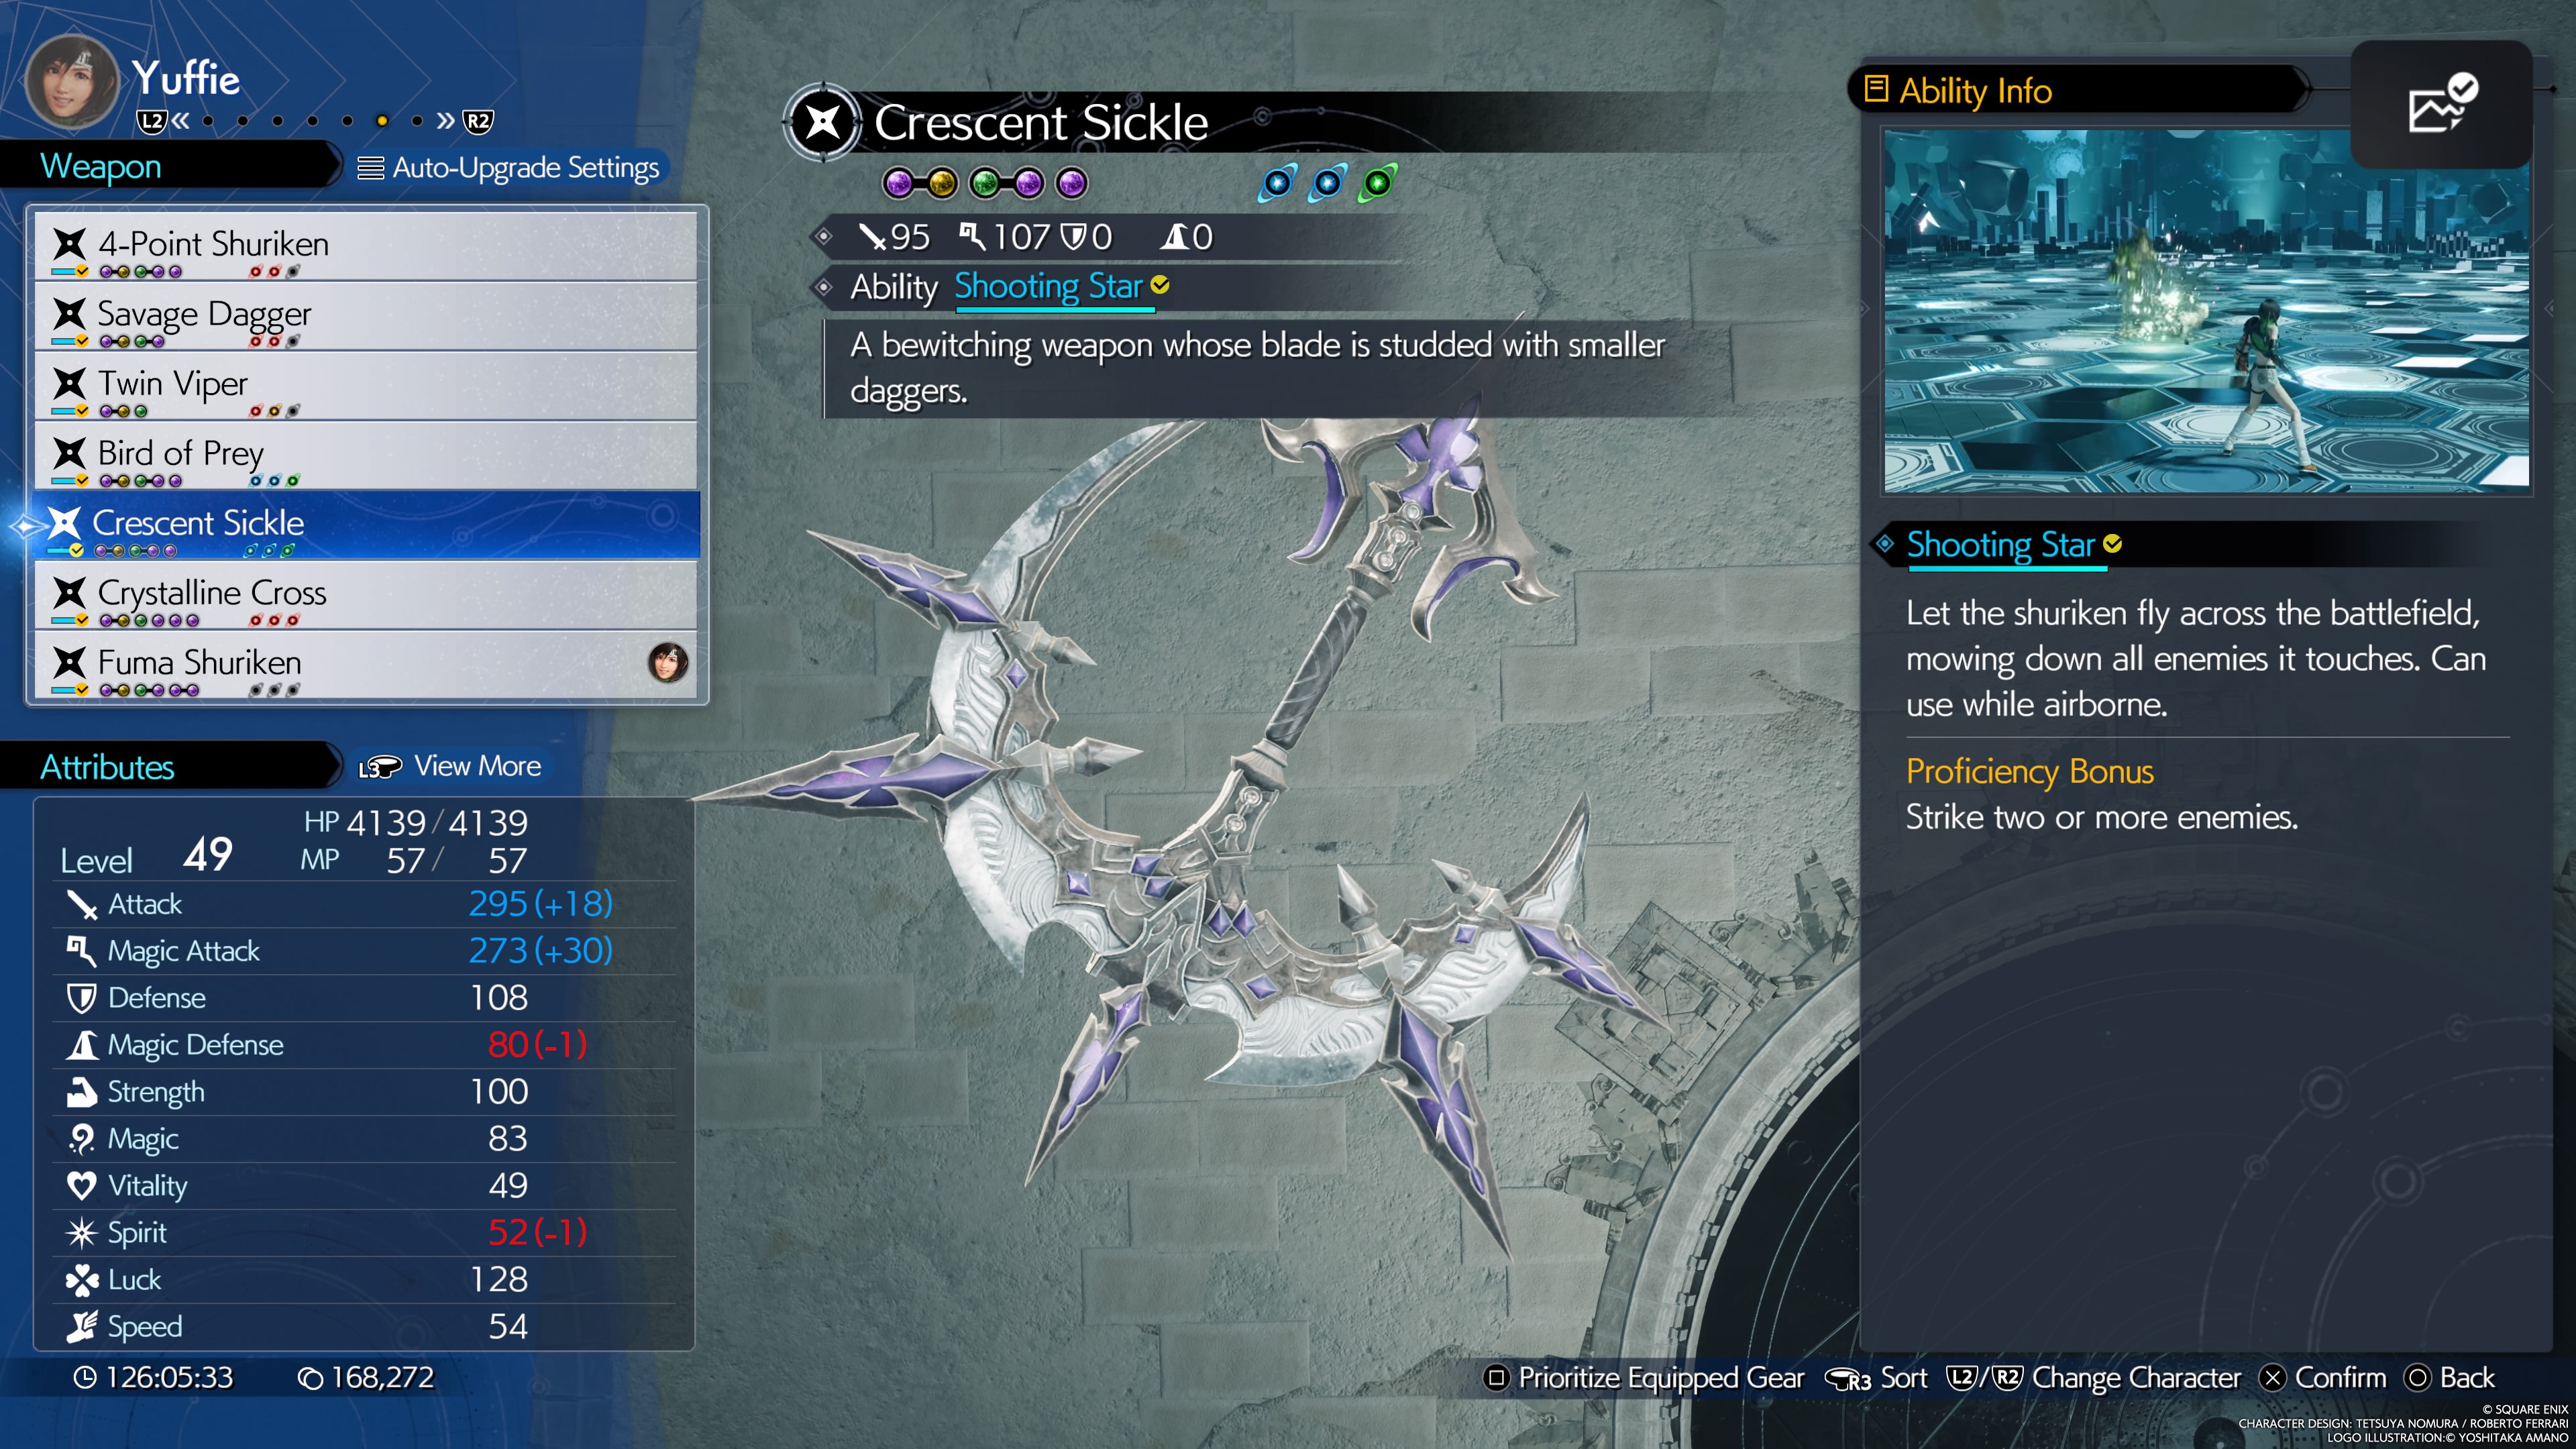
A bewitching weapon whose blade is studded with smaller daggers.
- Stats (Weapon Lv. 7): 95 Attack, 107 Magic
- Materia Slots (Weapon Lv. 7): 2x2, 1x1
- Weapon Ability: Shooting Star - Throw the shuriken across the battlefield, causing it to hit enemies in its path multiple times.
- Proficiency Bonus: Hit two or more enemies with the ability.
- Location: Achieve high-rank score in Glide de Chocobo minigame in Cosmo Canyon.
- Weapon Skills (Weapon Lv. 7):
- Shuriken Mastery
- Precision Defense ATB
- Attack Power +20 x2
- Enhanced Elements
- Opening ATB Bonus
- Synergy Damage Up +10%
Crystalline Cross
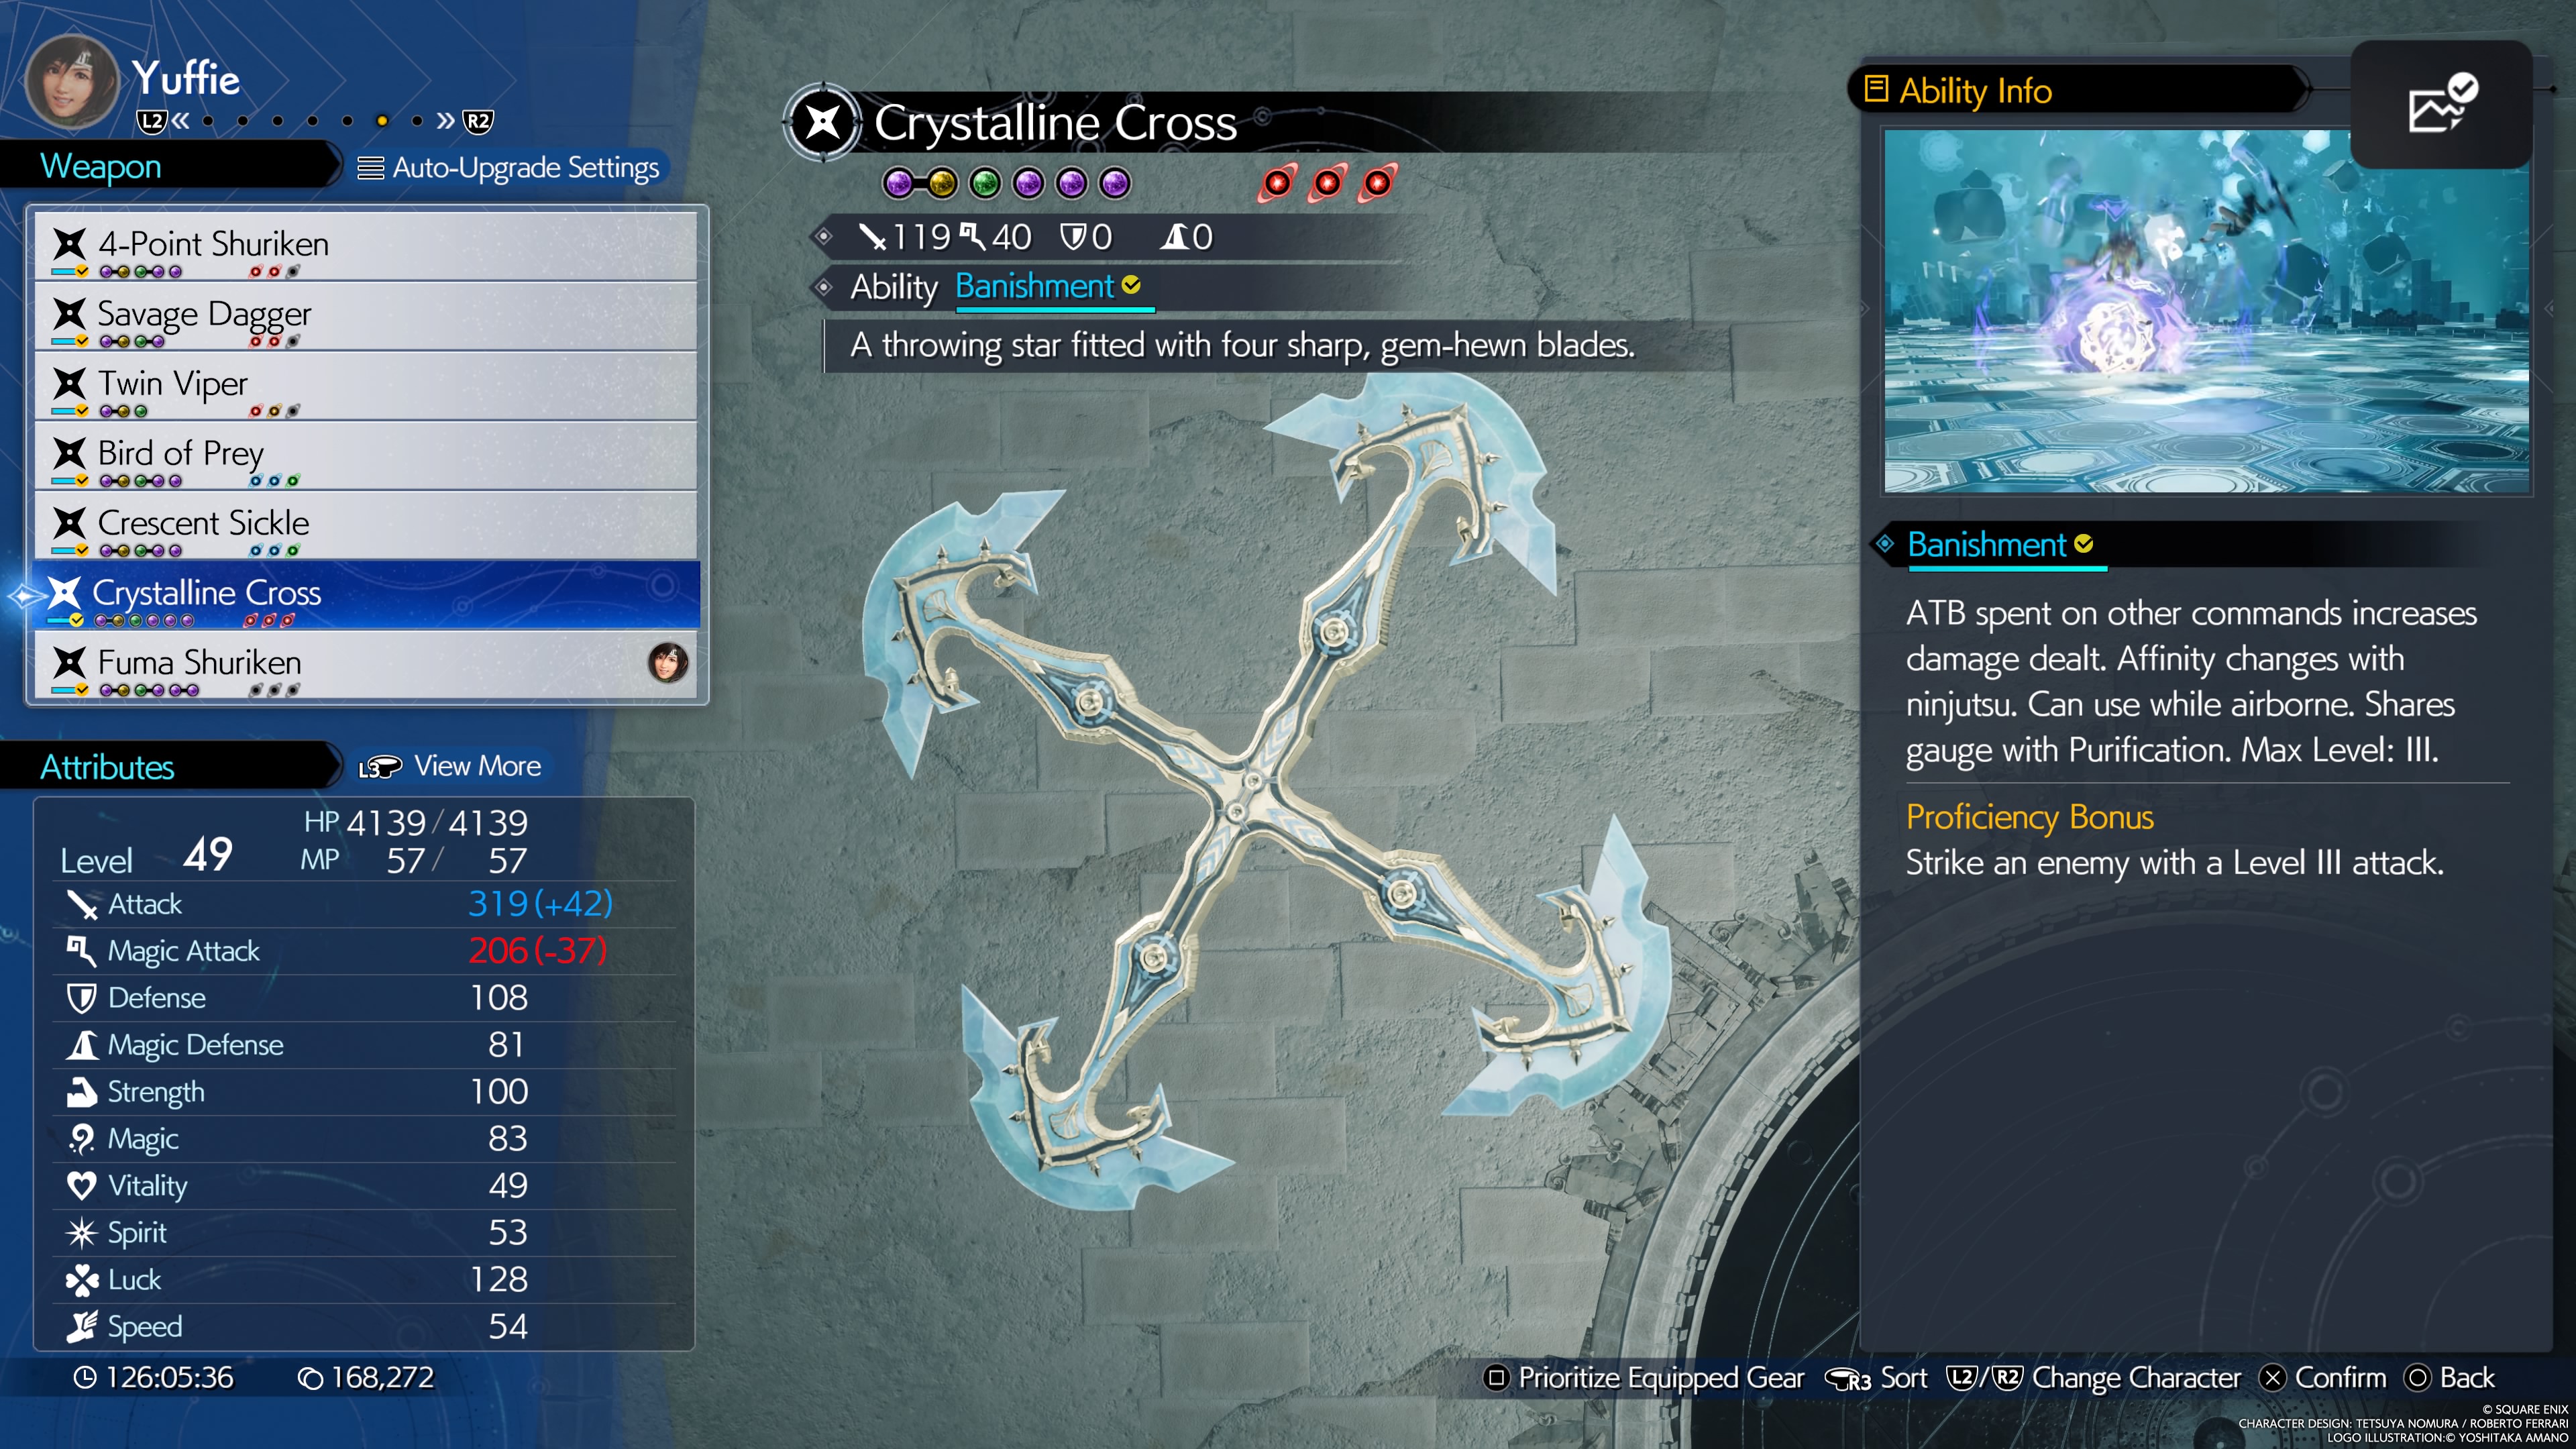
A throwing star fitted with four sharp, gem-hewn blades.
- Stats (Weapon Lv. 7): 119 Attack, 40 Magic
- Materia Slots (Weapon Lv. 7): 2x1, 4x1
- Weapon Ability: Banisment - Ranged magic attack whose element matches Elemental Ninjutsu setting. Charges up as Yuffie uses ATB on other abilities. Shares charge with Purification.
- Proficiency Bonus: Hit an enemy with a Level III charged Banishment.
- Location: Found in a chest while chasing a party member through the Gold Saucer's service area in Chapter 12.
- Weapon Skills (Weapon Lv. 7):
- Wind Damage Up +10%
- Lightning Damage Up +10%
- Brave Thief (Applies Bravery after successful steal)
- Max HP +200
- Magic Attack Power +20
- Debuff Extension
- Synergy Damage Up +10%
- Altruistic Recovery +10%
Fuma Shuriken
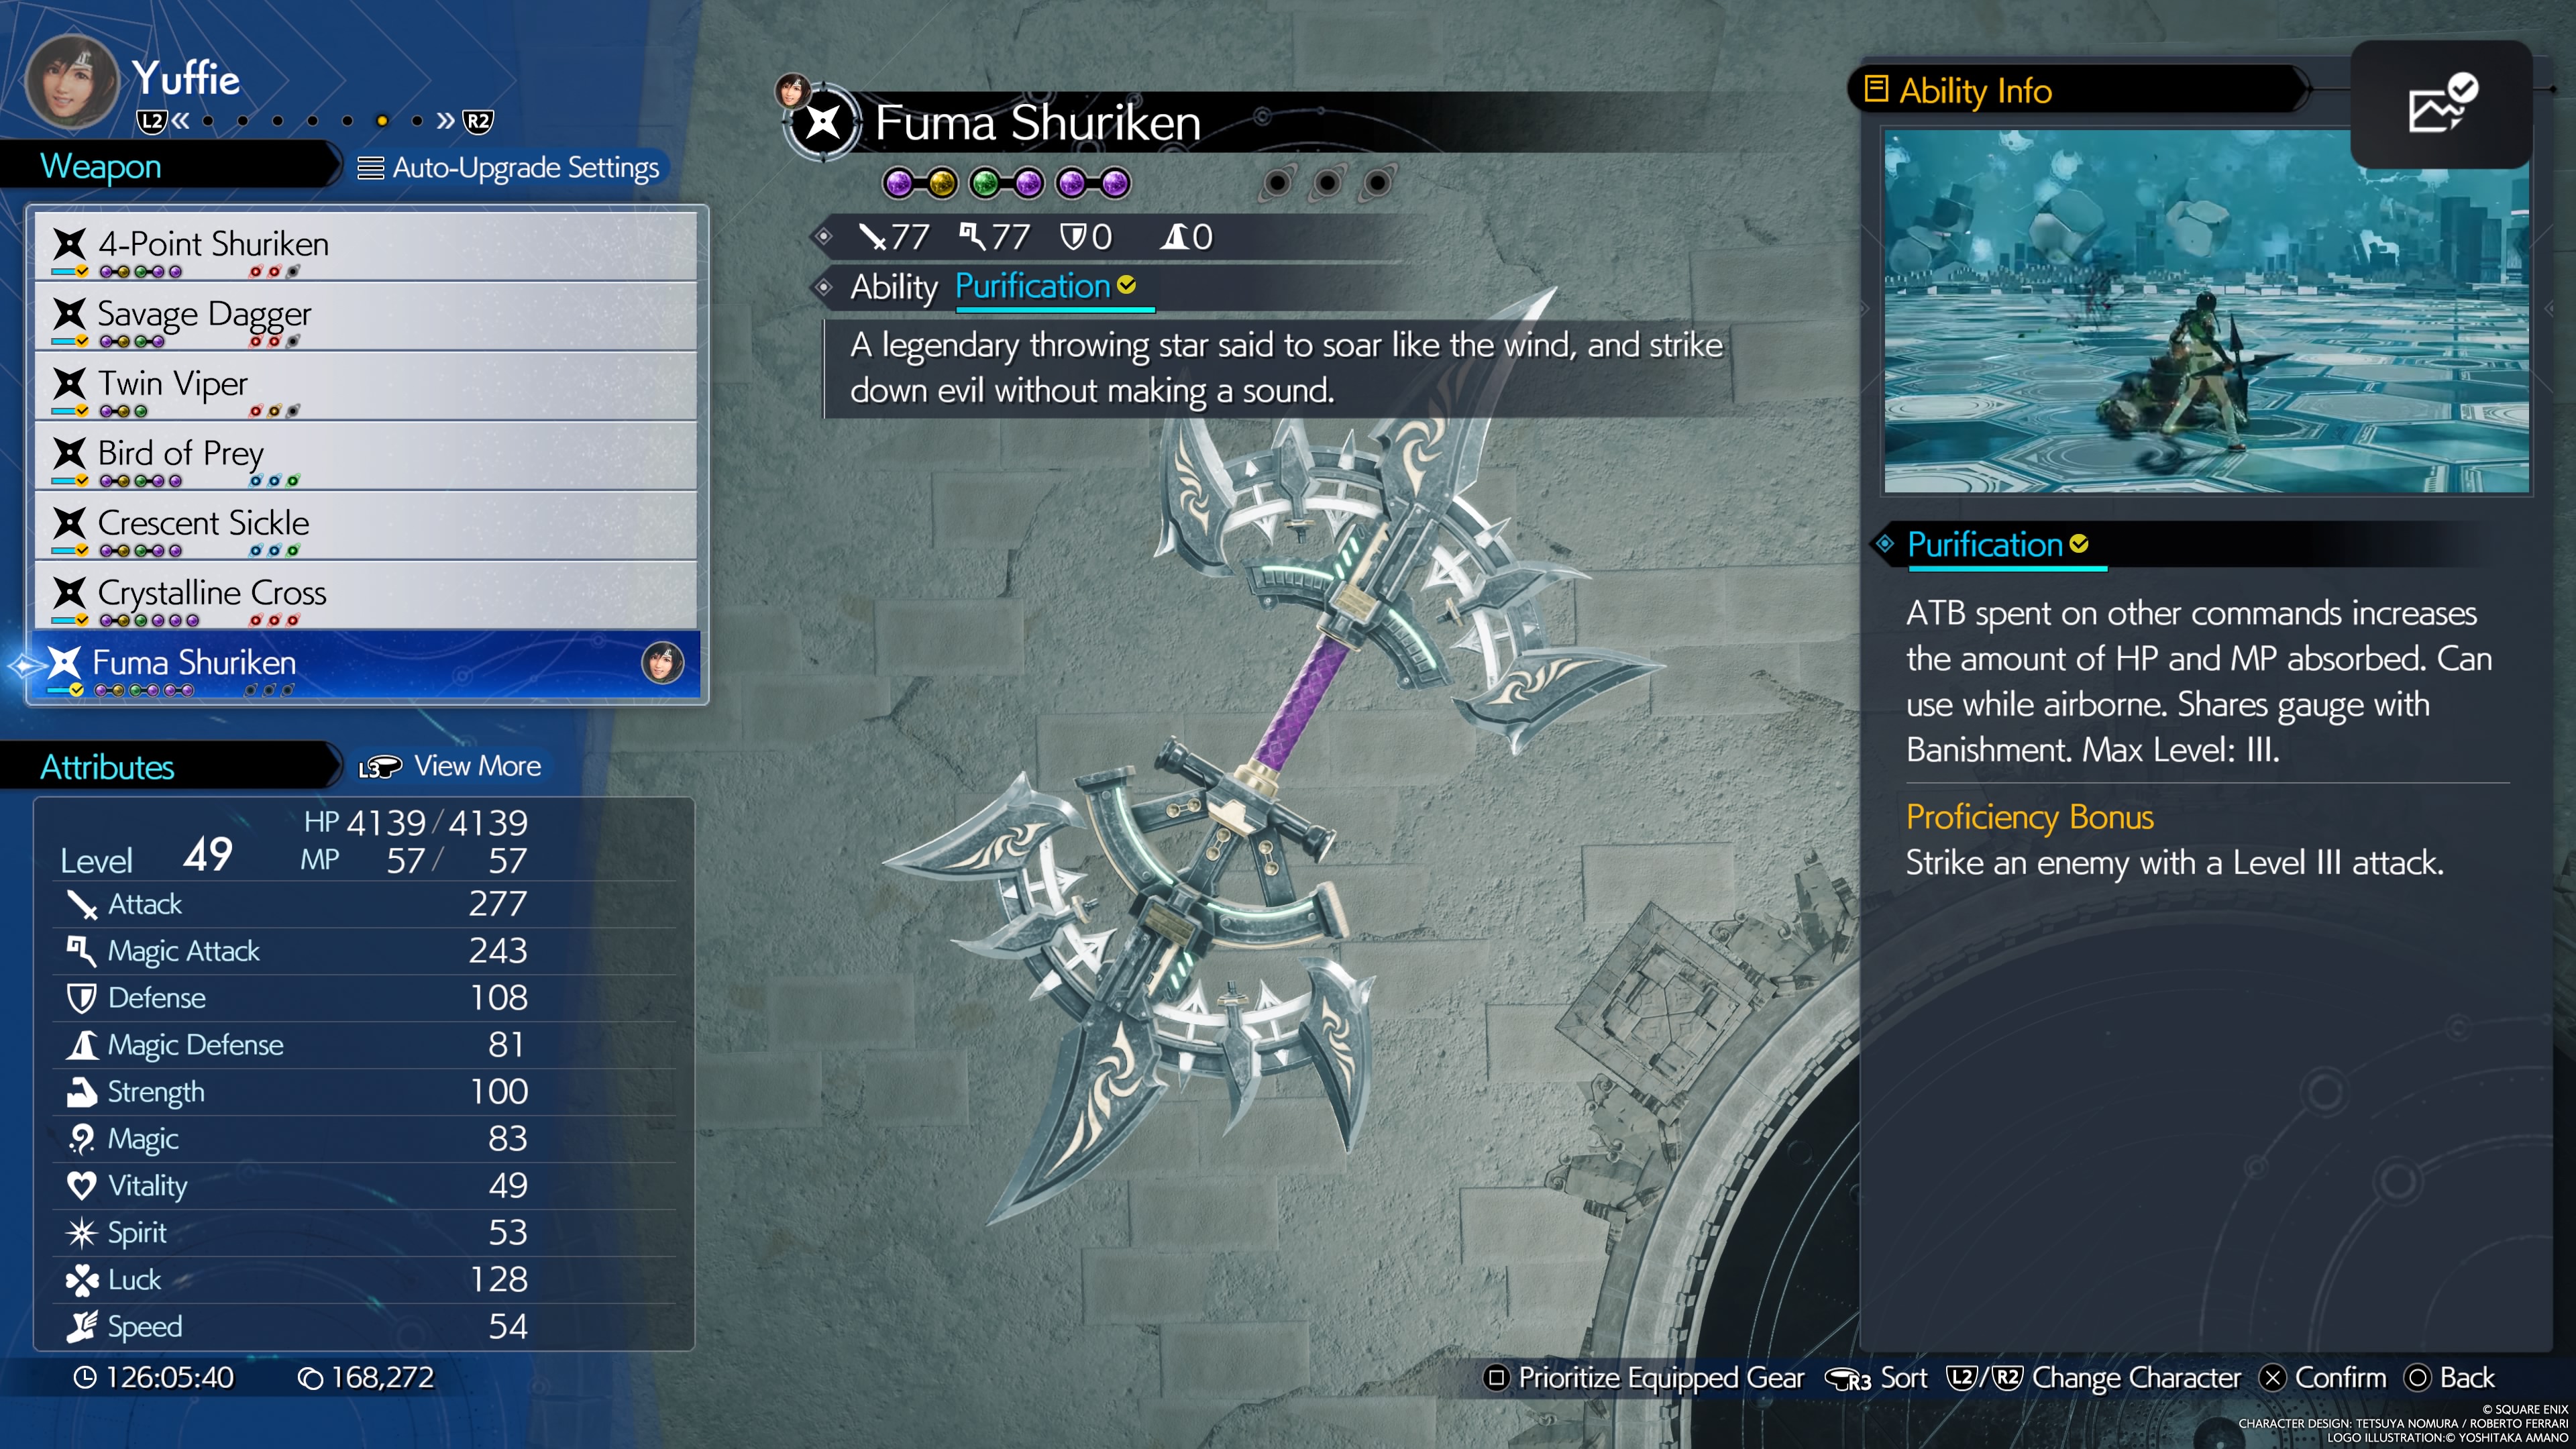
A sturdy, hardwood throwing weapon boasting a sharp metal blade.
- Stats (Weapon Lv. 7): 77 Attack, 77 Magic
- Materia Slots (Weapon Lv. 7): 3x2
- Weapon Ability: Purification - Non-elemental ranged magic attack that abssorbs HP and MP. Charges up as Yuffie uses ATB on other abilities. Shares charge with Banishment.
- Proficiency Bonus: Hit an enemy with a Level III charged Purification.
- Location: Found in the Temple of the Ancients, Shrine of Ambition area.
- Weapon Skills (Weapon Lv. 7):
- Fire Damage Up +10%
- Ice Damage Up +10%
- Attack Damage +5%
- Magic Attack Power +20
- ATB Charge Rate Up
- Shuriken Mastery (throw duration +25 sec.)
- Max MP +3
- MP Recovery Rate Up
Weapons for Cait Sith in Final Fantasy VII Rebirth
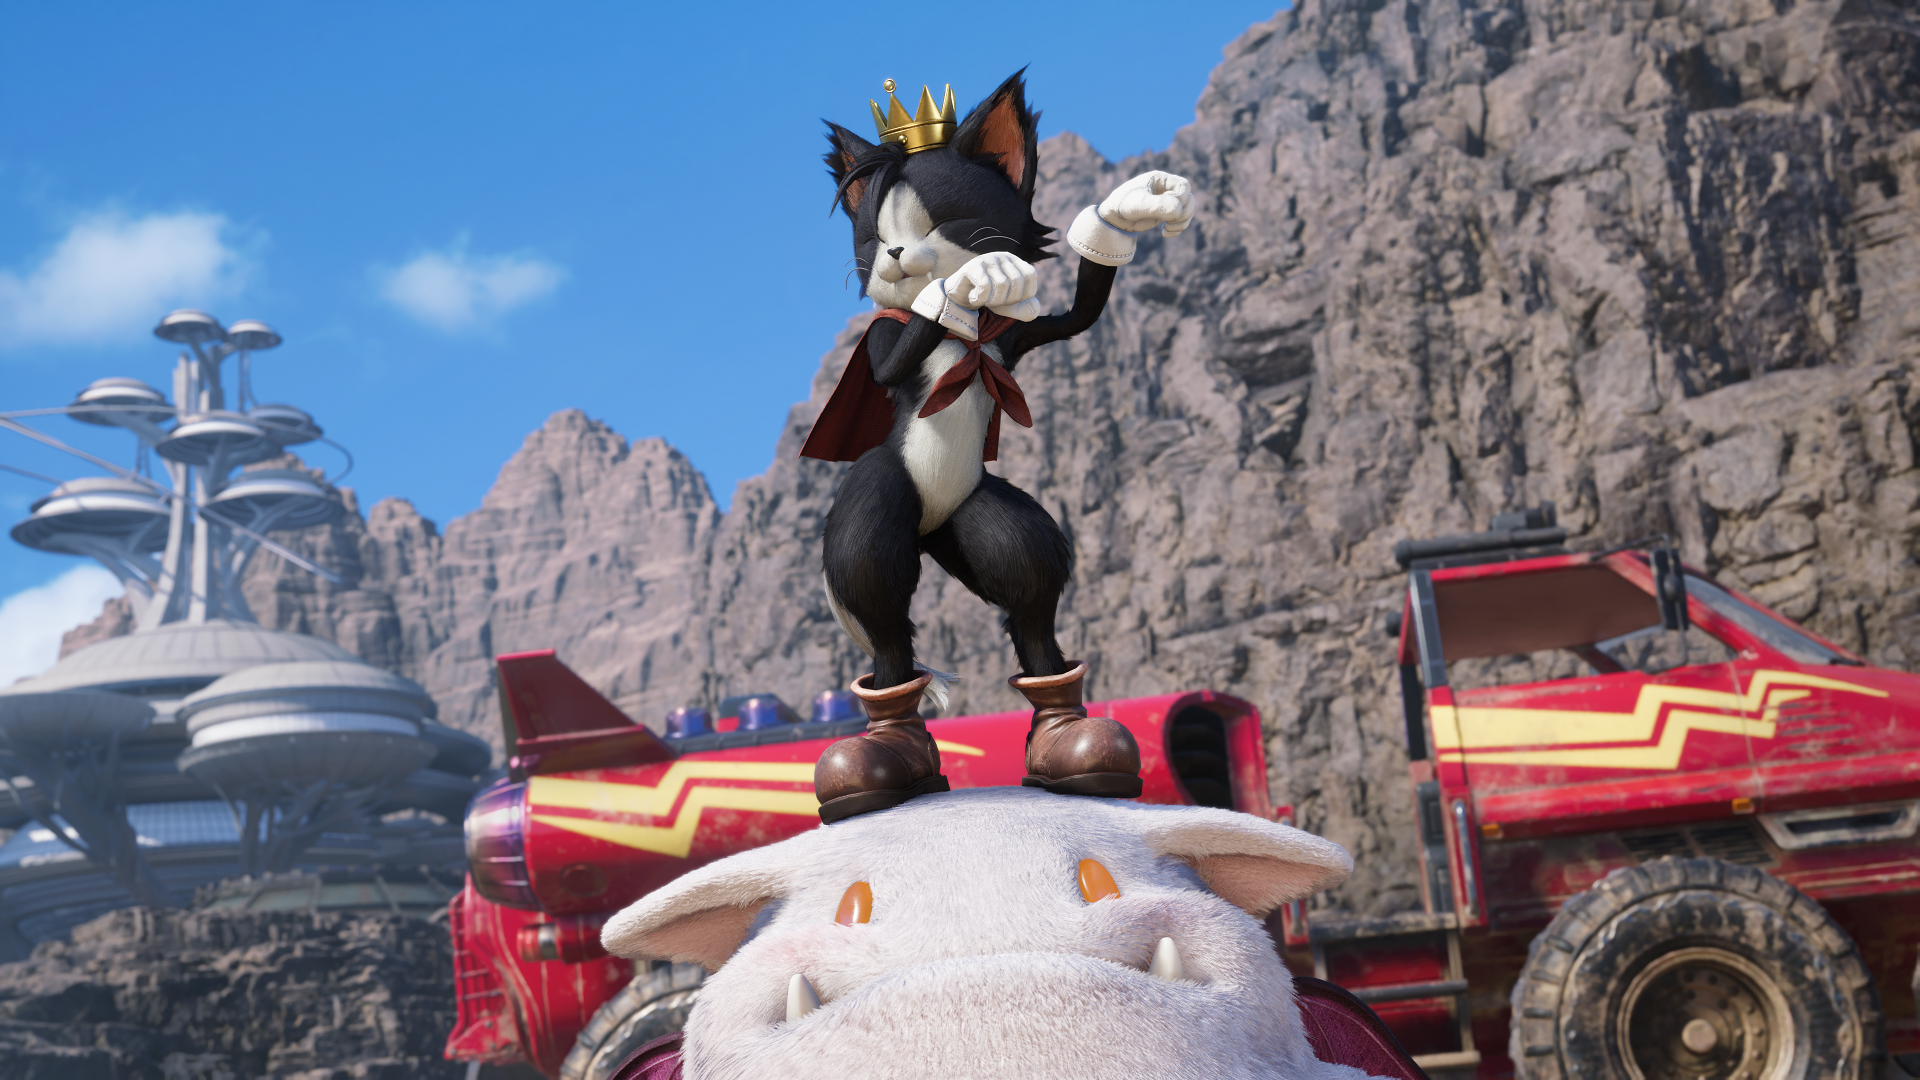
Cait Sith, the robotic fortune-telling cat is an unusual character with a slightly awkward fighting style, but a surprisingly malleable set of specialties depending on one's gear and Materia preferences. Cait's Megaphone-based weapons vary widely in their stat allocations, Materia slot configurations, and Weapon Skill loadouts.
- Yellow Megaphone
- Iron Megaphone
- Red Megaphone
- Resounding Megaphone
- Crystal Megaphone
- Golden Megaphone
- Gjallarhorn
Yellow Megaphone
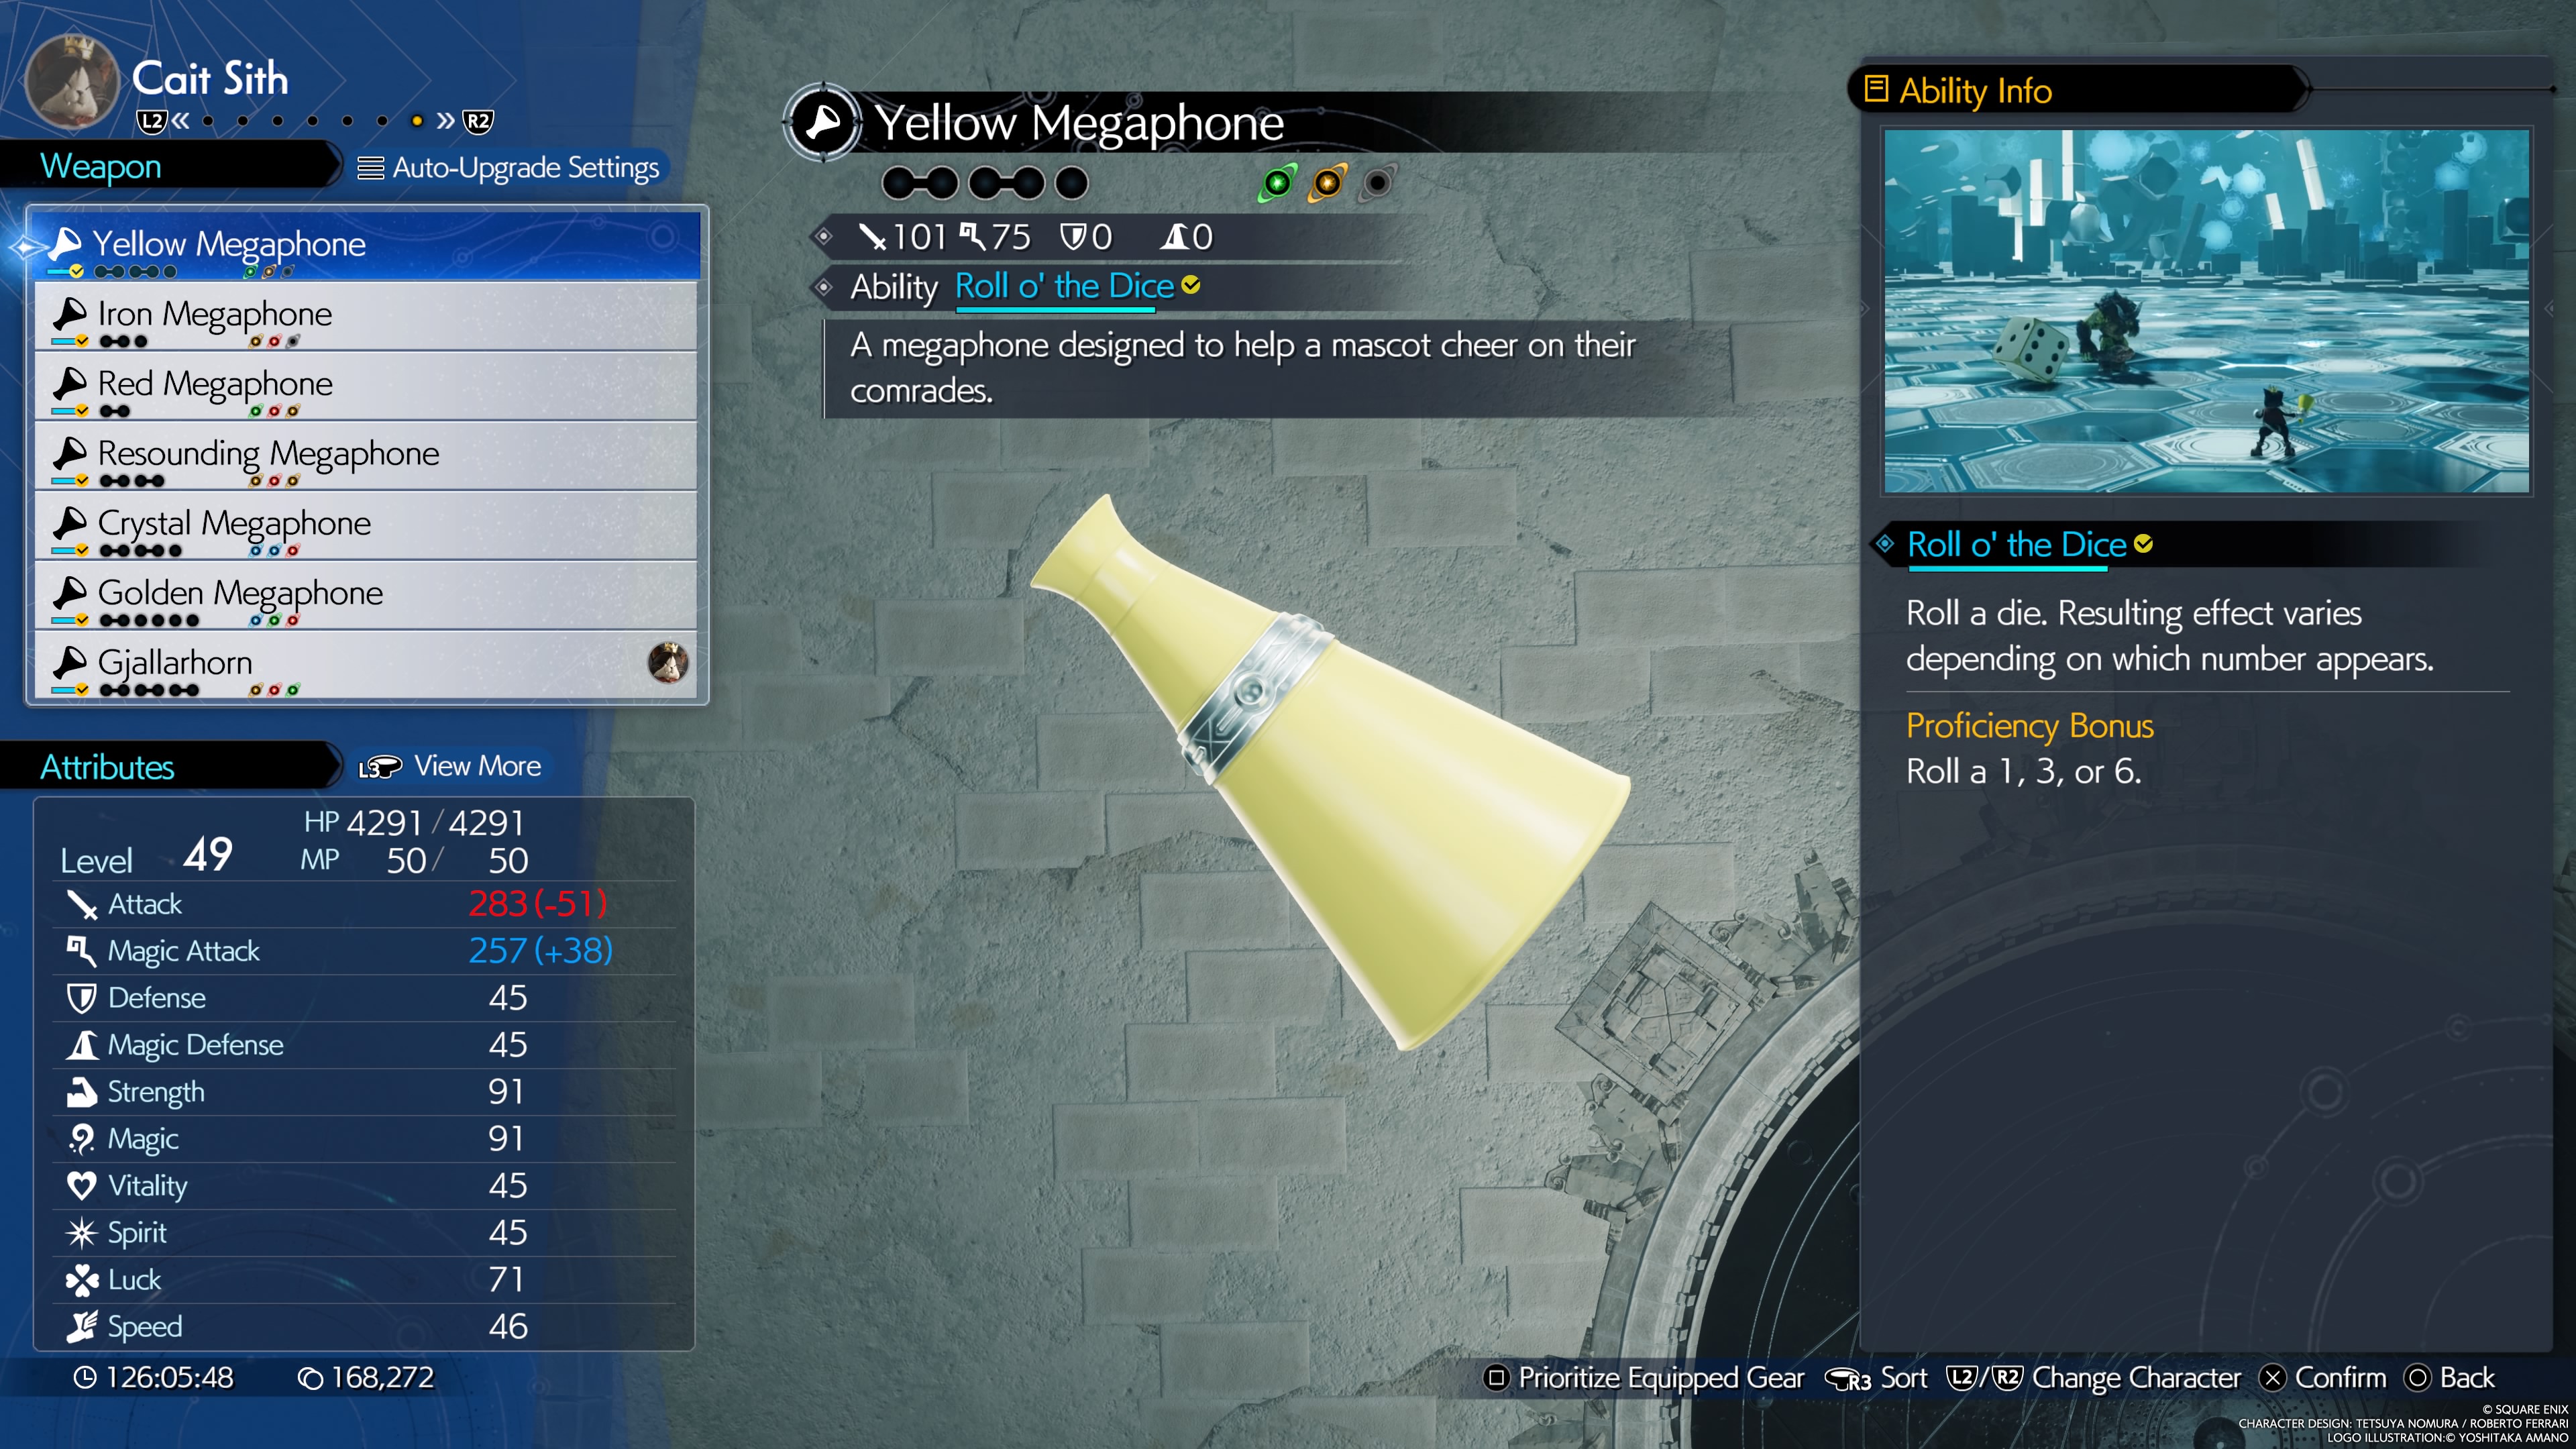
A megaphone designed to help a mascot cheer on their comrades.
- Stats (Weapon Lv. 7): 101 Attack, 75 Magic
- Materia Slots (Weapon Lv. 7): 2x2, 1x1
- Weapon Ability: Roll o' the Dice - Randomized dice roll with 6 different effects:
- Roll a 1: Fire & Thunder
- Roll a 2: Hypurr Beam
- Roll a 3: Aero & Blizzard
- Roll a 4: Total Outrage
- Roll a 5: Regenerative Aura
- Roll a 6: Expansive Shield
- Proficiency Bonus: Roll 1, 3, or 6 on the ability.
- Location: Cait Sith starts with this weapon.
- Weapon Skills (Weapon Lv. 7):
- Moogle Decoy (enemies more likely to attack the Moogle)
- Moogle Sentinel (Moogle takes 15% less damage)
- Lucky Jockey (Luck +100 when riding the Moogle)
- Moogle Vanguard (Moogle damage dealt +10%)
- MP Recovery Rate Up
- Max HP +200
- Weapon Ability Damage +5%
- Attack Damage +5%
Iron Megaphone
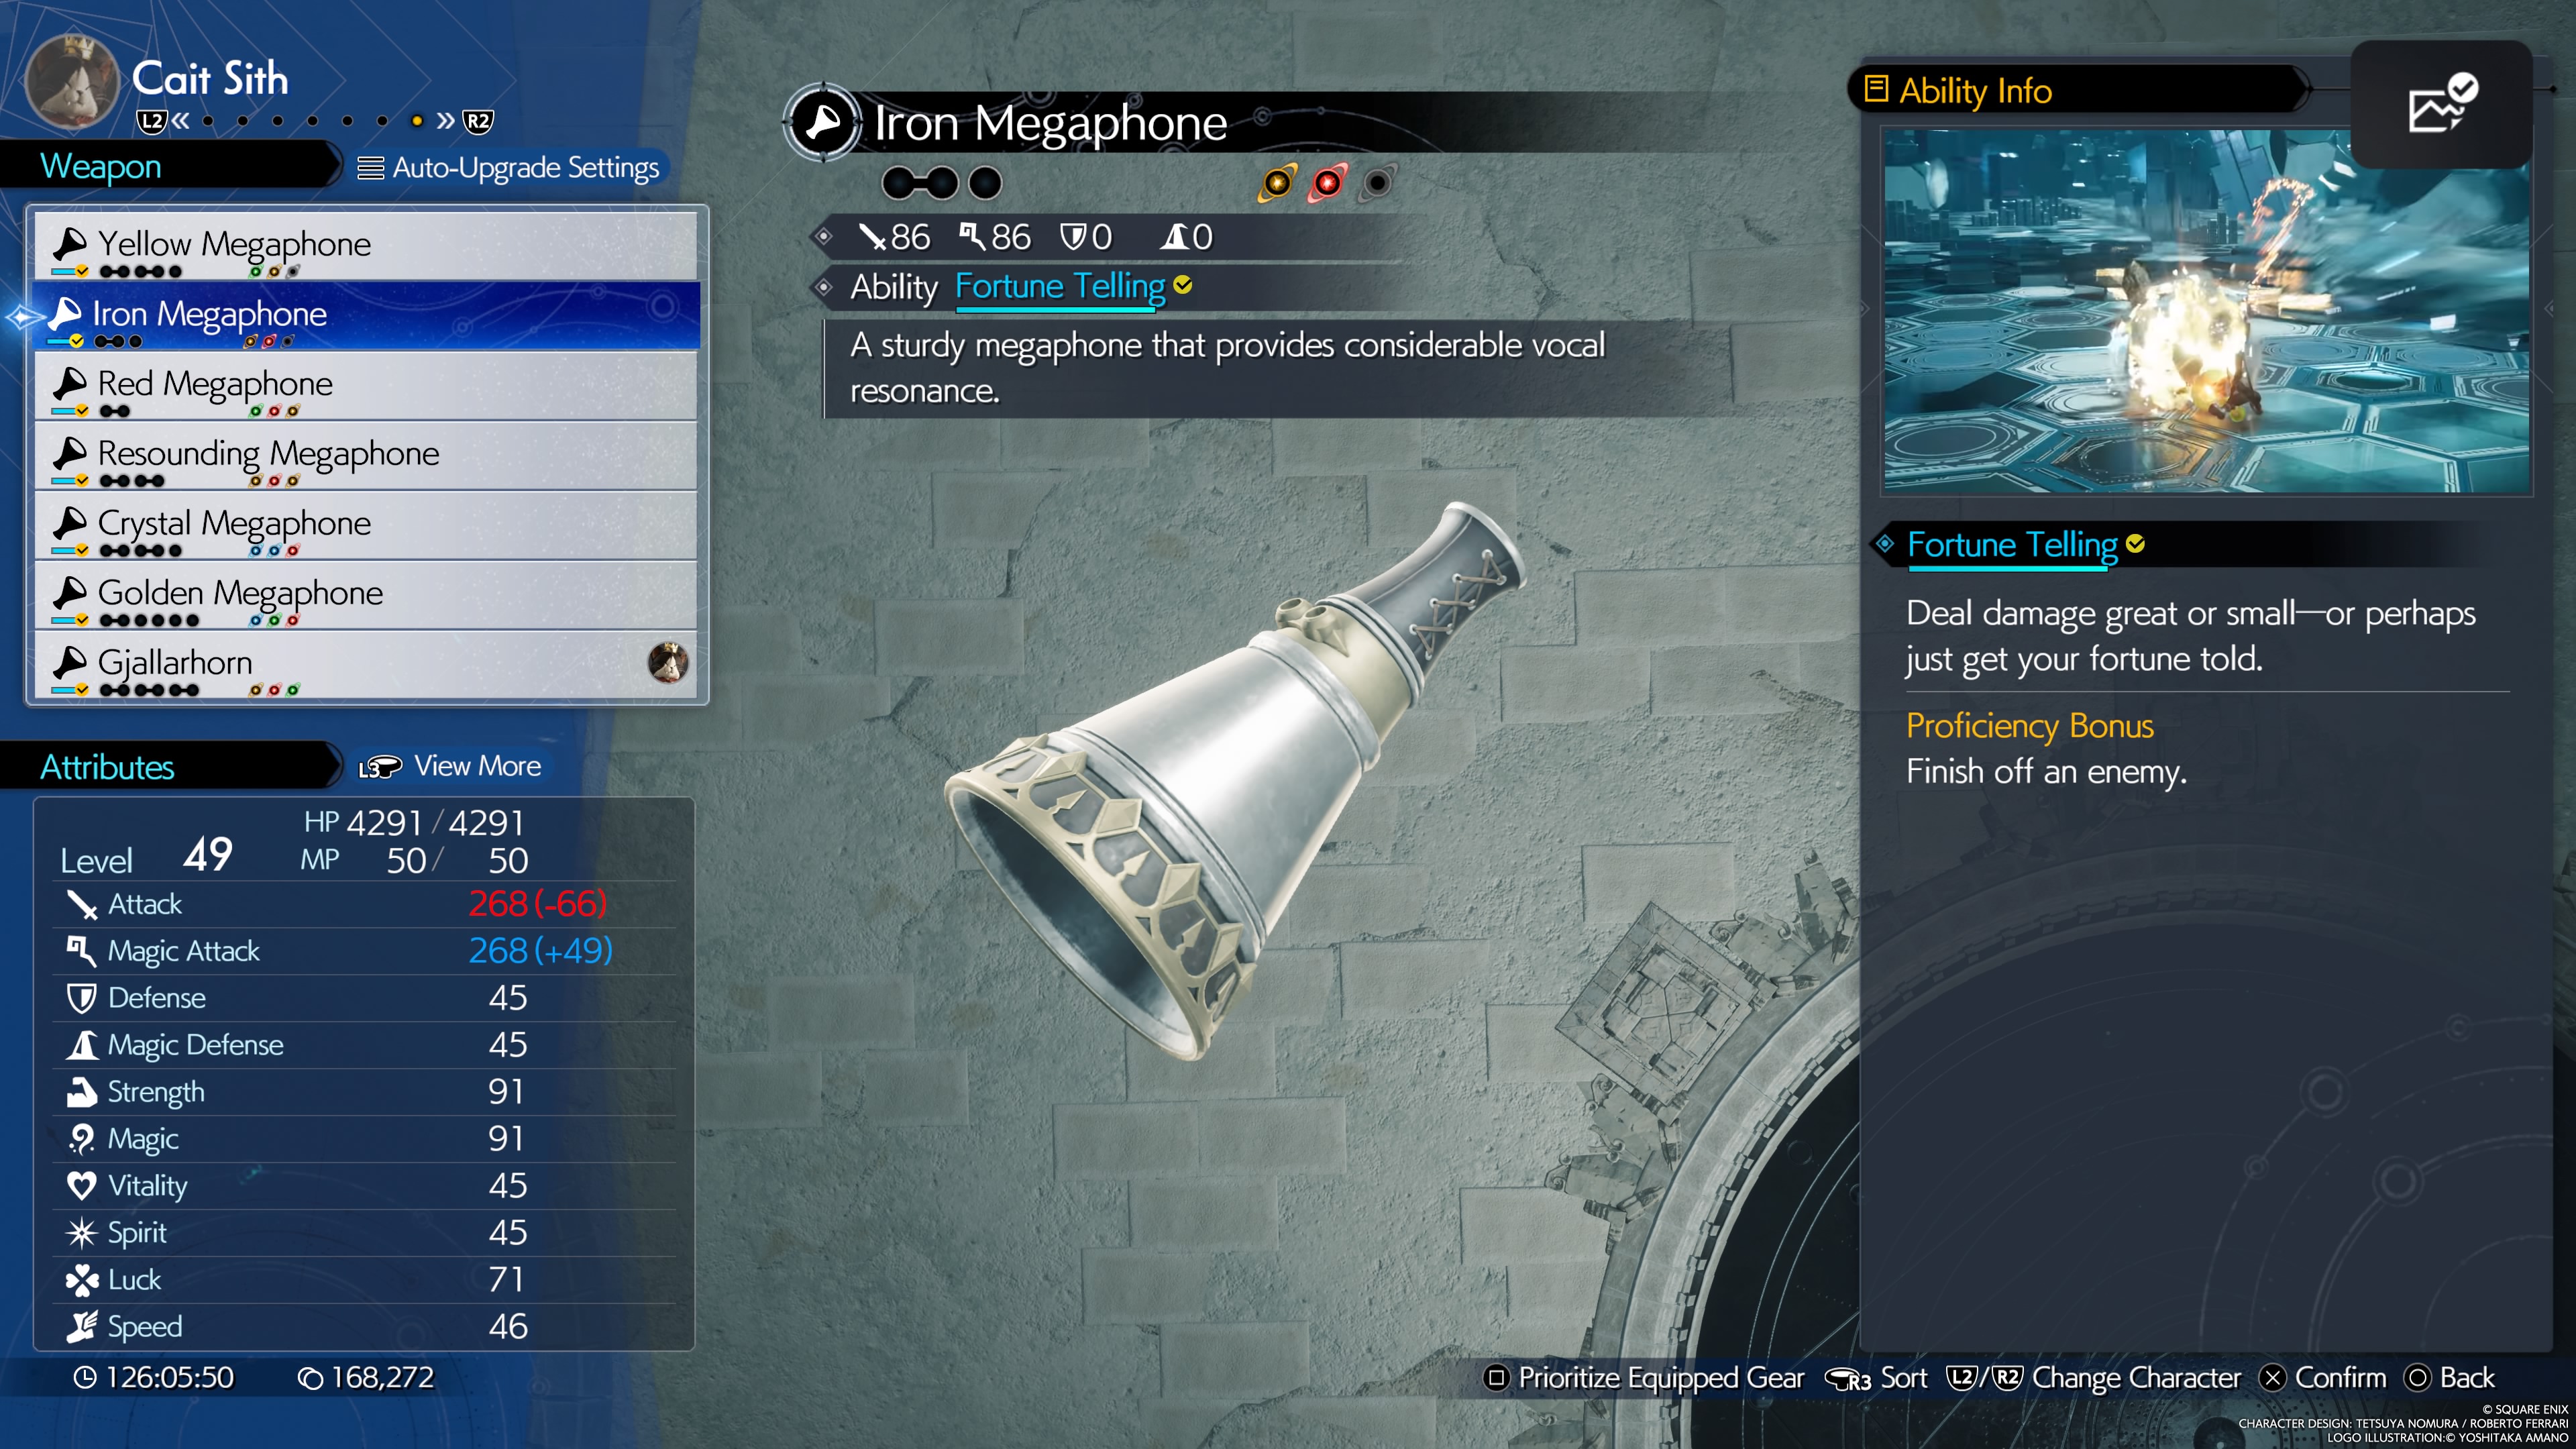
A sturdy megaphone that provides considerable vocal resonance.
- Stats (Weapon Lv. 7): 86 Attack, 86 Magic
- Materia Slots (Weapon Lv. 7): 2x1, 1x1
- Weapon Ability: Fortune Telling - A melee hit that does random damage.
- Proficiency Bonus: Finish off an enemy with the ability.
- Location: Cait Sith's second starter weapon.
- Weapon Skills (Weapon Lv. 7):
- Moogle Vanguard
- Moogle Sentinel
- Attack Damage +5%
- Debuff Extension x2
- Max MP +3 x2
- Attack Power +20
Red Megaphone

A megaphone that helps its user pour their heart into their cheering.
- Stats (Weapon Lv. 7): 111 Attack, 67 Magic
- Materia Slots (Weapon Lv. 7): 2x1
- Weapon Ability: Moogle Kaboom - Turns the moogle into a suicide time bomb that explodes when the Moogle leaves combat.
- Proficiency Bonus: Strike an enemy with the explosion.
- Location: Found in a chest in a riverside cave underneath Gongaga village.
- Weapon Skills (Weapon Lv. 7):
- Lucky Jockey x2
- Moogle Vanguard
- Critical Hit Damage +10% x2
- MP Recovery Rate Up
- Critical Hit Rate +5%
- Limit Break Damage +10%
Resounding Megaphone
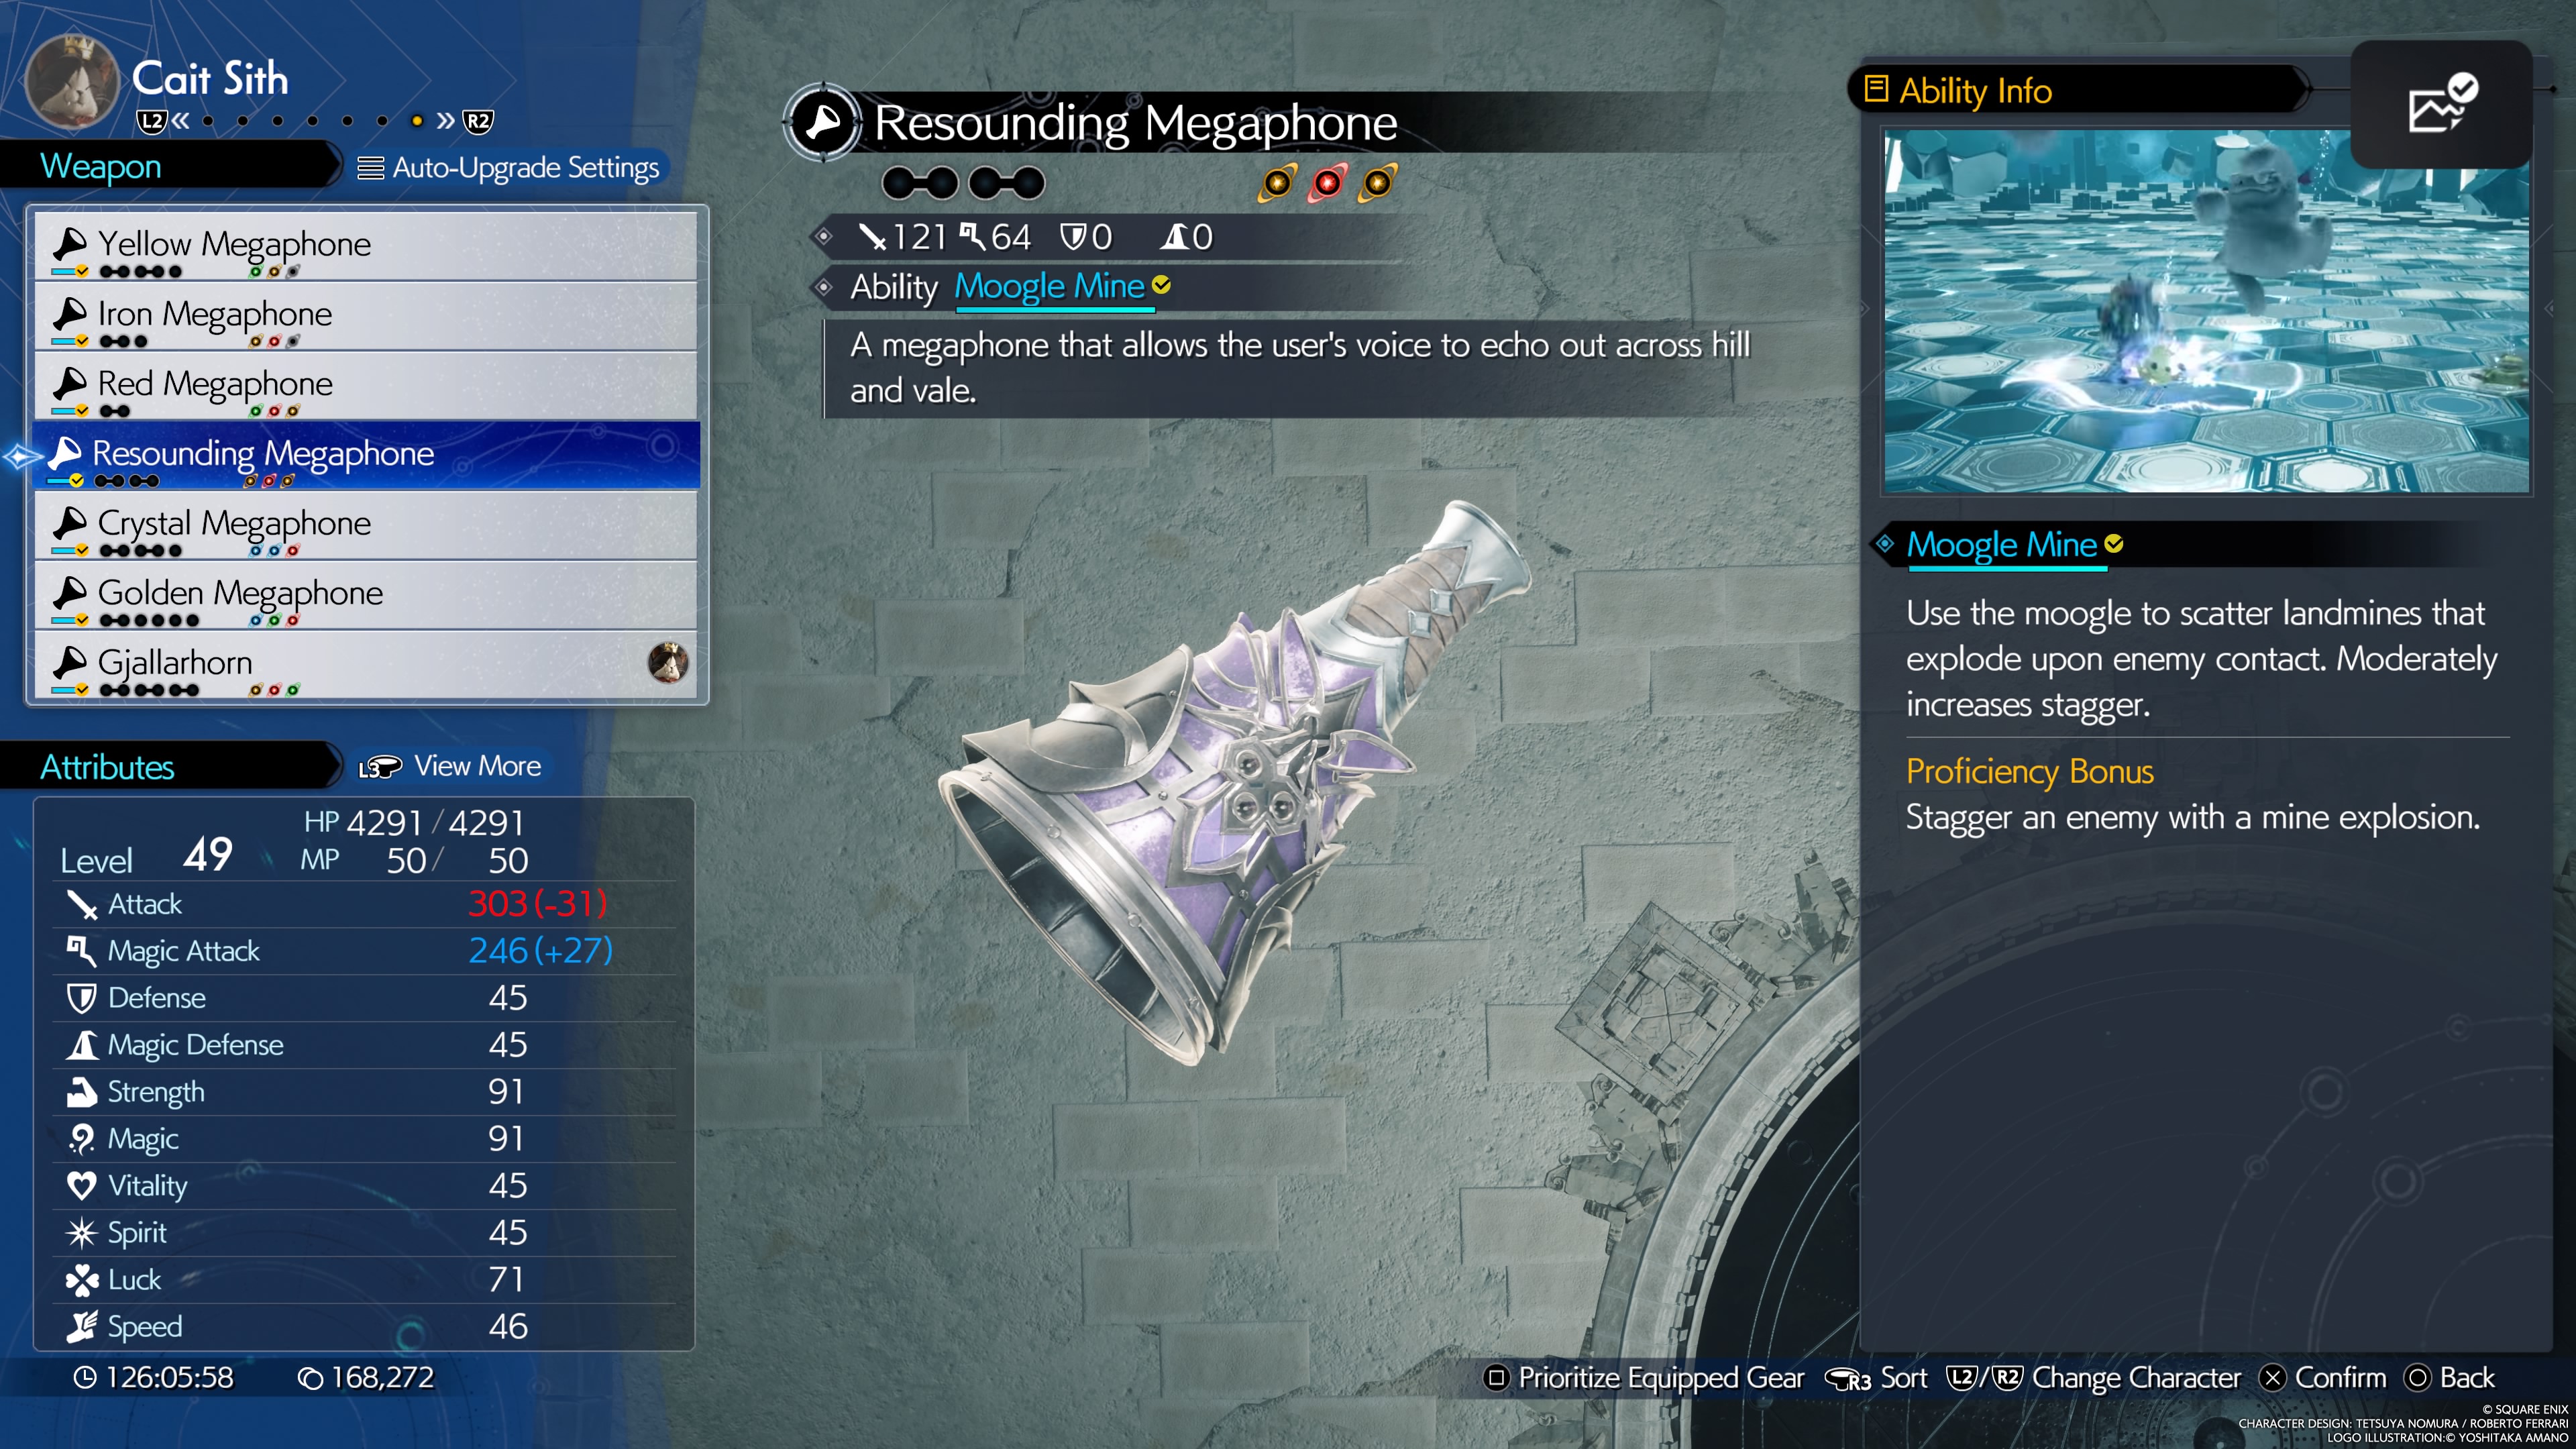
A megaphone that allows the user's voice to echo out across hill and vale.
- Stats (Weapon Lv. 7): 121 Attack, 64 Magic
- Materia Slots (Weapon Lv. 7): 2x2
- Weapon Ability: Moogle Mine - Scatters landmines that increase stagger on contact with a foe.
- Proficiency Bonus: Stagger an enemy with a mine explosion.
- Location: Found at the Gongaga Airstrip in Chapter 9, near the phone booth. If missed it will be next seen at the Nibelheim item shop for 7,500 Gil.
- Weapon Skills (Weapon Lv. 7):
- Moogle Decoy x2
- Moogle Sentinel
- Altruistic Recovery +10%
- Enhanced Physical Guard
- Selfish Recovery +25%
- Altruistic Buff Up
- Selfish Buff Up
Crystal Megaphone
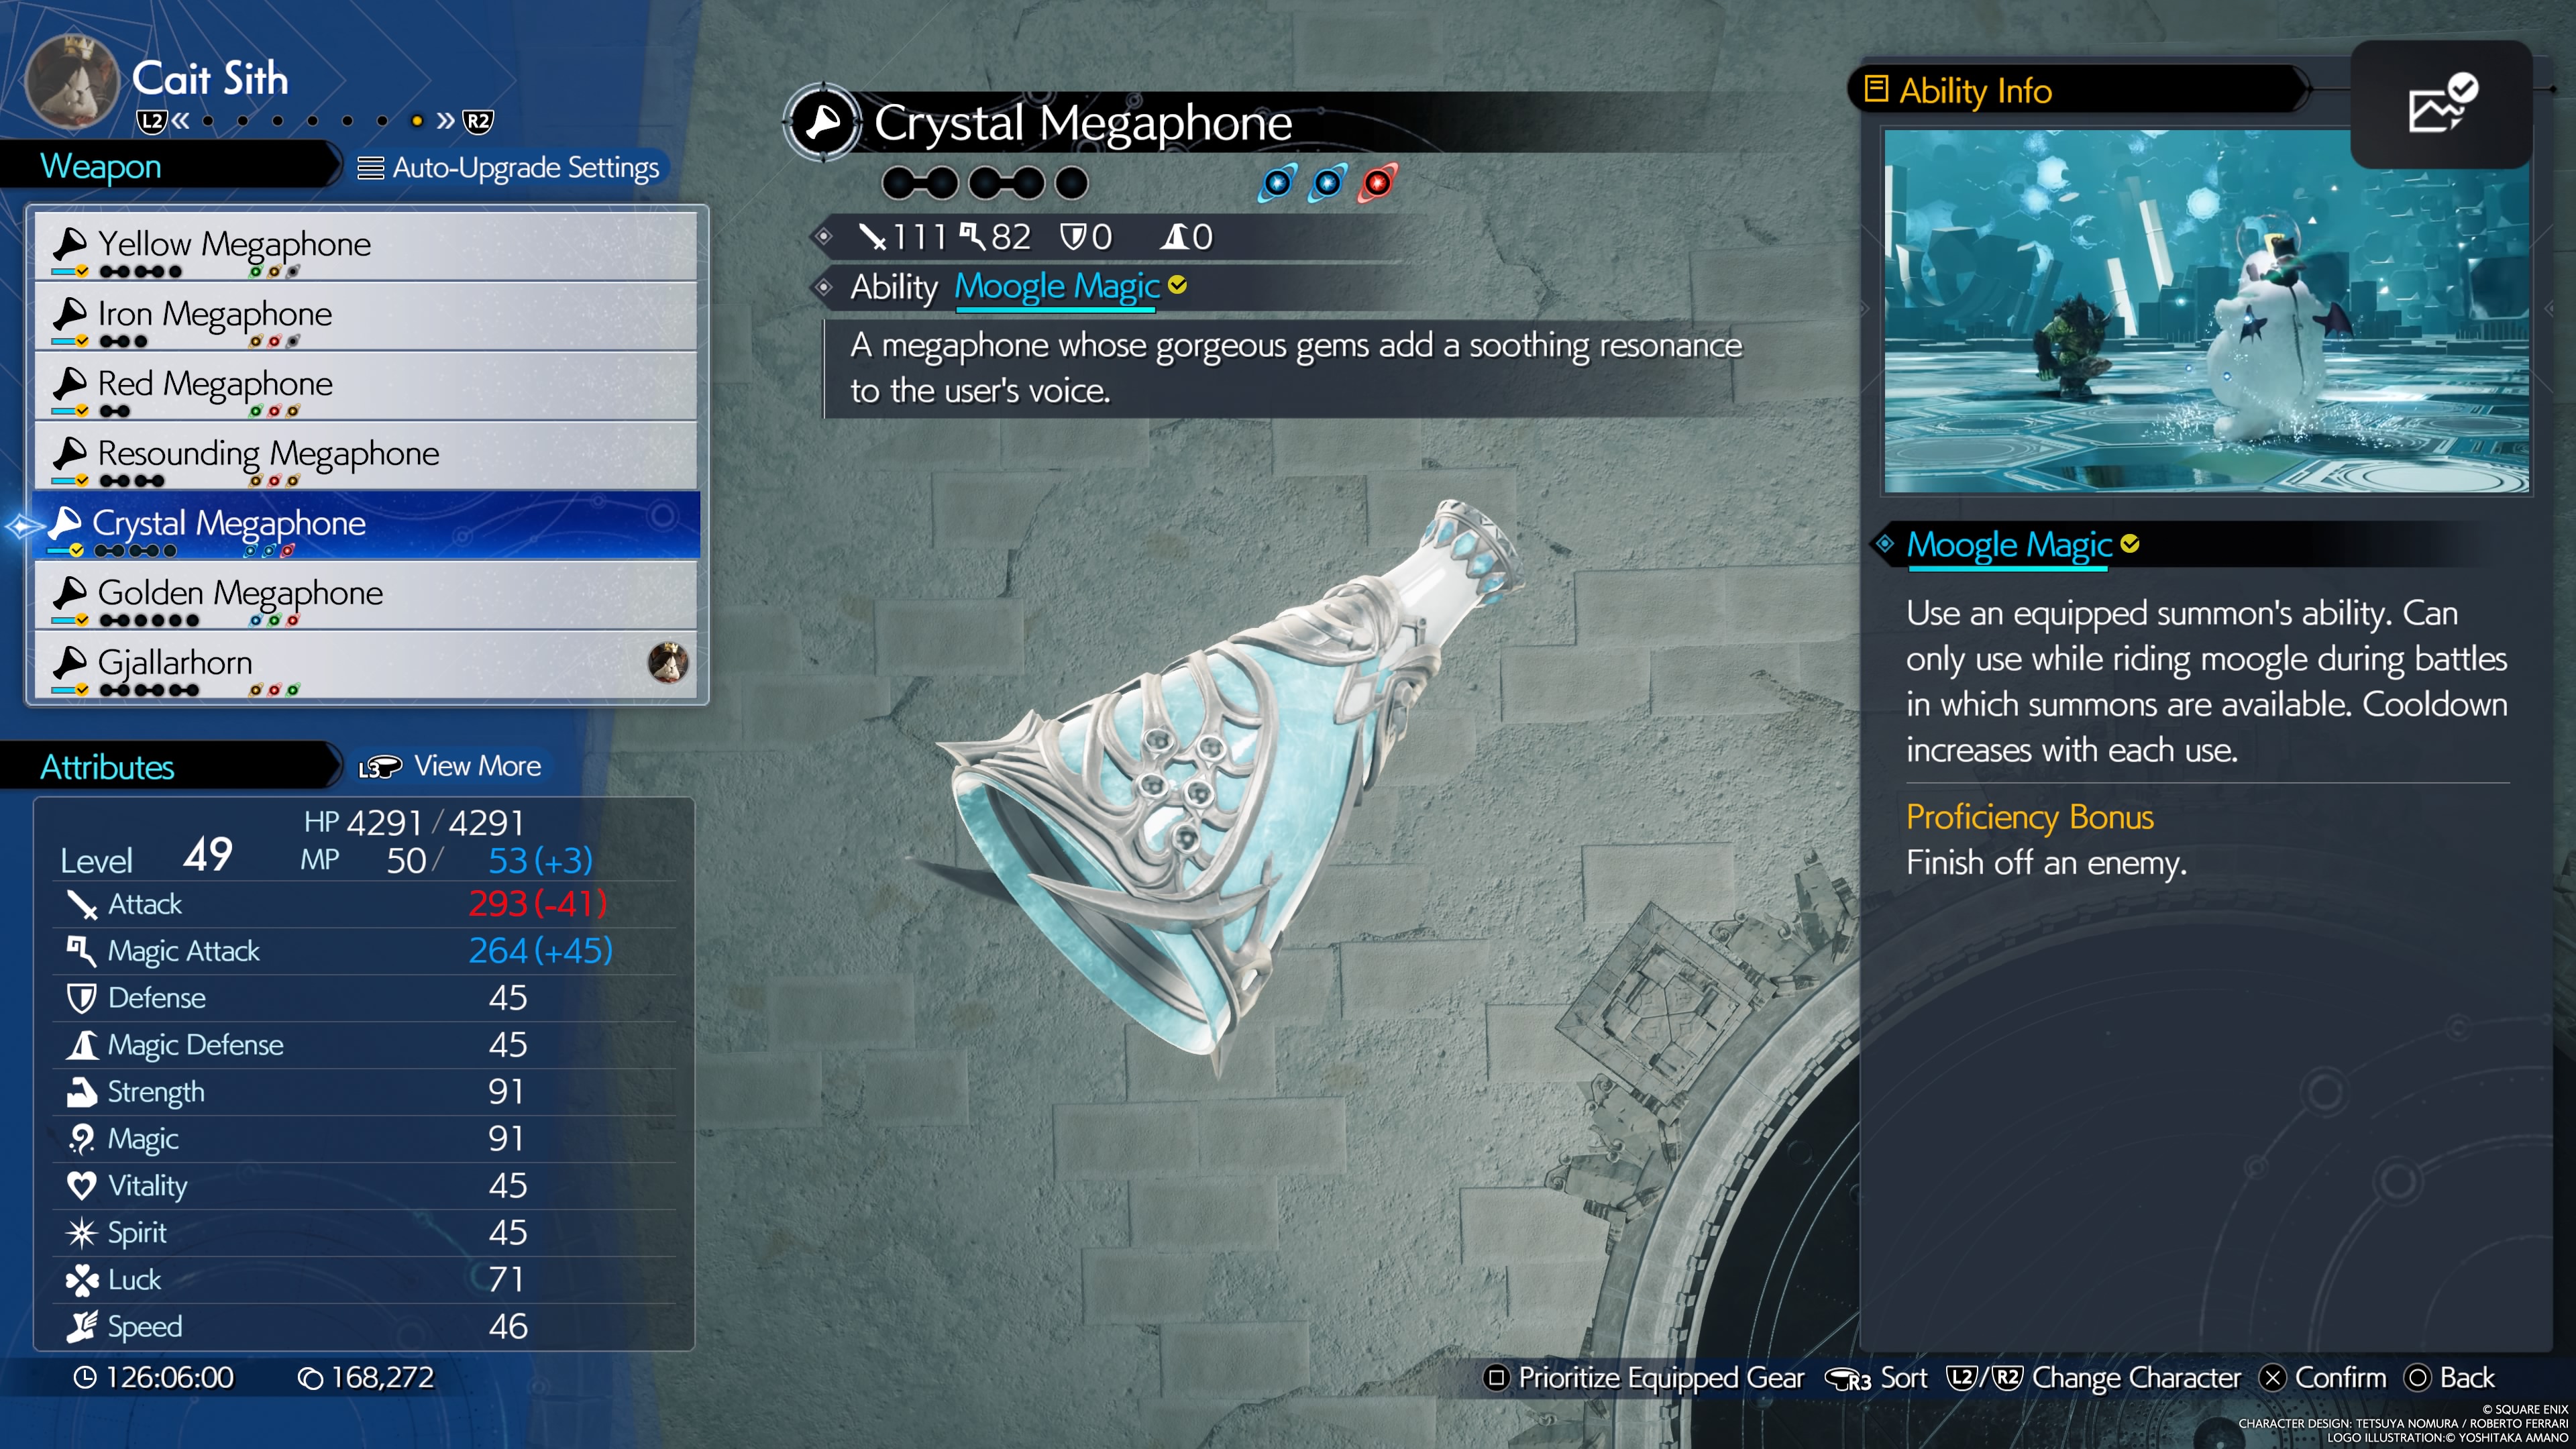
A megaphone whose gorgeous gems add a soothing resonance to the user's voice.
- Stats (Weapon Lv. 7): 111 Attack, 82 Magic
- Materia Slots (Weapon Lv. 7): 2x2, 1x1
- Weapon Ability: Moogle Magic - Briefly calls in a summon to use one of its abilities. Only usable in battles where summons are allowed, and while riding the Moogle. Cooldown increases with each use.
- Proficiency Bonus: Finish off an enemy with the summon's ability.
- Location: Found in the treasury of the Cosmo Canyon observatory.
- Weapon Skills (Weapon Lv. 7):
- Moogle Sentinel
- Lucky Jockey
- Attack Damage +5%
- Offensive MP Saver
- Restorative MP Saver
- Max MP +3
- Attack Power +20
- MP Recovery Rate Up
Golden Megaphone

A glimmering megaphone used by some to scare off the most ferocious of beasts.
- Stats (Weapon Lv. 7): 71 Attack, 101 Magic
- Materia Slots (Weapon Lv. 7): 2x1, 4x1
- Weapon Ability: Moogle Knuckle - Powerful melee hit from the Moogle. Increased stagger damage bonus.
- Proficiency Bonus: Strike a staggered enemy with the ability.
- Location: Found behind a switch-operated cell door in Shinra Manor's Mako Research facility.
- Weapon Skills (Weapon Lv. 7):
- Moogle Vanguard
- Weapon Ability Damage +5%
- Attack Power +20
- Max HP +200
- Max MP +3
- Limit Break Damage +10%
- ATB Charge Rate Up
- Enemy Parts Damage Up
Gjallarhorn

A luxurious megaphone passed down from one Kitty King to the next.
- Stats (Weapon Lv. 7): 152 Attack, 37 Magic
- Materia Slots (Weapon Lv. 7): 3x2
- Weapon Ability: Lady Luck - Increases the party's Critical Hit Rate.
- Proficiency Bonus: Use the ability on a 3-person party.
- Location: Earned by finding 45 tufts of chocograss in the Nibel Region using an Ocean Chocobo, for the "Chocograss Collector" Discovery Goal.
- Weapon Skills (Weapon Lv. 7):
- Moogle Decoy
- Lucky Jockey
- Magic Attack Power +20
- Synergy Damage Up +10%
- ATB Limit (spending ATB charges fills the limit gauge)
- Opening ATB Bonus
- Max MP +3
- Max HP +200
The Best Weapon for Each Character in Final Fantasy VII Rebirth
As in FF7 Remake, FF7 Rebirth's weapon upgrade system ensures that weapons aren't too widely separated in overall attribute gains. Every weapon's level is pegged to the Weapon Level of the character, which means that one's choice of weapon will largely depend on a combination of Materia slots, Weapon Skills, and stat leans. Each weapon strikes a balance between Attack and Magic Attack that typically biases it towards one or another, allowing you to decide how best to equip a character.
One wrinkle in weapons that's been smoothed out is the elimination of weapons that drastically change the combat style of the character. That means Barret won't be getting any melee weapons in Rebirth and Cloud's Punisher Mode will work the same no matter what greatsword he has equipped. Instead, you'll make a weapon unique by using it and its weapon skills to alter the performance characteristics born from your choice of Armor, Accessory, and Materia loadout.
Note that Weapon Abilities are easy to master and are accessible on any weapon once mastered. If you end up with a new weapon that doesn't suit your build, simply keep it equipped long enough to master its ability and ditch it for your preferred weapon.
Best Weapons for Cloud in FF7 Rebirth
Being mandatory for most party selections by default, Cloud is a jack of all trades - and a master of most. With high Attack and Magic stats and a bevy of powerful Weapon Abilities, Cloud should be up front and fighting regardless of whether he's specced towards magical or physical damage. That said, the adjusted MP economy in FF7 Rebirth and close-range nature of most of Cloud's best tricks means that everyone's favorite loner merc is a bit wasted in a caster role. At the same time, as the party member with the most presence, you'll want to give him key Materia to make sure it's available most times, so having a good number of slots is always preferable.
- For pure physical damage, the Igneous Saber is Cloud's best friend. It has the strongest stat bias towards physical attack, and its weapon skills further enhance Cloud's damage output, particularly in conjunction with Punisher Mode. It also has a good number of Materia slots, and the one linked pair it has is enough to give Cloud an Elemental + Elemental Spell Materia to add to his basic attack damage.
- For magical casting prowess, the Rune Blade is Cloud's top option. The Rune Blade is easily acquired and has a very strong Magic stat lean. Furthermore, its weapon skills favor increasing Magic Attack, making spells more efficient in the opening moves of combat, and improving Synergy Abilities, some of which will grant Cloud temporary infinite MP. The Slips
- For all-round lethality, favor the Crystal Sword and Slipstream Saber. Cloud's an all-rounder at heart, so a sword with a versatile skill selection will get the most out of his offense-minded suite of abilities. Both the Crystal Sword and his last weapon, the Slipstream Saber favor magic slightly in their stat leans, but their Materia setups and weapon skills are highly desirable. The Crystal Sword doesn't have as much space for Materia but can turn Cloud into a deadly crit-hitting machine thanks to multiple instances of Critical Hit Up and Critical Damage Up, as well as boosts to his Weapon Ability damage. The Slipstream Saber has three linked Materia pairs, allowing Cloud to pair up Materia to enhance the effects of things like attack spells and buffs. Its weapon skills also favor a balance of MP recovery and basic attack damage. For the earlier game, the Sleek Saber is also a strong option for the more physical-minded all-rounders.
Best Weapons for Barret in FF7 Rebirth
The loss of Barret's melee configuration from Remake pushes the big man further into a supportive role when it comes to party dynamics. He has relatively low attack power on his basic attack, so weapons with skills that buff up his Overcharge are crucial to giving Barret's gunarms extra punch (and some attack-interrupting stopping power). Some judicious MP management can also turn Barret into a credible support caster, taking advantage of his unmatched HP and defensive ratings to be the final breakwater that guarantees the party's survival.
- The Calamitous Bazooka is the best choice for maximizing Barret's gunarm damage output. Its lean towards physical damage and Weapon Skills that favor boosting both his Critical Hit Rate, Critical Damage, and basic attack damage means that holding down the trigger and Overcharging whenever possible turns Barret into the king of sustained physical DPS.
- Barret's low MP and relatively low Magic Attack power gets him into trouble when trying on an offensive caster role, but the Fafnir Rifle gives Barret the tools to make magic happen. Elemental damage boosts and stacked MP bonuses well help keep him in the fight longer. That said, in general a caster Barret is best used with magic materia that doesn't depend too much on the Magic Attack stat.
- The best weapon overall for Barret is his final weapon, Battle Cry. Battle Cry's weapon skills heavily favor rapid and consistent use of Overcharge for damage output, while also leaving room for ATB bonuses, allowing Barret the resources to cast spells or use helpful abilities to support the team.
Best Weapons for Tifa in FF7 Rebirth
Tifa is arguably Final Fantasy VII Rebirth's top melee "assassin" character. In the right hands, she can deal unmatched single-target damage thanks to her endless combos and Unbridled Strength martial arts techniques. The many pairs of gloves she can wear focus on boosting Tifa's Unbridled Strength further and giving her the chance to enter combat at a higher chi level than usual.
- For pure power in basic physical attacks, the Kaiser Knuckles are Tifa's go-to gloves. They boost the duration of Unbridled Strength, give Tifa a 50% chance to enter combat with a level 2 chi activation, and can even improve her Synergy Skill and Ability damage.
- Tifa's best when punching holes in enemies, but you'll want at least a bit of casting potential to help her deal with fliers. To that end, the Crystal Gloves help her put out some magic power, with skills that boost elemental damage, MP, and add some opening ATB to get spells out quickly.
- The Jarngreipr is the best pair of gloves to emphasize Tifa's specialty: Up-close murder. They come with multi-stacked critical-boosting skills and skills that up weapon ability damage.
Best Weapons for Aerith in FF7 Rebirth
Aerith is unequalled as a magical caster, but some of the changes to the magic economy in FF7 Rebirth have diminished her potency somewhat, particularly when it comes to ATB gain. That said, you won't get double-casting and elemental fury from anywhere else in the party, so it's still best to favor magic and materia leanings when it comes to her weapon choice.
- With the Radiant Ward boosting her basic attack damage and the right Folio choices to boost Tempest, the Empress's Scepter can be a surprisingly potent melee tool for a player that wants to turn Aerith into a magical turret.
- While it has lower stats than the Ceremonial Staff, the Plumose Rod has a better spread of Materia slots to help Aerith cast through a crisis. It also extends her magic potency by enhancing both tempest and the Fleeting Familiar Buff, and keeping her Wards up for longer.
- The Gambanteinn is also a contender for Aerith's best weapon, as it has more Linked Materia slots that can be used to enhance offensive Magic Materia. Its boosts to Magic Attack and ATB charge also allow Aerith to cast faster and get more out of each spell.
Best Weapons for Red XIII in FF7 Rebirth
If Tifa is FF7 Rebirth's assassin extraordinaire, Red XIII handles crowds of foes like no one else. His sheer physical power and area-effect counterspin are unmatched in group combat. His main weakness, like Tifa, is that he has a negligible anti-air kit. Thus his best weapons leave a bit of materia space for a wayward magic-casting orb or two in between all of the complete and command materia.
- The Amethyst Collar's magic leaning stat allocation will allow Red XIII some magic utility as a support caster. Its weapon skills don't boost magic much, so an Amethyst Collar-main Red XIII will want to favor status materia and magic materia that aren't dependent on magic attack.
- Red XIII's Brisingamen final weapon is the best-balanced of Red XIII's collars. Its high, balanced bonuses allow Red a bit of magical potency, but its weapon skills lean in on letting Red XIII unleash hell through an enhanced counterspin and better Vengeance charge rates. Further, it has a good number of Materia slots to stuff good, stat-boosting orbs into.
Best Weapons for Yuffie in FF7 Rebirth
Fresh off her "ninja gaiden" in Remake Intergrade's Intermission DLC, Yuffie joins the roster as one of the most versatile members of the group. While she can display credible DPS in both physical and magical fields, she's at her best when drowning enemies in a storm of Ninjutsu strikes. That said, most of Yuffie's weapons aim for a balanced stat outlook.
- A magic-focused Yuffie build will derive a lot of utility from the Crescent Sickle weapon. Its balance leans slightly toward Magic, but it has Weapon Skills and ATB bonus skills that help Yuffie act as a powerful ranged elemental turret.
- Yuffie does have some powerful melee moves, and those get a boost from the Crystalline Cross, which has the heaviest physical attack lean of Yuffie's weapon selection.
- Yuffie's balanced, versatile style benefits most of all from her final weapon, the Fuma Shuriken. The Fuma's three linked materia pairs ensure a lot of functionality, while its weapon skills can boost Yuffie's magic, basic attack damage, and even her MP.
Best Weapons for Cait Sith in FF7 Rebirth
Cait Sith is a quirky character with a fighting style that can take some getting used to. He's not too mobile until you master his movement quirks, either. That said, his stat makeup means that the right choices in gear and materia can easily make him into a strong contender for top spot in either magic or physical damage.
- Cait Sith joins the party with Materia and skills befitting a status-focused caster, and the Magic-specialized Golden Megaphone boosts that initial loadout further.
- If you'd prefer to use Cait Sith as a healer/buffer the Resounding Megaphone's Weapon Skills favor extending friendly buffs and boosting outgoing heals.
- That said, the final Gjallarhorn weapon is Cait Sith's best option, as its Materia pairs enable the best variety of spells and command materia for Cait Sith, while the luck-boosting weapon skills it packs can increase the reliability of Cait Sith's random-number-based abilities.
Final Fantasy VII Rebirth is available for PS5. Check out our full review and our growing selection of guides!