
Final Fantasy VII Rebirth - Biological Intel: Head Case
In RPG Site, we have created a detailed breakdown of how to obtain all the Enemy Skills. However, there is one challenge that can be particularly frustrating, even with the best possible strategy. This refers to the Enemy Intel: Head Case. The reward for clearing this challenge is the Mind Blast Enemy Skill. Although the challenge is completely optional, you are still required to clear all VR challenges in Final Fantasy VII Rebirth to get the Platinum Trophy.
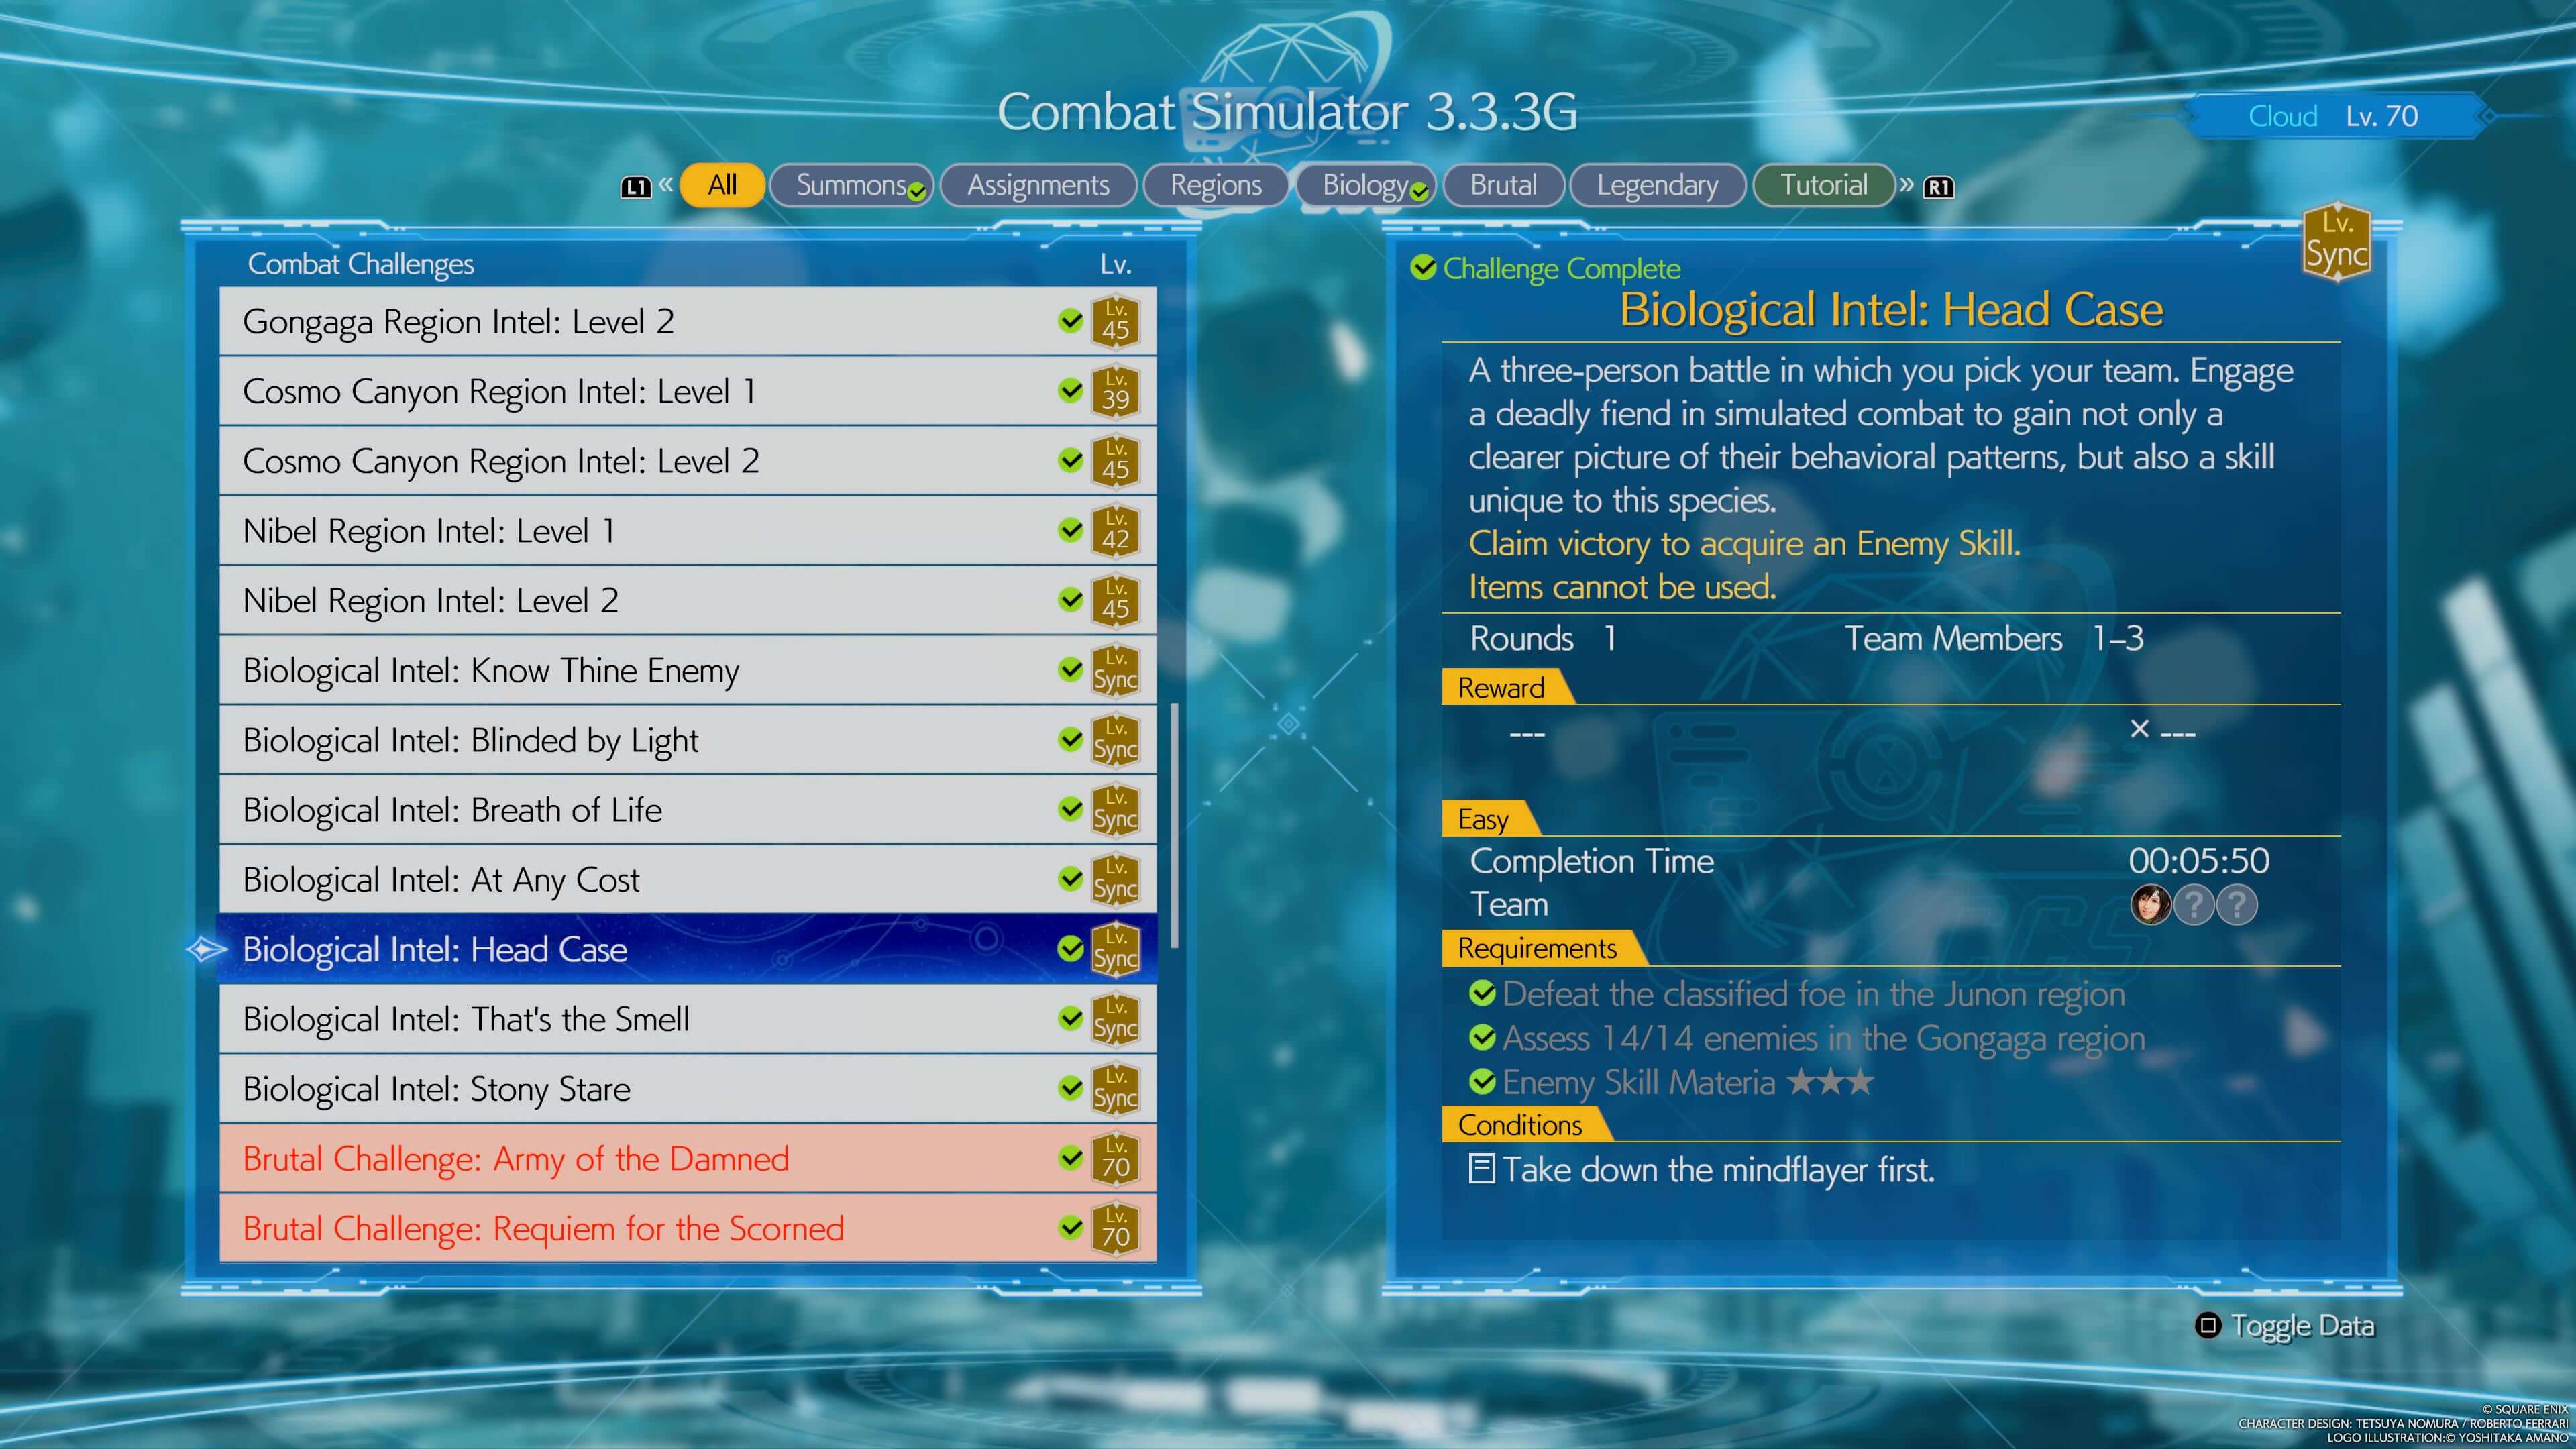
This challenge is unlocked relatively early, around Chapter 9. Since it's a level-synced fight, you can't simply overpower it by being overleveled. The battle will always pose a threat, regardless of your strength. However, tackling it later in the game may be easier, as endgame accessories and equipment could give you a slight edge. Regardless of your level, these fights are still affected by the difficulty level you choose. You can also opt to play on easy, but it can still be difficult due to some of the circumstances in this fight.
The Objective
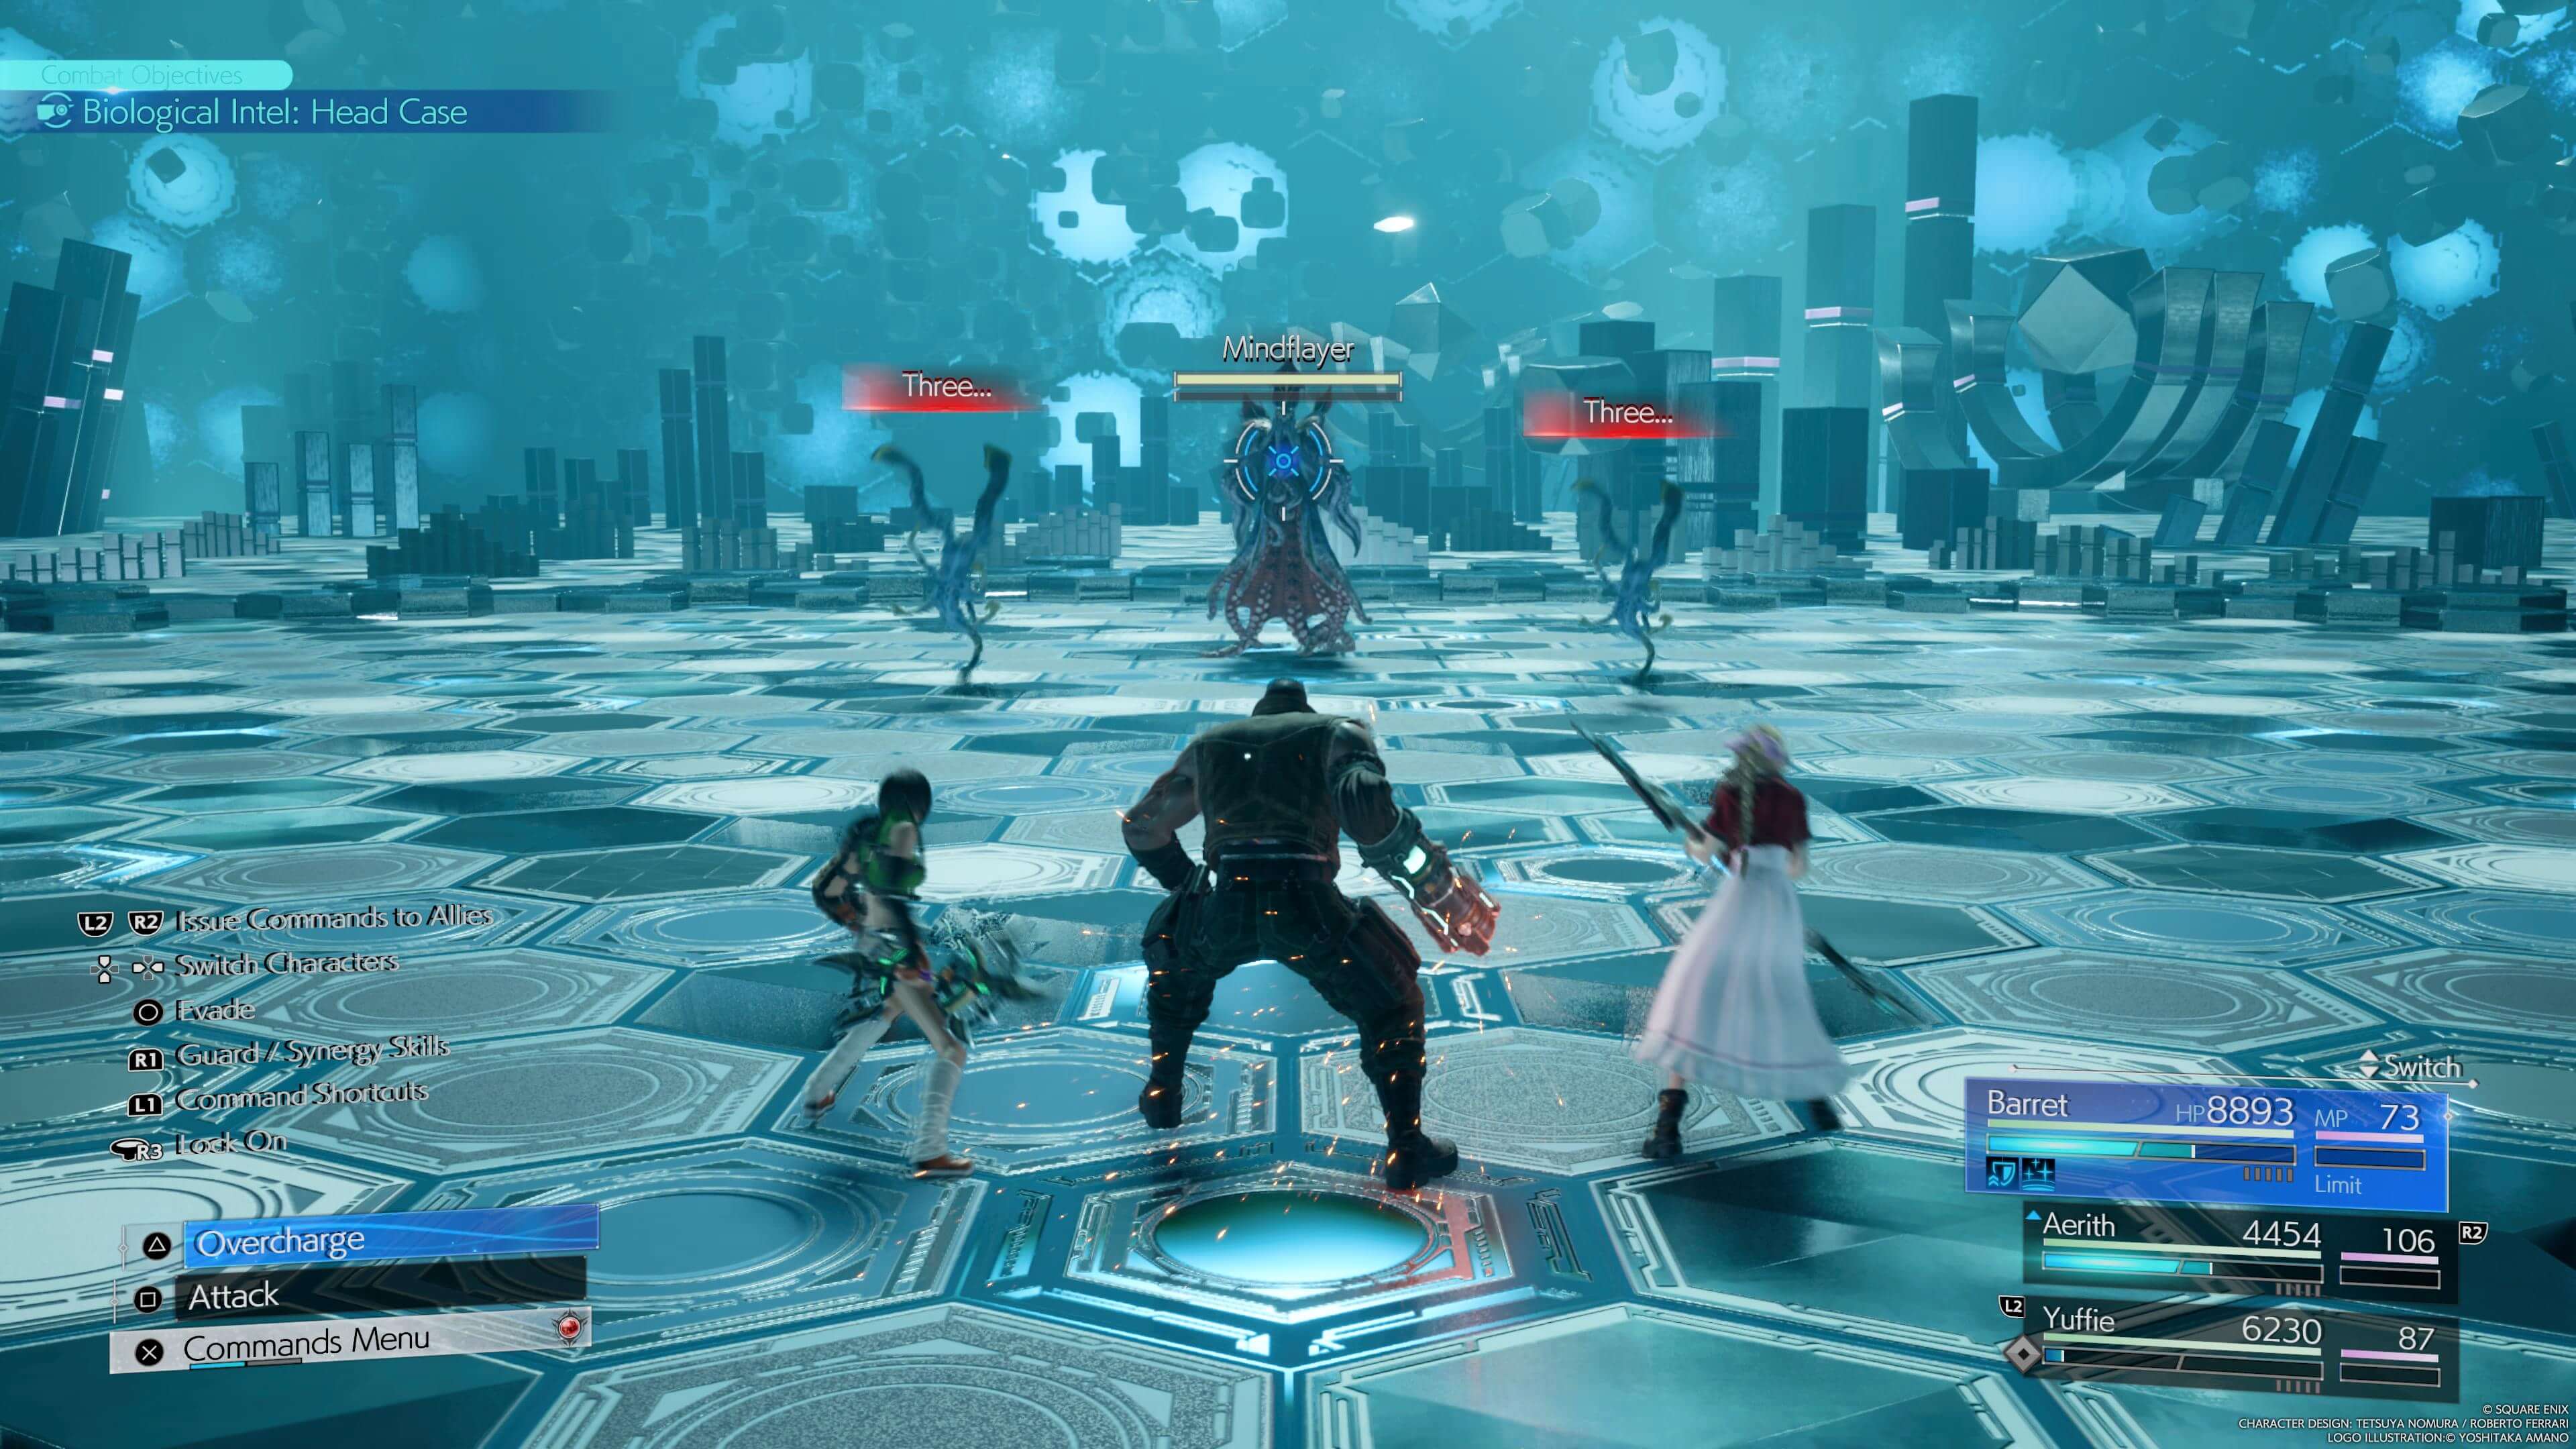
The breakdown of this fight is as follows: there is a Mindflayer and two Experimental Varghidpolis. You will need to defeat the Mindflayer first if you want to clear this mission, or else it's a failure. The problem is that the smaller mobs are extremely fragile and can self-destruct once you are stunned by their Deafening Screech. To make matters worse, the in-game lock-on is also quite unreliable for this fight, as the Mindflayer will occasionally teleport, causing you to lose sight of him with your lock-on. This can also affect your party members, causing them to attack the Varghidpolis instead, hindering your success in completing this mission.
Preparation
Highly Recommended
- Binding + Magnify Materia: Binding Materia is required as it comes with the sleep spell used for putting Varghidpolis to sleep. Having it attached to Magnify will be even more effective as it will put all enemies to sleep.
- First Strike Materia: Let you have a full ATB bar to start.
- Elemental + Lightning Materia on Armor: Since a lot of the enemy attacks are lightning-based, having the elemental materia equipped on your armor will reduce the damage you take. For late game, the elemental materia setup will make you immune to electricity.
- Time Materia: Let you cast Stop. This will put the mobs to a complete stop, however, this status ailment lasts nowhere as long as sleep.
- Malboro Orb: Although not mandatory, equipping the Malboror Orb will make status ailments last much longer. Since most strategies in this fight involve landing Sleep on the small mobs, having the orb equipped will make Sleep last much longer. Malboro Orb can be created by using the materials from killing the Great Malboro in Gongaga.
Optional
- Enfeeblement Ring: Now you might be wondering, why would you want to equip an accessory that turns your party members into frogs? Well, if you decide to tackle this fight solo, having your party members turned into frogs will cause them to draw hostility from the smaller mobs. Additionally, they won't perform at their normal capacity, which makes them no threat to the mobs, allowing you to focus solely on the boss.
- ATB Boost Materia: Can be used to charge up ATB Bar, effectively for players that want to use a full team to get a Synergy Skill ready early.
The Fight
Types of Attacks
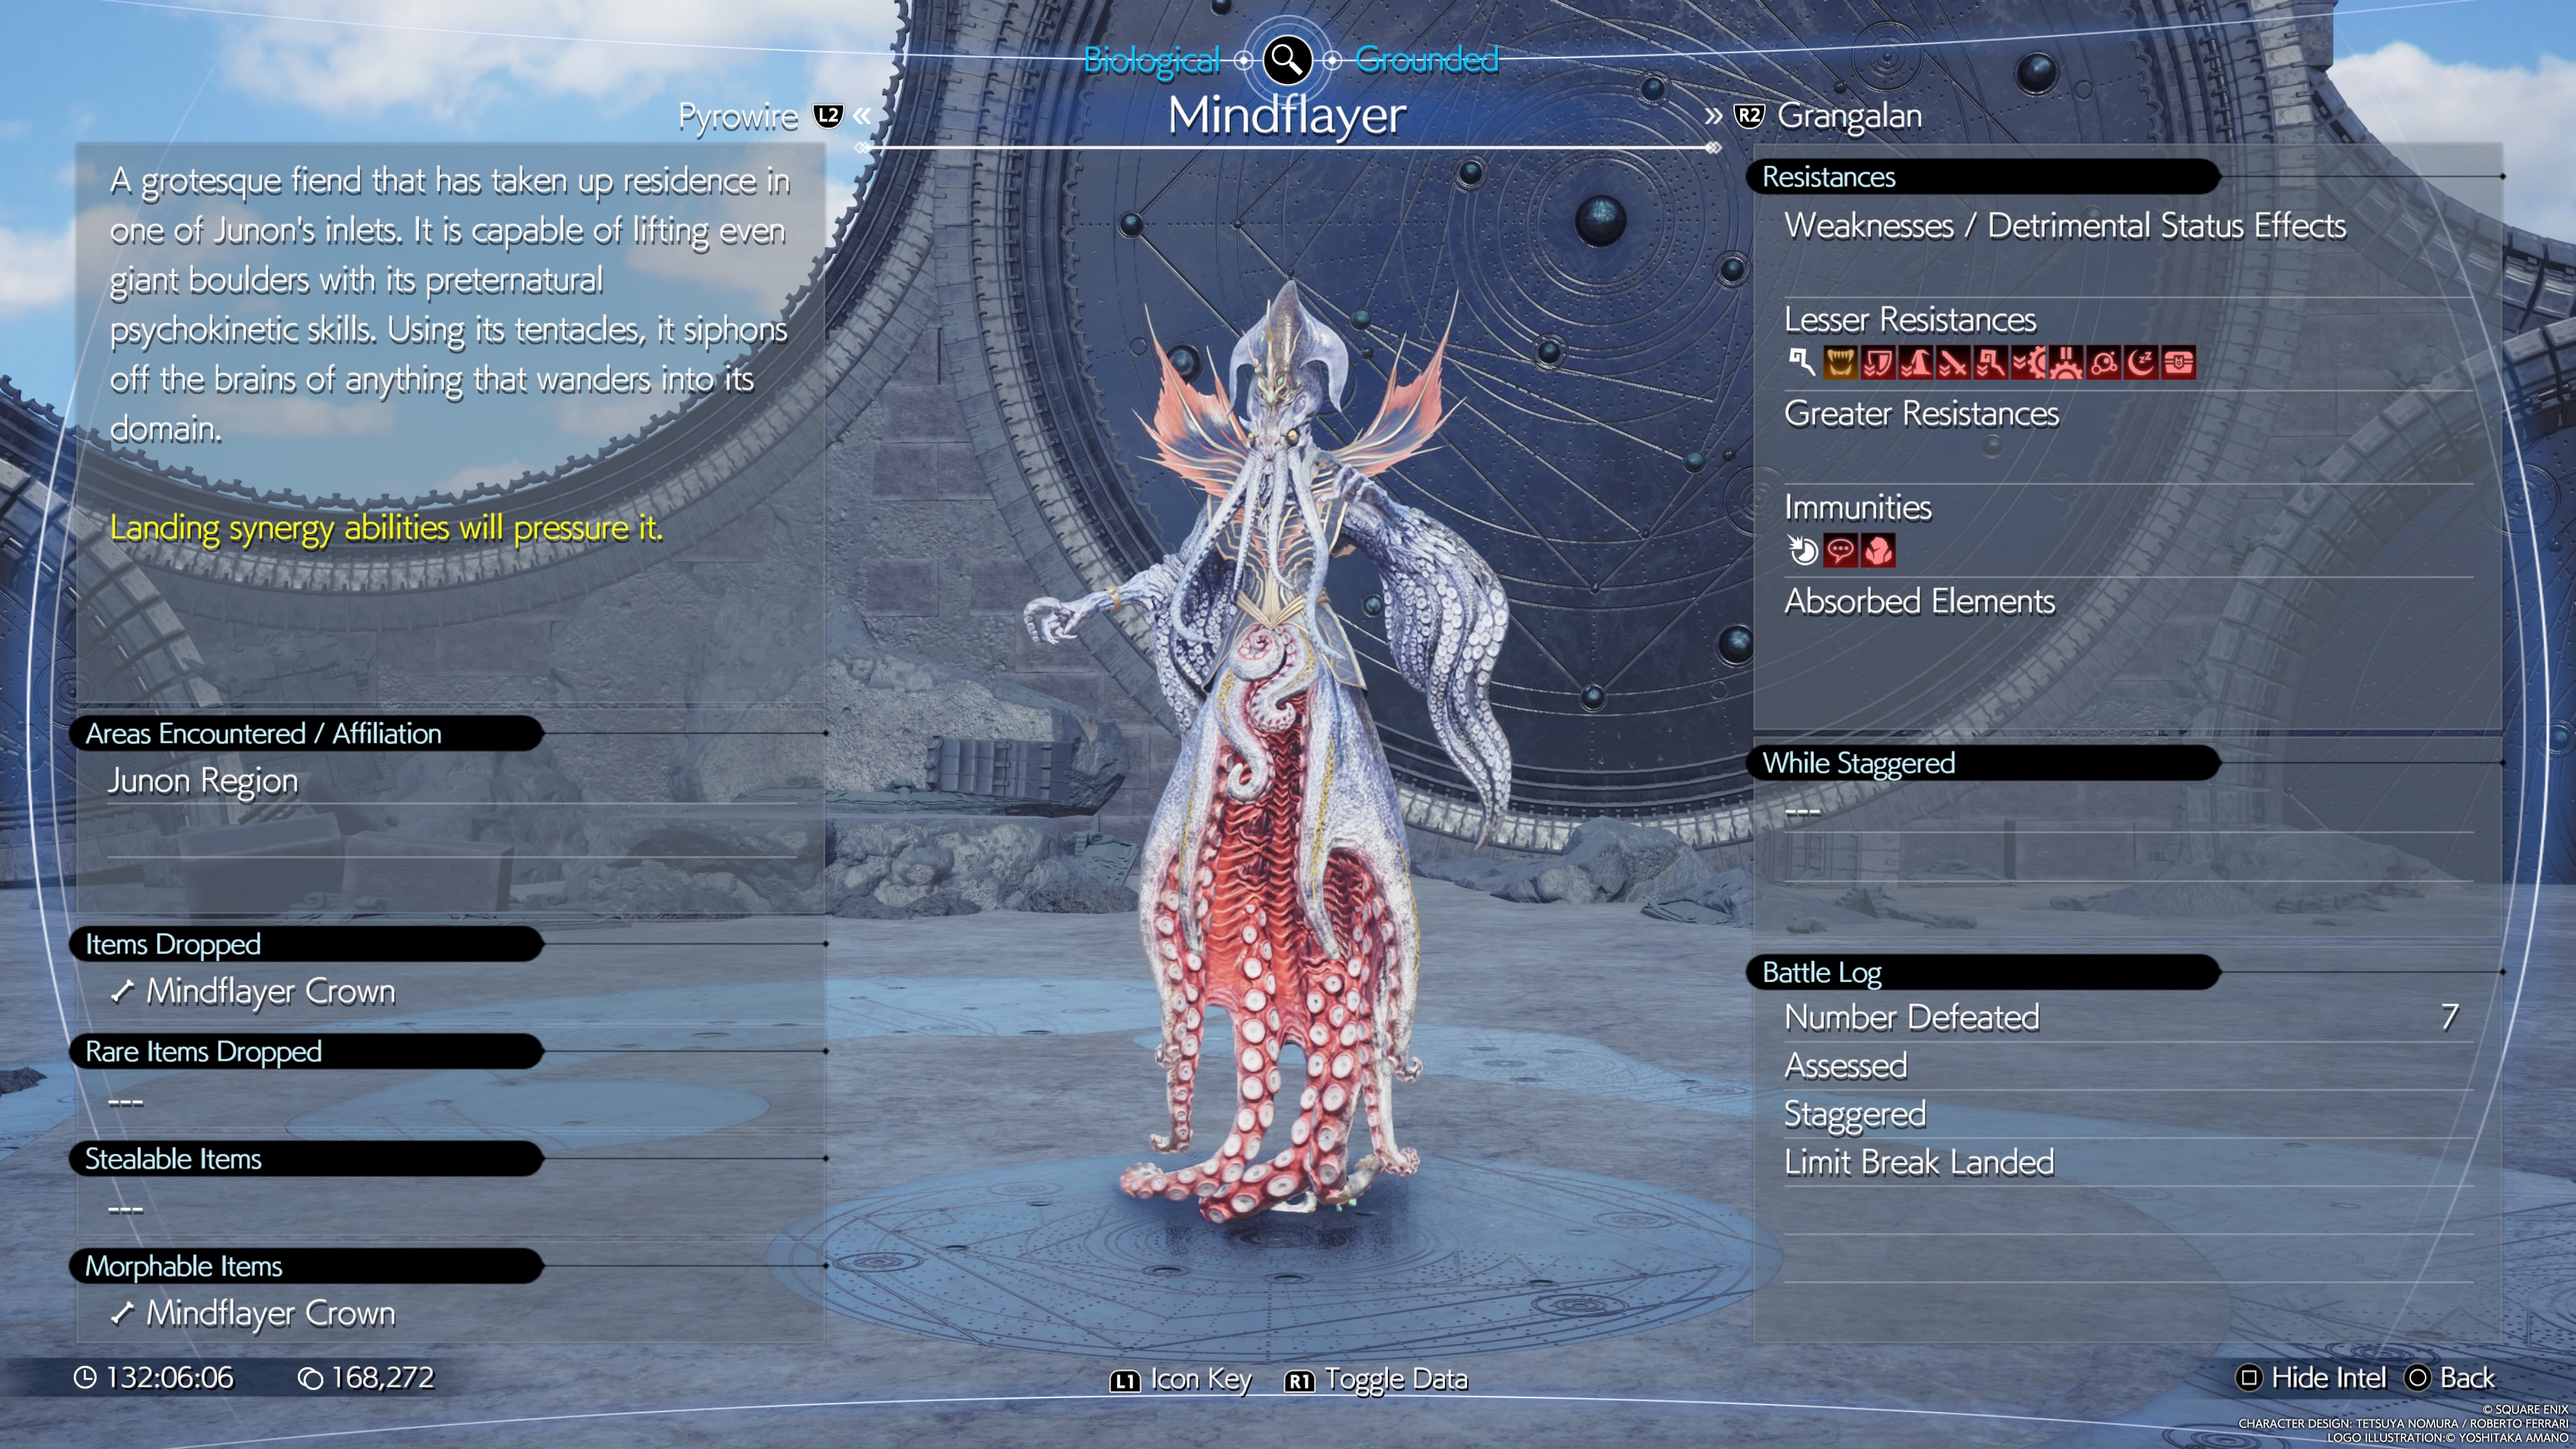
Mindflayer
- Astral Apprehension: Creates a field of electric storm.
- Sinister Seizure: Throws a tentacle that will bound whoever is caught by it.
- Accursed Orb: Shoots an orb that slowly chases after a target.
- Eldritch Horror: Shoots a beam of laser directly in front of him.
- Telekinesis: Forms a large boulder and throws it on whoever is being targeted.

Experimental Varghidpolis
- Thundara: Drops a bolt of lightning on whoever is targeted.
- Deafening Screech: Will cause paralysis to whoever is hit. On Easy Mode, Status Ailments such as Paralysis will most likely go away before the Varghidpolis can latch on to you.
- Self-Immolation: Latches onto a target and will self-destruct. Usually, right after a target is hit by Deafening Screech.
Solo Approach
When going solo, you lose the ability to pressure the Mindflayer, as it can only be pressured by Synergy Skills. The reason you want to do this fight solo is mainly due to the unreliable AI. The Mindflayer frequently teleports, causing you to lose target, and the AI tends to attack whatever is nearest to them. To make the situation worse, when you start putting the smaller mobs to sleep, they can be woken up when party members attack them. Although you can use Stop instead, it doesn't last as long as sleep. For the solo experience, you're going around kiting the boss while the mobs are asleep. Just beware, that this method takes a long time to finish the boss.
The other solo method involves equipping your party members with Enfeeblement Rings, which turns them into frogs. This allows them to draw attention from the smaller mobs, freeing your attention and letting you focus on soloing the main boss. However, this approach isn't the most effective, but it serves as an alternative if you prefer not to rely solely on sleep.
Full Team Approach
If you decide to tackle this fight with a full team, the approach is to quickly build ATB so that you can activate Synergy Skills immediately. First, cast sleep immediately to disable the smaller mobs. Then, when the main character you're controlling has three charges from using abilities, switch to the secondary DPS. I recommend Tifa for her Unbridled Strength ability, which adds a higher damage multiplier during stagger.
Next, focus on building charges with the secondary DPS until you have three charges, then perform a Synergy Skill immediately. For the third party member, I recommend Aerith, as her attacks are slower and less harmful to the smaller mobs.
When the boss is staggered, abuse Tifa's changed special attack from Unbridled Strength, such as Omni-Strike, to increase the damage multiplier. This will allow you to kill the boss in one stagger session. If it takes two stagger sessions, repeat the same process, but note that it will be harder to stagger the boss, as using the same Synergy ability requires five charges now.