
Final Fantasy 1 Job Classes: FF1 character class list and best team & party options
As you’d expect, the first Final Fantasy is the starting point for many series traditions - including that of character classes, with each playable party member fitting into a specific job class that you’ll likely be very familiar with even if you’ve never played FF1 before.
The character classes in FF1 form a basis for much of the series - not just in the sequels with explicit job systems, but also in specific characters throughout the other FF adventures. FF9’s Vivi is a direct descendant of an FF1 Black Mage, for instance. Yang, Tifa, and Zell are relations of the Black Belt. The skills of FF7’s Yuffie are those of a Thief and a Ninja - which aligns precisely to one of FF1’s job classes.
In the first Final Fantasy, you have four slots in your character party and six different job classes to choose from. That leaves you with a conundrum: how do you pick the best team for FF1 and its challenging adventure? And obviously, before that, you have to learn about and decide which the best of FF1's character job classes are for you. On this page we aim to detail all this - and more…
FF1 Character Classes: all jobs explained
The six FF1 job classes are all unique, each with their own strengths and weaknesses that you’ll want to consider - including their base stats and which of the many weapons in FF1 they can equip. Each class also gets a promotion/upgrade to an advanced job, which significantly changes its utility.
The question of which is best is a complicated one that we’ll get into a little further down the page. For now, however, here’s all the character job classes in FF1:
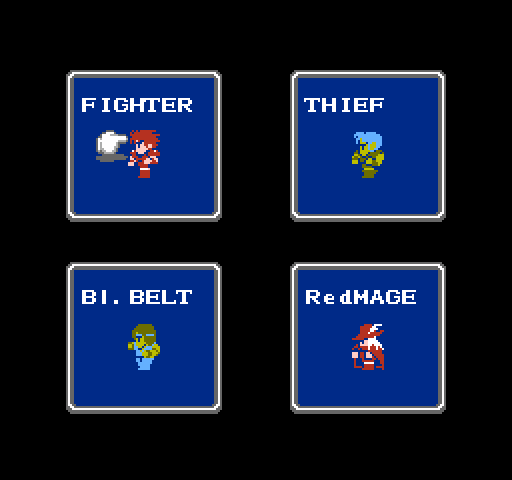
- Fighter: the archetypal RPG warrior class, it’s your primary physical damage dealer, leading from the front. It has no magic at first, but can later learn low-end White Magic, adding minor support functions. For most people, the Fighter will be the anchor of their team.
- Starting Stats: 35 HP / 10 Damage / 10% Hit / 0 Absorb / 53% Evade
- Promotion - Knight: Can use more weapons and armor, and is able to use low-level White Magic.
- Black Belt: in later FF titles, this class becomes the Monk. They miss quite often, and are challenging at lower levels, but the higher level they get, the more devastating they become. While you can equip weapons to them, don’t - they should fight with bare hands. Early on you might find them a bit weak, but picking them pays off in the late game. Key to this is the Absorb stat, which allows the Black Belt to nullify incoming damage an increasing amount as it levels up.
- Starting Stats: 33 HP / 2 Damage / 5% Hit / 1 Absorb / 53% Evade
- Promotion - Grand Master: Obtains no new moves, but is drastically more powerful.
- Thief: a defining class for the series, the Thieves are held back by their choice of weapons - which kinda sucks. However, the Thief has the highest chance at escaping from battles, which is really useful early on. In the late game, Thief promotes to Ninja - and the Ninja gets much more access to weapons, armor, and even some magic - which immediately transforms it into a fast, hard-hitting powerhouse.
- Starting Stats: 30 HP / 2 Damage / 5% Hit / 0 Absorb / 58% Evade
- Promotion - Ninja: Can use many weapons and perform low-level Black Magic.
- Black Mage: the archetypal mage, later in the game it’s promoted to the Black Wizard. It can learn all of the black magic spells in the game. It’s multi-target attack spells can help you to quickly mop up large enemy mob groups in random encounters, while powerful spells can blast down bosses. Just be warned it’s the squishiest class, with the lowest HP.
- Starting Stats: 28 HP / 2 Damage / 5% Hit / 0 Absorb / 53% Evade
- Promotion - Black Wizard: Unlocks the most powerful Black Magic spells.
- White Mage: unless you’re doing some sort of novelty run, a White Mage is a must-have for your class, as they’ll be your primary healer, promoting into the White Wizard later in the game. As well as healing and buffs, the White Mage can use their spells to annihilate undead monsters.
- Starting Stats: 28 HP / 2 Damage / 5% Hit / 0 Absorb / 53% Evade
- Promotion - White Wizard: Unlocks the most powerful White Magic.
- Red Mage: a jack of all trades but master of none, the Red Mage can use both Black and White magic, plus some heavy armor and weapons. They’re all-rounders, a combination of the two mages and fighter, but not as good in any single area as any of the three. A truly physically-based party could swap their mages for a Red Mage, however - you’d just have a more limited spell list.
- Starting Stats: 30 HP / 5 Damage / 7% Hit / 0 Absorb / 58% Evade
- Promotion - Red Wizard: Enables the use of a wider range of equipment and spells.
Once you've chosen your class, you’ll be thrown into the game proper with very little fanfare. If you’re wondering about the promotions you can get for each job later on, check out our more in-depth page on the job upgrades to Knight, Master, Ninja, and Wizard.
FF1 Best Team options: the best job loadouts for your party
Naturally, the first Final Fantasy is an open-ended RPG, and that means one core thing - there isn’t really one absolute best team or party setup in FF1, as the game is designed to be open-ended. In fact, some party setups might be preferred by some players because they lean into a specific play-style, or offer a particular sort of challenge. Additionally, the truth is that this first entry in the series is rather easy, even when you get into the deeper late-game bosses in FF1.
With that said, there’s a lot of depth in this game despite its creaking age - and thanks to that, we’ve been putting our heads together to come up with some suggestions of some of our favorite ways to play FF1. Here’s our picks for the best team options and party class loadouts:
The Classic Party - Fighter / Black Belt / Black Mage / White Mage
This is arguably the most basic, iconic class setup in FF1. It’s sort of the ‘iconic’ setup, and though we wouldn’t argue it’s the best party, we’d be remiss not to mention it.
Out of the gate, the Fighter is your only strong physical attacker - but the Black Mage quickly catches up. What you’re really waiting for, however, is the Black Belt. FF1’s Monk basically needs to bide time to become a Master through the promotion, at which point it becomes a total beast that’ll equal and in some cases surpass the Knight.
One advantage to having the Black Belt in your party is that they don’t need nearly as much gear - which frees up money for the Fighter/Knight gear and the spells for the Mages. Later in the game, the Level 4 Black Magic Spell Fast/Haste will be vital - as you can cast it on the Knight and Master, using it to drastically raise their damage output.
The Classic Party II - Fighter / Thief / Black Mage / White Mage
A twist on the classic party above, you’ll have access to a strong suite of both Black and White magic right from the start of the game, while the Fighter will be your physical attack anchor. However, you’ll need to consider this class carefully - it’s an expensive setup as you’ll need to keep the squishy Thief well-equipped and keep the spell upgrades flowing.
Ultimately, this class setup comes into its own in the later half of the game. Once the classes are promoted, the Thief finally becomes actually somewhat useful as the Ninja - and alongside the Knight, it means all four party members will have access to at least some basic spells.
Consider this class setup a slow burn - a little less exhilarating early on, but one that gradually grows into a satisfying powerhouse.
Low Healing Powerhouse - Fighter / Thief / Black Mage / Red Mage
This is similar to the above, but of course you’re switching out the White Mage for the Red Mage. This means you’re locking yourself out of the very best healing spells - but you’ll still have plenty of healing later in the game as both the Knight (evolved from Fighter) and Red Mage will have a suite of White spells.
The Fighter will remain your anchor for much of the game, especially as you wait for the Thief to get their hands on gear good enough to bolster their lacklustre attack. Most of your cash will have to be dedicated towards buying spells for the Mages - which means scavenging gear from dungeons. However, this class setup is all about biding time for the late game, where there’s a damage explosion as Thief hits Ninja and the Knight reaches its full potential.
All out Attack - Fighter / Fighter / Fighter / Red Mage
If you just want to absolutely go for it and throw everything you’ve got at every encounter like a total meathead, consider this class setup. It’s pretty simple, really - you’ll have top attack power and defense all game. Because you’re focused on physical attacks, you won’t be spending money on much magic until the late game.
The Red Mage is there to balance things just a touch; you’ll have access to some spells to help out, in particular healing. You’ll need to balance this carefully, however, as the gear to make all the fighters survivable in the early and mid-game is expensive.
By the endgame you’ll have a powerhouse that can steamroll everything in front of you - and of course, the class-evolved Knights will all have access to White Magic. An utterly beastly party setup, and one of the best - though perhaps a touch boring to play.
The Magicians - Red Mage / Red Mage / Black Mage / White Mage
In many ways, this party setup is quite similar to ‘The Classic’ setups above, except you’re swapping out the three physically-minded classes for two Red Mage slots - and keeping your White Mages.
The magic is powerful in the early game, but you’ll be facing off against the limitations of the Red Mage class and also how expensive it is to keep everybody fully equipped. The Red Mage is closer to the Knight and Black Belt earlier on, but the deeper you get the wider that physical attack gulf becomes.
This can be challenging, but really satisfying if you get it right - little is more satisfying in FF1 than orchestrating a magical firestorm that takes down bosses in minutes. Just be aware that this isn’t for everyone.