
Elden Ring Mimic Tear location: How to get the Mimic Tear Ashes
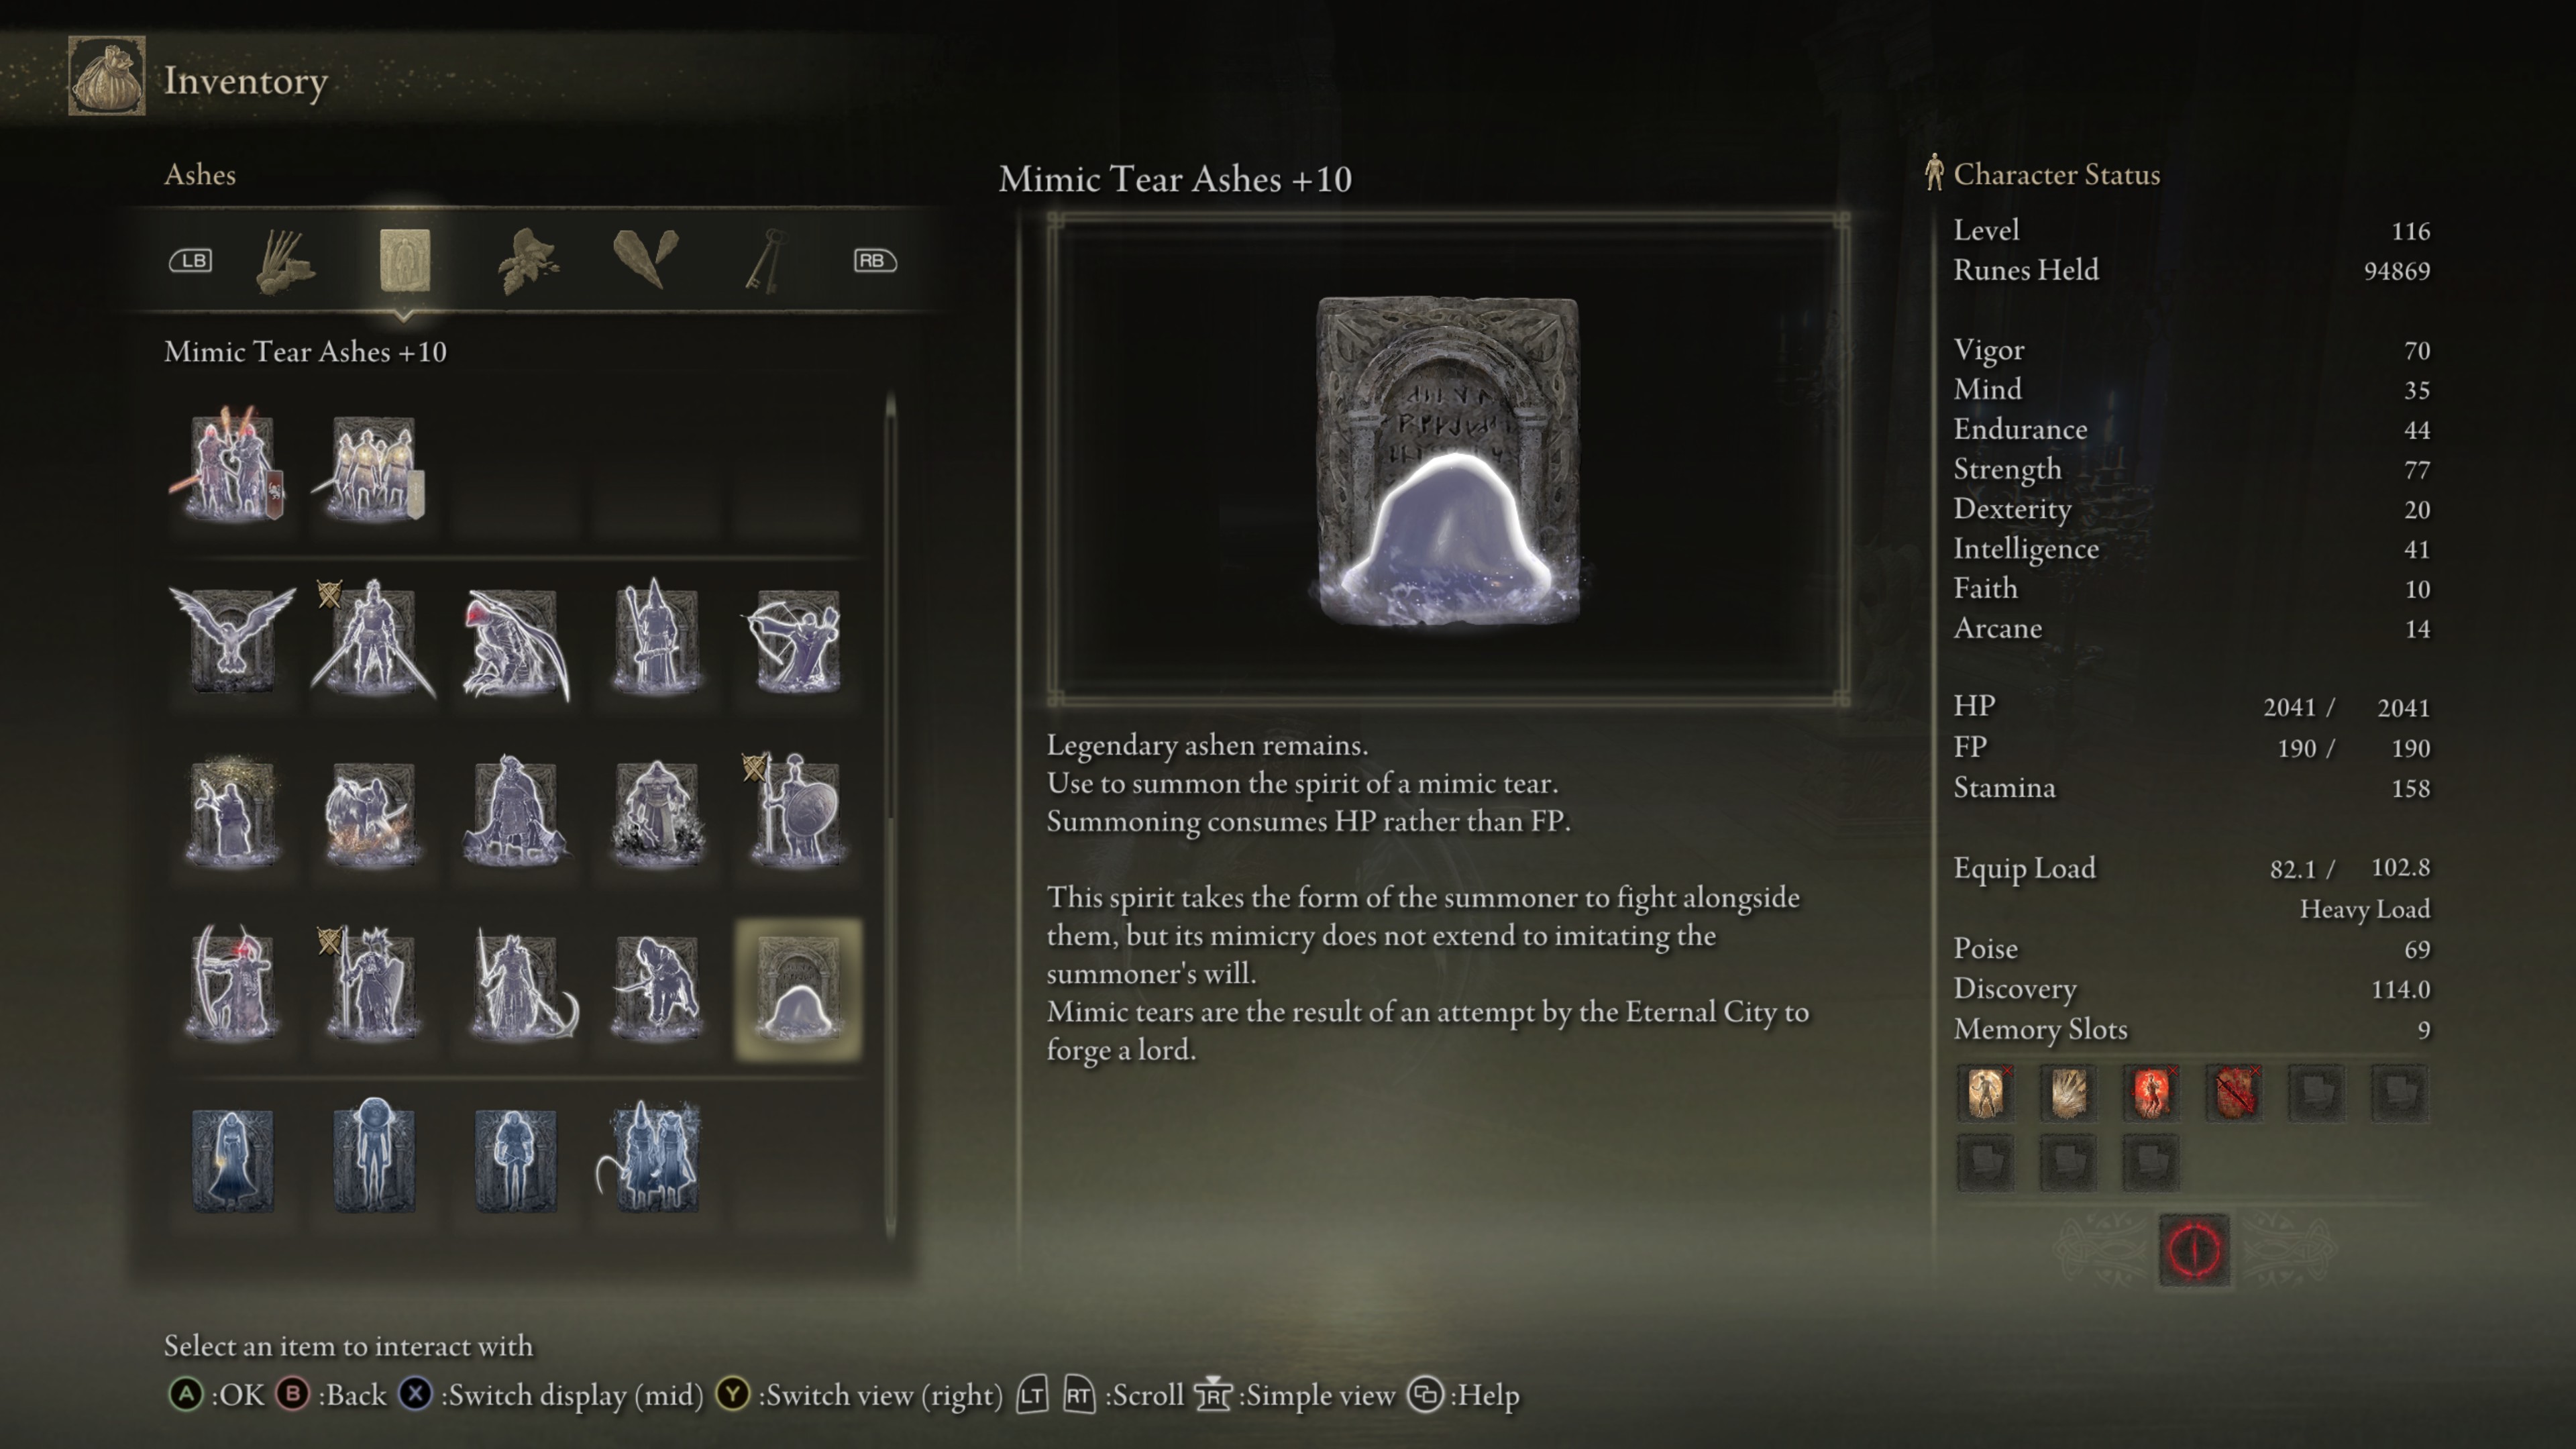
The Mimic Tear is one of the absolute best helping NPC summons you can get in Elden Ring - but it’s difficult to unlock until quite deep into your adventure through The Lands Between.
As explained on our Spirit Ashes Summons guide, the AI help you can call in to assist in boss battles are broken into a few categories. There’s regular ashes, then ‘special’ ashes, which includes puppets, special characters, and legends. We’ve got a separate page all about the Legendary Ashen Remains - but what you want to know here and now is that the Mimic Tear is one of them.
The Mimic Tear is unique for two reasons - and these reasons make it one of the best summons in the game, especially when fully upgraded. It’s ultimately tied for our favorite with another, Lhutel the Headless.
First of all, summoning The Mimic Tear costs HP rather than FP - meaning you can spend health to summon it, then use a health flask to recover, quickly. If you have a character class with stats and attributes that don’t lean into magic, this makes it a unique summon that you might, y’know, actually be able to summon.
Second, the Mimic Tear doesn’t just summon any character: it summons you, or rather, a direct copy of your Tarnished character, weapons, equipment and all. Basically, it means there’s an AI you that can help out in fights - and if you’ve got a good, strong character build, this can be a game-changer.
So. Here’s how to get this powerful summon:
How to get the Mimic Tear in Elden Ring
So, here’s the thing - getting the Mimic Tear Ashen Remains isn’t easy, and it’s literally impossible to get early on. If you want other summons you can get right from the start, check our Spirit Ashes summon list, which features early-game summons. The easiest legend to get early is Lhutel, who we mentioned earlier, who is also great - but you will need a build with some FP to summon her.
To get the Mimic Tear, you’ll first need to beat Starscourge Radahn, one of the Demigod Lords who are main targets in Elden Ring’s story. Radahn is located in Caelid, and though you can visit Caelid from as soon as you’re set loose in the open world, it’s a difficult zone. This is the first hurdle.
Once Radahn is defeated and you’ve got his Remembrance and Great Rune, there’s story repercussions. Defeating Radahn causes a world state change - blasting a hole in Limgrave that unlocks a new area of Elden Ring’s underground maps, reached by descending through the new hole in Limgrave. This is where the Mimic Tear is located.
This leads to three new locations: Nokron, Eternal City, the Ancestral Woods, and Night’s Sacred Grounds. These are all in the same section of the map as the Siofra River, but are unreachable from the regular river map, as they are hundreds of feet above it. As well as opening up after defeating Radahn, you’ll be directed towards these locations as part of Ranni’s quest line, which leads to one of the optional Elden Ring endings, if you’re chasing that.
Anyway. Once that hole is opened up in Limgrave, where the woods once were, head on down into Nokron. Work through the city. In it, you’ll fight Mimic Tear as a boss, which drops a Larval Tear item that can be used for a character respec.
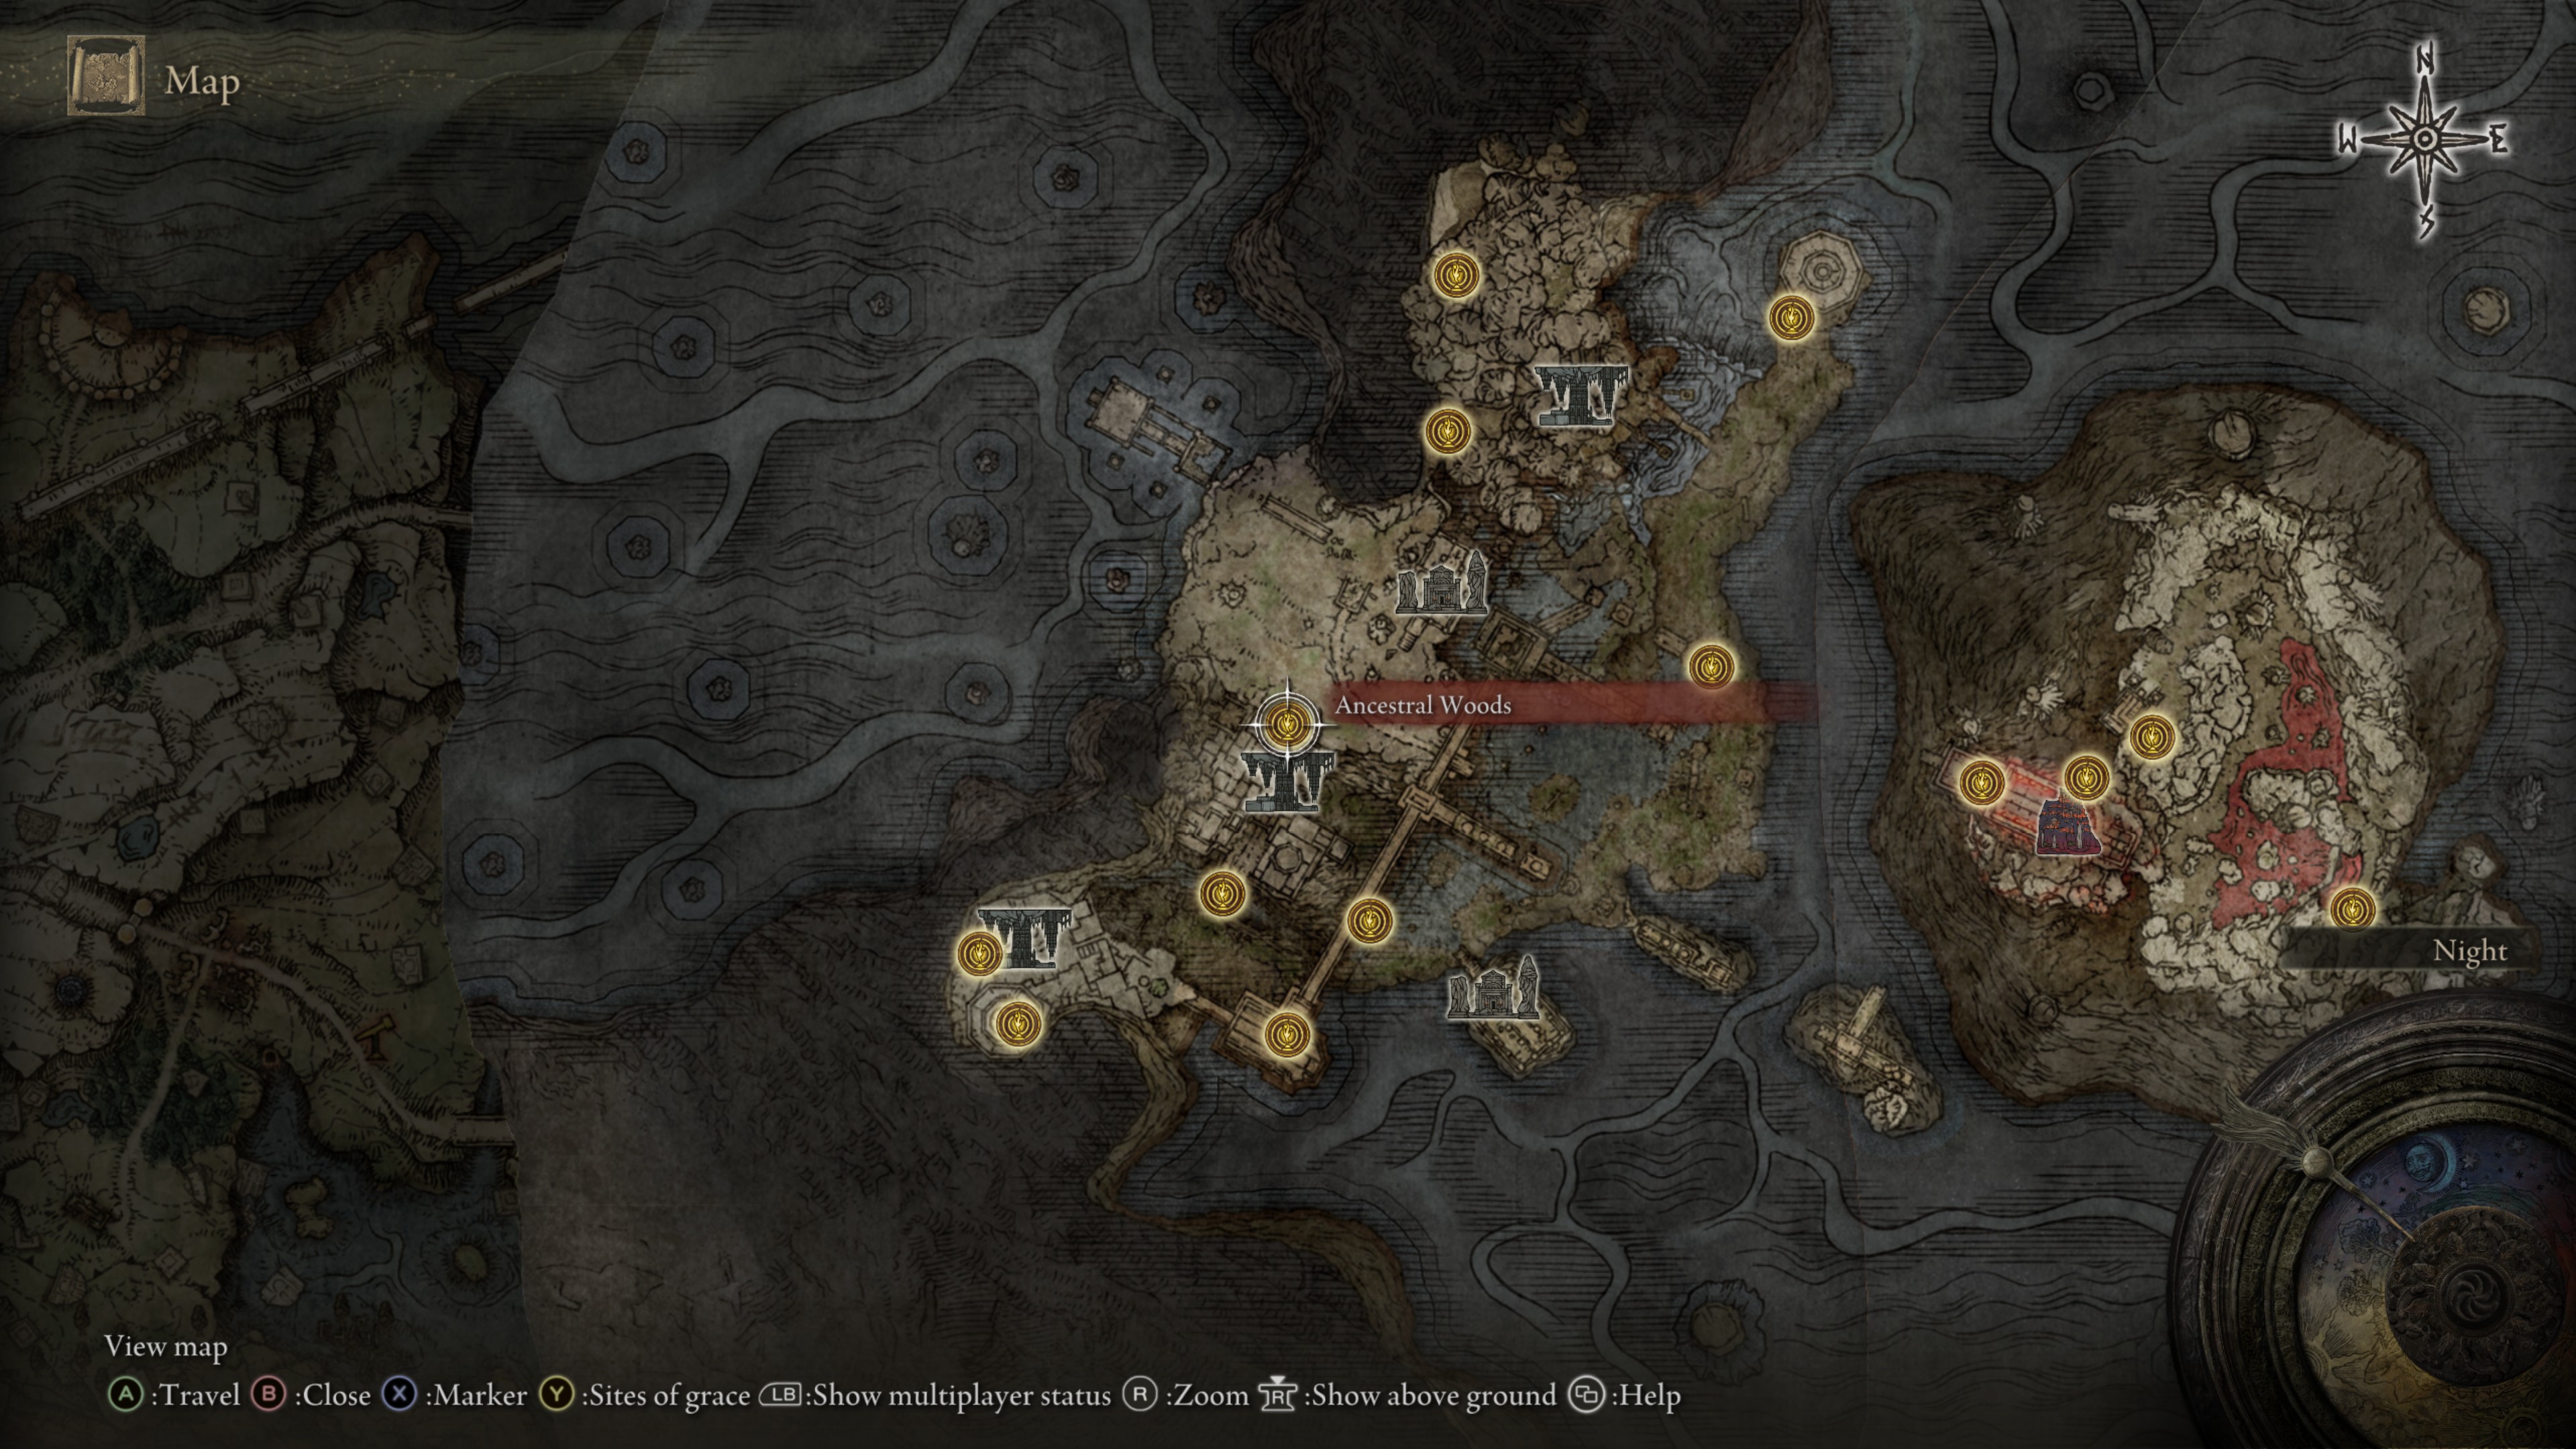
Work your way through the city and then out to the Ancestral Woods. On the southern tip of this land there’s an Ancestral Woods Site of Grace - this is the one we want.
From this Site of Grace, look toward the buildings. You’ll be able to safely jump to a ledge of one building. Use these ledges and continue to work your way down, ledge by ledge.
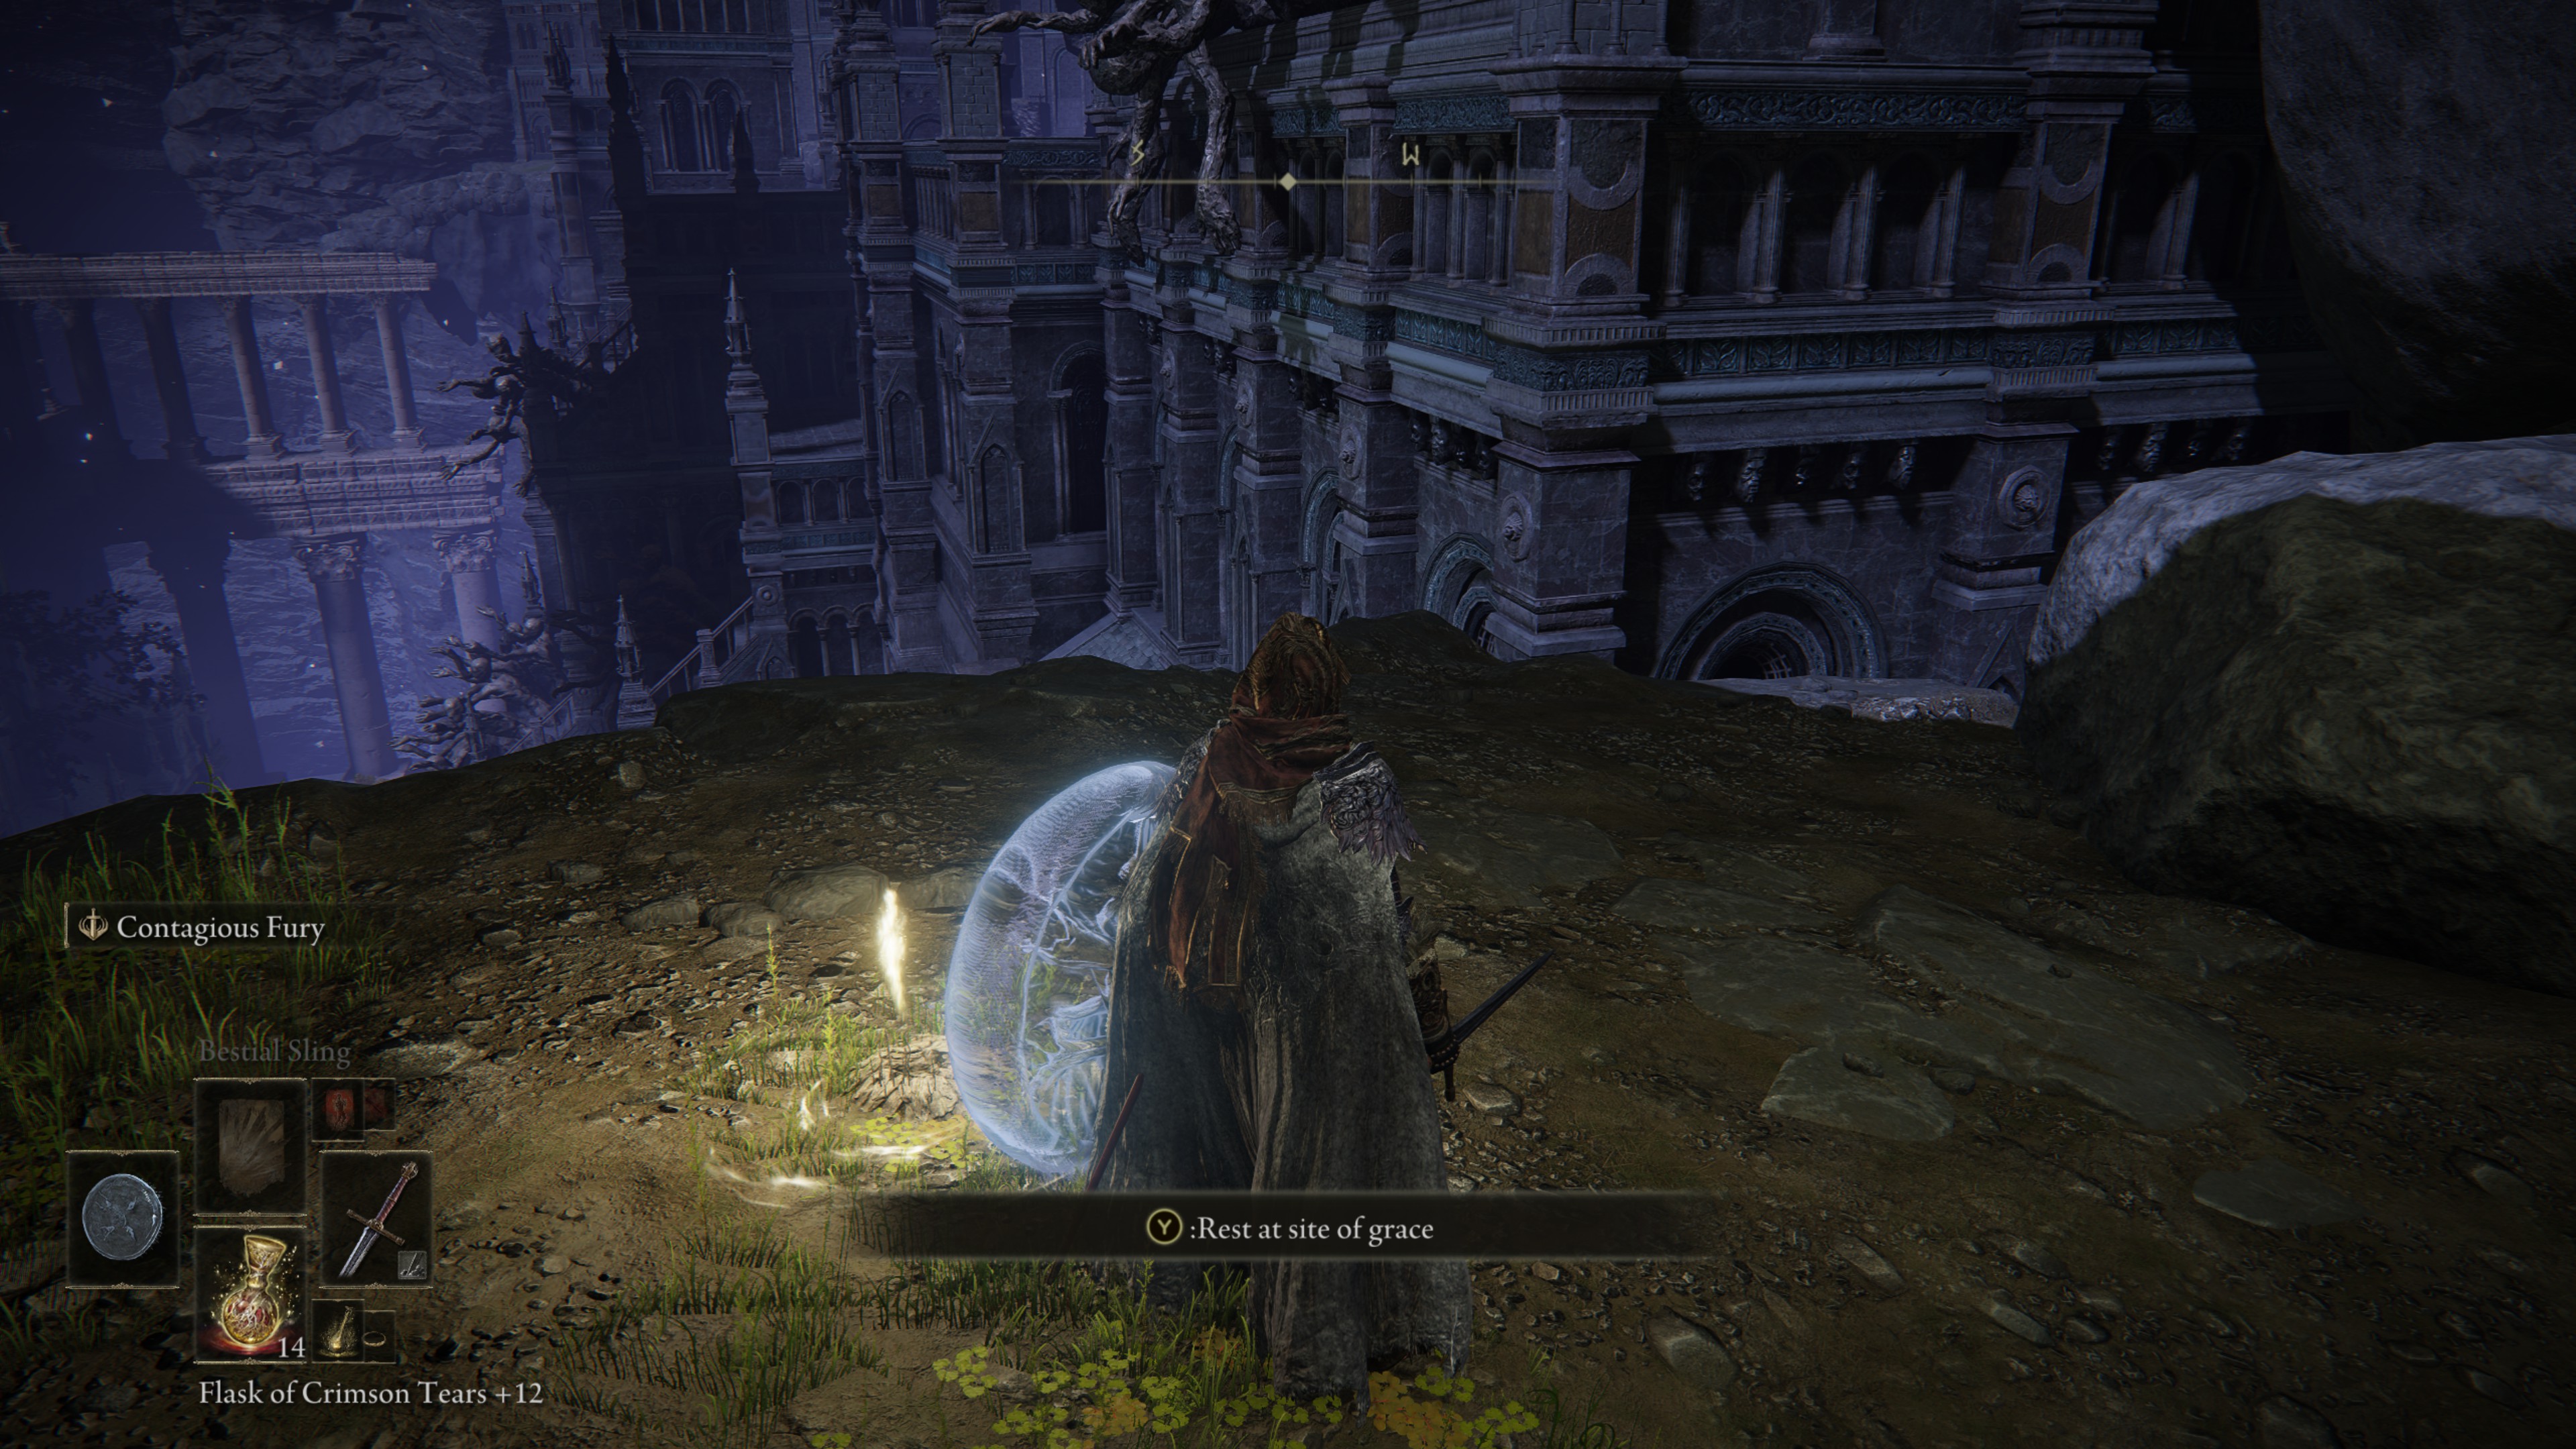
Eventually you’ll reach a ledge where there’s a conical building between you and the next ledge - and on that ledge are some mimic tear enemies that’ll transform into human fighters; proof that you're on the right track. Defeat them, and keep moving.
Eventually, you’ll reach a ledge where directly opposite there’s two large windows that’ll, y’know, make pretty good doors.
Go across the crumbling wall between the buildings and go through these windows, but don’t drop all the way to the ground floor; just go through the windows to the first floor.
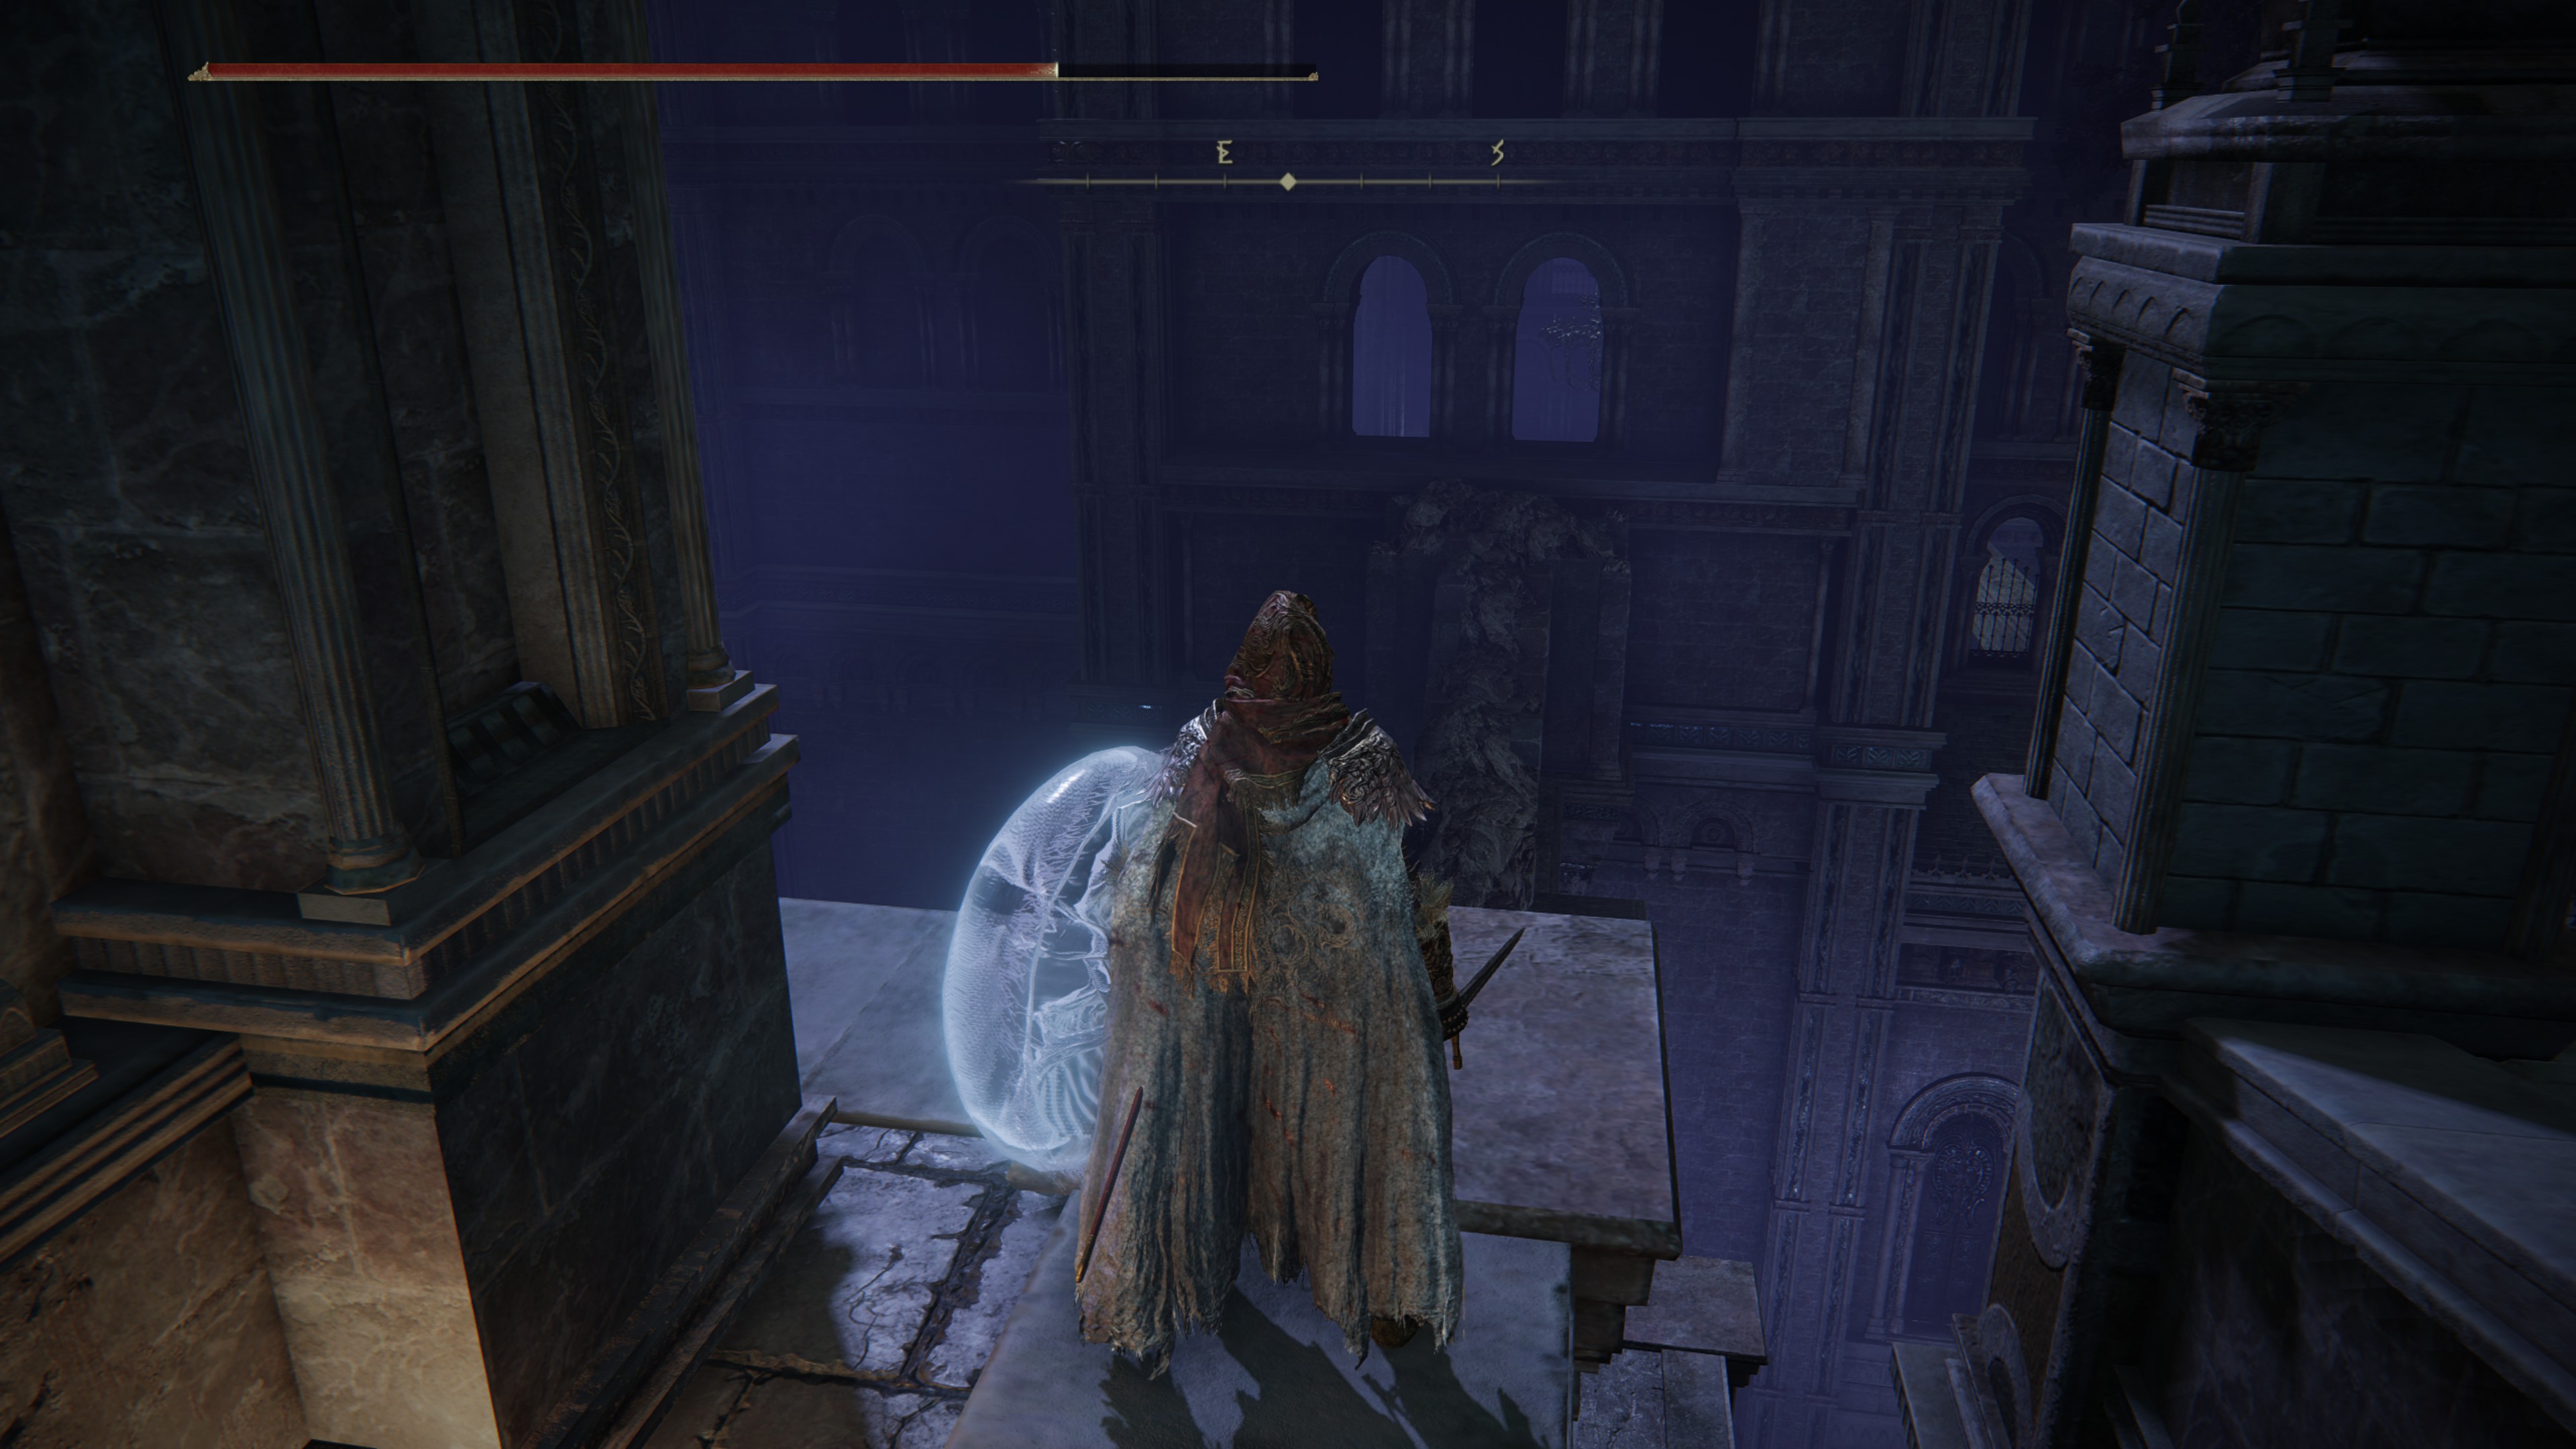
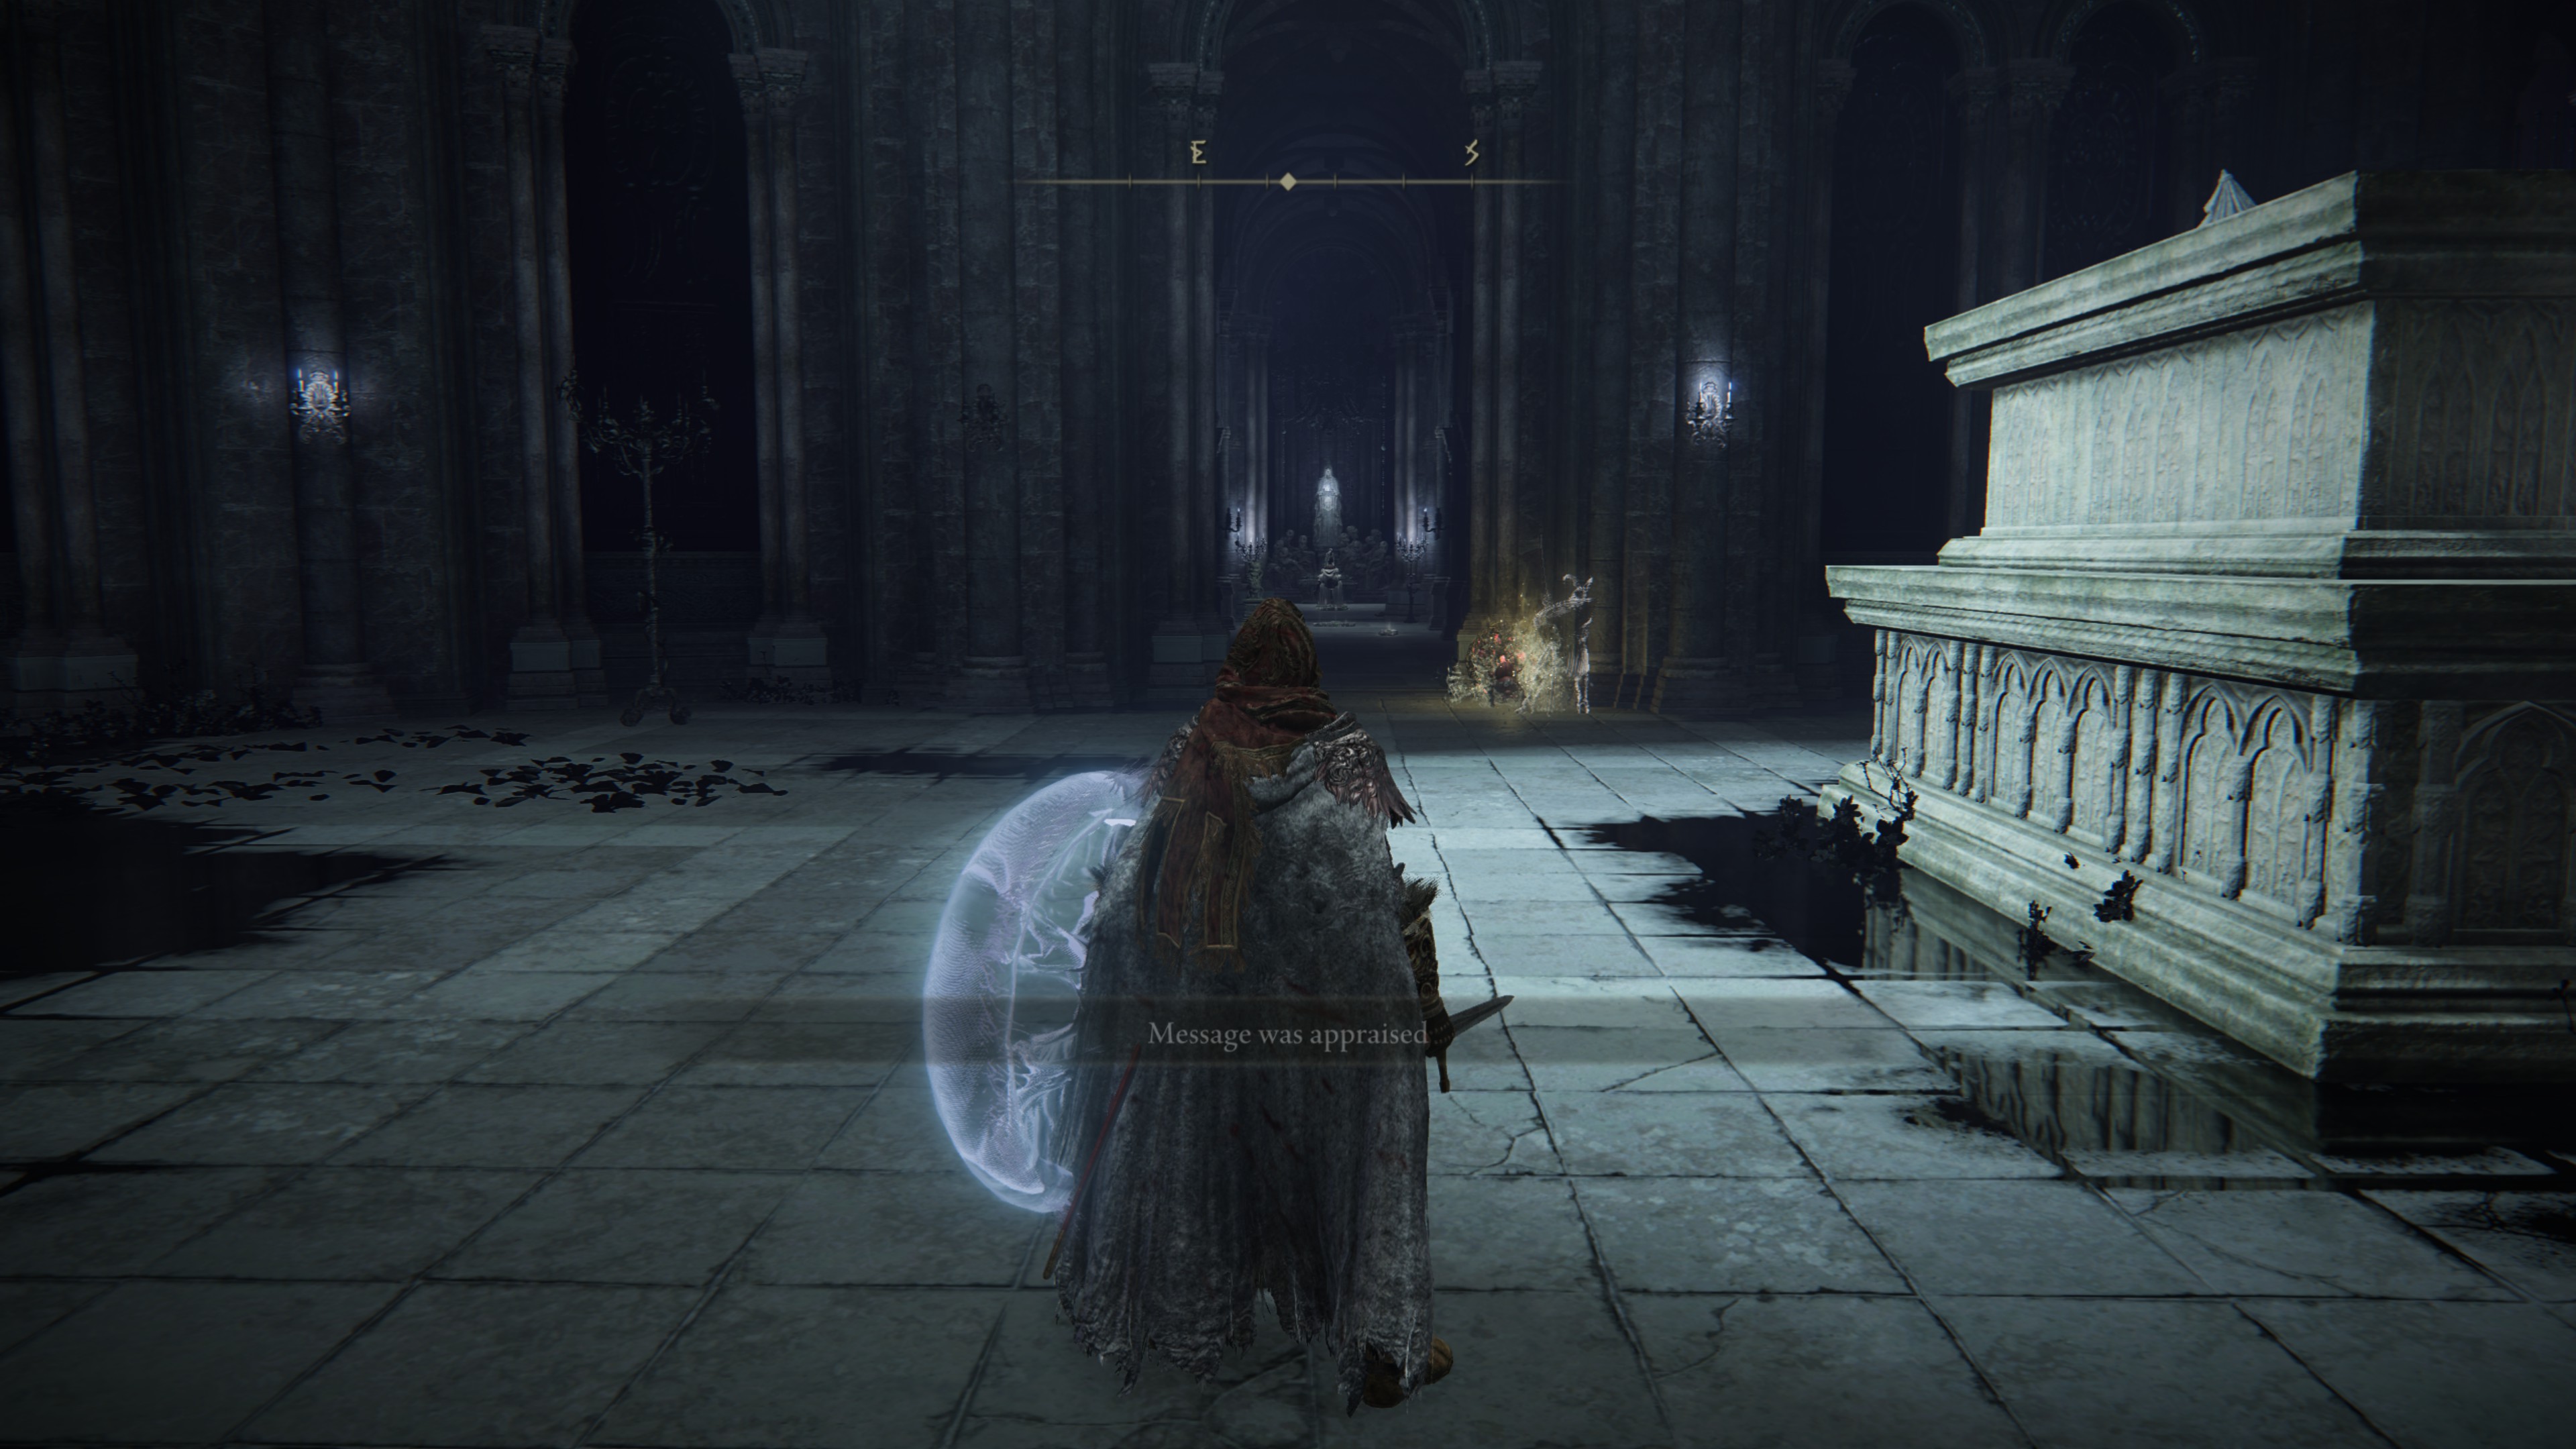
Once inside this building, don’t drop all the way to ground level. Instead, on this floor (the level you climbed in at), walk around the upper cathedral area.
Nearby, there’s an altar. If you look behind and past the altar, there’s a narrow corridor with a tall ceiling, and at the end of it there is a Stonesword Key gate.
Feed the Imp a Stonesword Key. Inside there’s an enemy guarding (or worshipping?) the contents of a chest. If you sneak up you can backstab the enemy - and then open the chest to get your Mimic Tear Ashes!
Enjoy this powerful summon - and don’t forget to upgrade it back at Roundtable Hold to make it even more powerful. Like we said - it’s a game-changer.