
Final Fantasy XII: The Zodiac Age - Quickenings, Mist Charges & Concurrences explained
One of the things Final Fantasy is most famed for, especially in the 3D era, is a good old over-the-top attack with a ludicrous, lucious spell effect. Final Fantasy XII: The Zodiac Age is no different in this regard, with the game's mega attacks taking the form of 'Quickenings' and 'Concurrences', huge magical blasts that can dish out immense amounts of damage all while looking very pretty indeed.
Quickenings are basically big combo attacks that'll consume the Mist Charges of your party members. If you've played Final Fantasy X, think of it as being like a large-scale version of Rikku's ability to 'mix' things together, except in this instance you're mixing a combination of attacks from all your party members to create overall devastating effects. Depending on what you do and how well you do it, there's a chance at the end to finish off the chain with an enormously devastating finisher that's known as a Concurrence. These are really useful attacks, plus performing them all is tied to a trophy, so you'll want to do them and do them right.
This all sounds pretty complicated, we know: but have no fear. That's what we're here for - to get in-depth into this gameplay system and explain it piece-by-piece. First off, let's explain how you actually unlock these mega attacks, then we'll expand out from there.
How to Unlock Quickenings in The Zodiac Age
All of FF12's six playable party member characters start without Quickenings unlocked - and that's a chance from things like Limit Breaks and Overdrives in other FF games. Quickenings are unlocked like any other skill in the International Zodiac Job System - by buying the special quickening licenses on the license boards in your character progression menus.
Each of the members of FF12's cast can unlock three Quickening license boards in total - and unlike every other license these are not job-specific abilities. Whatever class/job you decide is best for your character you won't be offered different Quickenings as a result - all Quickenings are based on the character in question - each has three increasingly powerful signature moves, which we'll get into in a little bit. Job boards tend to have four Quickening slots, but once you've unlocked your third the fourth Quickening license will disappear entirely and the path to abilities behind it will no longer be accessible, similar to what happens when you use FF12's Espers on your license boards.
What happens when you unlock these license board panels is pretty simple: unlocking a character's first license unlocks their level one Quickening, and unlocking the second unlocks their level two Quickening. Can you guess what the third license does? You guessed it - it unlocks the level three quickening. Yep. Simple!
Each character has three unique quickenings each, as the above likely makes obvious. Each character's Quickenings are unique, but they have no elemental affiliation (despite how they often look) and all level 1, 2 and 3 Quickenings work in the same way. This is:
- Level 1 Quickenings deal damage equal to a random number between 1 and 90 multipled by the character's strength stat. It costs one Mist Charge to execute.
- Level 2 Quickenings deal damage equal to a random number between 1 and 140 multipled by the character's strength stat. It costs two Mist Charges to execute.
- Level 3 Quickenings deal damage equal to a random number between 1 and 230 multiplied by the character's strength stat. It costs three Mist Charges to execute.
Here are what the Quickenings are called, for the record:
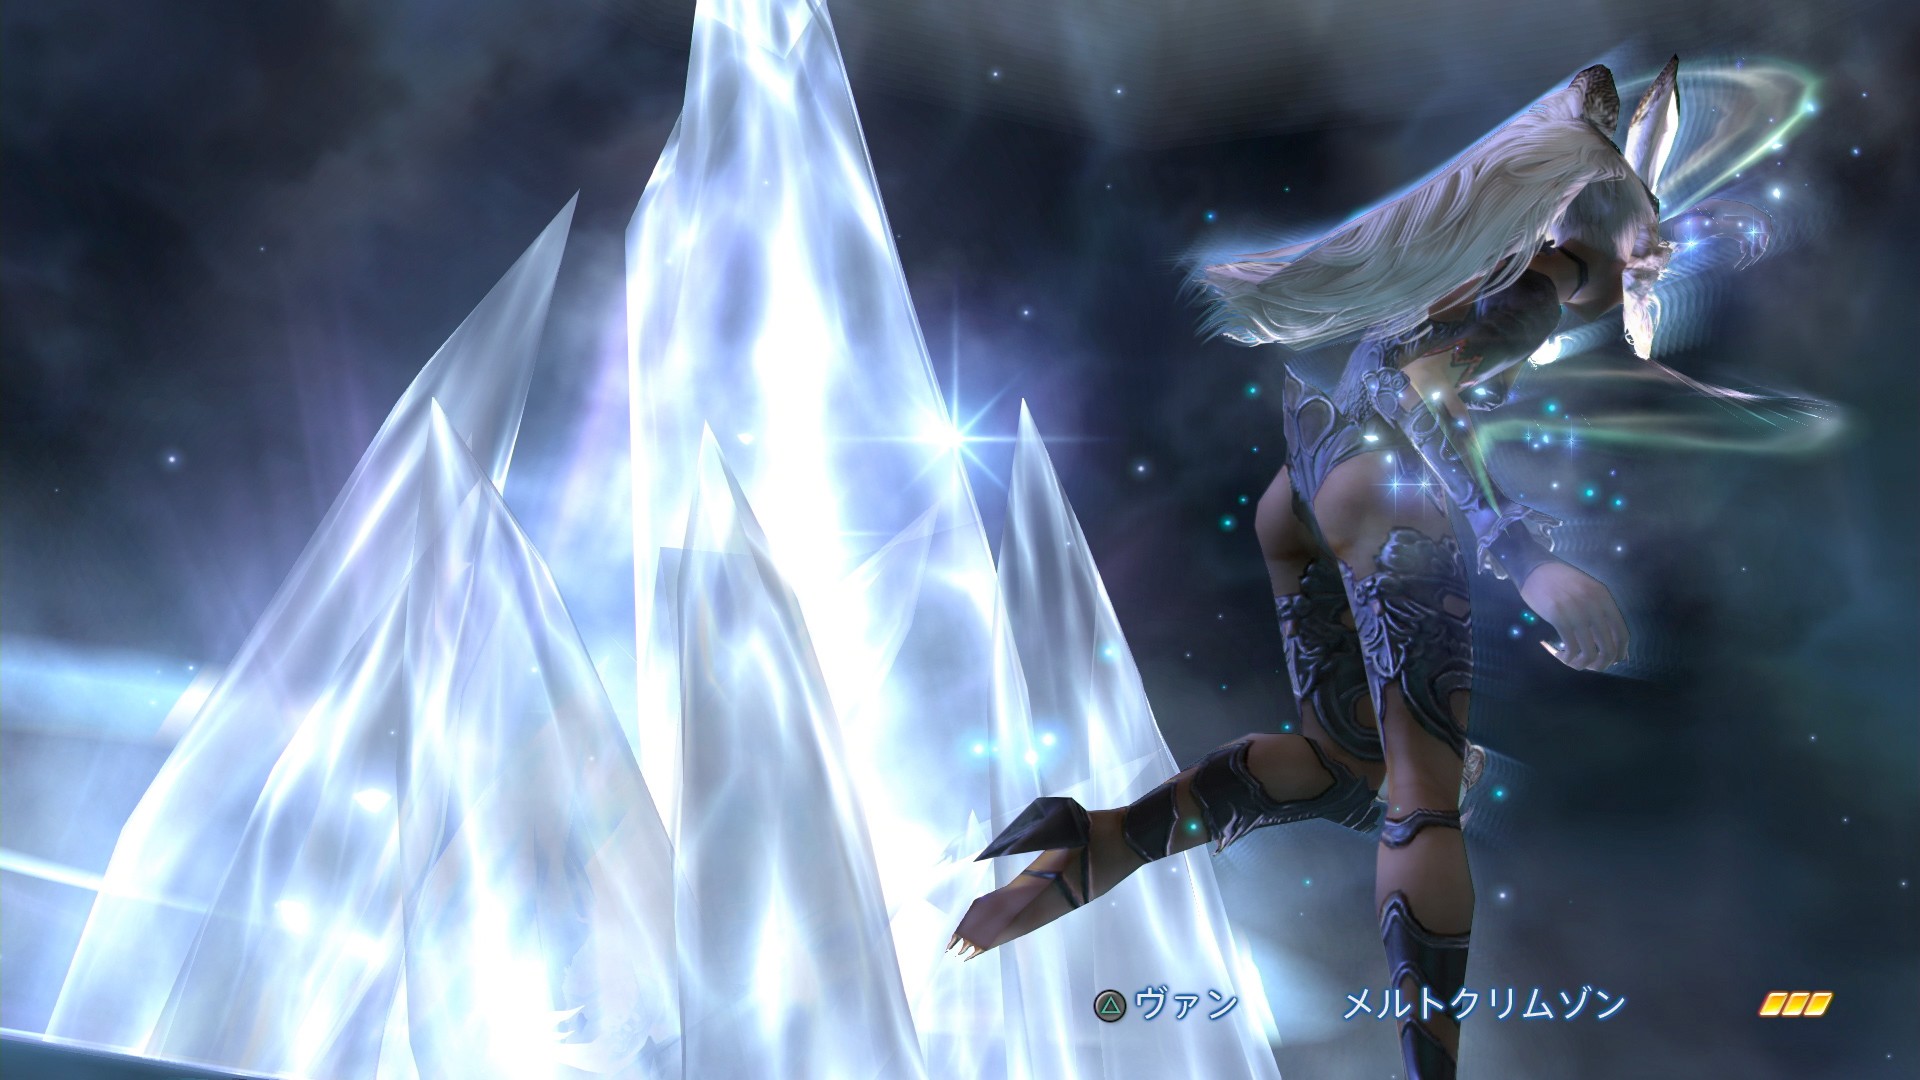
- Vaan's Quickenings: Red Spiral (Level 1), White Whorl (Level 2), Pyroclasm (Level 3)
- Ashe's Quickenings: Northswain's Glow (Level 1), Heaven's Wrath (Level 2), Maelstrom's Bolt (Level 3)
- Balthier's Quickenings: Fires of War (Level 1), Tides of Fate (Level 2), Element of Treachery (Level 3)
- Fran's Quickenings: Feral Strike (Level 1), Whip Kick (Level 2), Shatterheart (Level 3)
- Basch's Quickenings: Fulminating Darkness (Level 1), Ruin Impendent (Level 2), Flame Purge (Level 3)
- Penelo's Quickenings: Intercession (Level 1), Evanesence (Level 2), Resplendence (Level 3)

How Mist Charges Work in FF12
As mentioned above, Mist Charges are the method by which your use of Quickenings is gated. Think of it like your Limit Break bar, or like an additional MP bar of sorts. However, Quickenings work a lot through luck, which we'll explain here.
Once you trigger a Quickening, your health and ATB HUD will be replaced by three lines of information, one for each character. Each character will have the option to trigger one of a character's unlocked Quickenings, though what shows up here is random. Think of it like slots - either the real machines or like Tifa's classic Limit Break - there's an element of luck. Any Quickening you're actually able to trigger will have white text, where those you can't will be greyed out.
As displayed in the bottom left during a Quickening, you can press R2 to shuffle your chances again, giving you three new options. Basically, this is on you - choose attacks, shuffle your 'deck' of three attacks and perform as many attacks as possible within the Quickening Time Limit. It's that simple - or almost, anyway. You then have Mist Charges to worry about.
The number of Mist Charges an attack uses is displayed in the Quickenings HUD as orange blocks - there'll be one, two or three next to each of your options on the right. What moves you can do depends entirely on how many Mist Charges you entered the battle with. If you enter with three Mist Charges for Vaan, that means you can either trigger Pyroclasm once, Red Spiral three times or White Whorl once followed by a single Red Spiral. Whatever you do, the number of mist charges you can use tops out at the number you enter the battle with - in this example 3 - but how to use those charges is up to you.
When a character's Mist Charges are used, all their options will be greyed out. That doesn't mean they're out, however. Keep an eye out as you shuffle for the words "Mist Charge" to appear in place of a Quickening in the menu. If it appears, hit it. You'll use up some combo time, but this will refill that character's Mist Charge, which in turn allows you to keep combos going for far longer.
Being quick and managing your limited time is absolutely key to making sure that you get the maximum damage out of a Quickening Chain. You only have four seconds, but the clock pauses when commands are actually ongoing, so the only thing that matters is making sure you choose between shuffling and your three options quickly. You want to nail as many attacks as possible - not just to do maximum damage, but to maximize your chances of a concurrence.

How to trigger a Concurrence in FF12: The Zodiac Age
Concurrences are special finishing attacks that can be triggered at the end of a successful chain of Quickenings when you manage to fulfil certain conditions - some of them easy, some of them incredibly difficult. There are eight Concurrences in the game, and there's actually a trophy available for triggering each of the eight at least once.
How you trigger a Concurrence is actually pretty simple: each of the eight has a requirement of a certain number of Quickenings you need to trigger during your Quickening Chain. So, for instance, to trigger the basic first Concurrence you simply need to have a successful chain that includes at least three level 1 Quickenings.
Some of the later Concurrences are very difficult to get, however - just due to the sheer luck and timing involved. Keep plugging away and it'll happen! It's difficult to understate how powerful these are - they can do five figures of damage easily, and are the best attacks in the whole game.
Here are the eight, plus how to trigger them:
- Inferno: Trigger three Lv1 Quickenings
- Cataclysm: Six Lv1 Quickenings
- Torrent: Two Lv1 Quickeings & Two Lv2 Quickenings
- Windburst: Four Lv2 Quickenings
- Ark Blast: Two Lv1 Quickenings, Two Lv2 Quickenings & Two Lv3 Quickenings
- Whiteout: Four Lv3 Quickenings
- Luminescence: Three Lv1 Quickenings, Three Lv2 Quickenings & Three Lv3 Quickenings
- Black Hole: Four Lv1 Quickenings, Four Lv2 Quickenings & Four Lv3 Quickenings