
Dragon Quest XI S Best Party Guide: the best party builds and setups for every situation
Wondering the best party setups for Dragon Quest XI? We can help you with that! This guide will help you figure out the right party members for each situation, and more. Fair warning: This guide will have spoilers for each party member you’ll recruit throughout the game.
Looking for some spoiler-free advice? Check out our Dragon Quest XI Beginner’s Guide!
Before we get started with our guide to the best party for different situations, let's make one thing absolutely clear: when it comes down to it, there is no one absolute best character or party load-out. Dragon Quest XI: Echoes of an Elusive Age is a really competent, broad RPG which has a lot of choice.
To that end there's a slew of character skills and you can switch characters in and out of battle easily, and it's highly recommended you keep mixing things up - especially in boss battles.
With that noted, we have some pretty good Dragon Quest XI party set-up suggestions for you here in this guide - and if you find yourself stumped, they may help you through or suit as a good starting point for your own party build experimentation. We've broken up our suggestions into a few categories...
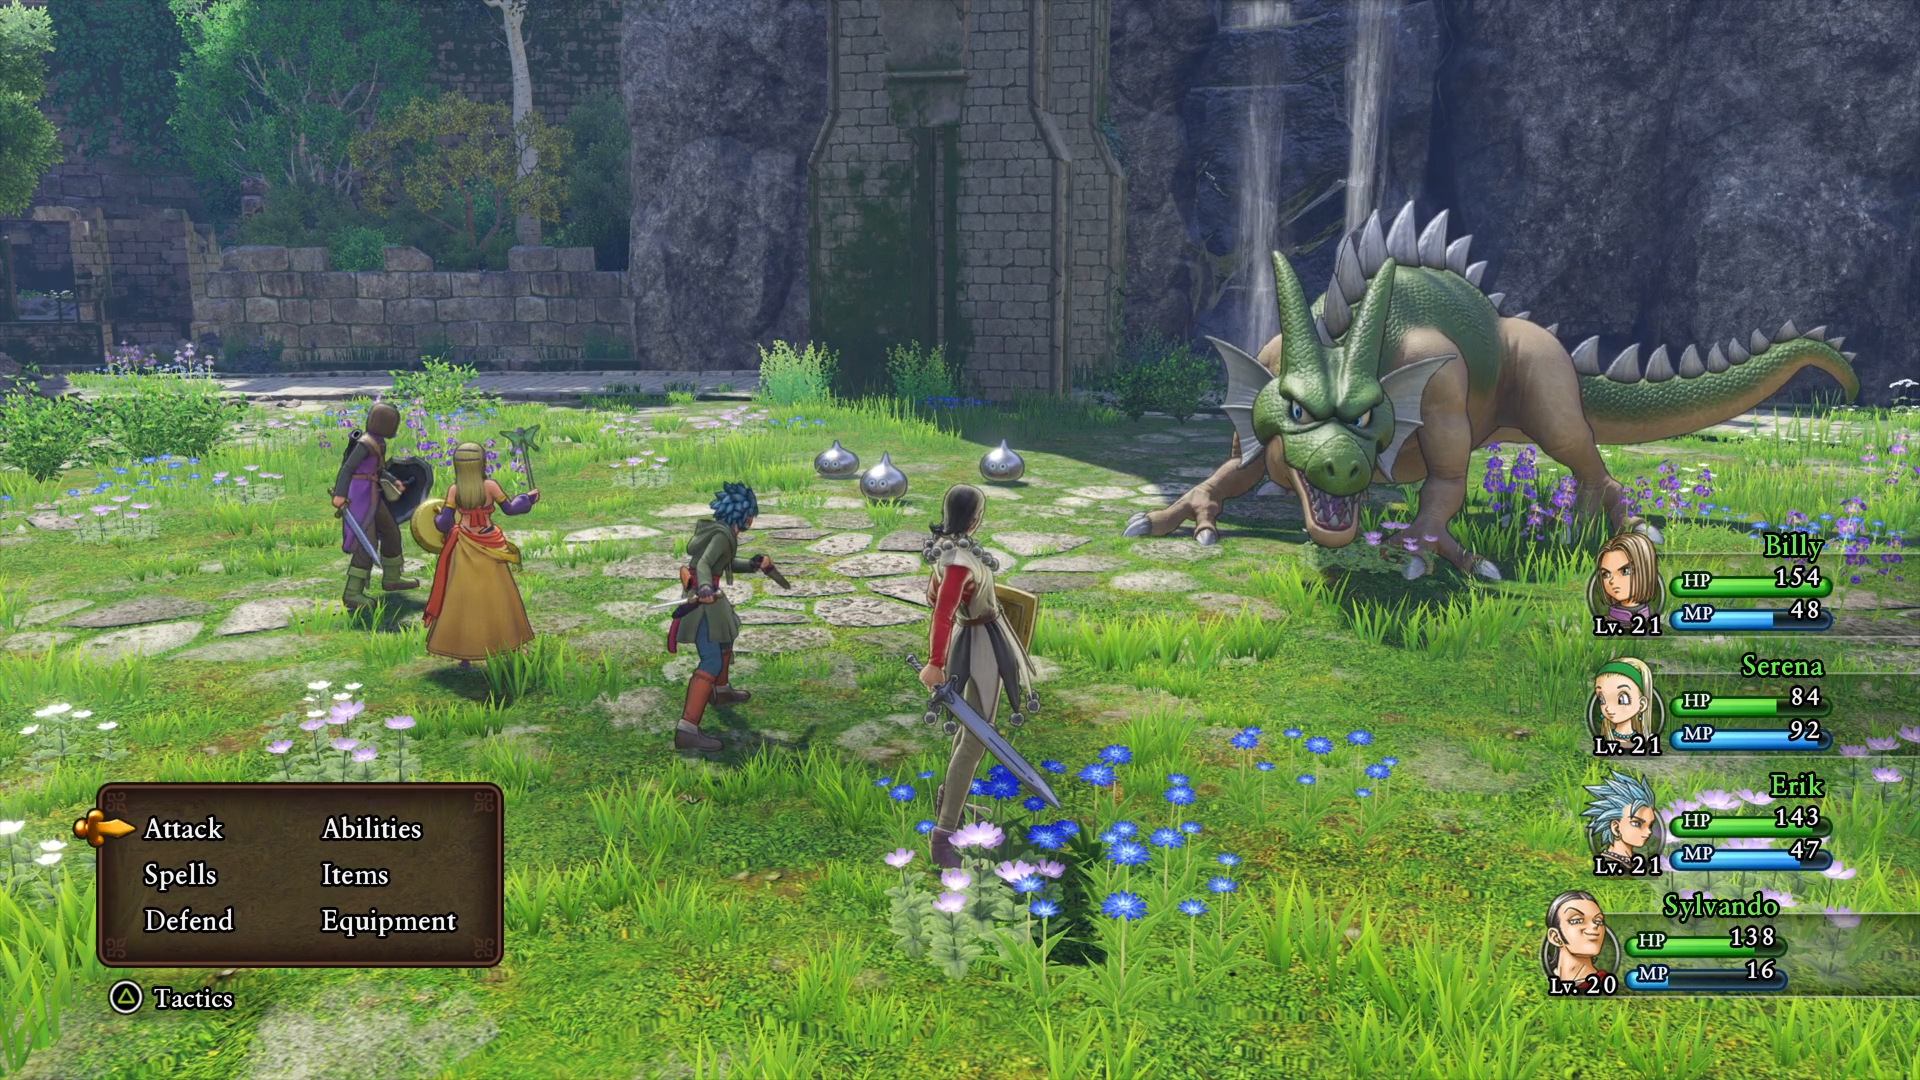
The Best Party for Normal Battles in Dragon Quest 11
When fighting regular enemies in Dragon Quest 11, you usually just want to knock them out and move on. Therefore the best party set-up if going to be the one that can handle this the fastest, allowing you to progress, travel and grind more quickly than you otherwise would.
How to handle regular enemies quickly and efficiently changes throughout the game. Early on, the best option is to give one of your characters a whip or boomerang to attack multiple enemies at once:
- Erik with a boomerang can be a good choice, as well as Sylvando with a whip.
- I wouldn’t recommend giving Veronica a whip, as being equipped with a Heavy Wand gives bonuses to her Magical Might.
- Additionally, while you may not need a healer during normal battles, having Rab on the field can help if you have an enemy mob that’s on the difficult side with healing, or lob a spell or two when everyone’s at full health.
Later in Dragon Quest 11, many characters gain spells and skills that attack multiple enemies, making whips and boomerangs less of a necessity in knocking out foes. This changes things up quite a bit.
- In the end- and post-game, I found myself using Veronica’s Boom abilities to weaken enemies, and a variety of the Hero’s skills to land the finishing blows.
- Jade’s Femme Fatale is also very useful, attacking all foes while healing her
- Hendrick is powerful, but it can be hard to utilize him in normal battle--however, if he’s specializing in Greatswords, the Helochopper move can make short work of a group of foes.
The Best Party for Fighting Metal Monsters in Dragon Quest 11
Killing metal monsters can be very difficult, but the massive amount of experience they provide is well worth the trouble. Dragon Quest 11 offers a bunch of options to take Metal Slimes down, but you need to know the best option for each situation.
For early on, a variety of characters can learn skills that can cut through defenses. Metal Slash is one such move, and with four characters with access to Swords (Hero, Erik, Sylvando, and Hendrick) this will be your best option. Metal Slash will guarantee 1-2 damage on a metal enemy, making sure you don’t waste your time missing attacks.
However, when you start fighting Metal King Slimes and higher (that’s right, there’s more powerful metal enemies this time around), 1-2 damage isn’t going to cut it before they run away.
At this point, you have to rely on landing criticals… and thankfully one character has the ability to always land a crit. Erik’s Critical Claim ability costs a whopping 64 MP, but lets the thief pull off an unblockable, unmissable critical hit, which will kill even the toughest metal enemy in one blow. Erik is almost always fast enough to pull this off before the enemy has a chance to run too, though you can give him a Meteorite Bracelet to make him go even faster.
If you haven’t learned Critical Claim, though, there are a few other options. Jade has the highest natural critical chance, and that coupled with claws gives her two chances to put those stats to good use. Hendrick can also learn the axe ability Hatchet Man, which trades a higher critical hit chance with a higher chance to miss. Against metal enemies, Hatchet Man is worth the risk!

The Best Party for Boss Battles in Dragon Quest 11
So here’s the thing - each boss in Dragon Quest 11 is going to require a completely different strategy to survive. Some have high magical defense, rendering Veronica useless. Others inflict different sorts of status ailments, and certain party members can heal different ailments. One boss even has a move he uses constantly that tanks your characters’ Magical Mending, ironically making Sylvando the best party member to heal for that battle.
But, especially in the late-game, there are some strategies you can employ broadly speaking in every boss battle. Let's get into what those are:
The first is a major damage dealer - Divide and Critical Claim. Erik’s Divide ability lets him make two doppelgangers for a turn, meaning he’ll use his next attack three times. Choose Critical Claim next turn and… that’s right, three critical hits for massive damage. This is seriously powerful.
During the final boss of the True Ending, Erik was landing about 1400 damage per Critical Claim, outdoing even Veronica’s impressive spell damage output. Of course, given how much MP this cost he’ll only be able to do this combo 2-3 times before running dry… and at that point, it’s best to just switch him out for another damage dealer. While this combo is impressive, it can be difficult to keep Erik healthy with his low defense.
Hendrick can help keep Erik and other weaker party members alive with Forbearance, which is part of the Fraternity skill set that he gains access to in the post-game. Forbearance has the knight taking all attacks in place of his party members. This is both a blessing and a curse, as it’s great that you won’t have a constantly hurt party or worry about your healer dying, but Hendrick having to tank a lot of blows (especially of the magical nature) puts him at a high risk of getting killed. There’s no denying Forbearance’s advantages, though, even if it sometimes turns Hendrick into a sacrificial lamb.
Additionally, buffs are quite useful in Dragon Quest 11, so it can be useful to throw a few on when you’re not having to heal. It does pay to be smart, however--if a boss is mostly using flame attacks, a Hymn of Fire is going to help out more than Kabuff. Oomph and Oomphle can be great on Erik or Jade, but late in the game most of your party isn’t going to be doing a bunch of physical attacks. Serena has spells that protect against instant death, but that is rarely a concern in boss battles themselves.
Late-game, my party set-ups usually started like this:
- Hero - Mainly used Quadraslash, no matter how many enemies
- Hendrick - Used Forbearance until either he died or I finished up Erik’s combos
- Erik - Used Divide + Critical Claim until he ran out of MP. If he died I revive him
- Serena - Generally keeping everyone alive/buffs when able. Also Kerplunk is an immensely helpful ‘nuclear’ button that revives every character at full health, even in the back row--just keep an Elfin Elixir handy.
Then, I’d typically switch Erik out for Veronica, and either kept Hendrick out or switched him with Jade. Late in the game Rab’s ‘jack-of-all-trades’ set-up really works against him. He can’t heal as well as Serena nor can he survive many blows, so the old man usually sat out most boss fights.
Sylvando is a great support character, but it would often be difficult to keep him alive in the post-game, making it hard to justify him a spot on the front lines with the heavy hitters and Serena giving buffs when she can.