
Phoenix Wright Justice For All walkthrough: Spoiler-free Ace Attorney 2 case guide
After the truly excellent first entry in the series, it's time for the visual novel mystery adventures of defense attorney Phoenix Wright to continue in Justice For All. Like the rest of this series' original trilogy, this game is very widely available on practically every platform, from PC to PlayStation and Nintendo Switch.
The structure will be familiar if you played the original Phoenix Right: Ace Attorney - you're put through a series of investigations and trials, tasked with finding the truth. This is our spoiler-free walkthrough guide to Phoenix Wright: Ace Attorney - Justice For All - which is the second entry in the series.

Following on from our original Phoenix Wright: Ace Attorney guide, this guide gives you the correct path through every trial and investigation in as spoiler-free a fashion as possible, so you can enjoy the story. If you've already completed this game, move on to our Ace Attorney 3: Trials & Tribulations guide. Use the handy links to skip to where you're at, or just scroll the page:
- Case 1: The Lost Turnabout
- Case 2: Reunion, and Turnabout
- Case 3: Turnabout Big Top
- Case 4: Farewell, My Turnabout
Case 1 - The Lost Turnabout: spoiler-free walkthrough
Phoenix Wright is having terrible dreams, but that's no excuse - he has a difficult new case to solve. You're thrown in at the deep end, at the trial of Maggey Bryde...
Case 1, The Lost Turnabout Trial
We're staying as spoiler-free as we can in these walkthrough, so we'll simply list the answers to questions posed to you in trial in the order that they appear:
- Say you're ready.
- The Glasses.
Decisive Evidence - Gumshoe's Testimony: Witness Cross-Examination
Cross-examination is a key part of the Ace Attorney Formula - you'll be using it right through Justice for All. The game will explain, but to reiterate, you'll get a series of statements. You can 'press' statements to get more information, and present evidence to reveal and prove contradictions in testimony - which can unravel a case. Here's what to do this time:
- On the 4th Statement ("I don't like saying it..."), Present Maggey Bryde's Profile from your evidence.
Gumshoe will now have to testify again.
Dustin and Maggey - Gumshoe's Testimony: Witness Cross-Examination
- Press Gumshoe on his 5th statement ("It was something...").
- Choose to press further when given the chance.
- Say "Of course it's relevant." for some new evidence.
Writing on the Ground - Gumshoe's Testimony: Witness Cross-Examination
- On the 6th statement ("From this, we could..."), present the Baseball Glove.
This causes quite a stir. It's now time for a brief recess in the trial. You'll get some new items to study, and then you'll find yourself back in the trial, hearing testimony from a new witness.
What I Saw That Day - Wellington's Testimony: Witness Cross-Examination
- On the 6th statement ("The only other thing I saw..."), present the Baseball Glove.
- Select "Has Bad Eyesight."
What Happened Next - Wellington's Testimony: Witness Cross-Examination
- On the 3rd statement ("It must've been..."), present Dustin's Autopsy Report.
- Questen Further.
- "There is something..."
- When asked, Present Crime Photo 1.
- "Yes, I have an idea."
- Present the Glasses evidence.
- "There was a way."
- Present the Cell Phone Evidence.
- When prompted, present the Names List.
- "A member of that group."
- Now, present the Dustin Prince profile
- "Fingerprints on the phone?"
- Raise an Objection.
- Present Phoenix's Business Card.
- "The back of the card."
...and with that, your first case - something of a tutorial - is complete! Now it's on to the real deal, with Justice for All ramping up into...
Case 2 - Reunion, and Turnabout: spoiler-free walkthrough
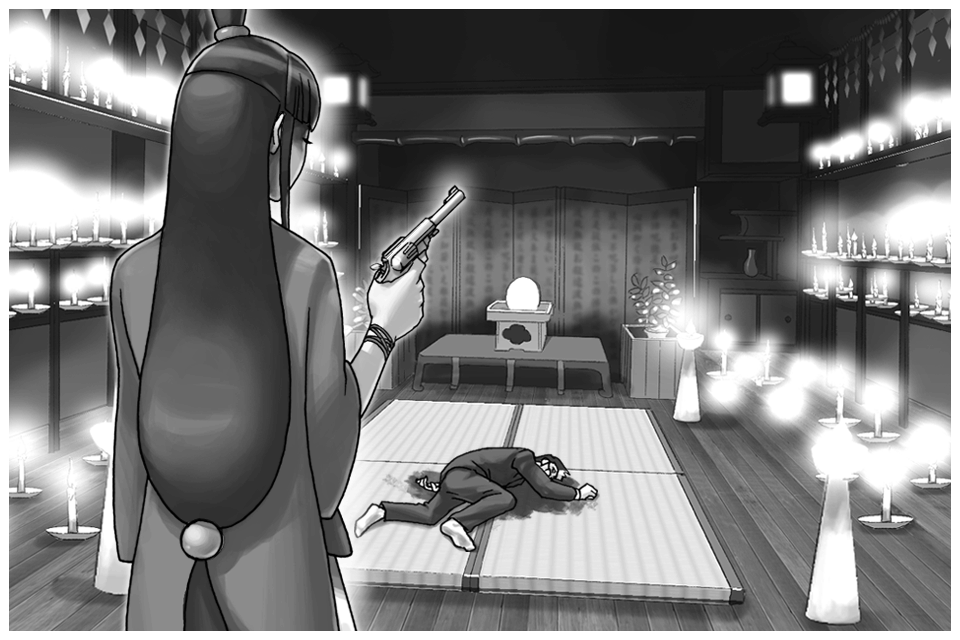
An old friend of Phoenix is in deep, deep trouble. There's a horrifying car accident and a seemingly impossible murder. The pressure is on for Phoenix not just to solve a case, but to save a friend.
Case 2, Reunion, and Turnabout: Day One Investigation
It's time for the first investigation in Justice For All. Here are the steps you'll need to take to gather all of the evidence you need today, to prepare for trial - all presented in a spoiler-free fashion, of course.
- You start in Kurain Village. Talk to Maya and exhaust all options to learn about the Channeling, and how Maya's been doing.
- Move to the Meditation Room.
- You'll get the Guidemap (Fey Manor) evidence.
- Talk to Dr. Grey to learn a little more about the channeling, which is key.
- Go to the Channeling Chamber next. Talk to Morgan Fey. This is Maya's aunt. You'll learn even more about Maya and the channeling...
- Move to the Winding Way, then the Side Room, then back to the Winding Way. Pick any option when prompted. The correct answer is Lotta Heart, however, if you remember the first game.
- Back and forth you go - now back to the Meditation Room. When asked, pick either option - but we guess you'll want to break in.
- Now you're in the Channeling Chamber. Events unfold, and disaster strikes. You'll be shunted back and forth between the chamber and Kurain Village a few times, talking to Lotta both about recent events.
- Eventually, you can now re-enter the Channeling Chamber properly. Gumshoe is here. Talk to him to get a full idea of events. You learn the victim was stabbed.
- Go to the Side Room to meet Ini Miney. Talk to her about the case and herself.
- In the Winding Way there's a mysterious girl again, but keep moving, now to the Meditation Room. Your investigation pauses for now...
If you need a break, now is an ideal time - you're still mid-investigation, but time skips forward to the next day...
- You pick up back in the Detention Center, with Maya. Of course talk to her.
- Exhaust all the topics with Maya and you'll get the Maya's Magatama evidence.
- Next up is a quick trip to the Wright & Co. Law Offices. As part of this, you'll get the Newspaper Clipping 1 piece of evidence.
- Head back to the village and to the Channeling Chamber. Morgan Fey is here. Talk to her about all three options.
- Stay in this room, and now use your examine mode to examine the folding screen on the right of the room. There's a little hole in it, which is suspicious. This adds the Folding Screen to your Court Record evidence list.
- Now go to the Winding Way. Pearl Fey is here.
- In order to get Pearl talking, present Maya's Magatama to her. Then talk to her as much as you can.
- When prompted, accept the item to get the Black Key in your court record.
- A new game mechanic is lightly introduced here - you'll have the Magatama charged so you can see into people's hearts. More on this soon...
- Go back to the Meditation Room. Gumshoe is here.
- Talk to Gumshoe about the two topics to get some interesting background detail. He mentions a newspaper article...
- So present Newspaper Clipping 1. This jogs Gumshoe's memory and then adds Newspaper Clipping 2 to the court record.
- You can now talk to Gumshoe a second time, about some different topics. Do that, then move on to...
- Now get back to The Side Room. Talk to Ini Mini about every topic, and... A Psyche-Lock appears! This is what Pearl charged the Magatama for.
- Think of these sections as a lot like a court cross-examination, but in the investigation phase. The Psyche-Lock represents a person hiding something. You have to pressure the person through evidence presentation and correct answers in order to make them tell the truth.
- Present Maya's Magatama to Ini Miney to start the Psyche-Lock.
Psyche-Lock: The Victim (Ini Miney)
- Simply present Newspaper Clipping 2 to prove the connection to Dr. Grey.
- Now talk to Ini about the newly unlocked topic.
- Move back to Kurain Village, and then to the Detention Center. Talk to the person here.
- Present the Black Key evidence when you get the chance. Something shocking happens here... but there's no time to worry about it now. It's almost time for the trial.
Case 2, Reunion, and Turnabout Day One Trial
There's a lot of ground to cover before the trial here, including the introduction of the new prosecutor you'll be facing, who has a relationship with two key characters from the past.
After a lot of exposition, the trial begins.
- Gumshoe will describe the crime. Listen to the important details. The Floor Plans get added to the Court Record.
- Gumshoe will testify.
Cause of Death - Gumshoe's Testimony: Witness Cross-Examination
You'll remember this from the first case; to break a cross-examination, you just need to poke holes in the narrative it weaves. Like this:
- As part of the testimony you'll get Dr. Grey's Autopsy Record.
- Press all five of Gumshoe's Testimony Statements. This gets the Knife and the Pistol added to the Court Record.
- There's nothing further you can really do here, so....
- When asked if you want to make a plea, of course choose to "Plead not guilty"
Incriminating Evidence - Gumshoe's Testimony: Witness Cross-Examination
- At the end of the testimony you'll get the Maya's Costume evidence. Evidence is stacking up now...
- Press Gumshoe's 3rd statement ("As you can see...") for some crucial background.
- Press further when given the chance.
- "There is one little thing..."
- Point to the hole in the sleeve of the costume. Present that.
What Transpired - Gumshoe's Testimony: Witness Cross-Examination
- Poor old Gumshoe testifies again. Present Maya's Costume to the 4th statement "(The victim took...").
- Say "Something doesn't make sense."
- Now present the Folding Screen evidence we discovered a while ago.
- When prompted, point to the spot just to the left of the bullet hole and present that.
- When asked, you of course say "It changes everything."
You are, as ever, causing a stir - and so it's time for a brief recess. When you return, a friend takes to the stand once again...
Witness's Account - Lotta's Testimony: Witness Cross-Examination
- That picture that was taken earlier is presented as part of the testimony; Lotta's Photo gets added to the court record.
- Press Lotta on all of her statements.
- When prompted, Press Harder against her 4th statement ("Inside was the...")
- When asked a question pressing the 5th statement, choose "Behind the folding screen."
- Unfortunately, you "Can't present anything yet" beyond that - so select that.
Witness's Account, Part 2 - Lotta's Testimony: Witness Cross-Examination
- Press the 4th statement ("But I still managed...")
- Confront Franziska or don't - this choice doesn't matter.
- You now get Lotta's Photo 2, another piece of evidence.
- Another choice that doesn't impact things: pick whichever option you want.
- Is there something wrong with this new evidence? Check it out. Now you have to say "I can prove it."
- Point to the right-hand side of the photo - to the sleeve. Present it.
- You've uncovered a contradiction, but what does it mean? Tell the judge that "The shooter is someone else."
- Next, say "Maya had left the room" when prompted.
- Finally, present the Black Key from your court record.
Von Karma is furious, but you've managed to quite literally buy a stay of execution. Now it's time to investigate again.
Case 2, Reunion, and Turnabout: Day Two Investigation
- You're back in Kurain Village. Talk to Pearl about everything you can. On the 4th option, 2 Psyche-Locks appear - but you can't open them yet.
- Present the Black Key to Pearl. This hints you should check out the Incinerator...
- Therefore, head to Winding Way. The Incinerator is in this room, as is Ini.
- Talk to Ini Miney. The 3rd option will trigger some currently unbreakable Psyche-Locks.
- Examine the Incinerator. This adds the Cloth Scrap to your Court Record.
- Examine the urn on the table - this adds the Sacred Urn to the Court Record.
- Head to the Channeling Chamber. Morgan Fey is here. Talk to her about everything you can for curious background.
- Let's see Maya; go to the Detention Center. Talk to her about everything you can, and take in all the detail.
- Back at Kurain Village, you see Lotta, who runs away. Follow her to...
- ...the Side Room. Except Lotta isn't here. You can do other stuff, however.
- Examine the Ball first. This adds Pearl's Ball to the Court Record.
- Examine the Large Box for a surprise. The Clothing Box also gets added to the evidence list.
- Go to the Meditation Room. We now have what we need to unlock Pearl's Psyche-Locks - so let's do that. Present Maya's Magatama to Pearl to get started.
Psyche-Lock: Pearl's Alibi (Pearl Fey)
- When prompted, point to the Winding Way on the map and present it.
- Now present Pearl's Ball.
- Now present the Sacred Urn - so that's what happened...
- Finally, present Ami Fey's Profile.
- With the locks broken, you can now talk to Pearl about two new topics. This will update the Sacred Urn in the court record.
- Go back to the main Kurain Village area. Talk to Lotta here about two topics.
- After talking about those two topics, present Ini Miney's Profile to Lotta. This unlocks a new topic of discussion.
- It's time for a new location - the Hotti Clinic! Mosey on over there.
- Talk to Hotti about the Clinic and Ini, then Present your Attorney's Badge to him.
- This unlocks three new topics of chat. The second adds the License Photo to your evidence, and the 3rd updates the Newspaper Clipping 2 evidence.
- Go back to Kurain Village once again. Talk and exhaust all avenues of conversation for important information.
- Now go to the Winding Way. Ini Miney is in here - and we can finally break her Psyche-Locks. Present Maya's Magatama.
Psyche-Lock: Traffic Accident (Ini Miney)
- At the first prompt, present Ini Miney's Profile.
- Show you know what you're talking about by presenting Newspaper Clipping 2.
- Now present the License Photo from the Court Record.
- Finally, present Mimi Miney's Profile.
- With the Psyche Locks broken, you can now talk to Ini about two new topics, with interesting revelations abound.
- Nowm head back to Kurain Village again to see something suspicious...
- Go back to the Detention Center - we need to see Maya again.
- Discuss all three topics, and then present Maya's Magatama - it's time for one last Psyche Lock session.
Psyche-Lock: The Murderer (Fey)
- When asked who is being protected, present Morgan Fey's Profile.
- For the next piece of evidence, present the Cloth Strap.
- For your next slice of proof, present the Black Key.
- Now you need motive. Why? Well, present Ini Miney's Profile.
- Completing this Psyche-Lock unlocks one final topic of conversation. You know a lot now - but do you know enough? Hopefully - it's trial time...
Case 2, Reunion, and Turnabout Day Three Trial
The stakes are raised. Apparently the world is watching. So, let's get to it...
Maya's Escape - Morgan's Testimony: Witness Cross-Examination
- Press Morgan on every single one of her statements.
- Whenever you're prompted to "Question Further", do so. Aside from some volunteered information there's nothing for you here - so on to the next testimony.
After the Murder - Ini's Testimony: Witness Cross-Examination
- Press the 3rd statement ("It was, like...")
- Then Press the 4th statement ("I, like, hadn't seen her...").
- When prompted to, Question Further.
- Say "It's Very Important."
- Press on the newly-added statement ("I wasn't, like, scared...")
- Now present Lotta's Photo 2 or Maya's Costume to that statement. Either will do.
After the Murder, Part 2 - Ini's Testimony: Witness Cross-Examination
- Press the 3rd statement ("And I, like, persuaded...), then the 4th statement ("And then, like, I took...").
- Ask, "Were going to the Crime Scene."
- Press Harder, then say "It's Very Important." This forces a new line to be added to the testimony.
- Present the Sacred Urn and Pearl Fey's Profile against this new statement ("I, like, didn't see anyone...")
- Say "There is no way!"
- Point out where the contradiction is: "In her testimony just now."
- When you have to use the map, point to the Channeling Chamber and present it.
- Now present the space behind the folding screen.
- You probably know where this is going now. Present the Clothing Box.
- Can you prove it? "Yes, I can, with some evidence."
- Next Present the Folding Screen or the Clothing Box - either works.
- When questioned on the number of people, say "Correct, it's not possible."
- Now present Morgan Fey's Profile.
- Now we need to prove motive. Present Newspaper Clipping 2.
- Finally, confidently answer "Yes, I can." You're in the home stretch!
...but the Judge calls a Recess. Once you return, it's back to cross-examination. You are closing in on a conclusion to Justice For All's case 2, mind.
Last Year's Accident - Ini's Testimony: Witness Cross-Examination
- Press the 3rd statement ("And, like, the night...").
- When prompted, press harder still. She amends the statement.
- Present the License Photo evidence against the newly added statement ("I, like, didn't have my license...")
I Wouldn't Be Allowed - Ini's Testimony: Witness Cross-Examination
- Press the 3rd statement ("She, like, had just gotten...").
- Press Harder when given the chance to get a revised statement.
- Now present Newspaper Clipping 2 against the revised statement ("My sis' new car wars...")
- So, who was driving the car...? It's the second option.
- In the search for motive, present Newspaper Clipping 1.
- Now there's a lot of explanation and exposition to explain exactly what happened. It's complicated, but the good news is that the trial is over!
- After the trial, present Pearl Fey's Profile when you get the chance.
The next case up is, if we're honest, not only probably the weakest in Justice For All, but arguably in the whole Ace Attorney Trilogy - but what do you expect when there are clowns involved...?
Case 3 - Turnabout Big Top: spoiler-free walkthrough

Murder is no laughing matter - even at the circus. Phoenix is tasked with defending one of the world's most famed magicians...
Case 3, Turnabout Big Top: Day One Investigation
- You start out in the Wright & Co Law Offices. It's worth noting that as well as your usual Attorney's Badge, Maya's Magatama is still in your Court Record - that remains with you for breaking Psyche-Locks.
- Go to the Detention Center to meet the defendant, Max Galactica, aka Billy Bob Johns.
- Talk to Galactica about everything you can. The 4th option will trigger 3 Psyche-Locks you can't break yet.
- Present your Attorney's Badge to Max.
- You can detour to the Wright & Co Law Offices & present Max's profile for an achievement, if you want, but your next progression destination is...
- Head to the Circus Entrance. There's nothing here right now, but you have to come here to move on to the Big Top.
- In the Big Top, meet Regina, who tames the animals. Talk on two topics.
- Then present Max's Profile to Regina. You can now ask her about another topic.
- Finally, present the Russel Berry Profile to Regina.
- Now go to the Ringmaster's Room. There's nobody here, but there's some important things to take note of...
- Examine the Envelope on the table to learn about some money-related information. Always a motive, money. This adds Ringmaster's Papers to the court record.
- Now examine the posters on the wall. This will add a Max G. Promo Poster to your stack of evidence.
- Now head to the Lodging House - Plaza - you have to go past/through the Circus Entrance to get there.
- Gumshoe is here. Talk to him about everything you can; one option will add the Crime Photo to the court record.
- Present Max's Profile to Gumshoe. There's some chatter and the Silk Hat gets added to the court record.
- Once you've exhausted topics of conversation with Gumshoe, go back to the Circus Entrance. Benjamin Woodman is here; talk to him about all three topics.
- You need to get to Moe's Room - reach it through the Lodging House Plaza. In here, you'll find Moe the Clown. Talk to him about every topic.
- Once you've ran out of thing sto ask, present Max's Profile. This gets you more information, but also the Circus Map for your court record.
- Move on to the Big Top Cafeteria - which is reached through the Big Top, if that didn't make it obvious.
- Examine the broken glass bottole on the floor. This adds Broken Bottle to the court record.
- It's time to talk to our defendent again. Go back to the Detention Center and speak to Max. Talk through the options available, then present Maya's Magatama to start on those Psyche Locks.
Psyche-Lock: Meeting With Russell (Max Galactica)
- First, present the Ringmaster's Papers.
- Now present the Broken Bottle, followed up by Ben's Profile.You can also do these pair in the reverse order.
- With the Psyche-Locks broken, now talk to Max about the two new topics, which don't add new evidence but add a lot of key new information.
- With that information in hand, head back to the Big Top Ringmaster's Room, reached via the Entrance and then the Big Top.
- Inside the Ringmaster's Room, examine the trophy case. There's a puppet in here - this adds that puppet, Trilo Quist, to the court record.
- Return to the Big Top Cafeteria. Ben is here. Talk through the initial options, then...
- Present Trilo Quist. This leads to you being able to talk to someone else... kinda. You can talk about four more topics here, in more depth.
- Go back to the Big Top. You'll have a spot of trouble here. Talk to Regina.
- Go to Moe's Room again. When given the choice, choose to "Go with Moe."
- This leads to Arco's Room. Money the Monkey will be added to your evidence list automatically in here.
- Before you go, examine the pile of shiny things. You'll get your Attorney's Badge again, but also a Ring that gets added to the court record.
And with that, you're all out of time. Things don't quite make sense yet, but that's tough - you now have to go to trial.
Case 3, Turnabout Big Top Trial: Day Two
- You're back at trial again. After some exposition, Gumshoe takes to the stand for a testimony.
Details of the Events - Gumshoe's Testimony: Witness Cross-Examination
- At the end of the cross-examination, you'll get Russel Berry's Autopsy Report added to the court record. It's worth a look.
- Press all of Gumshoe's statements.
- The 5th statement ("The victim was found bent...") will add a Wooden Box to your court record when pressed.
- When prompted, ask "About the contents". This adds the Small Seasoning Bottle to your evidence.
- That's all from Gumshoe.
What You Witnessed - Trilo's Testimony: Witness Cross-Examination
- After some chatter, press the 4th statement ("He was the only one...").
- Ask "Ben only saw Max?"
- Who? Well, present the Russell Berry Profile.
- Now press the 5th statement ("Then the police..."), and when asked for another name, present Regina Berry's Profile.
About the Proposal - Trilo's Testimony: Witness Cross-Examination
- Press this testimony's 2nd statement ("I even had something..."). When prompted, keep pushing.
- This results in a revised statement. Move on, however.
- Instead, present the Ring on the 5th statement ("In the end...").
- Choose "Ben's testimony has a flaw." This results in another testimony.
Witnessing Max - Trilo's Testimony: Witness Cross-Examination
- Press the 4th statement ("I said 'good evening'"...").
- When prompted, pick "Trilo's evening greeting."
- On the 4th statement, present the Broken Bottle.
- When promoted, answer "He saw a different person."
- When asked who, present Russell Berry's Profile.
Franziska says she has a new witness for you, and the judge calls a recess - it's an ideal time to save and take a breather, if you want.
When you return to the court room, Moe the clown takes to the stand. Yep. The clown...
What You Witnessed - Moe's Testimony: Witness Cross-Examination
- First, there's a fake testimony of sorts. Then the real one. You don't need to do anything.
- Because Moe is such a scatter brain, you will be punished if you push him too much or too often. Instead, follow our instructions precisely this time to avoid penalties...
- Press the 3rd statement ("I thought I'd go straight to sleep..."). Keep pressing when prompted.
- This results in a revised statement ("I heard a huge noise..."). Press this statement.
- Now press the 6th statement ("I kept watching them...")
- When challenged, say "Of course I do!" with your chest. With confidence.
The Silhouette - Moe's Testimony: Witness Cross-Examination
- Present the Max G. Promo Poster against the 3rd statement ("...they were all there!")
The Silhouette, Part 2 - Moe's Testimony: Witness Cross-Examination
- Don't press any statements. The penalty is severe!
- Instead, present the Silk Hat evidence against the 4th statement.
- When asked to show evidence, present the Crime Photo.
- There will be one more testimony with a strange revelation - but it's of no use to you now. Instead, the Judge decides to end the trial for the day - which in turn buys you valuable investigation time!
Case 3, Turnabout Big Top: Day Two Investigation
- At the Wright & Co. Law Offices you can do a recap chat with Maya, but you really need to head to the Detention Center.
- Talk to Max about every topic. One topic will give you the Grand Prix Photo evidence for the court record.
- Go to the Circus Entrance. Talk to the folks here about everything you can.
- Move on to the Lodging House - Plaza. A brief story encounter here is all you get.
- Now get to the Big Top Cafeteria. Begin by presenting the Grand Prix Photo to Moe.
- Now you can chat to Moe about 4 different topics. These discussions will add the Max G. Bust and Note evidence to the Court Record.
- Return to the Detention Center, and present the Note evidence you just got to Max.
- Now go to the Ringmaster's Room at the Big Top for a little revelation...
- Examine the tailcoat. There's something sticking out of its pocket... this updates the Note in your court record, and makes it a huge piece of evidence.
- Go back to the Lodging House - Plaza. Gumshoe is here - and then so is Von Karma! Talk to her about every topic available.
- Next, head to Acro's Room. Acro's real name is Ken. But everyone here goes by their circus names, as we know. Talk about everything - note the Psyche Locks.
- Go back to the Big Top. This is your chance to talk to Regina. Exhaust your open topics first.
- Then present the Note to Regina. This updates this evidence in the court record yet again.
- Now present the Small Seasoning Bottle to Regina.
- Take yourself back to Moe's Room. Choose any option you like and get the Stage Costume, which goes into your court record.
- Head back to the Big Top. Present the Stage Costume, then talk about the option it opens up. Leon (the lion) gets added to the court record. The plot thickens...
- Now visit the Cafeteria. Talk to Moe about the topics you can - but you'll be stopped by Psyche-Locks. Luckily, we already have everything we need - present Maya's Magatama...
Psyche-Lock: Get Over It! (Moe)
- First up, present Leon (the lion).
- Now present Acro's Profile.
- Easy, right? Now talk to Moe about the two new topics to learn some very interesting new information...
- Head back to Acro's Room. We now also have what we need to crack those Psyche-Locks we saw on him earlier... so present Maya's Magatama to him.
Psyche-Lock: About the Wheelchair (Acro)
- Just like you did with Moe, start out by presenting Leon (the lion).
- Now present Bat's Profile.
- Next up, you'll need to present Regina Berry's Profile.
- Finally, present the Note.
- With the locks removed, you can finally talk to Acro about two more absolutely vital topics. The evidence is stacking up, but you're also out of time - you now have to head back to trial.
Case 3, Turnabout Big Top Trial: Day Three
- At this point, Phoenix feels like he has a pretty good idea who the culprit is - and you should too. But you have to reach it. First up, Von Karma calls Acro to testify.
What You Witnessed - Acro's Testimony: Witness Cross-Examination
- Press Acro on his 4th statement ("I only saw him from behind, but...").
- Say "There is a contradiction", then prove it by presenting the Silk Hat evidence.
- Be bold. Say "Acro is the real culprit."
- When prompted to answer, reply "Of course he didn't."
- You'll now have to use the Circus Map to demonstrate - present Acro's Room.
- Next, choose to Present Evidence, then present the Max G. Bust.
Acro's Physical State - Acro's Testimony: Witness Cross-Examination
- On the 6th statement ("Thus, it would be unrealistic for me..."), present the Crime Photo.
- When asked about the box, choose "The weight of the box."
- When asked about the bust, say "I remember."
- To answer the next question, present your old kleptomaniac friend Money the Monkey.
- Von Karma has questions. Answer next by presenting the Max G. Bust.
- Talking about the cloak and bust, present Russel Berry's Profile.
- Von Karma will keep pushing - now present the Silk Hat.
Things are quite rapidly spiraling out of control, so the judge calls a much-needed break. Save, grab a drink, and settle in for the thrilling conclusion...
- During recess, Gumshoe comes through for you, and brings you a new item: the Scarf evidence. It's added to the court record. If you examine the scarf and take it in, you should see why it is significant.
About the Ringmaster - Acro's Testimony: Witness Cross-Examination
- This testimony is air-tight. So don't take the bait; say "No need to question him now."
- When prompted by the judge, say "I can't provide one."
- You're then asked for another name - present Regina Berry's profile.
- To prove your claim, present the Note.
- To the judge, say "I know all about it," and then present the Small Seasoning Bottle when you can.
- Von Karma is on the attack. Present Bat's Profile next.
- Tell the court "It was more than that."
- Present the Scarf to back up your claims.
- You'll be given a choice; choose to "See how things work out first."
- When you get the chance, say that what you're looking for is "Somewhere in this courtroom."
- Asked where, say it's in "The Witness' Chair."
The truth is revealed! There's a big old exposition drop here explaining exactly what happened in full detail - if you haven't fully puzzled together what happened and why, it will then make sense.
Back outside the court, say, "I don't think so" and then present Bat's Profile. With that, it's time to move on to a much more exciting case - and the final case in Ace Attorney: Justice for All.
Case 4 - Farewell, My Turnabout: spoiler-free walkthrough
Here we are, at the fourth and final case in Phoenix Wright Ace Attorney: Justice for All. This case involves some familiar things - like the Grand Prix event mentioned in the last case and a familiar character from Phoenix's past...
Case 4, Farewell My Turnabout: Day One Investigation
- Players of the first game will find themselves kicking of this investigation with some familiar things, in the Viola Hall. You'll also begin with your Attorney's Badge, Maya's Magatama and The Nickel Samurai in your court record.
- Talk to Will Powers to learn about him.
- Go to the Hallway. You can examine here if you want, but you need to move back to the Viola Hall.
- Inside the Viola Hall you'll get the Press Conference Ticket added to your court record.
- Make your way to the Hotel Lobby. Oldbag is here! Talk through all the options.
- Head back to the Viola Hall for a brief story event, then to the Hallway. There's a few characters here.
- Talk to Gumshoe, exhausting all three topics of conversation.
- Present Matt Engarde's Profile to Gumshoe.
- Talk to Gumshoe about the newly unlocked topic.
- Now go back to the Hotel Lobby. Upon arrival you'll get the Radio Transceiver added to the court record.
- Talk to the person here about the two topics. There are revelations abound here - the stakes in this trial just got raised!
- Go back to the Hallway to find Gumshoe. Talk to Gumshoe.
- After a story interlude, you'll find yourself in the Wright & Co. Law Offices. Talk to Pearl.
- Go to the Detention Center. It's time to get some information. Talk to Matt Engarde about everything you can.
- Now present the Press Conference Ticket.
- Next, present the Radio Transceiver. This gets Engarde Talking. Talk about all four of the topics that are revealed.
A day passes...
- After more story unraveling, you're back at the Wright & Co. Law Offices again. You can recap with Pearl if you want, or even head to the Detention Center to talk to Engarde. But where you really need to go is...
- The Hotel Lobby. Oldbag is here. Talk to her about the three topics. The 3rd triggers 4 Psyche-Locks.
- Go to the Hallway. Lotta is here. Talking to her adds Lotta's Camera to the court record. Another topic uncovers a couple of Psyche-Locks.
- Next up is Engarde's Hotel Room. Adrian Andrews is here. Talk to her.
- Present Juan Corrida's Profile. This opens a new topic - which is closed by Psyche-Locks. There's a lot of these!
- Now go to Corrida's Hotel Room, via the Hotel Hallway. Gumshoe is here.
- Talking to Gumshoe will get you the Crime Photo evidence.
- This room is in two halves; pan to the right side and examine the Guitar Case. Guitar Case gets added to your Court Record. Who'd have guessed?
- Now examine the Wine Glass atop the dressing table. This adds the Wine Glass to your evidence list.
- Now you have it, present the Wine Glass to Gumshoe. This triggers a small event - and once you're alone in the room, a piece of paper is left behind.
- Examine the paper on the table. This adds Autograph to the court record.
- Optionally, you can examine the plush teddy bears for a cute conversation.
- Take yourself over to the Viola Hall now. Powers is here. Have a chat, then present Adrian Andrews' Profile to him. Talk about the Gossip to get the Newspaper Clipping in your evidence file.
- How go back to the Hotel Lobby. We know Oldbag's role, sort of - so it's time to smash those Psyche-Locks. Present Maya's Magatama...
Psyche-Lock: The Victim (Mary Oldbag)
- First off, start by presenting the Autograph.
- ...oh, that's it. The Autograph is deleted from the Court Record, but all 4 Psyche-Locks explode. Oldbag sure is fickle.
- Now that's over, talk to Oldbag about the two new topics to learn more about the case.
- Now move back to the Hallway. Lotta is here, and you now have what you need to deal with her Psyche-Locks. Present Maya's Magatama.
Psyche-Lock: Big Scoop (Lotta Hart)
- When you get the chance, start by presenting Adrian Andrews' Profile. This breaks the first lock.
- Now present the Magazine Clipping. This breaks the second Psyche Lock.
- Now talk to Lotta about the new 'Big Scoop' topic. This updates Lotta's Camera in the court record.
- Go to the Criminal Affairs Department now - we have to pay a visit to the cops!
- First talk to Gumshoe about everything you can.
- Then present the Magazine Clipping to him in order to unlock a new topic.
- Then... a mysterious figure appears! Talk to them.
- Present Celeste Inpax's Profile next, unlocking a new topic which adds Suicide Report to your evidence.
- Present the Suicide Report now. This further reveals another additional topics of conversation. that lead to the Attempted Suicide Report being added to the court record.
- As a side note, you can present Celeste Inpax's Profile to Engarde at the Detention Center if you want. It triggers a scene.
- It's time to see Andrews. Go back to Engarde's Hotel Room. Pay attention to what Von Karma says...
- When Von Karma is gone, present Matt Engarde's Profile to Andrews.
- Ask about the "Motive for Murder".
- Now present Maya's Magatama to tackle Andrews' psyche locks.
Psyche-Lock: Motive for Murder (Adrian Andrews)
- First off, dispute the first statement by presenting the Magazine Clipping.
- Then prove yourself by presenting Celese Inpax's Profile.
- Now present the Suicide Report.
- Follow the evidence - next, the Attempted Suicide Report.
- Phoenix will break that last lock all on his own.
- Now you can talk to Andrews about the motive. Do that.
- Go back to the Wright & Co. Law Offices. There are a few topics of conversation here.
- In the Mysterious Location, examine the card laying on the ground, then the door...
Next up, it's time for the trial - a lot is on the line...
Case 4, Farewell, my Turnabout Trial: Day Two
- Your day in court starts with you getting a 'gift' - you'll see.
- Gumshoe is called to the stand for his typical kick-off police testimony.
Bare Facts of the Case - Gumshoe's Testimony: Witness Cross-Examination
- Press Gumshoe on the 3rd statement ("After looking into the cause..."). This adds Juan's Autopsy Report to the court record.
- Press Gumeshoe's 4th statement ("At first, we thought there..."). This updates the Guitar Case evidence.
- Press on the 5th statement ("However, we later...").
Why Arrest Engarde - Gumshoe's Testimony: Witness Cross-Examination
- As soon as this testimony is over, you'll get the Knife and the Jammin' Ninja's Button added to the Court Record. It's worth checking these out.
- Present the Knife against Gumshoe's 6th statement ("The defendant bought the knife...")
- When Edgeworth challenges you, say "Actually, I do", and then present the Wine Glass.
- Say "There's no way." There's some chatter, then a new, old witness is called.
What You Witnessed - Oldbag's Testimony: Witness Cross-Examination
- Press Oldbag on the 5th statement ("It was Engarde...").
- When asked, say "The Person's clothes."
- Say "It was very important." Oldbag adds a new statement.
- On the new statement ("He was wearing..."), present the Jammin' Ninja's Button.
Who I Saw - Oldbag's Testimony: Witness Cross-Examination
- Pressing on the 2nd statement gets you an achievement in newer versions.
- At the 5th statement ("So he must've worn..."), present the Knife.
- Tell the court that "There is a contradiction."
- To back that up, present the Knife again.
- Say "To frame Matt Engarde."
- To back that up, present Adrian Andrews' Profile.
Secret Information - Oldbag's Testimony: Witness Cross-Examination
- Press the 5th statement ("...this is top secret, you got that?!").
- Choose to "Present Evidence", and then present Lotta's Camera.
- Given the option, "Pile on More Pressure"
- Now present Lotta's Camera again, as if to really drive it home.
- Lotta's Photo gets added to the court record.
- Say "There's something strange with it."
- To point out what, present the feet of the Nickel Samurai costume.
- The prosecutor wants a name, so present Adrian Andrews' Profile.
The judge calls a recess so Phoenix can gather his wits and figure out a game plan. Coming up, a cross-examination extravaganza.
Where I found the Body - Andrews' Testimony: Witness Cross-Examination
- Press her 3rd statement ("And there was his dead body...").
- Press her 5th statement ("I felt as though...").
- When prompted, Press Further. This adds a new statement.
- Present the Guitar Case against the new statement ("I was the one who...")
- When asked, choose to "Make Her Testify."
The Guitar Case - Andrews' Testimony: Witness Cross-Examination
- Present the Guitar Case against any statement but the first.
- Say "That's Strange," and then present the Wine Glass.
- After talking, you'll have a chance to present the Nickel Samurai. Lotta's Photo can work here, too.
- Tell the court "It was a spare costume."
- Finally, present the Press Conference Ticket. Then, more testifying!
Protecting Matt - Andrews' Testimony: Witness Cross-Examination
- Press on Andrews' 4th statement ("My thoughts were confirmed by the evidence...").
- A new statement is added ("That button was torn...") - present Juan's Autopsy Report against it.
- To the judge's question, say "To pin the crime on Engarde."
- Next, present Adrian Andrews Profile.
When I found the Body - Andrews' Testimony: Witness Cross-Examination
- Present the Crime Photo against the 4th ("When I saw...") or 5th ("To be honest...") statement.
- You'll be given a choice. You can choose either option. Another testimony follows.
My "Crime" - Andrews' Testimony: Witness Cross-Examination
- Press every single one of Adrian Andrews's statements.
- There is nothing to be done here, but the trial gets extended - buying you a half day of extra investigation...
Case 4, Farewell My Turnabout: Day Two Investigation
- You'll start in the Wright & Co. Law Offices. Talk to Gumshoe about the various topics at hand.
- Now go to the Hotti Clinic. There's a bunch of people here. First, talk to Von Karma.
- After she leaves, talk to Edgeworth. Exhaust topics of conversation in order to get the Picture Card added to the Court Record. More talking ensues, and then Edgeworth hands over the Letter of Introduction for the Court Record.
- The perspective changes, and now you're in ????. Move to the next ????, a different room, and examine the Satellite Dish, the Picture on the Table, the Door, and the Teddy Bear on the Sofa
- After another perspective switch, you're back as Phoenix in the Hotti Clinic. It's no use being here, however, so go to the Detention Center and experience a story event that gives you Matt's Note for your evidence list.
- Now go to Engarde's Living Room, which you can access from the Hotel Lobby. You'll meet Shoe, the cat, and a man called John Doe. Talk to him. This removes Matt's Note from the court record.
- Go to the Hotel Lobby. Oldbag is here; give her the Letter of Introduction, which is then removed from the Court Record.
- With Oldbag placated, go to the Hallway. Lotta is in here. Talk about everything with her.
- Now move yourself over to Corrida's Hotel Room. Oldbag is in here now - always in the way. Talk to her. You get some key information.... but not from Oldbag.
- Hotfoot it back to the Wright & Co. Law Offices. Present the Radio Transceiver evidence to Gumshoe. You can now talk to him about a new topic - which has curious implications.
- Now go back to Corrida's Hotel Room with that new information in hand. You need to sweep for bugs. On the left side of the room, point at the teddy bear's head and check.
- You can now talk to Gumshoe about a few more topics. These will add the Spy Camera, then the Transmitter, and finally the Stuffed Bear to your Court Record. The bear quickly gets removed again, however.
There's a natural break in events here, but when you're ready, press on for things to pick back up right where you left off...
- Bam. You're back in the room. Corrida's Hotel Room, to be precise. Run over things with Pearl by exhausting all topics of conversation.
- Now move to Viola Hall. Oldbag is in here - talk to her about the three available topics.
- Next up, head to the Criminal Affairs Department. Talk to the Chief, and you'll be allowed to return to the Detention Center.
- Head to the Detention Center. There's two people to talk to here. First, talk to Matt Engarde about all topics. A bunch of psyche-locks appear.
- Leave the Detention Center and go to the Criminal Affairs Department. Have a chat with Will Powers. There's four topics of conversation - see them all.
- When done with Powers, go back to the Detention Center and now talk to Adrian Andrews. Again, see every topic to reveal some Psyche Locks that need to be broken.
- Back to the Wright & Co. Law Offices you go. Talk to Gumshoe, and you'll get the Credit Card Receipt added to evidence, and you'll also learn what he found about the Spy Camera, Transmitter and Stuffed Bear.
- With all this in hand and mind, return to the Detention Center. We've got Psyche-Locks to break! Start with Matt Engarde.
Psyche-Lock: Matt's Secret (Matt Engarde)
- Start out by presenting the Spy Camera.
- Next, present the Stuffed Bear. This breaks the first lock.
- When prompted on who, present Matt Engarde's Profile.
- Asked for proof, present the Credit Card Receipt. Another lock down.
- Next, present the Picture Card.
- When asked about de Killer, pick the second option.
- With these psyche-locks broken, you can now talk to Engarde about 2 new topics.
- Back in the Criminal Affairs Department, you'll now need to talk to Edgeworth. Chat about all three subjects.
- After an important phone call, go back to the Living Room in the Hotel. Examine the Teddy Bear in front of the door on the right - it's next to the smaller door for the Cat. This adds the Figurine to the court record.
- Now you'll be in the Private Lounge. There's nothing to see here, so move on to the next room, the Wine Cellar.
- Inside the Wine Cllear, examine the picture frame at the bottom of the stairs. This adds Celeste's Photo to the court record.
- You're whisked back to the Detention Center - there's one bit of business left to deal with. Present Maya's Magatama to Adrian Andrews...
Psyche-Lock: Why Frame Him? (Adrian Andrews)
- When you first can, present the Suicide Report.
- When asked what that has to do with it, present Celeste's Photo
- With that done, Andrews will open up about two more topics. You now have the answers in hand... but knowing what to do with them is the challenge for Phoenix Wright. And the trial is coming.
Case 4, Farewell, my Turnabout Trial: Day Three
- After nightmares, pre-trial chatter, and nervousness, it's time to head into the trial.
- The first testimony is from Will Powers himself.
Visit to Matt's Room - Powers' Testimony: Witness Cross-Examination
- Press Powers on his 4th statement ("I watched the two...").
- Press the 3rd statement ("He was talking..."). A revised statement is added.
- Press the newly revised statement ("Matt gave the bellboy...").
- When prompted off the back of this, ask about "Engarde's tip."
- Given the chance to Object or Wait, you can decide which to pick. Next, another testimony.
The Second Time - Powers' Testimony: Witness Cross-Examination
- Press Powers on the 4th statement. When promtped, say, "Try to pull a fast one."
- There's a new statement added ("I thought it was kinda strange...") - Present the Wine Glass or Crime Photo evidence here - either works. Another testimony is incoming.
Their Second Meeting - Powers' Testimony: Witness Cross-Examination
- Press the 2nd Statement ("He gave something...").
- Ask about "the person inside".
- Now press the 2nd statement again, and "ask about this 'something'." A revised statement is added.
- To this revised statement ("If I saw it again..."), present the Figurine.
- When prompted, ask about "the person who received the bear".
- Next, ask about "the bear itself".
- Now you can do it - when given the chance, raise that Objection.
- Prompted to present another, present Adrian Andrews's Profile.
Events follow, of course, and the Judge calls a Recess. There's more story across the recess period - things are moving fast - and then you're called back into court.
- Now Adrian Andrews is taking to the stand for her new testimony.
The Bear Figurine - Andrews' Testimony: Witness Cross-Examination
- Press Andrews on every one of her statements. Doing so updates the Figurine in the Court Record and also adds Celeste's Suicide Note.
- When asked what evidence you'd like to persue, pick whichever of the two you want.
- Next, choose to "Present Evidence", then present Celeste's Suicide Note.
- A whole lot happens in the wake of this, and then you'll be back in Recess.
- In Recess, say "There is a way", then present Franziska von Karma's profile.
Given you're even presenting stuff in the recess, this trial is non-stop. Very soon, you're back in the courtroom, however...
- When prompted, choose to "Present Evidence", then present either the Spy Camera or the Tramsmitter - either will do.
- After some thrilling back-and-forth, you'll finally have another cross-examnination with a new witness...
About my Client - Shelly de Killer's Testimony: Witness Cross-Examination
- Press de Killer on his 2nd statement ("To an assassin...") What he says here is vital.
- Press on de Killer's 3rd statement ("And that is the reason..."). Hear what he has to say.
- Now press de Killer's 2nd statement yet again. This causes a new statement to be added.
- Press the newly added statement ("Now then, I do believe it's about time...")
- Some shocking events unfold, but when you're asked, choose to continue the trial.
About my Client, Pt. 2 - Shelly de Killer's Testimony: Witness Cross-Examination
- Press on any statements you like - de Killer is nothing if not an entertaining witness.
- Once you're ready, present the Wine Glass against de Killer's 5th statement ("Adrian Andrews already knew...").
- New testimony is up to answer your question...
Request Taking - Shelly de Killer's Testimony: Witness Cross-Examination
- Start by pressing de Killer on his 3rd statement ("We met at a certain bar..."). When asked, press further.
- When prompted, then say "It was not important".
- Then to the next question, say "It was very important." This adds a new statement.
- Target the new statement ("From the moment I saw him..."), present Adrian Andrews' profile.
Request Taking, Pt. 2 - Shelly de Killer's Testimony: Witness Cross-Examination
- Almost there. Press de Killer's 3rd statement ("The request was for...").
- When prompted, press further, and then press further again. This adds a new, 4th statement.
- To the new statement ("One of these was to find..."), present either Celeste's Suicide Note."
- When asked about the guilt of your client, choose whichever option you think is best.
From here on in, you can get either the bad ending or the good ending to Phoenix Wright - Ace Attorney: Justice for All. If you want to see both, go for the bad ending first - pursue a Not Guilty verdict. This guide, however, will continue to guide you towards the true ending.
- Von Karma appears and delivers a whole shed-load of new evidence. There's De Killer's Pistol, a Video Tape, and the Bellboy's Uniform. In all three cases, question Von Karma for more details so you know everything you need to know.
- When prompted to call a witness, present Shelly de Killer's profile. Anything else will send you to the bad ending.
- Next, present the Video Tape. Again, anything else will make a bad ending happen.
- When asked for the reason why, say "Wanted Blackmail on you".
- For plea, you can choose either option - the ending will be the same either way.
And that's it! The end. During the final stages of the game, you'll get one more piece of evidence - the Whip. When given the chance, present it - and then enjoy the credits and bask in victory. Next up - Phoenix Wright: Ace Attorney - Trials and Tribulations; the thrilling trilogy finale!