
Final Fantasy VIII SeeD rank guide: written test answers, field exam choices and grading
A huge part of the world of Final Fantasy VIII is the mercenary organization SeeD, which Squall and his friends will early on in the game become an official part of. SeeD also forms a great part of FF8's systems: there's a SeeD Rank to worry about complete with different salary grades, plus field exams and written tests that help to determine your SeeD ranking - and on this page, we're going to demystify them all.
Based on your SeeD Rank, you'll be paid a certain amount - there are thirty-one different SeeD pay grades ranging from 500 (rank 1) to 20,000 gil (rank 30). Finally, there's a special, final rank - A - which is paid 30,000 gil.
Final Fantasy VIII SeeD Rank explained: salary grades for each SeeD Ranking
Here's some key things you need to know about the SeeD ranking and salary:
- You're paid based on distance travelled - so you'll be paid automatically at interims based on your walking around, and that also means you'll earn more money more quickly traveling by car or Chocobo. You cannot grind this way, however - walking around doing nothing will actually cause your SeeD rank to slowly drop.
- Your initial SeeD Rank is determined by your conduct on the mission at Dollet, and we've got a guide on the Dollet SeeD mission choices and ranking below.
- Your conduct during various moments in the story can have an impact on your SeeD Rank.
- You can also raise your SeeD ranking by taking a written test, which is detailed below.
- Your SeeD rank is limited by your character level - so if Squall is level 20, his maximum SeeD Rank is 20.
SeeD Field Exam at Dollet and the Fire Cavern: how to get the best score to get a high starting rank
Your field mission to Dollet early on in FF8 is both a real, live mission and an exam - your performance on the mission will determine your starting SeeD Rank and therefore how much you're paid when you're out in the field for the rest of FF8. Thankfully, we've got some advice on how to get the best field exam score in Dollet - things you should and shouldn't do in order to score points.
As an aside, there's one more thing you shouldn't forget in this mission - there's a chance to obtain a new GF and a weapon upgrade magazine. For more information on those, hit up our guides on FF8 GFs and summons, including a list of missable GFs and obtaining the weapons monthly magazines and ultimate weapons. Don't forget to return to Dollet later on for some of FF8's collectible magazines, too.
The Field Exam is split into five different areas that represent what a SeeD needs: Judgment, Conduct, Attack, Spirit and Attitude. Here's how they all work:
Judgment SeeD Field Exam Scoring
The Judgment score in your field exam is based on your performance when you visit the Fire Cavern to obtain your first GF. You'll be asked how much time you want on the clock, and you'll be rewarded for accuracy in that judgement - the lower that the time remaining clock is when you defeat and name Ifrit, the more points you will recieve. Keep in mind that the clock keeps running on the Ifrit naming screen, but is not visible. If you let the clock run to 0 on this screen, you will get no points.
- 0:00~0:07: 100pts
- 00:08~00:29: 90pts
- 00:30~00:59: 80pts
- 1:00~1:59: 70pts
- 2:00~2:59: 60pts
- 3:00~9:59: 50pts
- 10:00~10:59: 40pts
- 11:00~11:59: 30pts
- 12:00~12:59: 20pts
- 13:00~13:59: 10pts
- 14:00~14:59: 5pts
- 15:00+: 0pts
Conduct SeeD Field Exam Scoring
The Conduct field exam scoring works much the same as the Judgment scoring, except this time it's actually during the Dollet Mission portion of the exam, like the rest of the categories. This is the opposite way, however: the more time remaining on the clock when you reach the beach during the evacuation, the better you score. Basically, you want to have strong conduct here and not be distracted by things on the way and get out of there fast once the evacuation order is given.
- 25:00+: 100pts
- 24:59~24:00: 90pts
- 23:59~23:00: 80pts
- 22:59~20:00: 70pts
- 19:59~19:00: 60pts
- 18:59~17:00: 50pts
- 16:59~15:00: 40pts
- 14:59~10:00: 30pts
- 9:59~6:00: 20pts
- 5:59~3:00: 10pts
- 2:59~0:00: 0pts
Attack SeeD Field Exam Scoring
Your Attack performance in the field exam is determined simply by how many enemies you defeat during the Dollet Field Exam. Enemies defeated by Guardian Forces do not count towards this total, and if an enemy's HP reaches zero more than once (so for X-ATM092, the boss), only the first 'kill' counts.
- 75+ enemies defeated: 100pts
- 25~74 enemies defeated: 80pts
- 15~24 enemies defeated: 50pts
- 10~14 enemies defeated: 20pts
- 0~9 enemies defeated: 0pts
Spirit Field SeeD Exam Scoring
The Spirit section of the field exam is all about the boss, the huge X-ATM092 spider mech that chases you. The mech can repair itself, and so can have its HP reduced to zero multiple times. The points total is determined by how many times you must escape from X-ATM092.
It's possible to only fight X-ATM092 once during the Dollet Field Exam; After the initial escape from X-ATM092 at the Communications Tower, you'll run for two screens. When you reach the screen with the downward slope, press the Triangle (or your platform equivilant) to walk instead of urn. this will keep the party from being stunned and avoids a second battle against X-ATM092.
- 1 Escape: 100pts
- 2 Escpaes: 70pts
- 3~4 Escapes: 50pts
- 5~9 Escapes: 30pts
- 10+ Escapes: 0
Something important to note here is that there is a 100 point bonus for fully defeating X-ATM092. The boss cannot be fully defeated the first time you fight it, so you must escape once, but it can be fully killed from the second encounter onwards.
Attitude SeeD Field Exam Scoring
Your Attitude score is determined by a number of things. This score starts out at 100 and is gradually reduced by deductions for any unbecoming actions you take during the Dollet mission. The following actions result in deductions:
- Talking to anyone during the Field Exam, including Zell and Seifer. There's 1 Deduction for each time you talk to them. If you talk to Biggs after defeating him, that adds 2 Deductions.
- Disregarding Seifer's order inside the ship adds 1 Deduction.
- Moving toward the communications radio tower before Seifer orders you to do so adds 1 Deduction each time you try.
- Following Sephie's lead and jumping off the cliff as a shortcut adds 5 Deductions each time you do it.
- Failing to save the dog that's in the town square from X-ATM092 adds 10 Deductions. If the player destroyed X-ATM092 before this point, the dog is automatically counted as saved.
- Hiding from X-ATM092 in the pub adds 20 Deductions
And here's how dedictions break down:
- 0 Deductions: 100pts
- 1-8 Deductions: 80pts
- 9-13 Deductions: 70pts
- 14-17 Deductions: 50pts
- 18-24 Deductions: 30pts
- 25+ Deductions: 10pts
SeeD Written Test Answers: every level of SeeD Rank Test
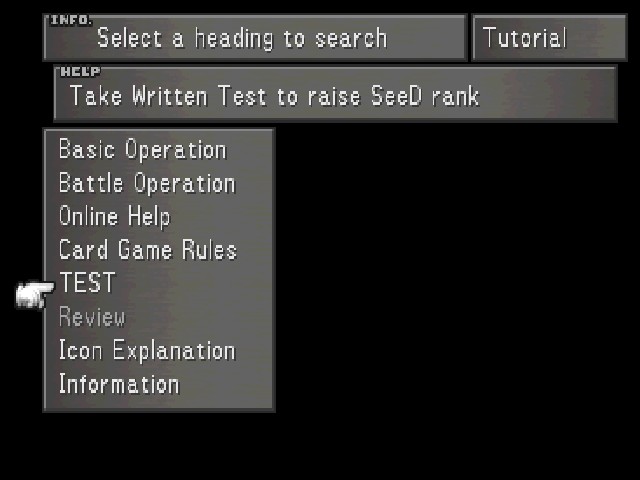
One way to raise your SeeD Rank in Final Fantasy VIII is to take a written SeeD Test. You don't need to be in Garden to take a SeeD Test - you can 'write in' and take the test at any time. The tests are a little hidden away, though - open up the menu of the game and hit the help option; you'll find the SeeD Tests within there.
There are 30 total SeeD tests you can take, which ask you a bunch of questions about the world, characters and systems of FF8. Completing a SeeD Written Test will raise your SeeD Rank, which in turn will earn you more money each time you're paid by Garden. This can be really helpful throughout FF8.
Here's a full list of every level of SeeD test in the game and all of their answers, written in order in a simple yes or no format.
- Level 1: Yes, No, Yes, Yes, Yes, No, No, Yes, No, No
- Level 2: Yes, No, Yes, Yes, Yes, No, Yes, Yes, No, No
- Level 3: No, No, Yes, No, Yes, Yes, Yes, No, Yes, No,
- Level 4: No, Yes, Yes, Yes, No, No, Yes, Yes, No, No
- Level 5: No, No, No, Yes, Yes, No, No, Yes, Yes, Yes
- Level 6: Yes, No, Yes, Yes, No, No, Yes, Yes, No, Yes
- Level 7: Yes, Yes, Yes, Yes, Yes, Yes, No, Yes, Yes, No
- Level 8: No, Yes, No, No, Yes, Yes, No, No, Yes, No
- Level 9: No, Yes, No, No, No, No, No, No, Yes, Yes
- Level 10: Yes, No, No, No, No, No, No, No, Yes, No
- Level 11: Yes, Yes, No, Yes, Yes, No, Yes, No, No, Yes
- Level 12: No, Yes, No, No, Yes, No, Yes, No, Yes, No
- Level 13: Yes, No, No, No, Yes, No, No, No, No, No
- Level 14: Yes, Yes, Yes, Yes, No, Yes, Yes, No, Yes, No
- Level 15: Yes, Yes, No, No, No, No, No, Yes, No, Yes
- Level 16: Yes, No, No, Yes, No, Yes, No, No, Yes, No
- Level 17: Yes, No, No, No, Yes, No, No, Yes, No, No
- Level 18: Yes, No, No, No, Yes, No, No, No, No, No
- Level 19: Yes, No, No, Yes, No, No, No, No, No, Yes
- Level 20: Yes, Yes, No, Yes, No, Yes, Yes, Yes, No, No
- Level 21: Yes, Yes, Yes, Yes, No, No, Yes, Yes, Yes, No
- Level 22: No, No, No, Yes, No, No, No, Yes, Yes, No
- Level 23: Yes, No, No, No, No, Yes, Yes, Yes, Yes, Yes
- Level 24: Yes, Yes, No, No, Yes, Yes, No, No, No, Yes
- Level 25: Yes, No, Yes, Yes, Yes, No, No, Yes, No, No
- Level 26: Yes, Yes, No, Yes, No, Yes, No, Yes, No, No
- Level 27: No, Yes, No, No, No, No, Yes, No, Yes, No
- Level 28: Yes, No, No, Yes, Yes, Yes, No, Yes, No, No
- Level 29: No, No, No, Yes, Yes, No, No, No, Yes, No
- Level 30: No, Yes, No, No, No, No, Yes, No, No, No