Final Fantasy VII Remake follows in the footsteps of the original game by having player choice sprinkled throughout the story. Each of the FF7 Remake choices that you're asked to make won't change the story in any major way, but each choice nevertheless has smaller consequences that play out as the adventure continues.
Advertisement. Keep scrolling for more
While most of the decisions made in Final Fantasy VII Remake will occur in the form of dialogue choices, there will also be a few other choices that have a slightly different context, such as setting the bomb timer in Chapter 1, as well as a unique situation that presents itself in early Chapter 10. This guide is to help you navigate all of the choices FF7 Remake has to offer, listing every choice and the consequences it can have.
Before we start, it's important to note that many decision in FF7 Remake won't have a clear outcome at the moment you make them. For instance, you'll always get the Yellow Flower key item from Aerith in Chapter 2, regardless of what you have Cloud say to her when they first meet. But many choices like this do have more subtle consequences down the line - which this guide exists to assist you with.
FF7 Remake Choices & Consequences guide
Some of the choices in FF7 Remake have obvious and immediate consequences, while others play out over a longer period of time. This actually makes the game similar to the original, which had many smaller choices come togethjer for the 'date scene' in the Gold Saucer. FF7 Remake doesn't stretch as far as that scene, but there is a branching cutscene of a similar type in Chapter 14 that functions in the same way. We reference all choices that can impact this in the guide, and how many of the three possible scenes you’ve seen will also be noted at the bottom of the ‘Play Log’ table in the ‘System’ menu as ‘Chapter 14 Resolutions Witnessed’.
Some of the choices will also affect which dresses you'll obtain at Wall Market in Chapter 9, as well as which set of quests you get in that chapter. Wall Market, in particular, is a very involved chapter, so we wrote up a separate guide that goes into detail about how to obtain the dresses and the other related dialogue in that chapter.
Below, we list all of the FF7 Remake choices and consequences so that you can figure out what decisions you want to make to all of the chocies that matter. Note that we will be skipping the more utilitarian dialogue choices, such as simply choosing to end a chapter by entering a room and the like.
Also note since this guide covers every chapter, there will be spoilers, especially for later parts of the game.
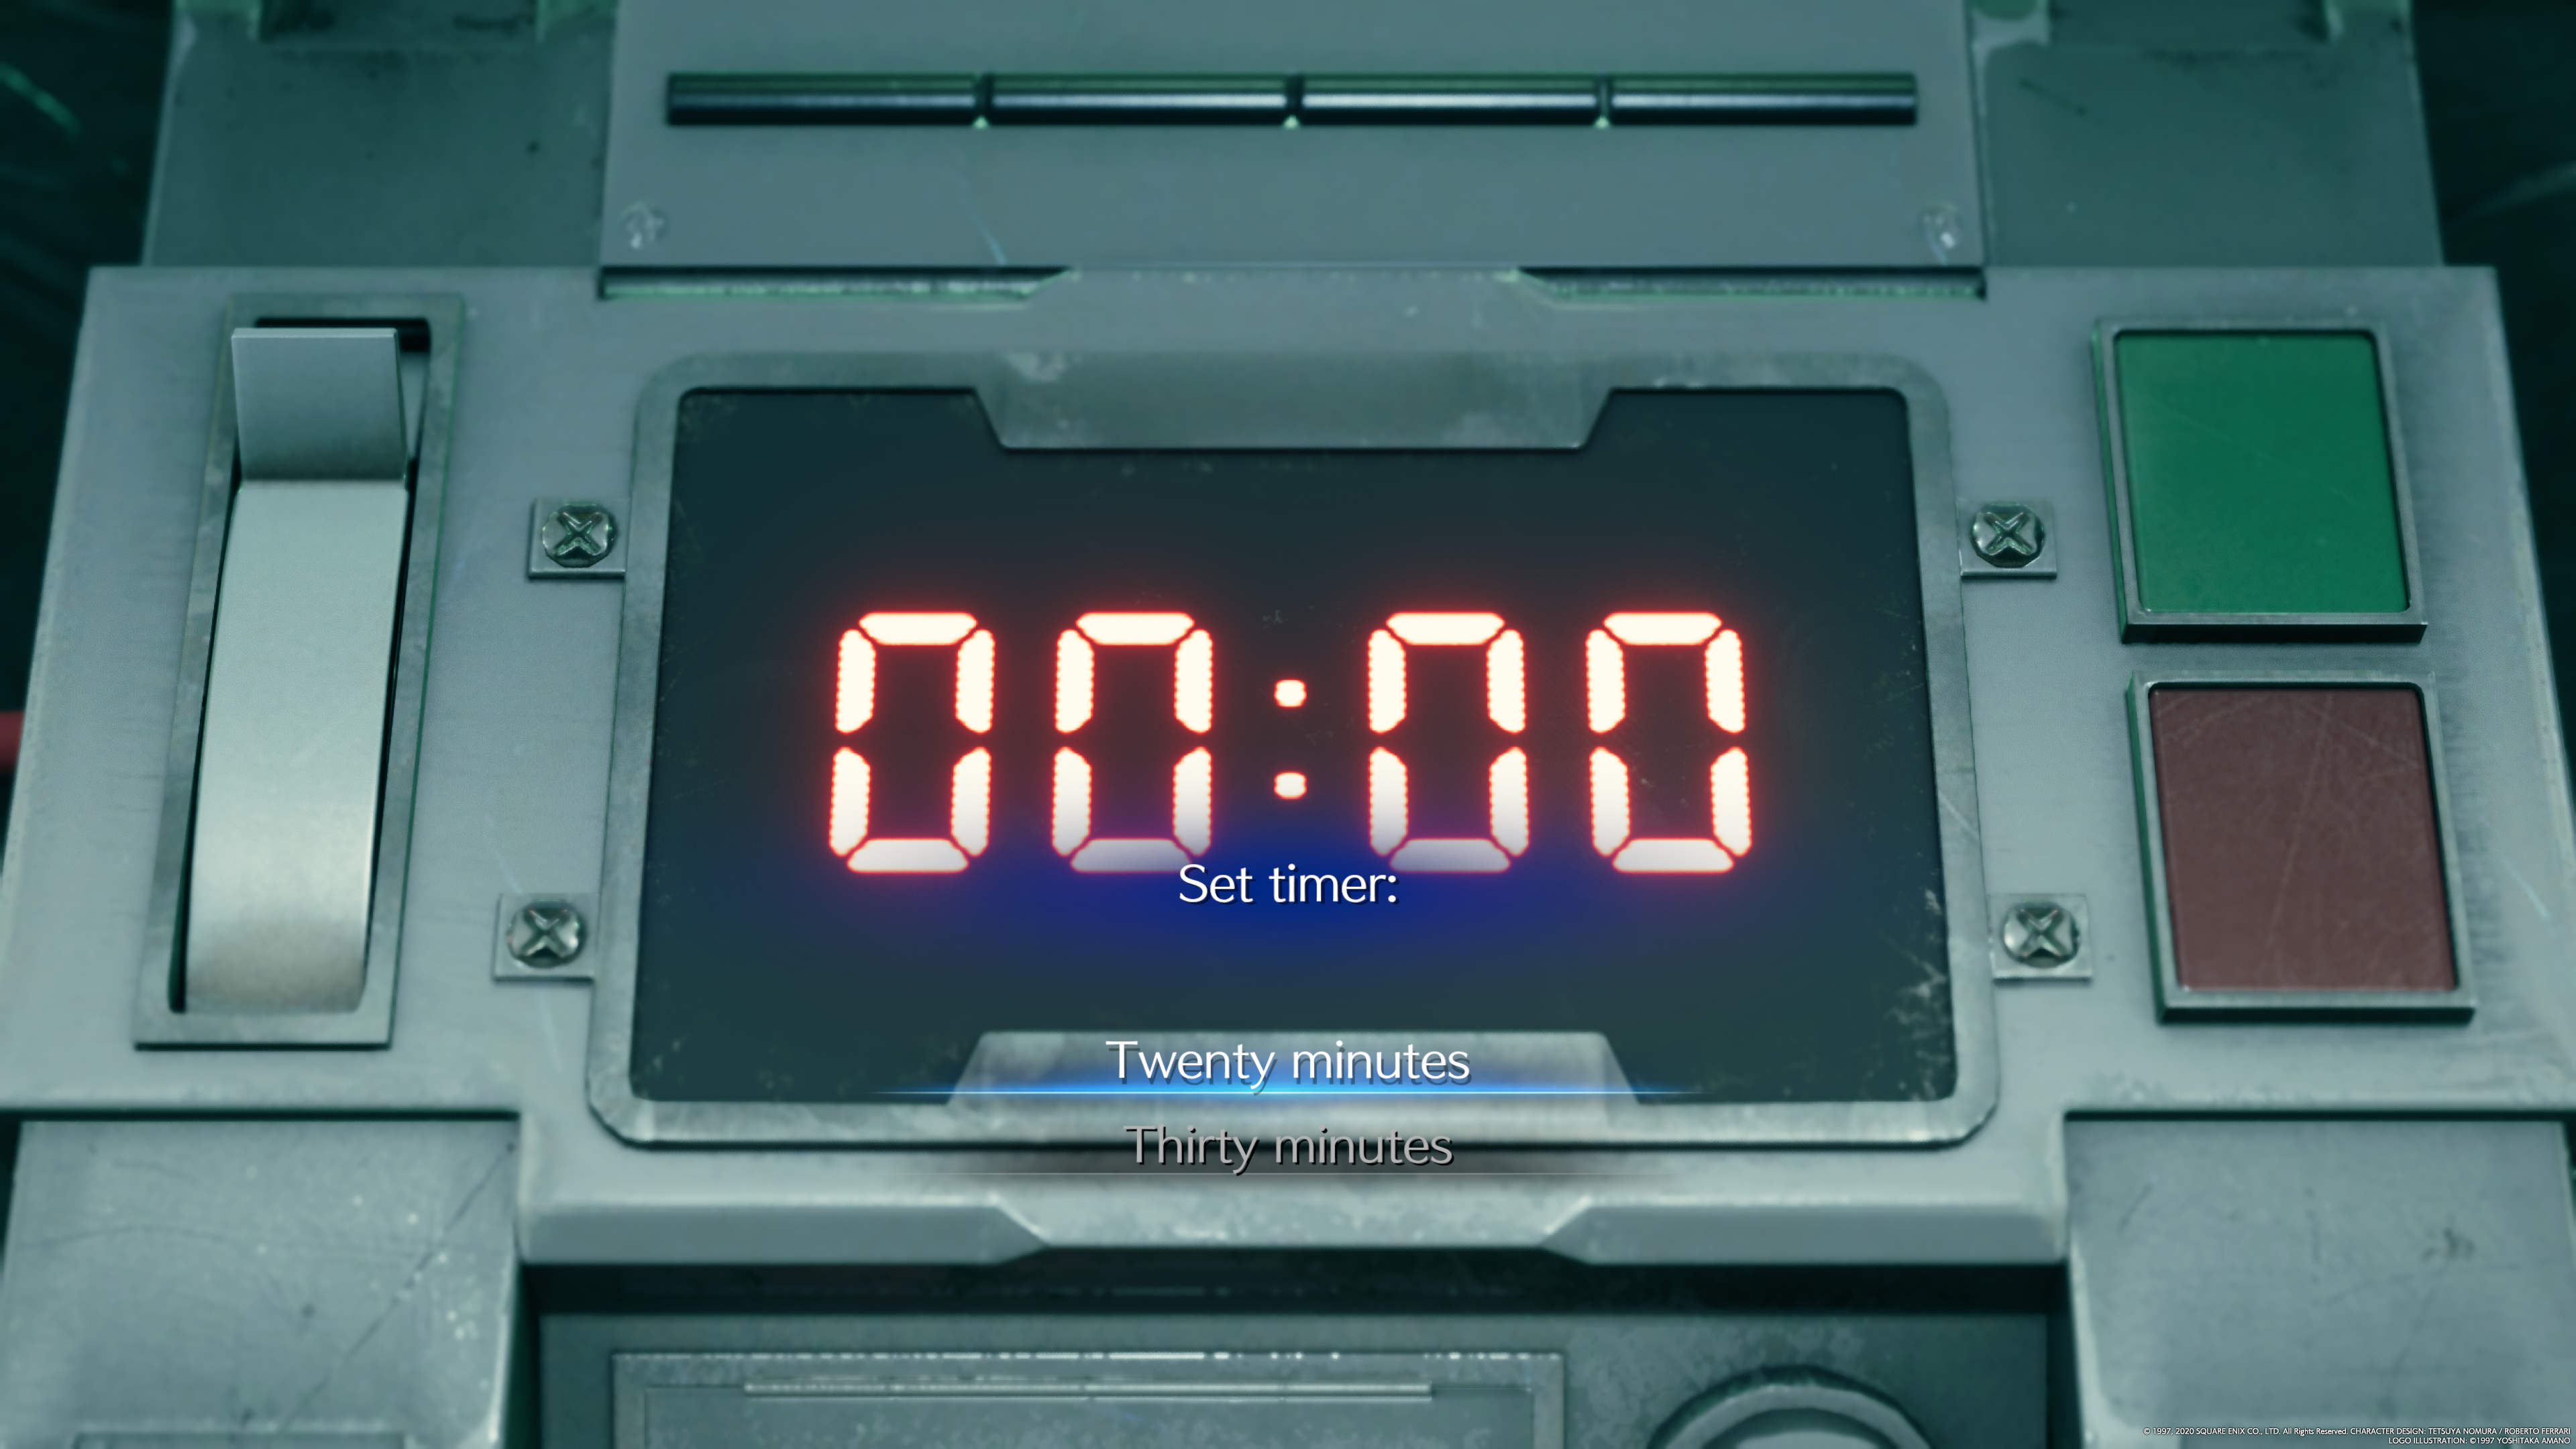
Setting the bomb timer is the first choice you get to make in the game, and it's a simple one. You choose between having 20 or 30 minutes on the timer to escape the reactor after defeating the Scorpion Sentinel boss. Your choice impacts what reward you recieve in the following chapter.
If you select 'Twenty minutes', Jessie will give you an Ether and two Hi-Potions near the start of Chapter 2, as a reward "for being brave".
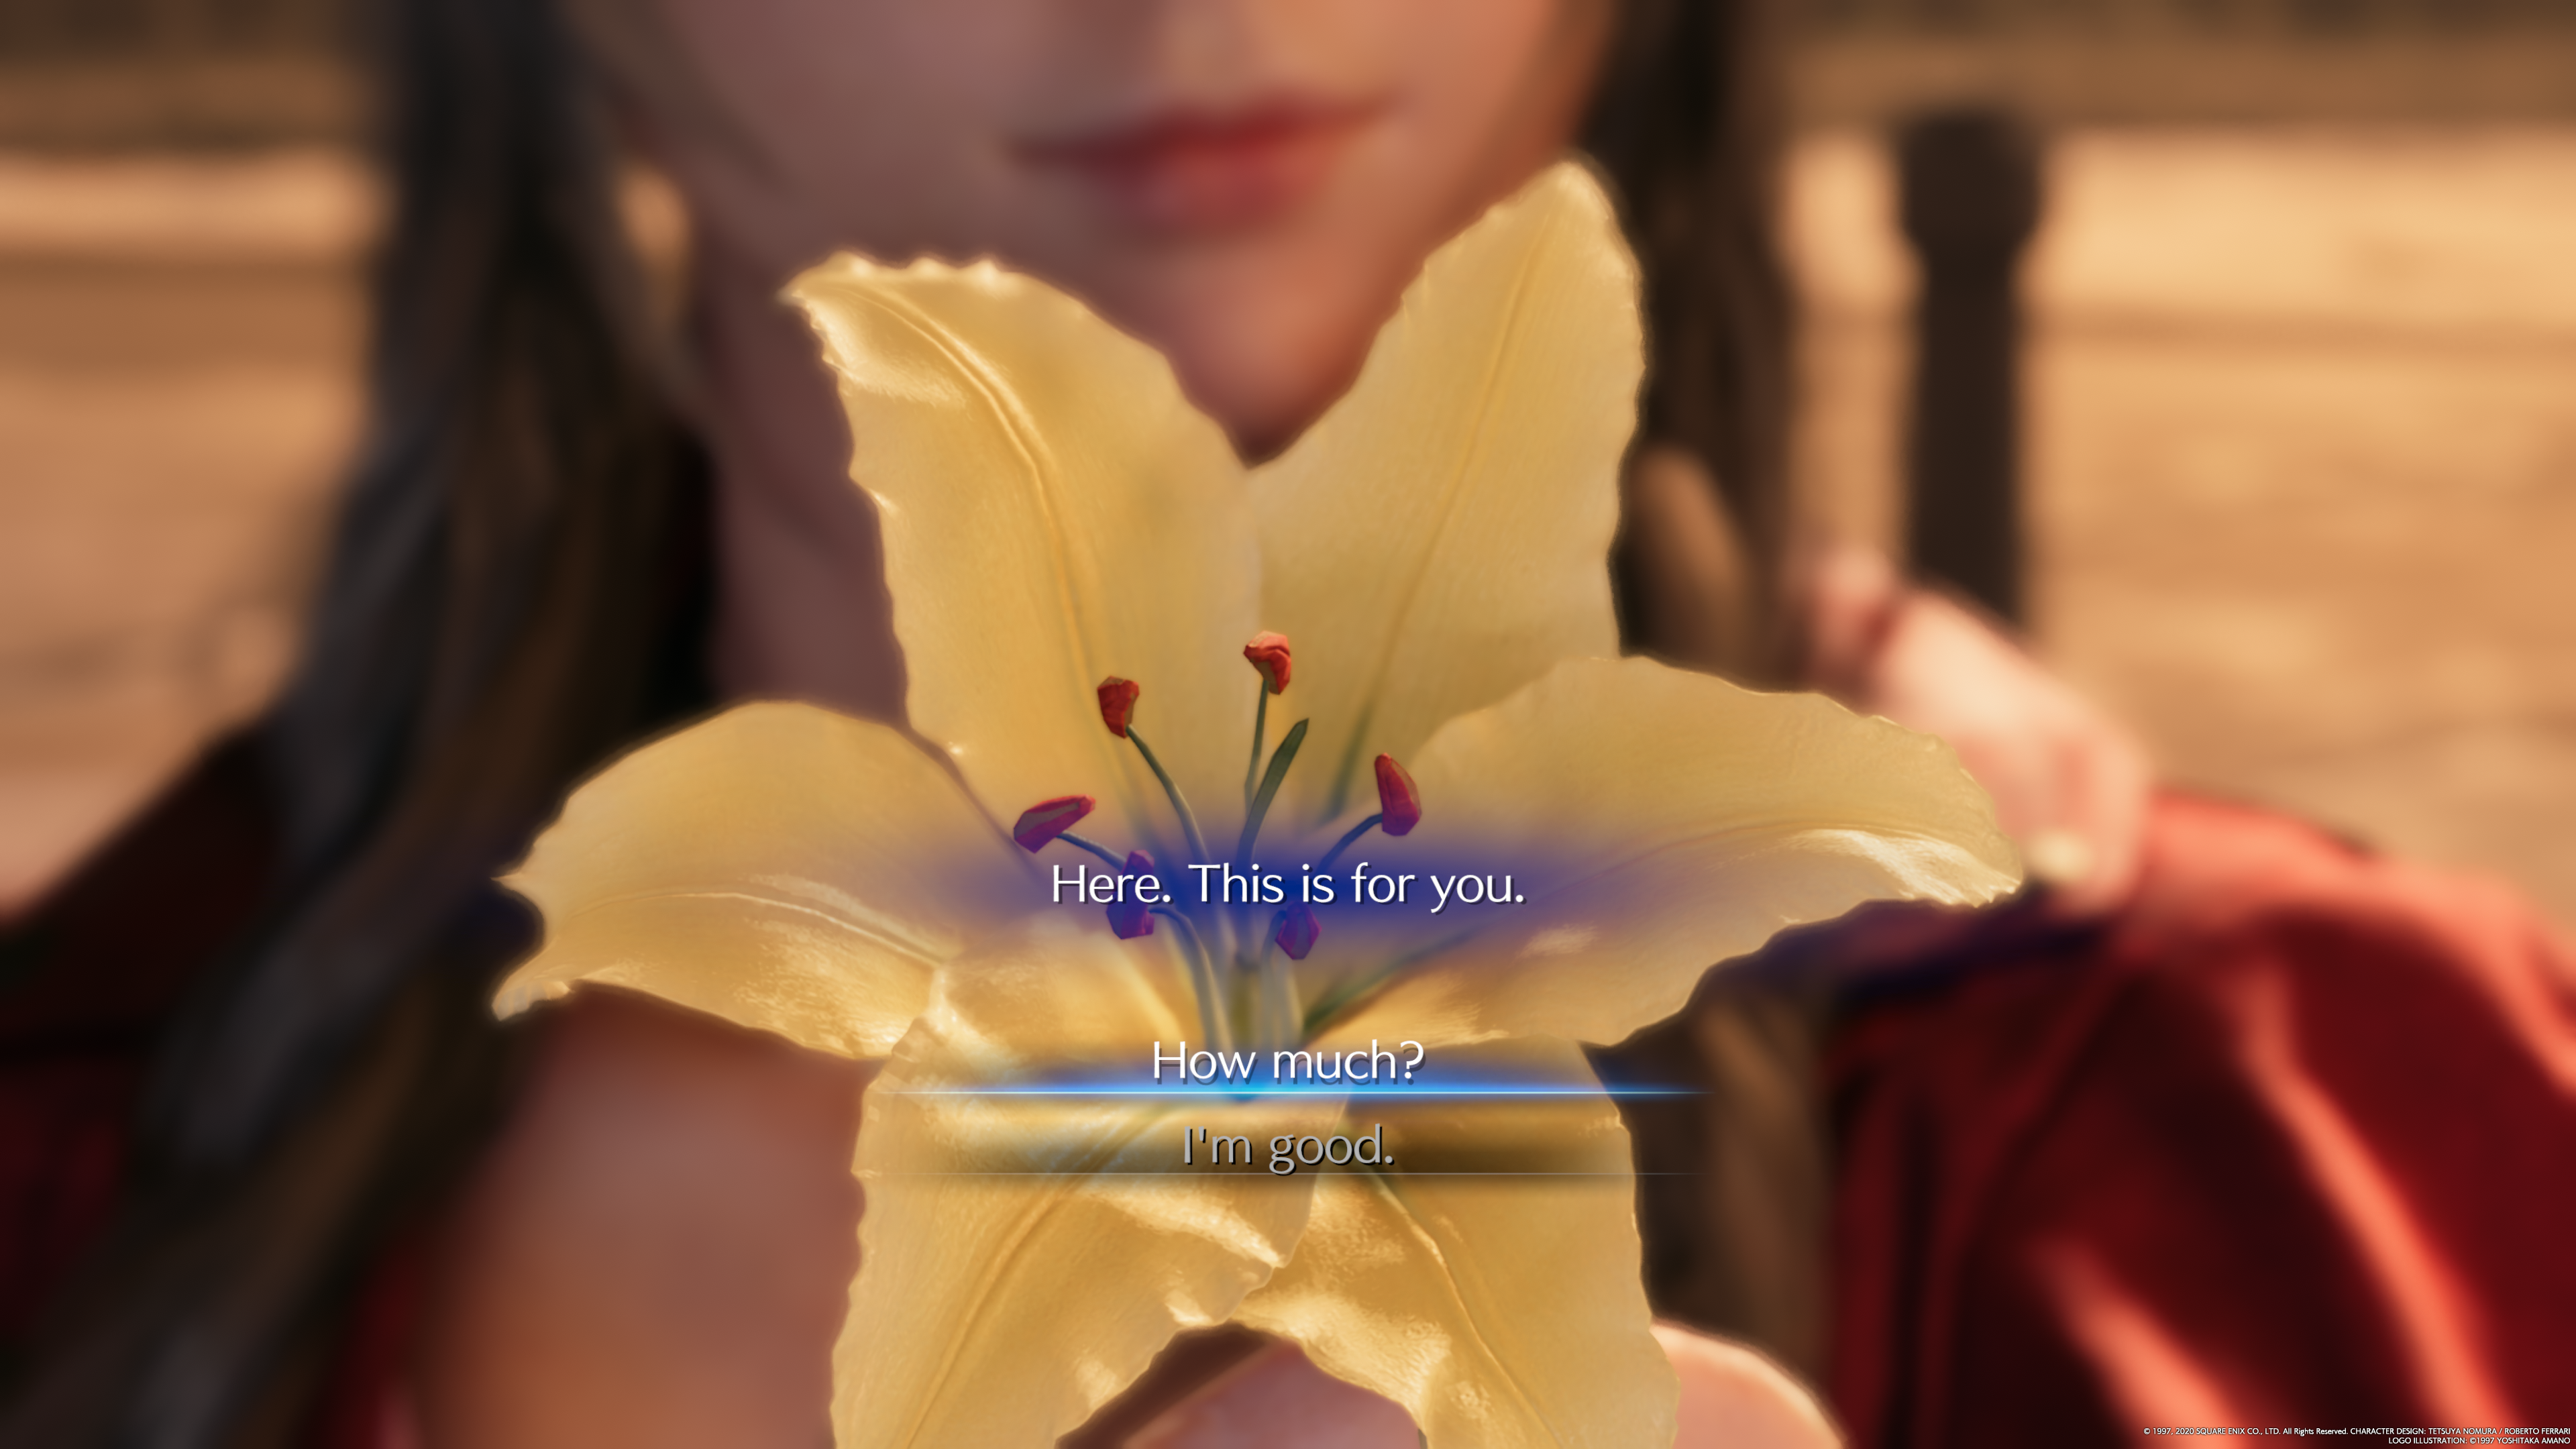
The dialogue choices when first meeting Aerith may seem momentous, but we want to note that this is actually an irrelevant choice and does not impact which character scene you'll see in Chapter 14. With that said, the immediate dialogue changes based on your choices. You'll end up with the Yellow Flower regardless of what you pick.
To accept the flower right away, you should go ahead and ask 'How Much?'
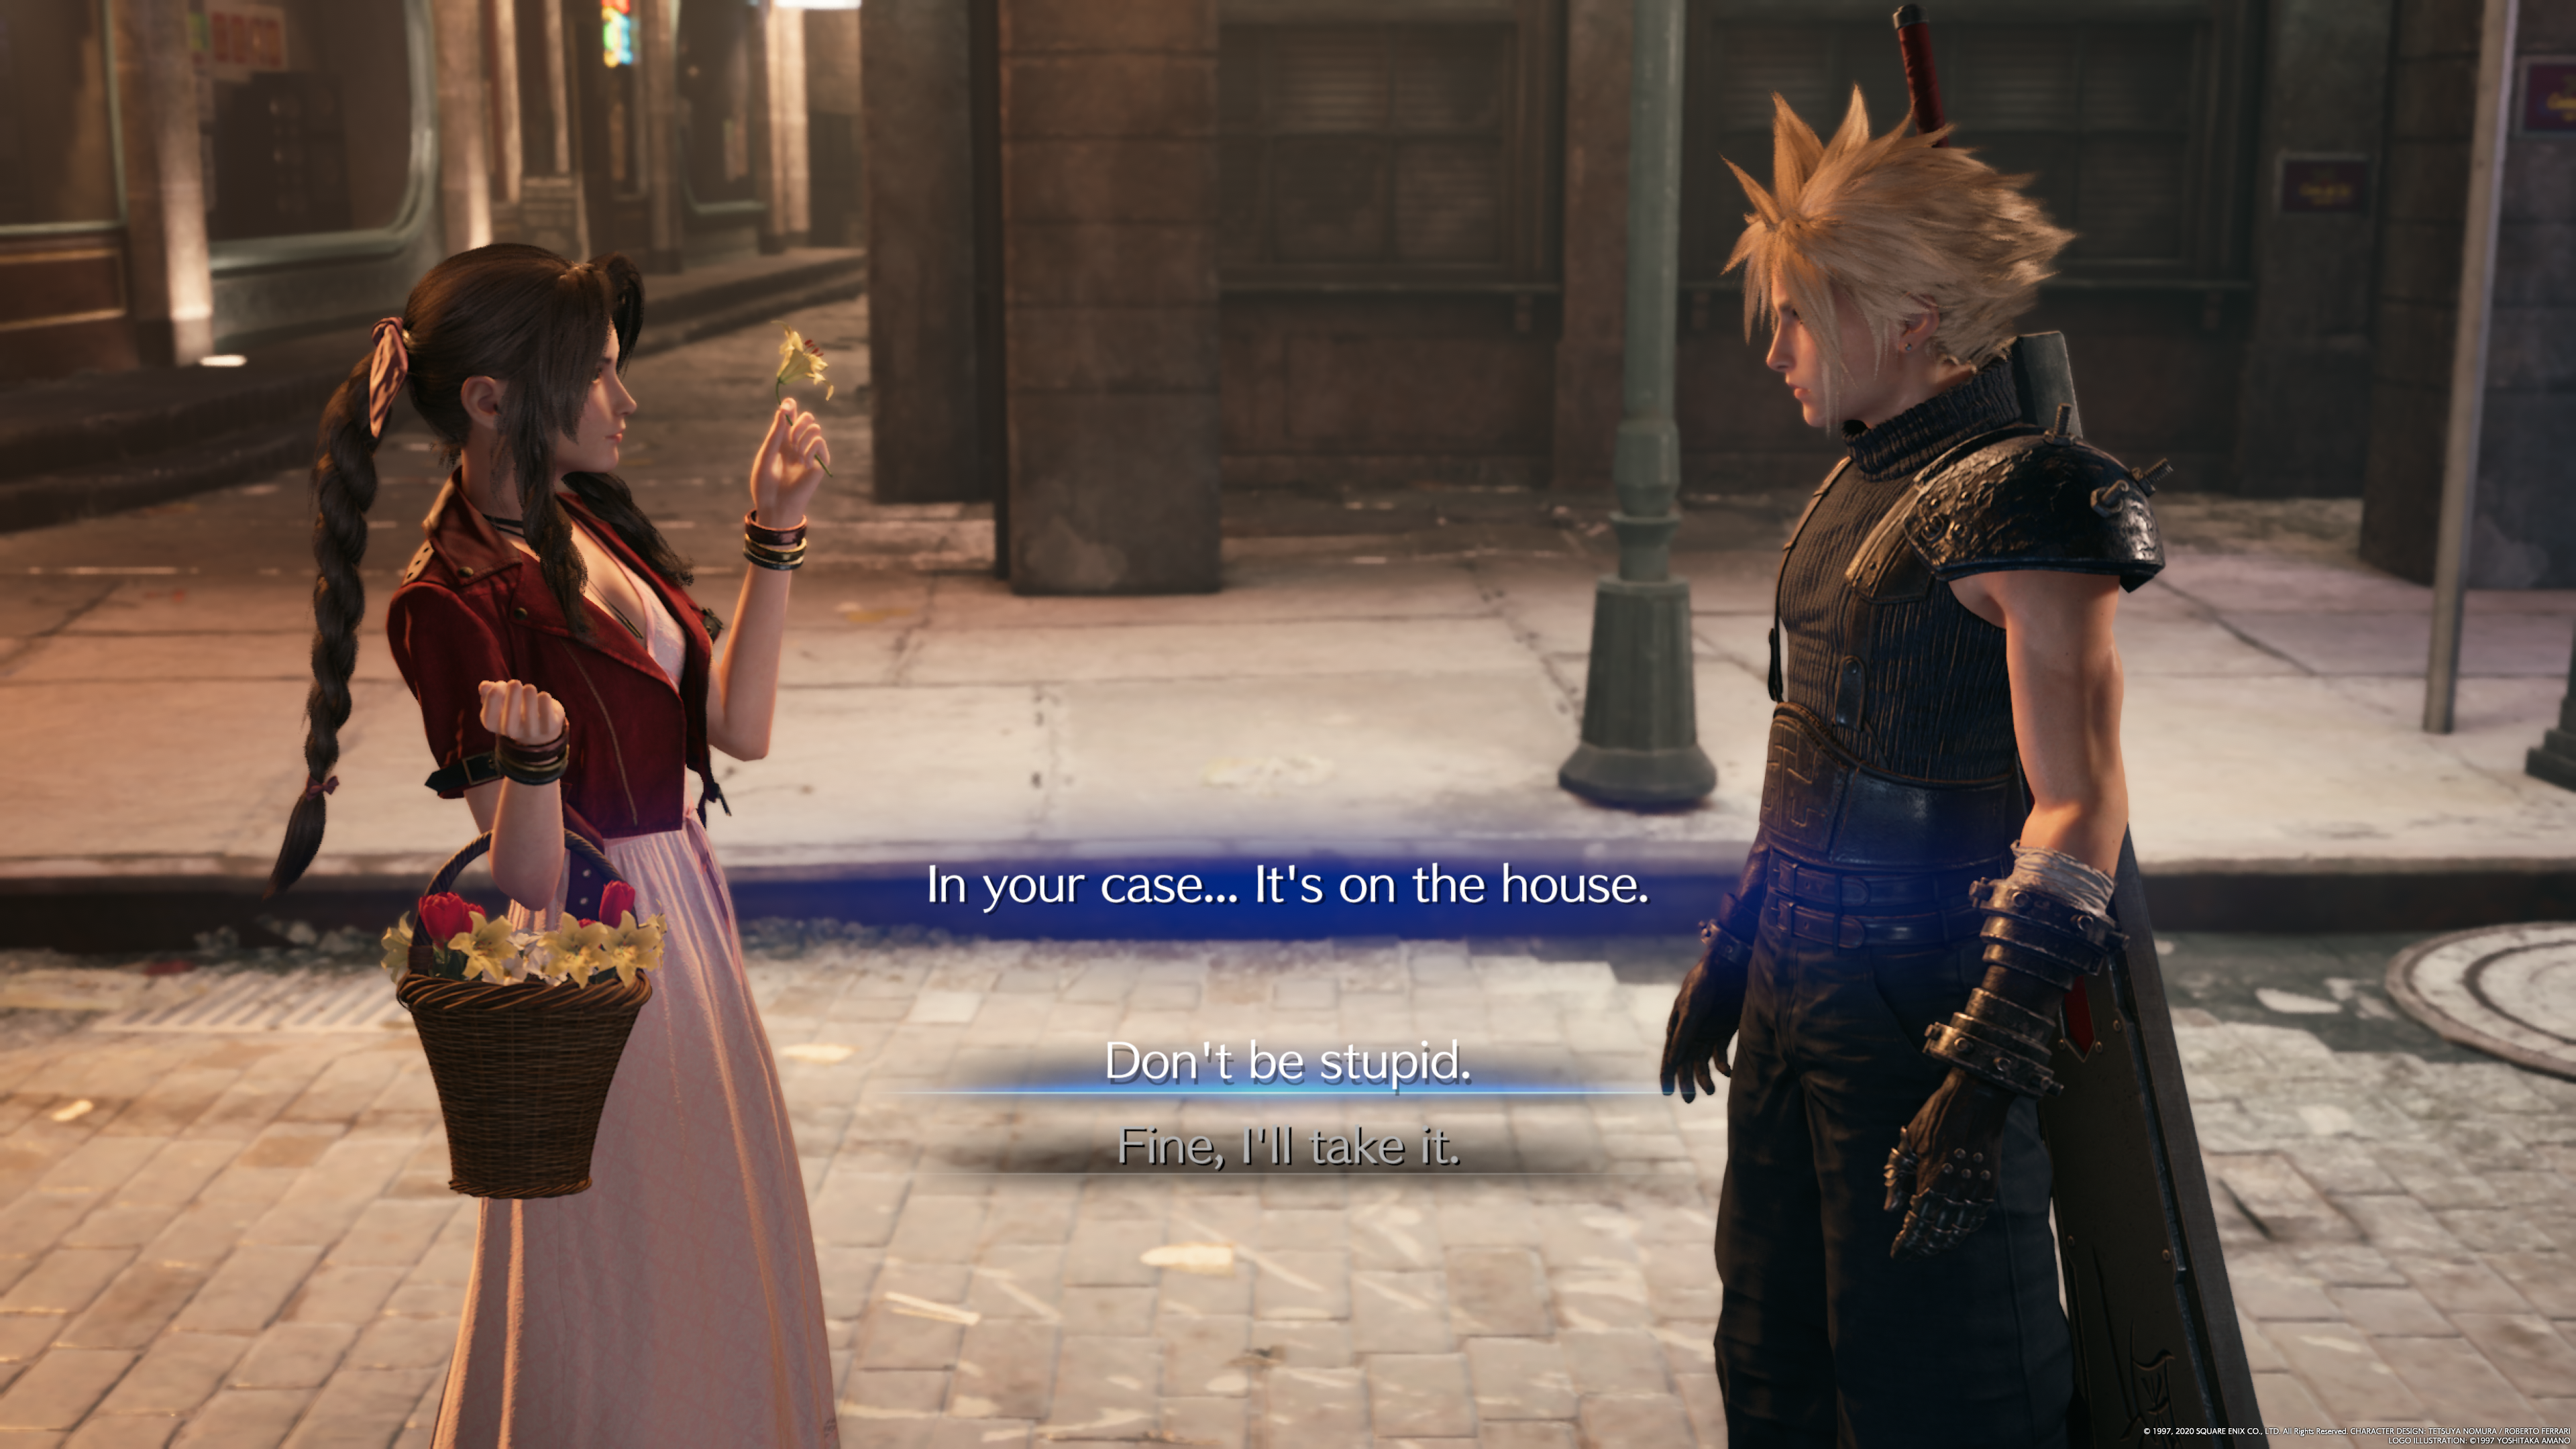
If you select 'I'm good.', read on..
"In your case...it's on the house."
Advertisement. Keep scrolling for more
You'll get this choice if you turn down the flower initially by selecting "I'm good." It basically seems like a second chance to make nice with Aerith, though again, it doesn't have any real consequences.
So you should select 'Don't be stupid.' to insist on paying for the flower.
Select 'Fine, I'll take it.' to have Cloud begrudgingly accept the Yellow Flower.
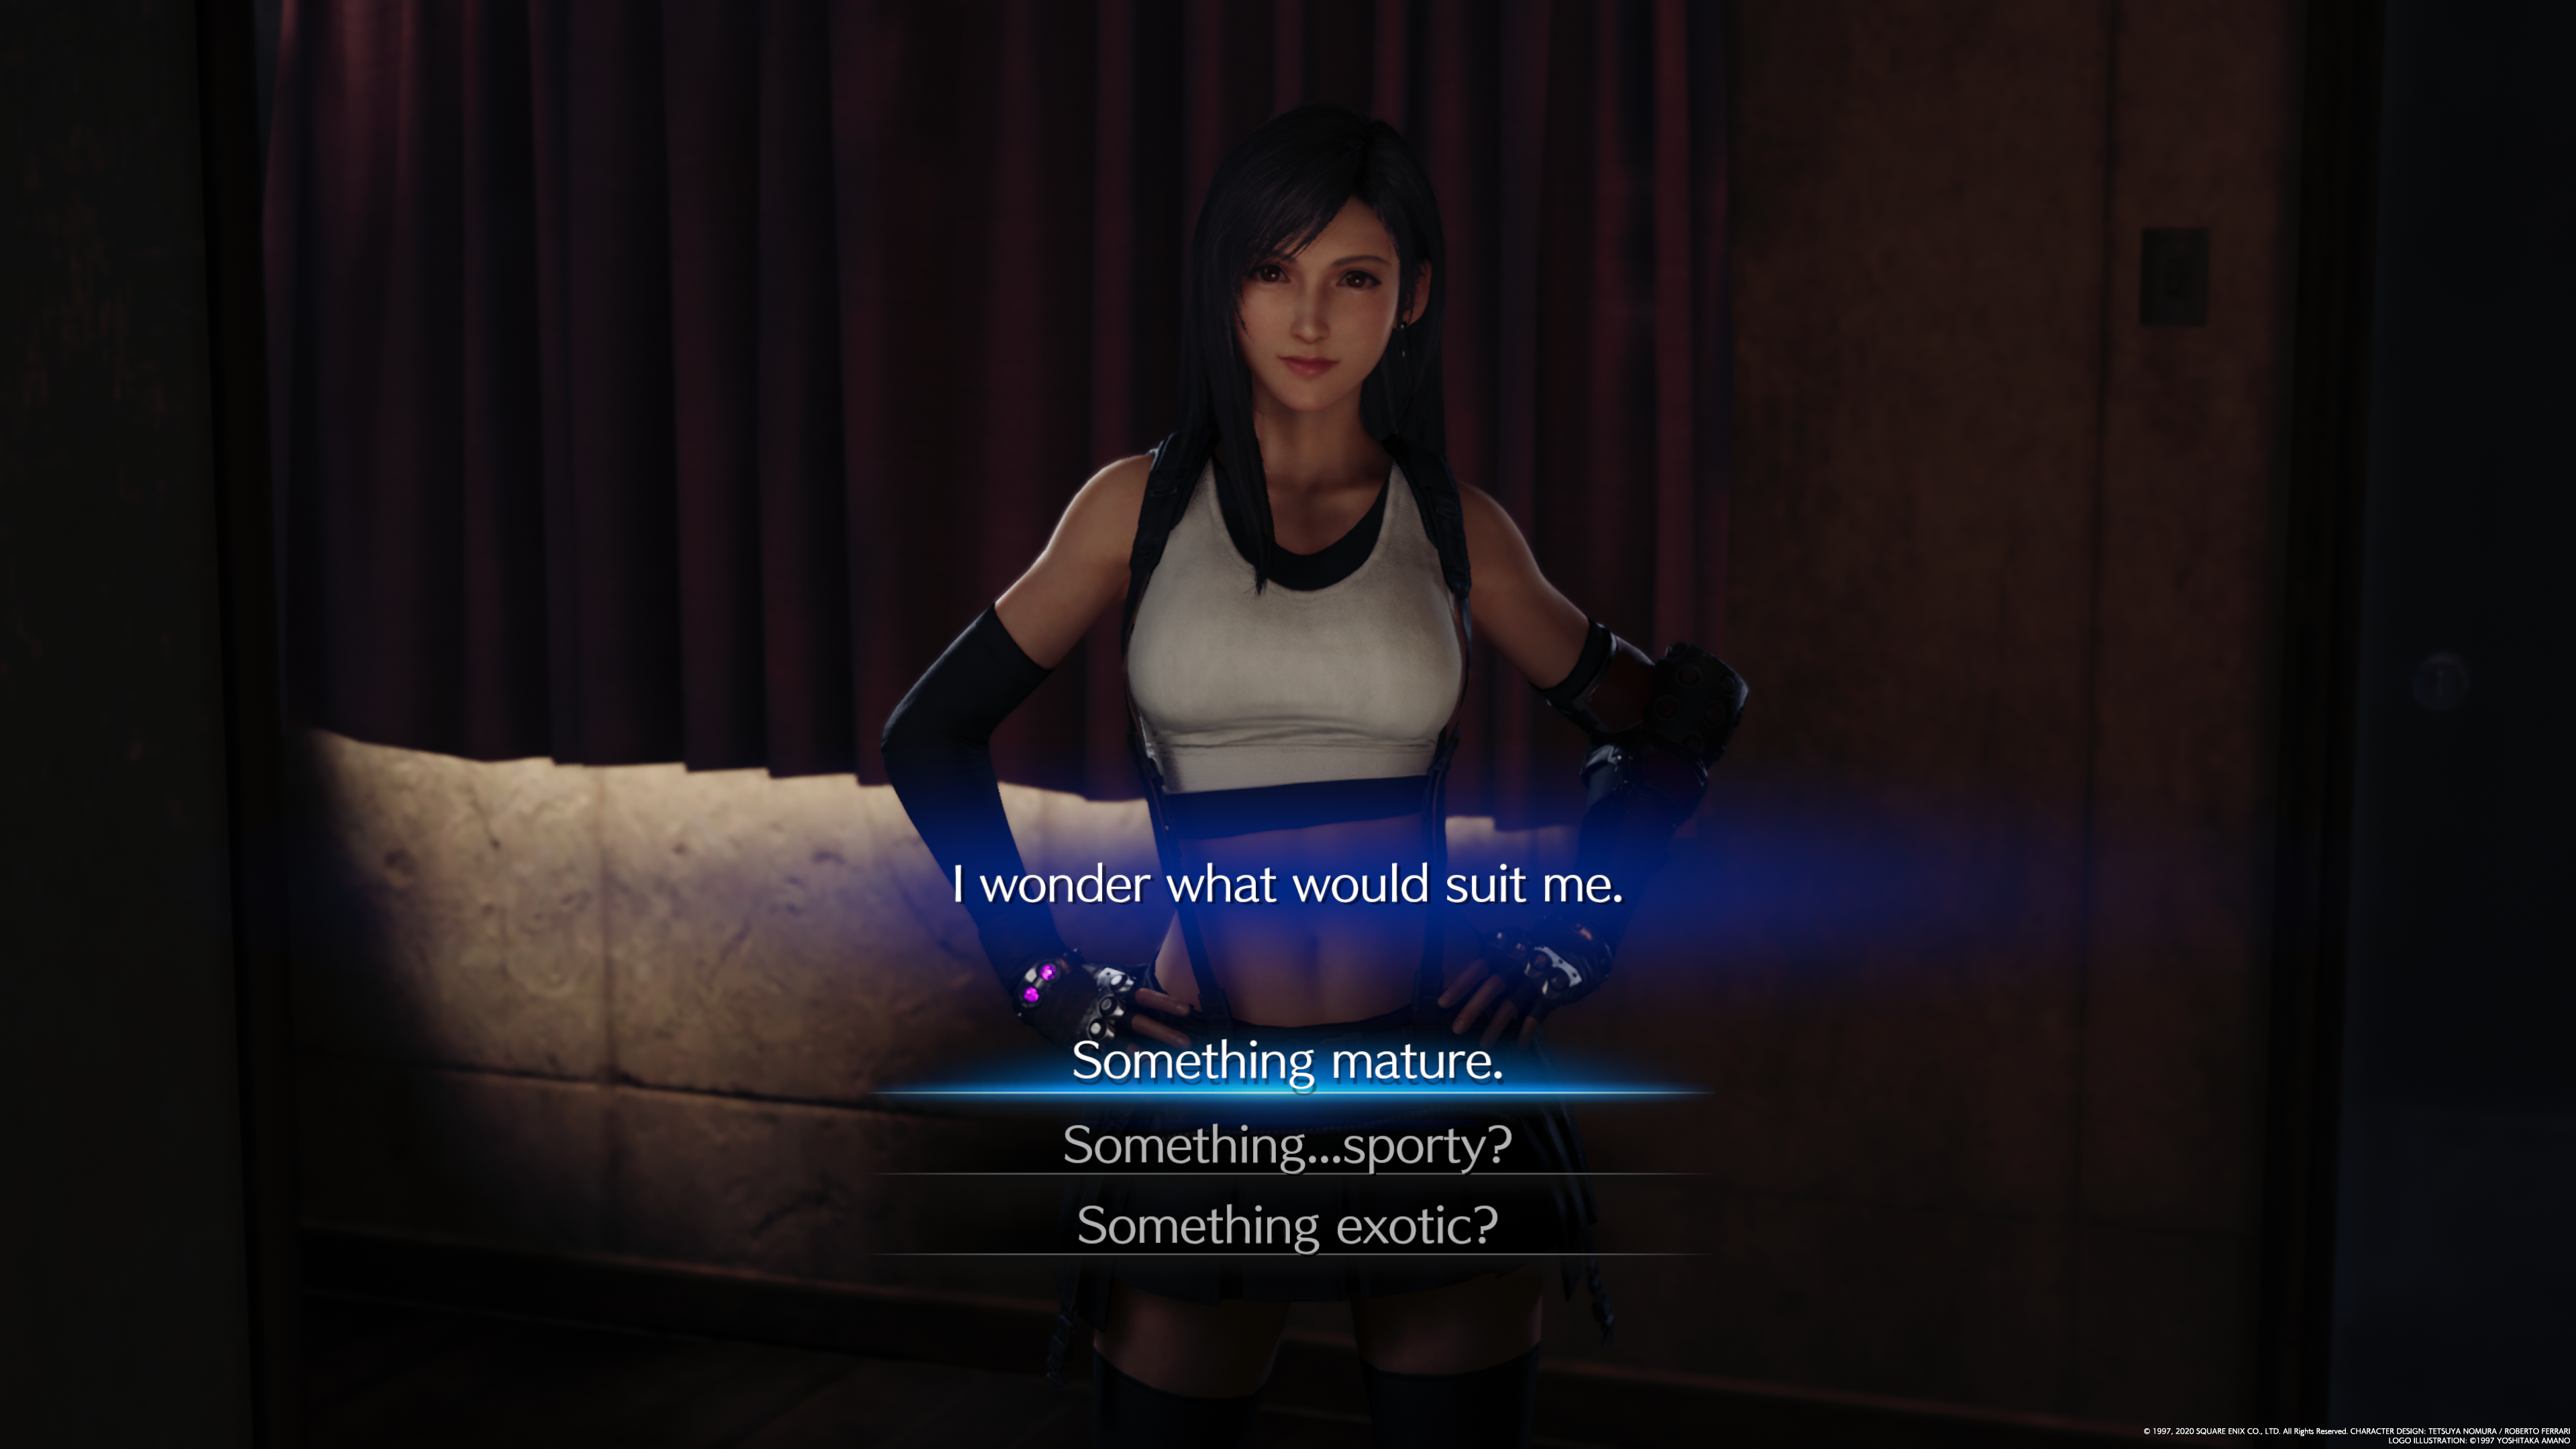
Chapter 3 Choices: an outfit for Tifa
"I wonder what would suit me."
You'll get this choice for Tifa via the Discovery Event 'Alone At Last' upon doing all sidequests in Chapter 3. This is the selection that will determine Tifa's dress in Chapter 9.
Select 'Something mature'. for the blue dress from the trailers.
Select 'Something...sporty?' for the patterned cheongsam.
Select 'Something exotic?' for the black robe-like dress.
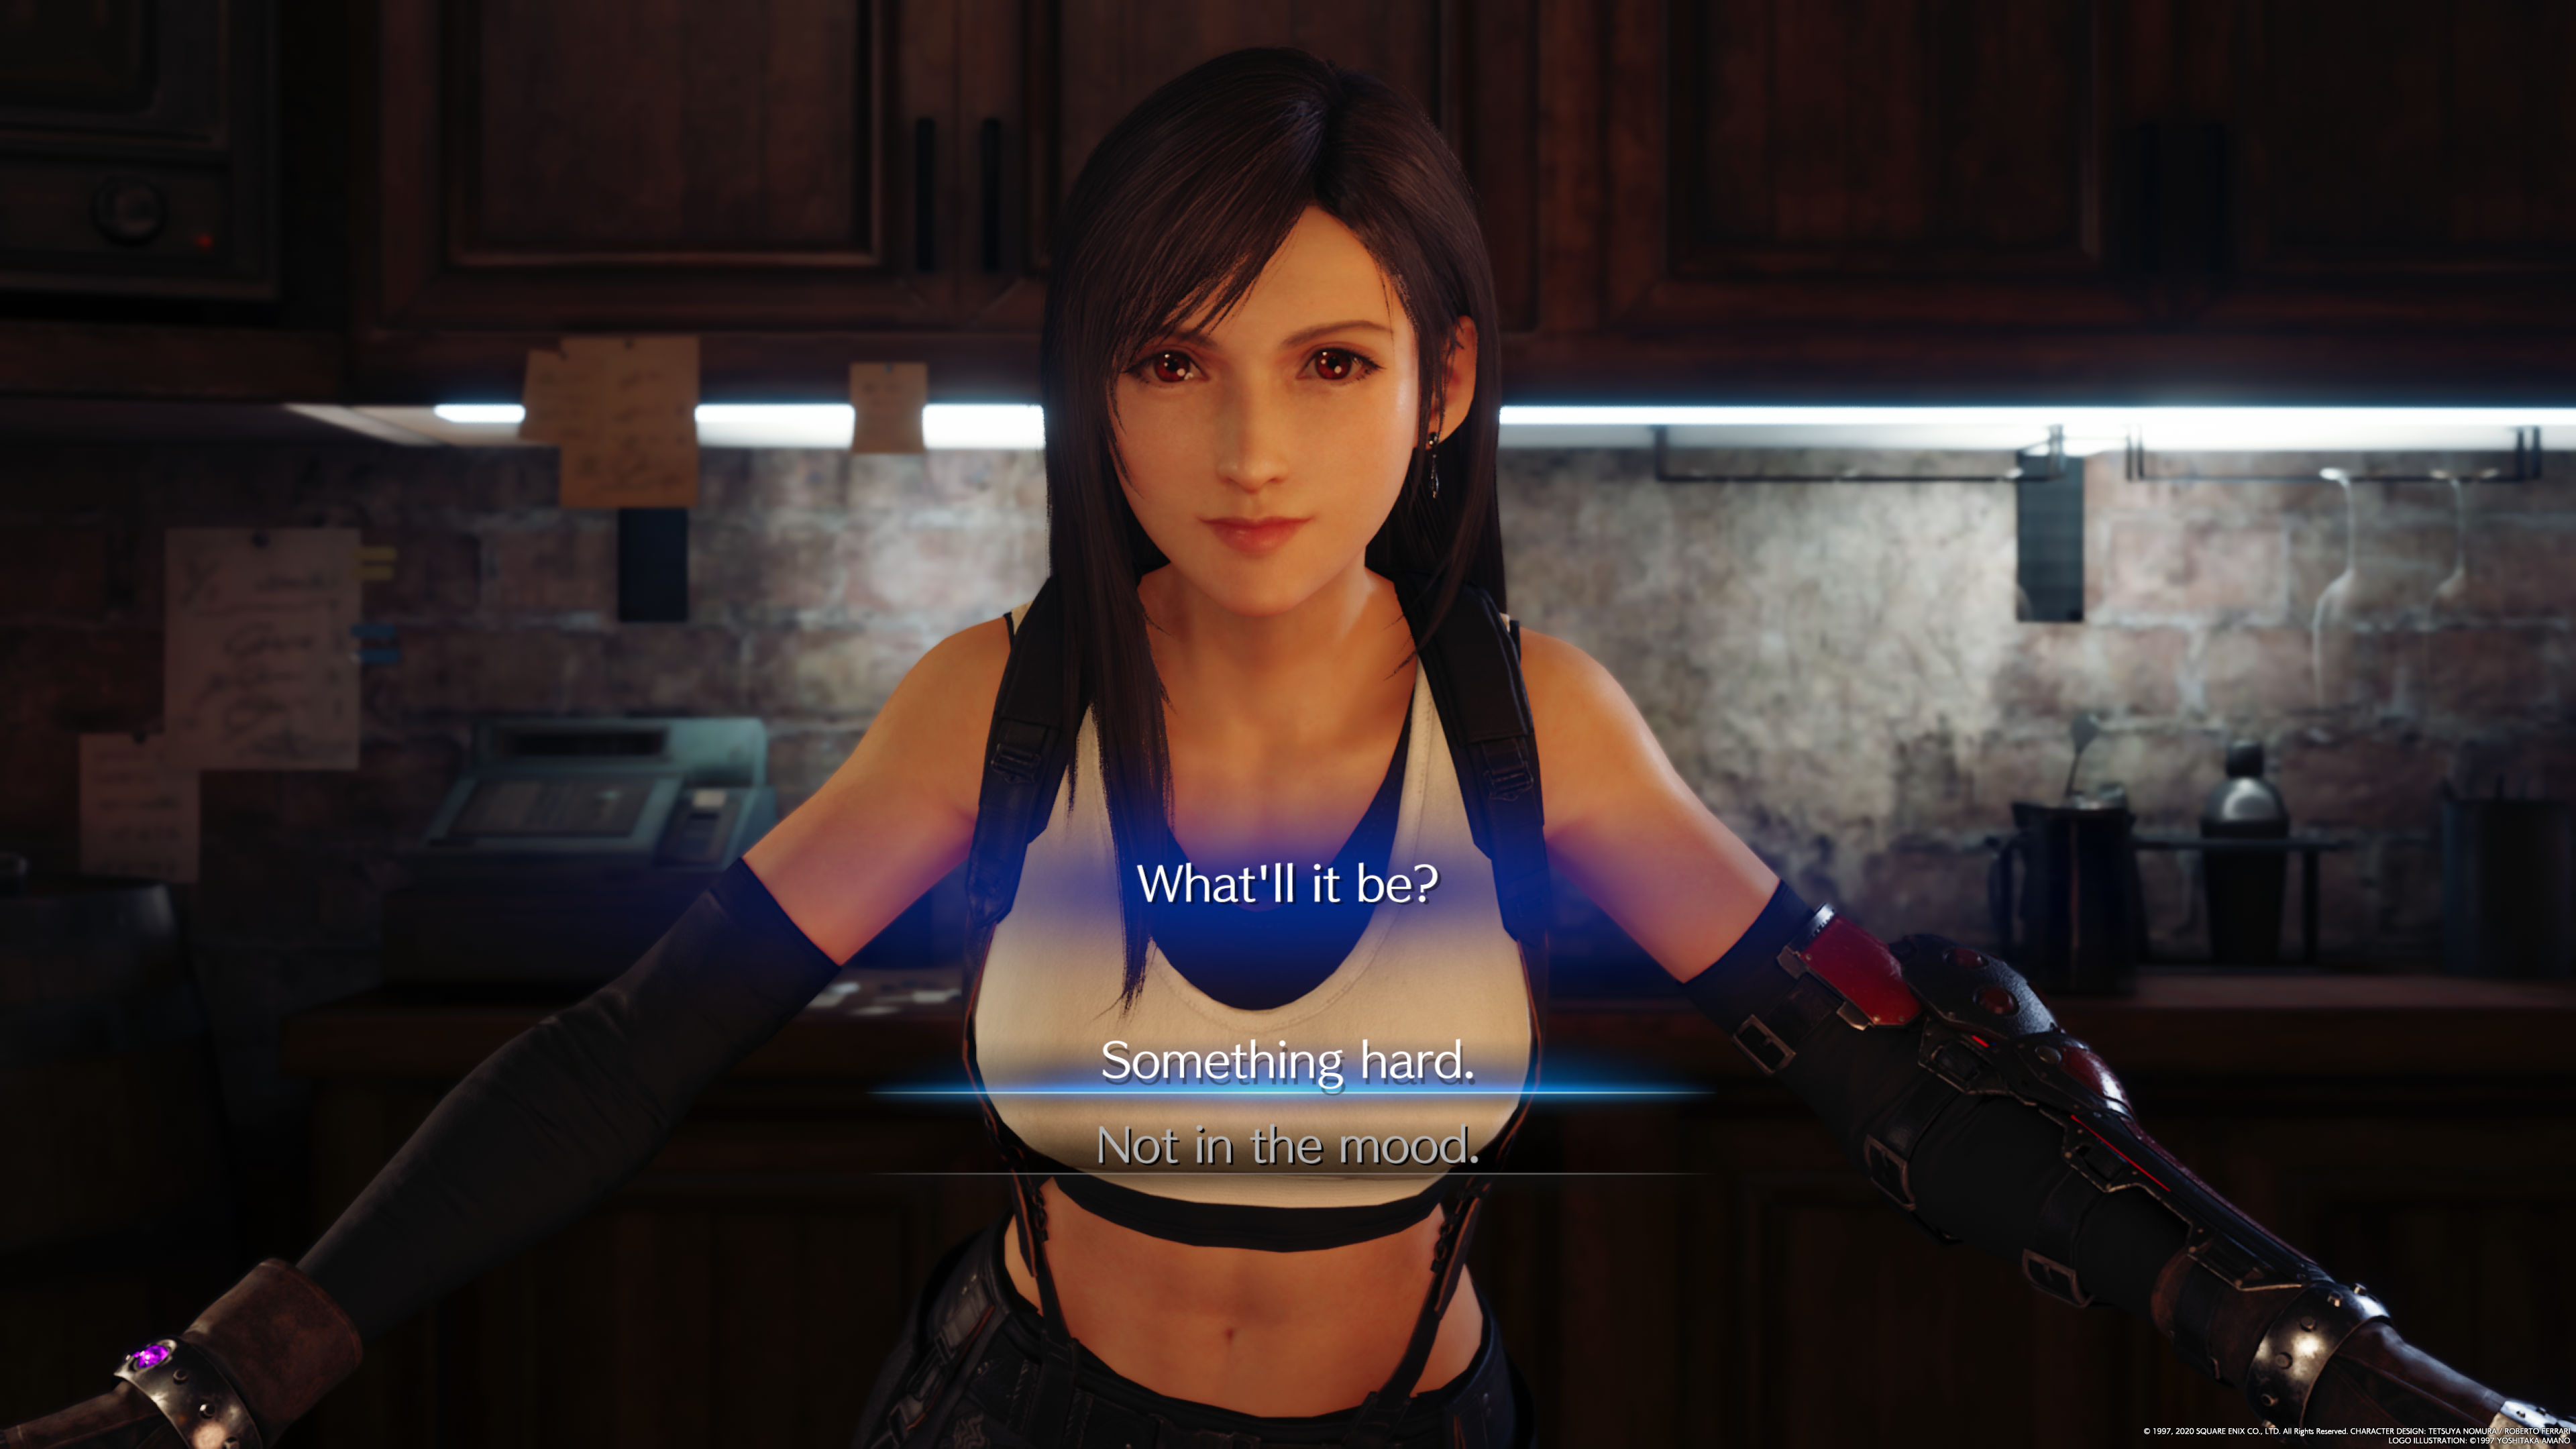
"What'll it be?"
This is a simple binary choice that doesn't make an immediate or long-term difference -- you'll end up having a drink either way. Similar to Aerith's question with the Flower, it doesn't actually have any implications for later.
'Something hard.' will please Tifa in the moment, but doesn't have any long-term effect.
Pick 'Not in the mood.' if you want to get another character's cutscene in Chapter 14. You'll still end up having a drink.
Chapter 4 Choices: a date with Jessie?
Advertisement. Keep scrolling for more
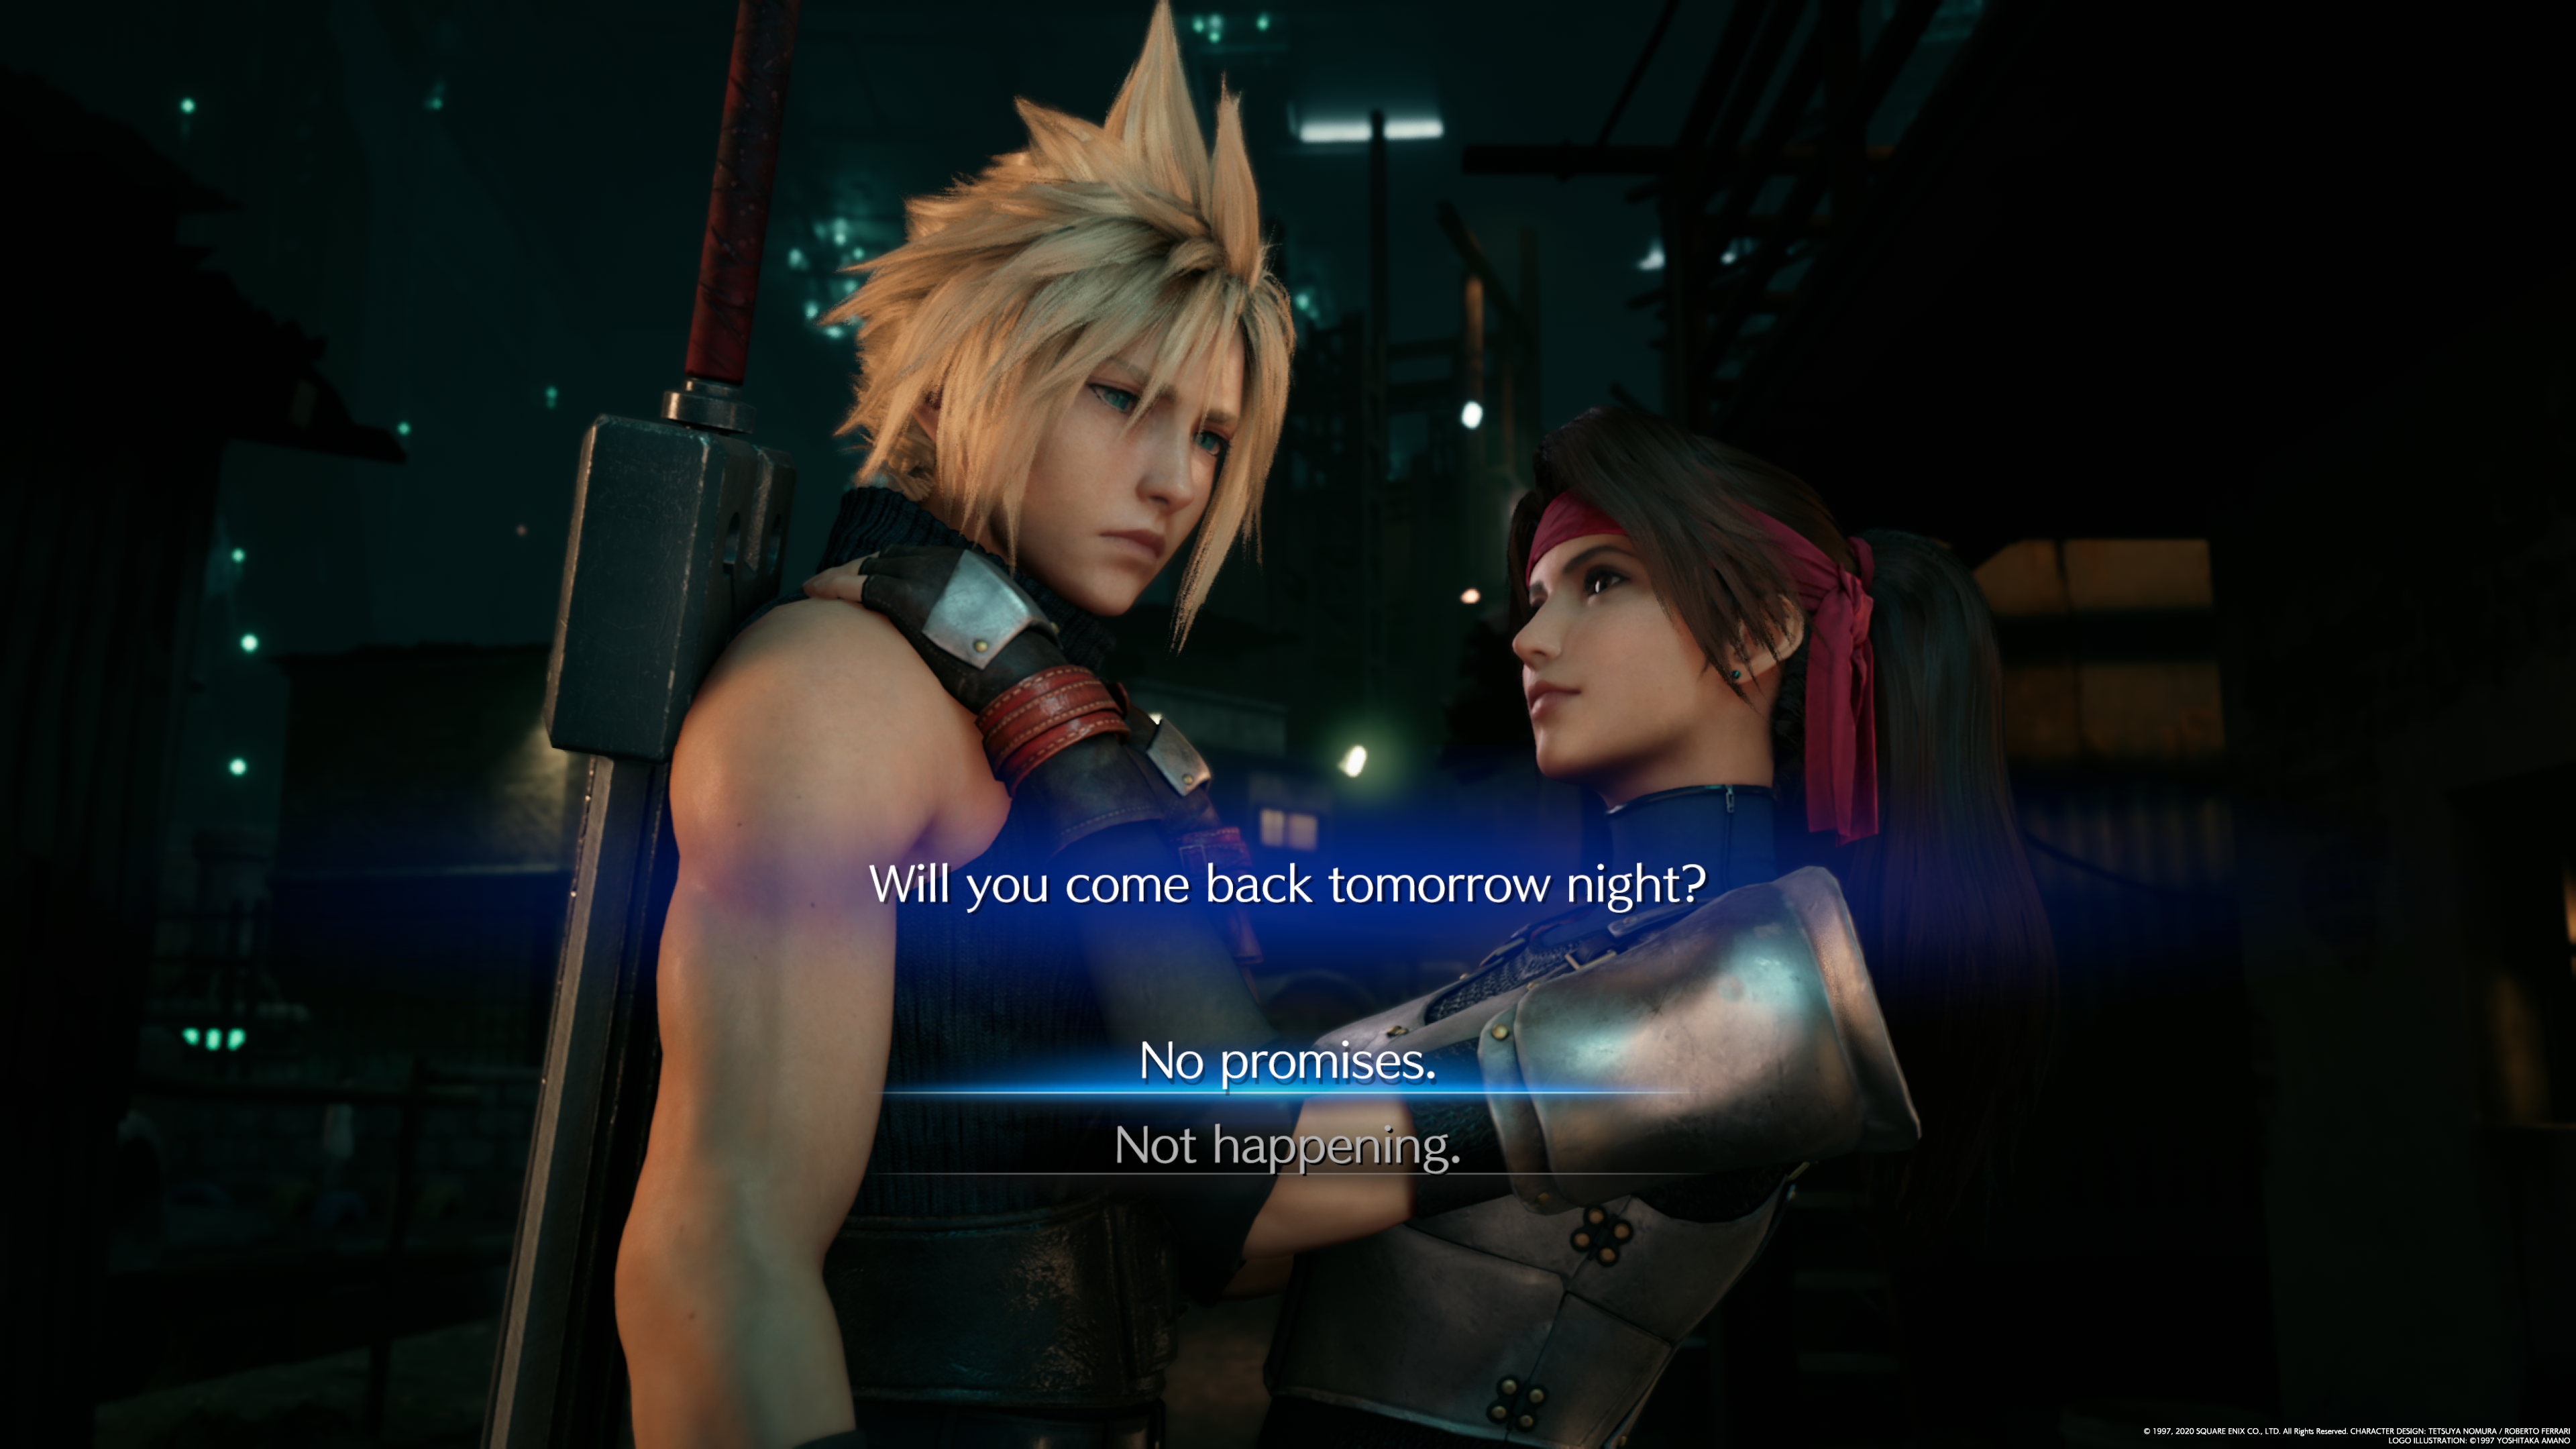
"Will you come back tomorrow night?"
In the newly-added Chapter 4, which wasn't a story beat present in the original FF7, Jessie lays it on thick with Cloud.
This choice doesn't seem to have any implications. The date mentioned won't ever take place due to story events. You can pick whichever you prefer.
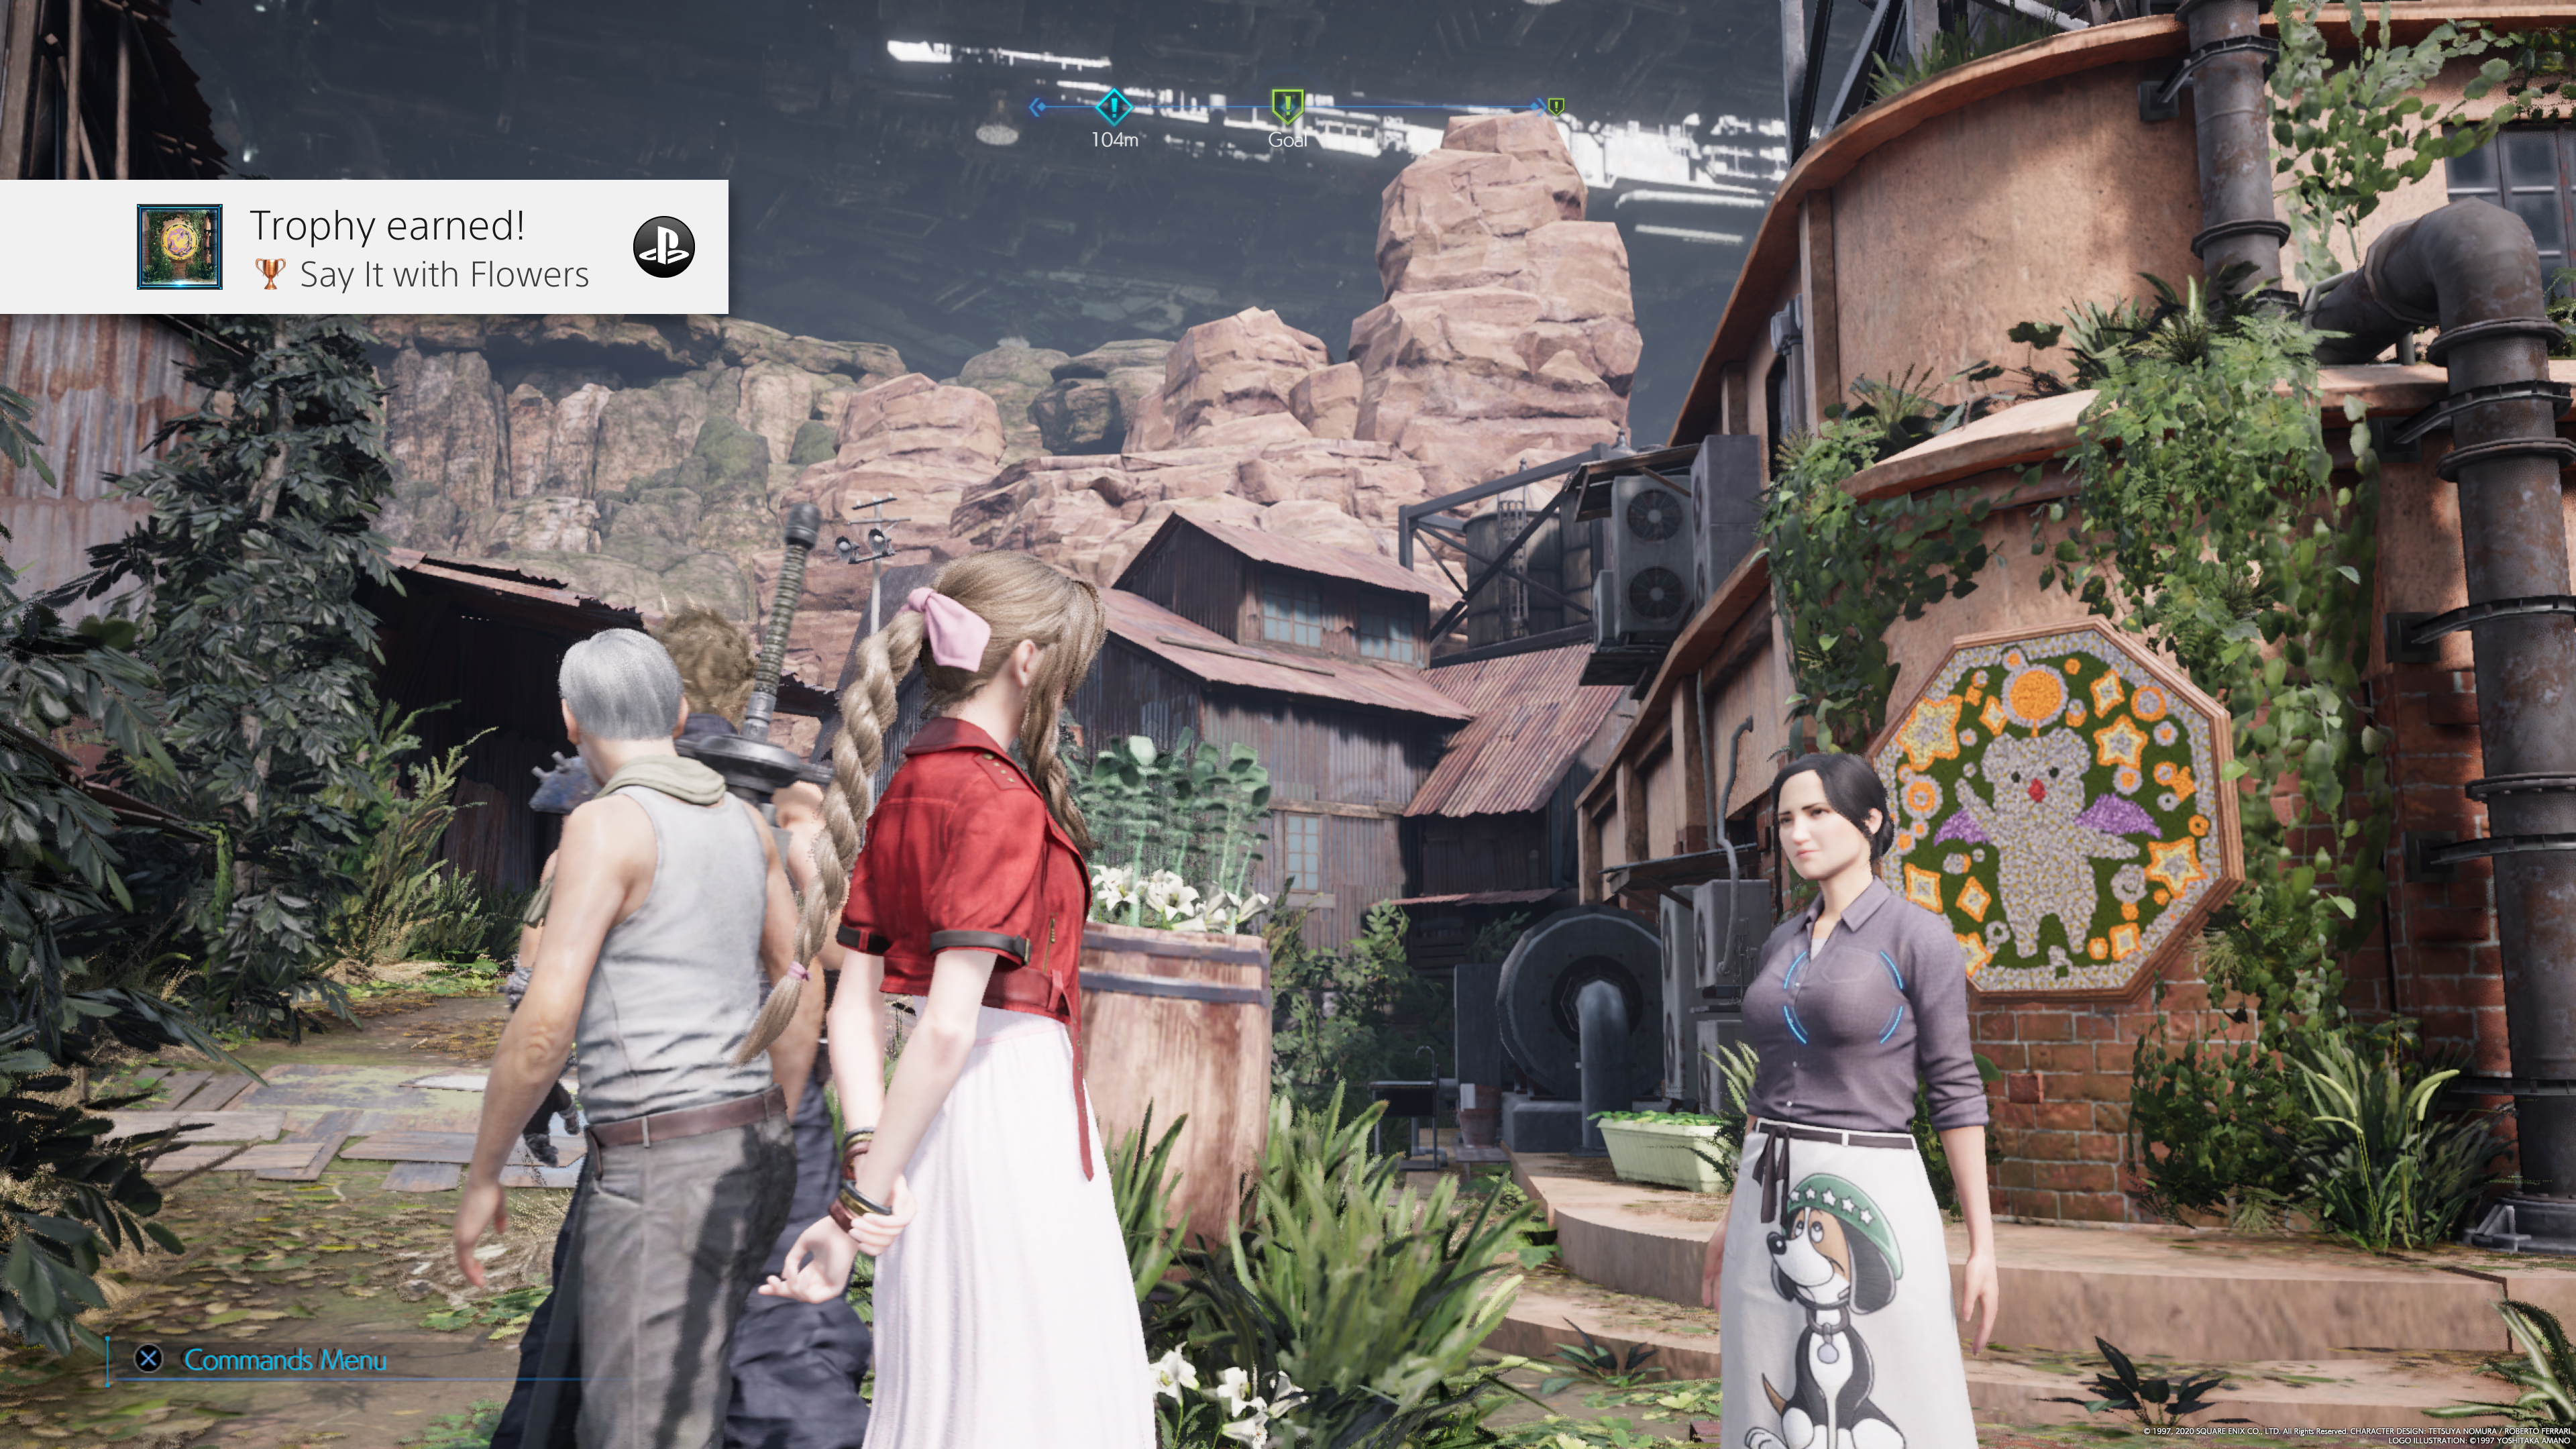
Chapter 8 Choices: Leaf House decoration and sidequests for an outfit
When you're picking flowers with Aerith, what you end up grabbing will actually affect what design ends up on the orphanage:
Chapter 9 has by far the most choices of any given one in the game. We go into some detail on this chapter in the link above, as well as in our sidequest guide,but we'll give a high-level overview here. Many of the choices here will decide which pair of sidequests you get in the back-half of the chapter, either two for Madam M, or two for Chocobo Sam:
Advertisement. Keep scrolling for more
Madam M's Quests
The Price of Thievery
Shear's Counterattack
Chocobo Sam's Quests
The Party Never Stops
A Dynamite Body
Chatting to Chocobo Sam
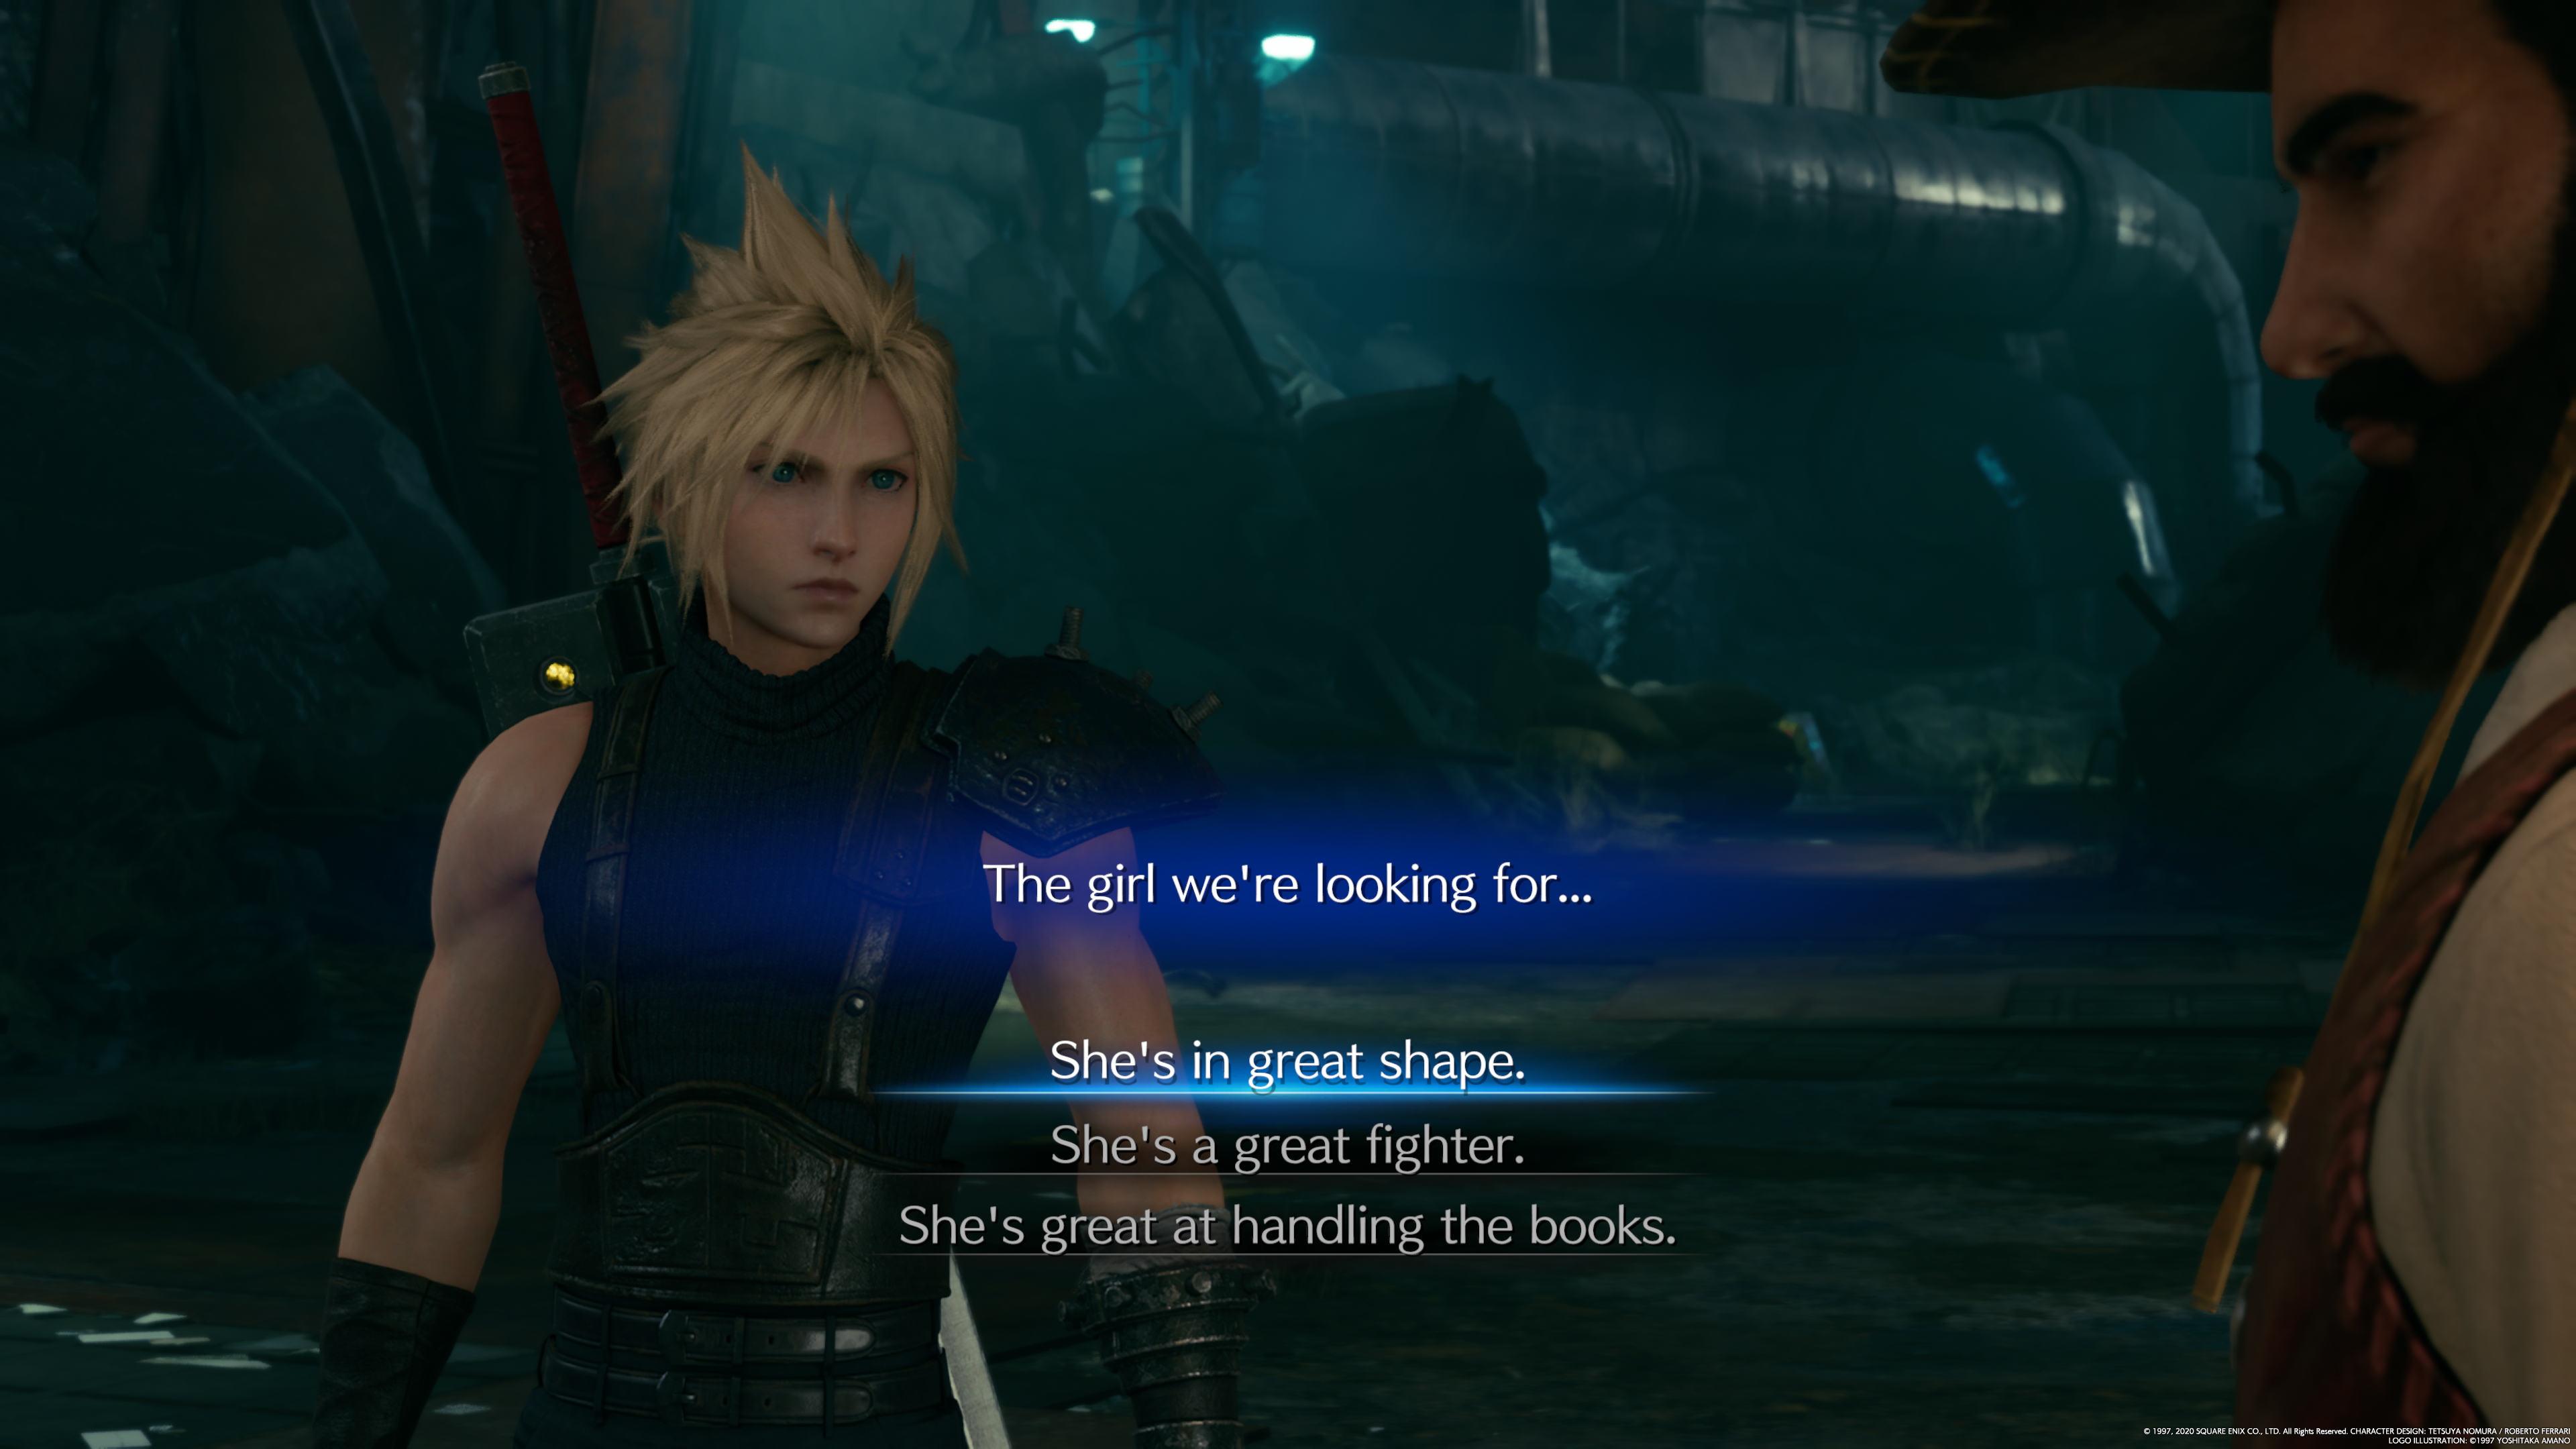
Chocobo Sam wants to know about "The girl we're looking for..."
Answering Sam about the girl you're looking for is the first of many choices in Chapter 9 that will affect which pair of quests you get at the end of the chapter.
Select 'She's in great shape.' for +1 chance to obtain Sam's quests.
Select ' She's a great fighter.' for no increase for Madam M or Sam's quests.
Otherwise, select 'She's great at handling the books.' for +1 chance to obtain Madam M's quests.
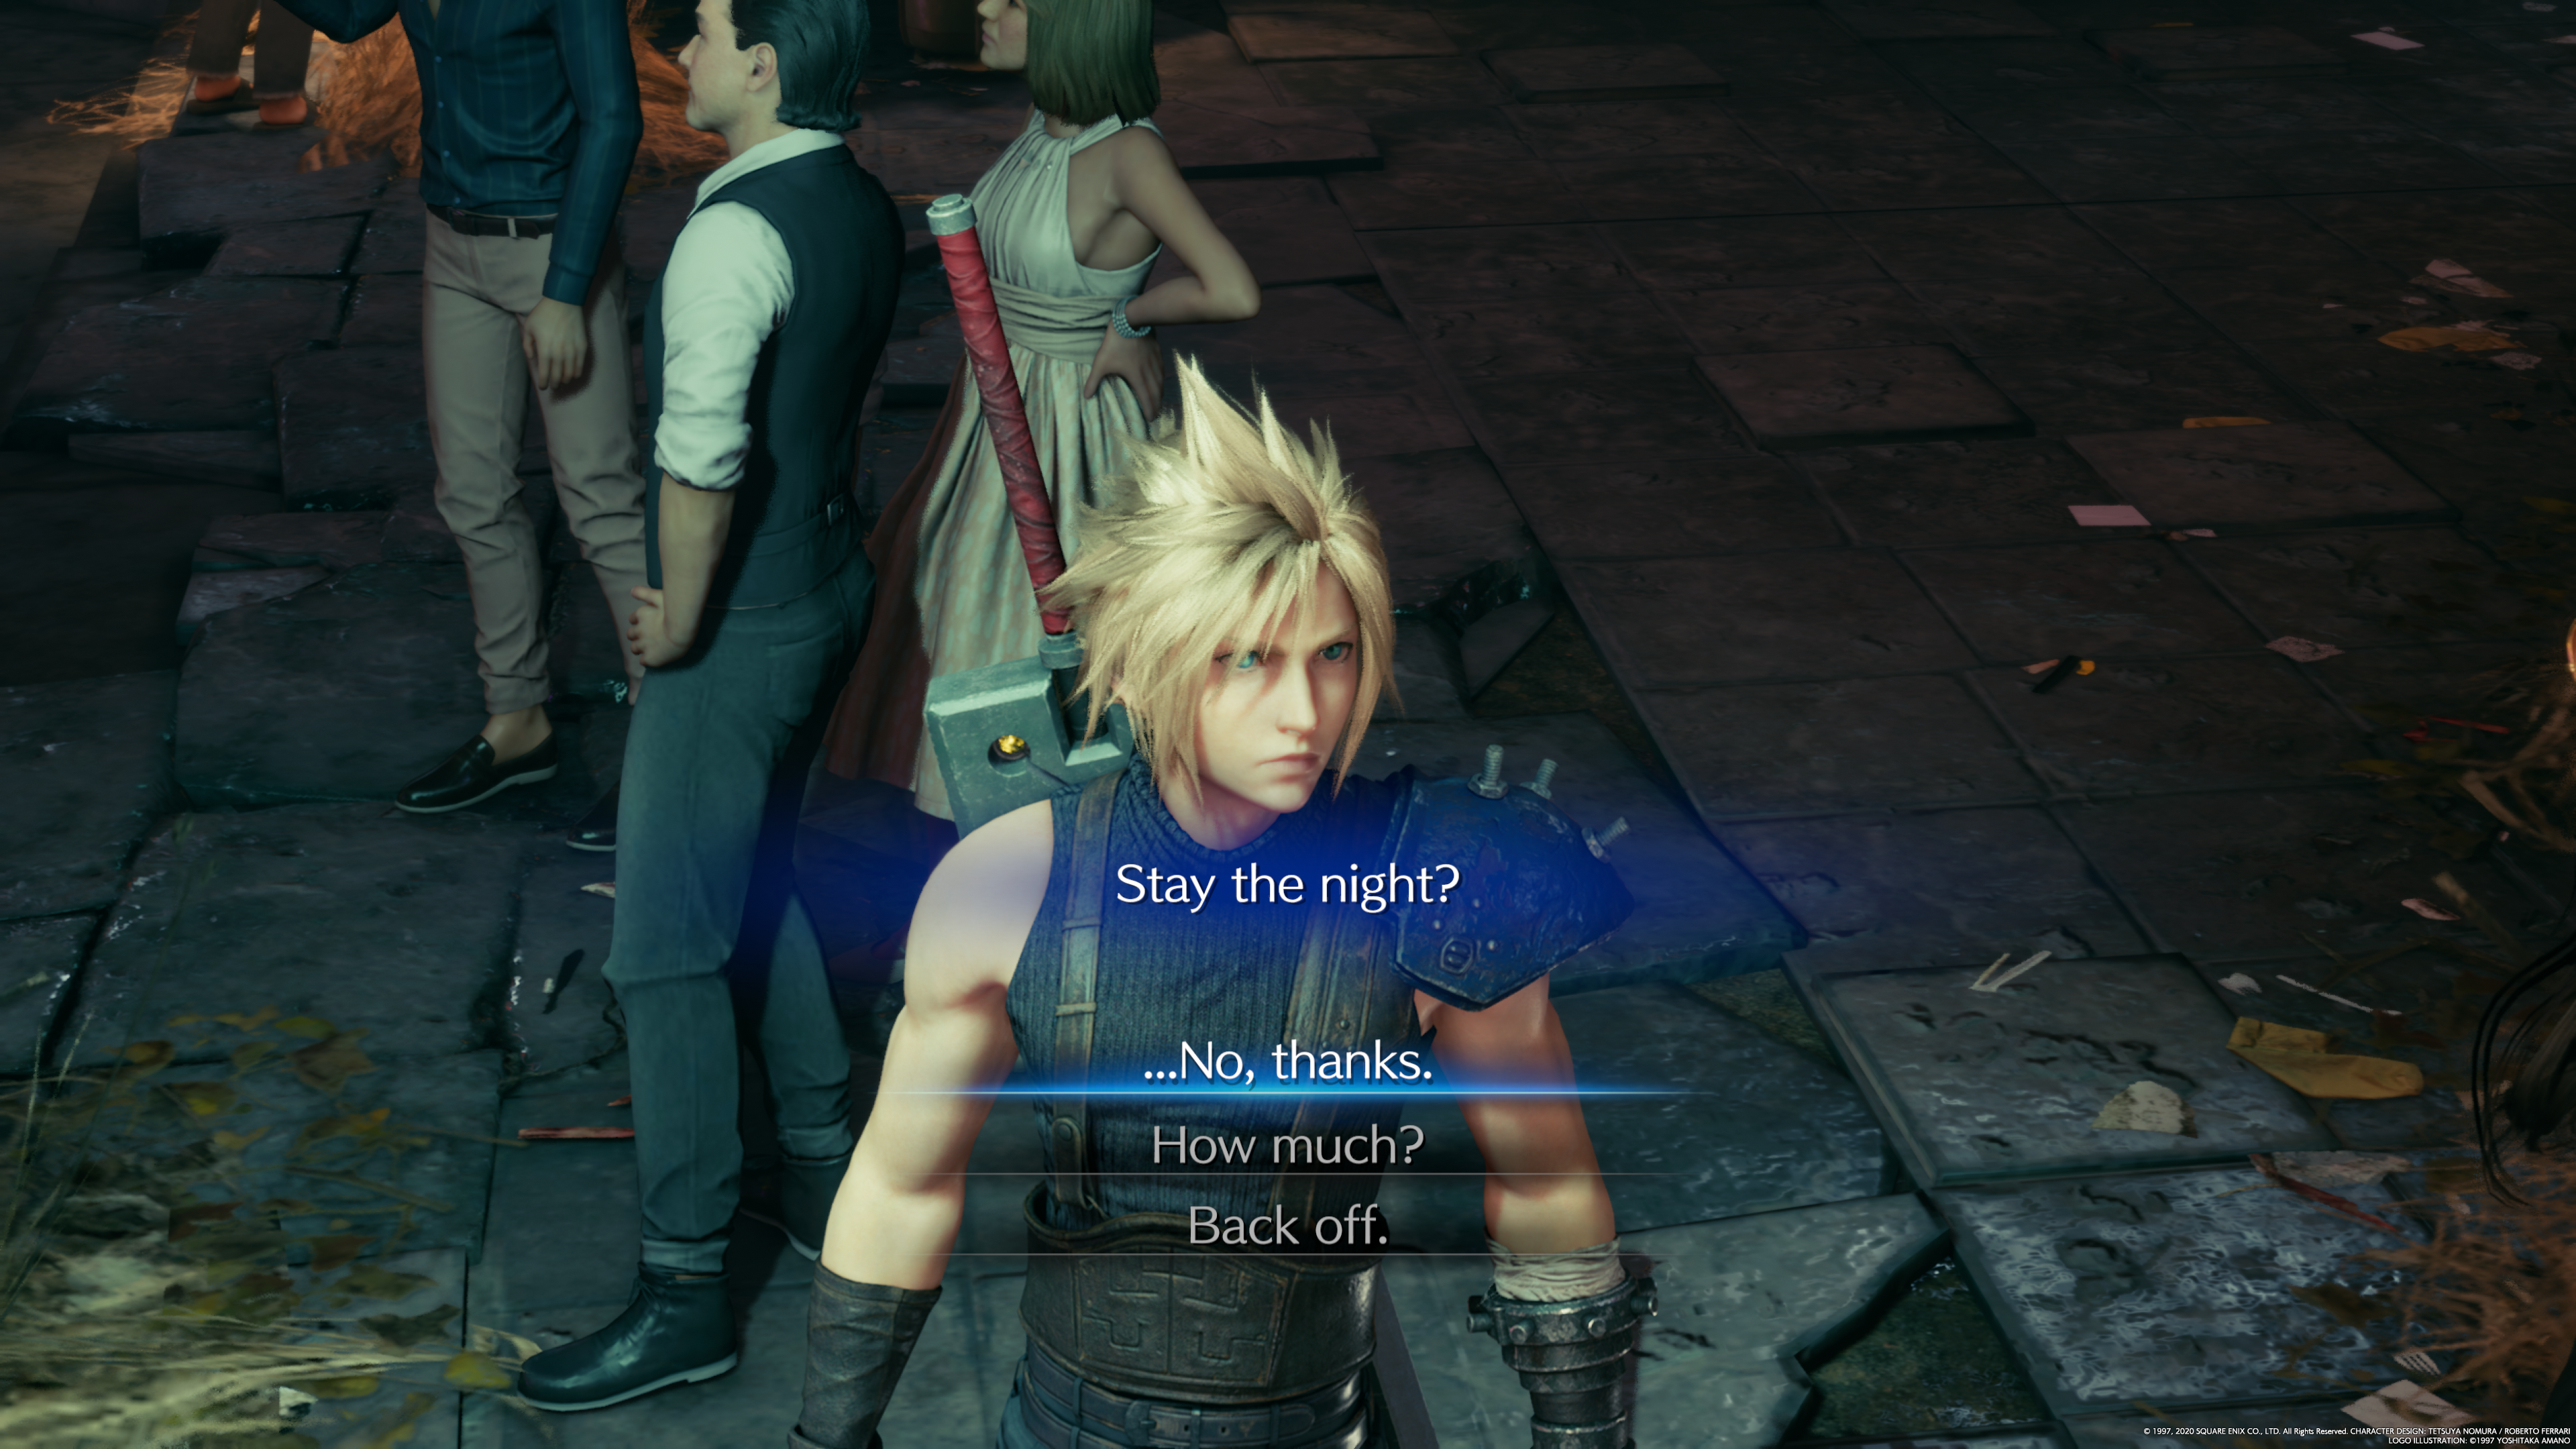
Will Cloud stay the night?
Advertisement. Keep scrolling for more
The choice to stay the night or not is a minor choice that is seemingly optional and also affects which pair of quests you'll get later in the chapter.
If you select '...No, thanks.', you'll get +1 chance for Sam's quests.
If you select 'How much', you'll get +1 chance for Madam M's quests.
If you select 'Back Off', or ignore the inn keeper, you'll have no affect on which pair of quests you'll get.
If you want to get Chocobo Sam's two quests, then choose "Yeah.' This will get you +1 point for Sam.
If you want to get Madam M's two quests but still want to meet up with Johnny (for the trophy), then choose 'No.' You'll get no points for either Madam M or Sam.
Of course, not meeting up with Johnny will also result in no net effect for Sam or Madam M.
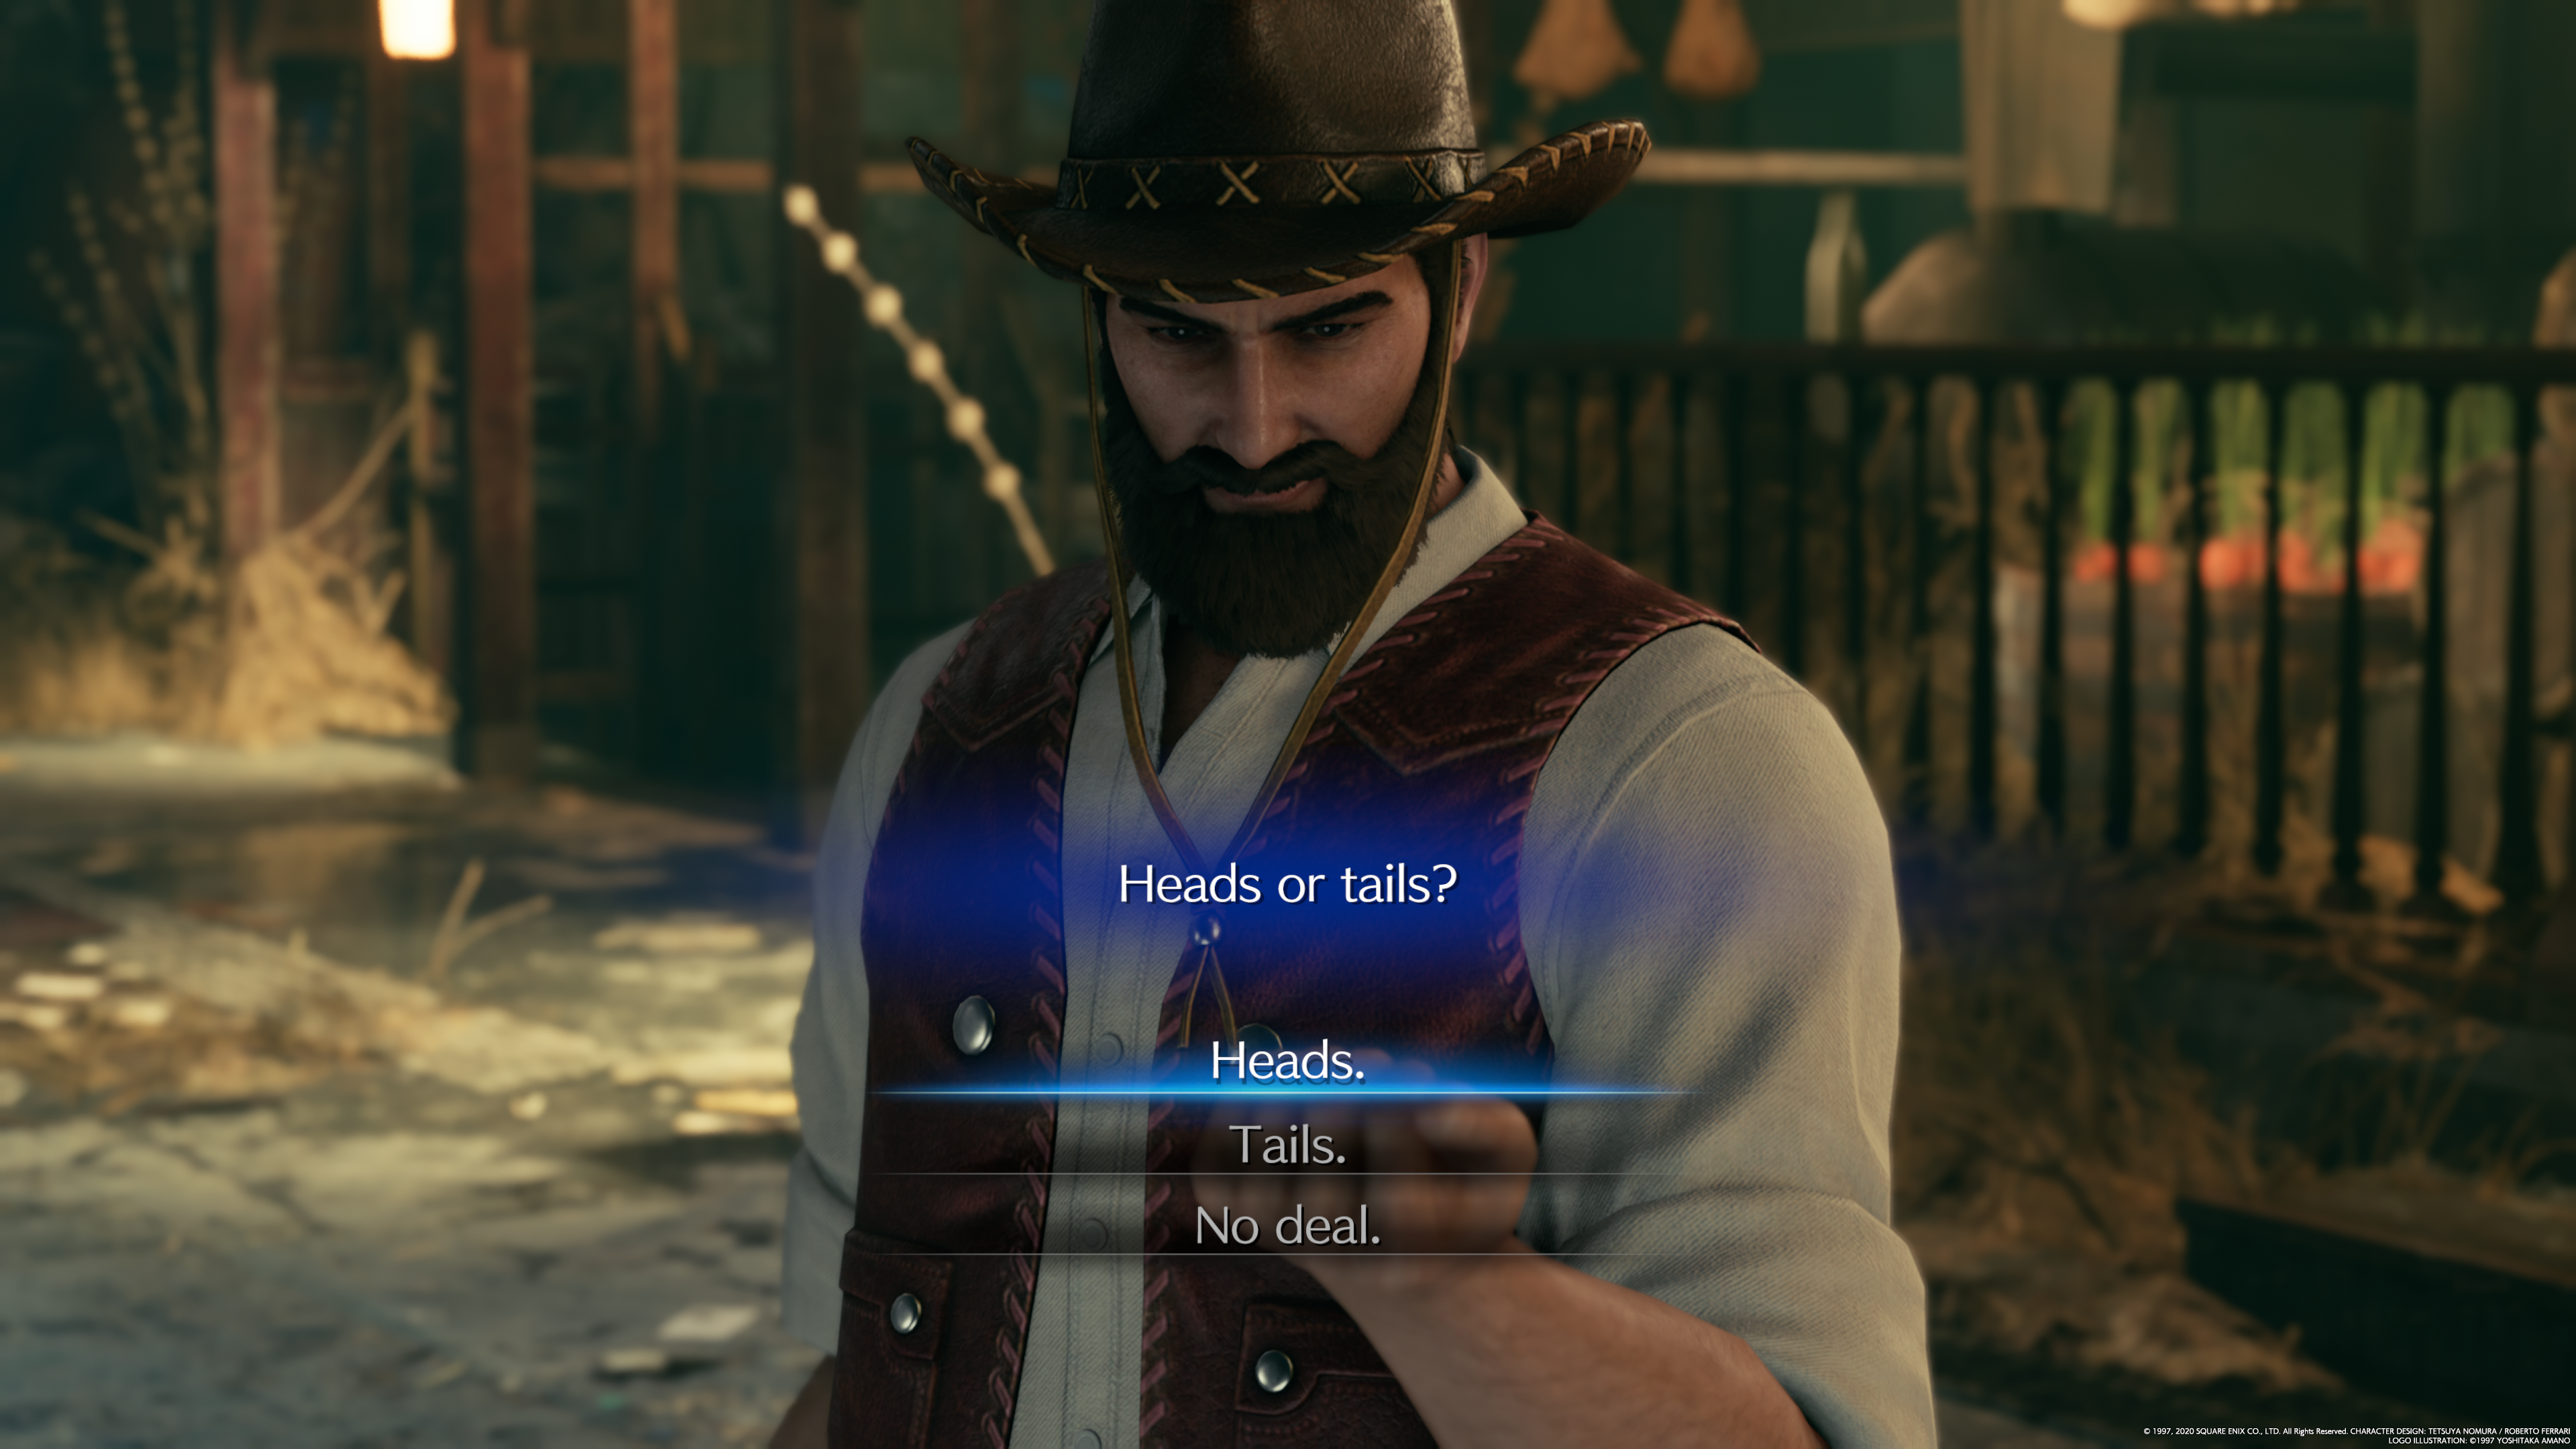
Heads or Tails - Sam's coin flip
Basically, the choice here isn't whether you select Heads or Tails, but rather if you're willing to gamble at all, or not. Thus, the choice breaks down as follows:
Select 'Heads' or 'Tails' for +1.5 points towards getting Chocobo Sam's quests.
Otherwise, select 'No deal.' for +0.5 points towards getting Chocobo Sam's quests.
Advertisement. Keep scrolling for more
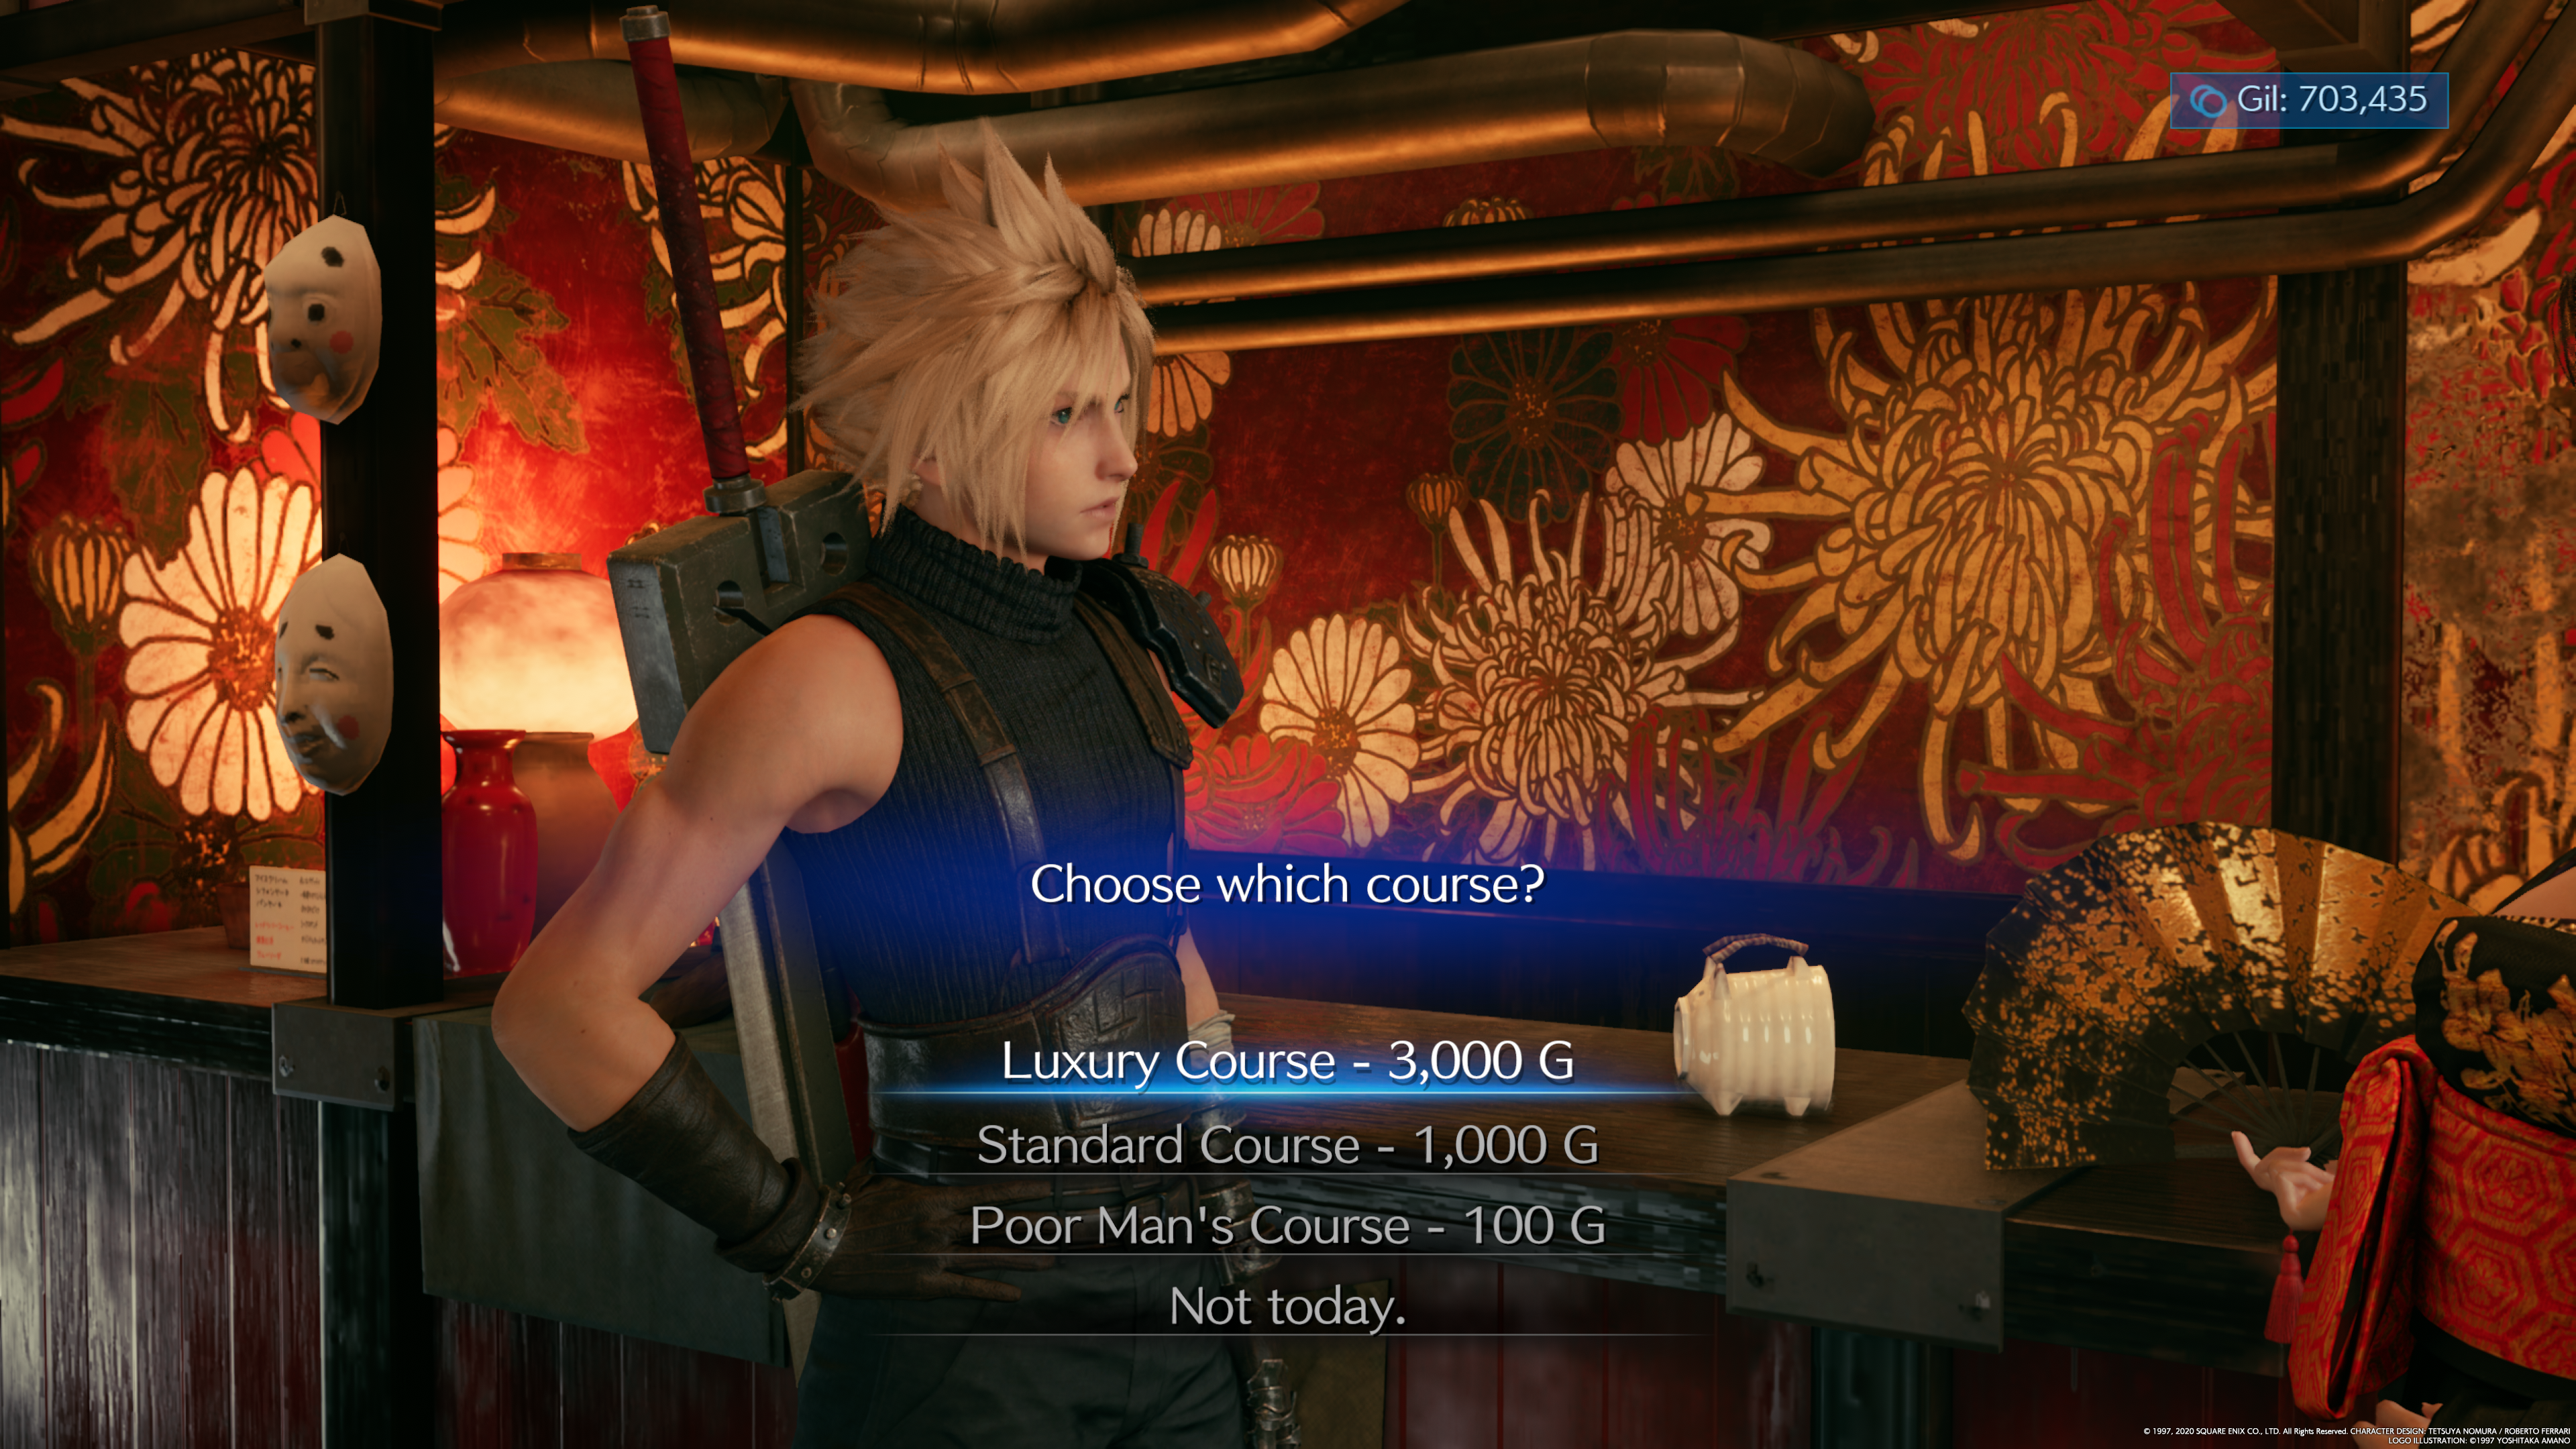
Which course to take from Madam M
Choosing the right Massage Course is another important selection in Wall Market that affects which set of sidequests you end up getting in the back part of the chapter. You'll also get a different cutscene depending on the choice, with the more expensive ones being seemingly more pleasant for Cloud.
Choose the Luxury Course to maximize your chances of getting Madam M's two quests, you'll get +2 points.
Second, choose the Standard Course to only get +1 points to Madam M's quests.
Finally, choose the Poor Man's Course to get no points towards Madam M's quests.
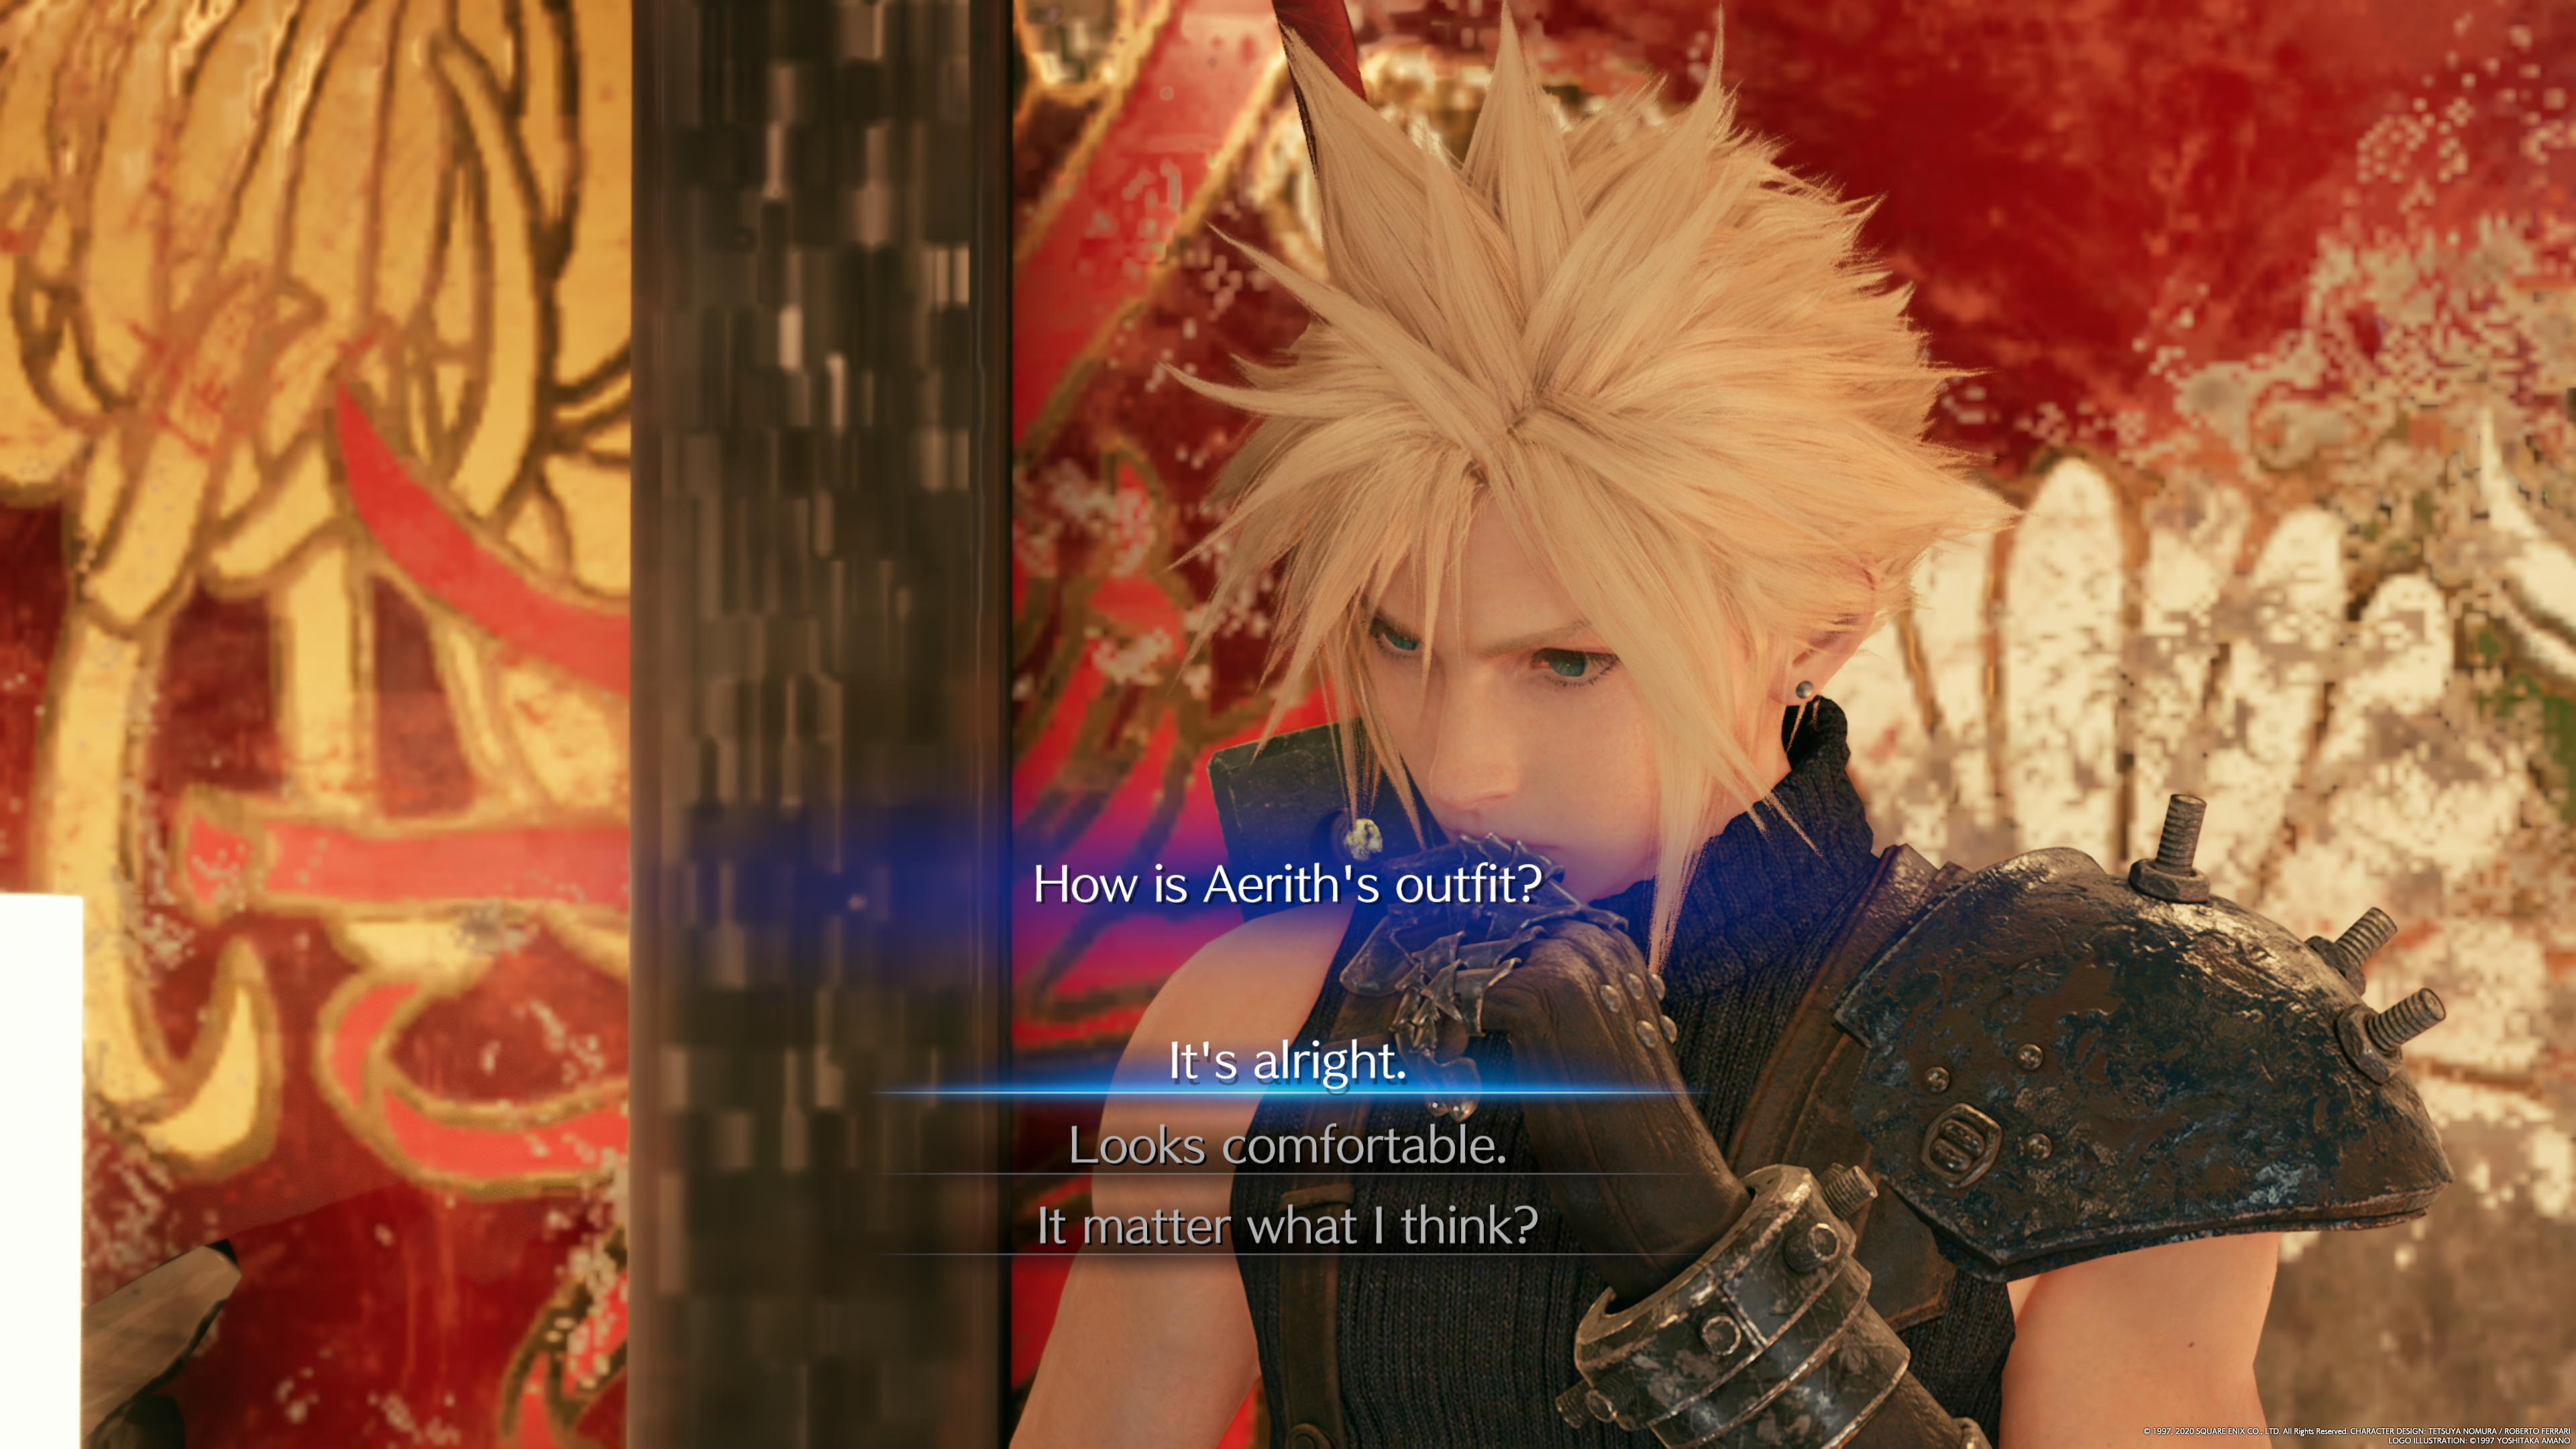
Judging Aerith's outfit
While this might seem like a choice geared towards building affinity with Aerith, it's actually one of the last in determining with quests you get.
'It's alright' will get you +1 point for Chocobo Sam.
'Looks comfortable.' will get a snide-but-playful remark in response. This has no net effect.
'It matter what I think?' should be selected if you want to get Madam M's two quests, you'll get +1 points for her.
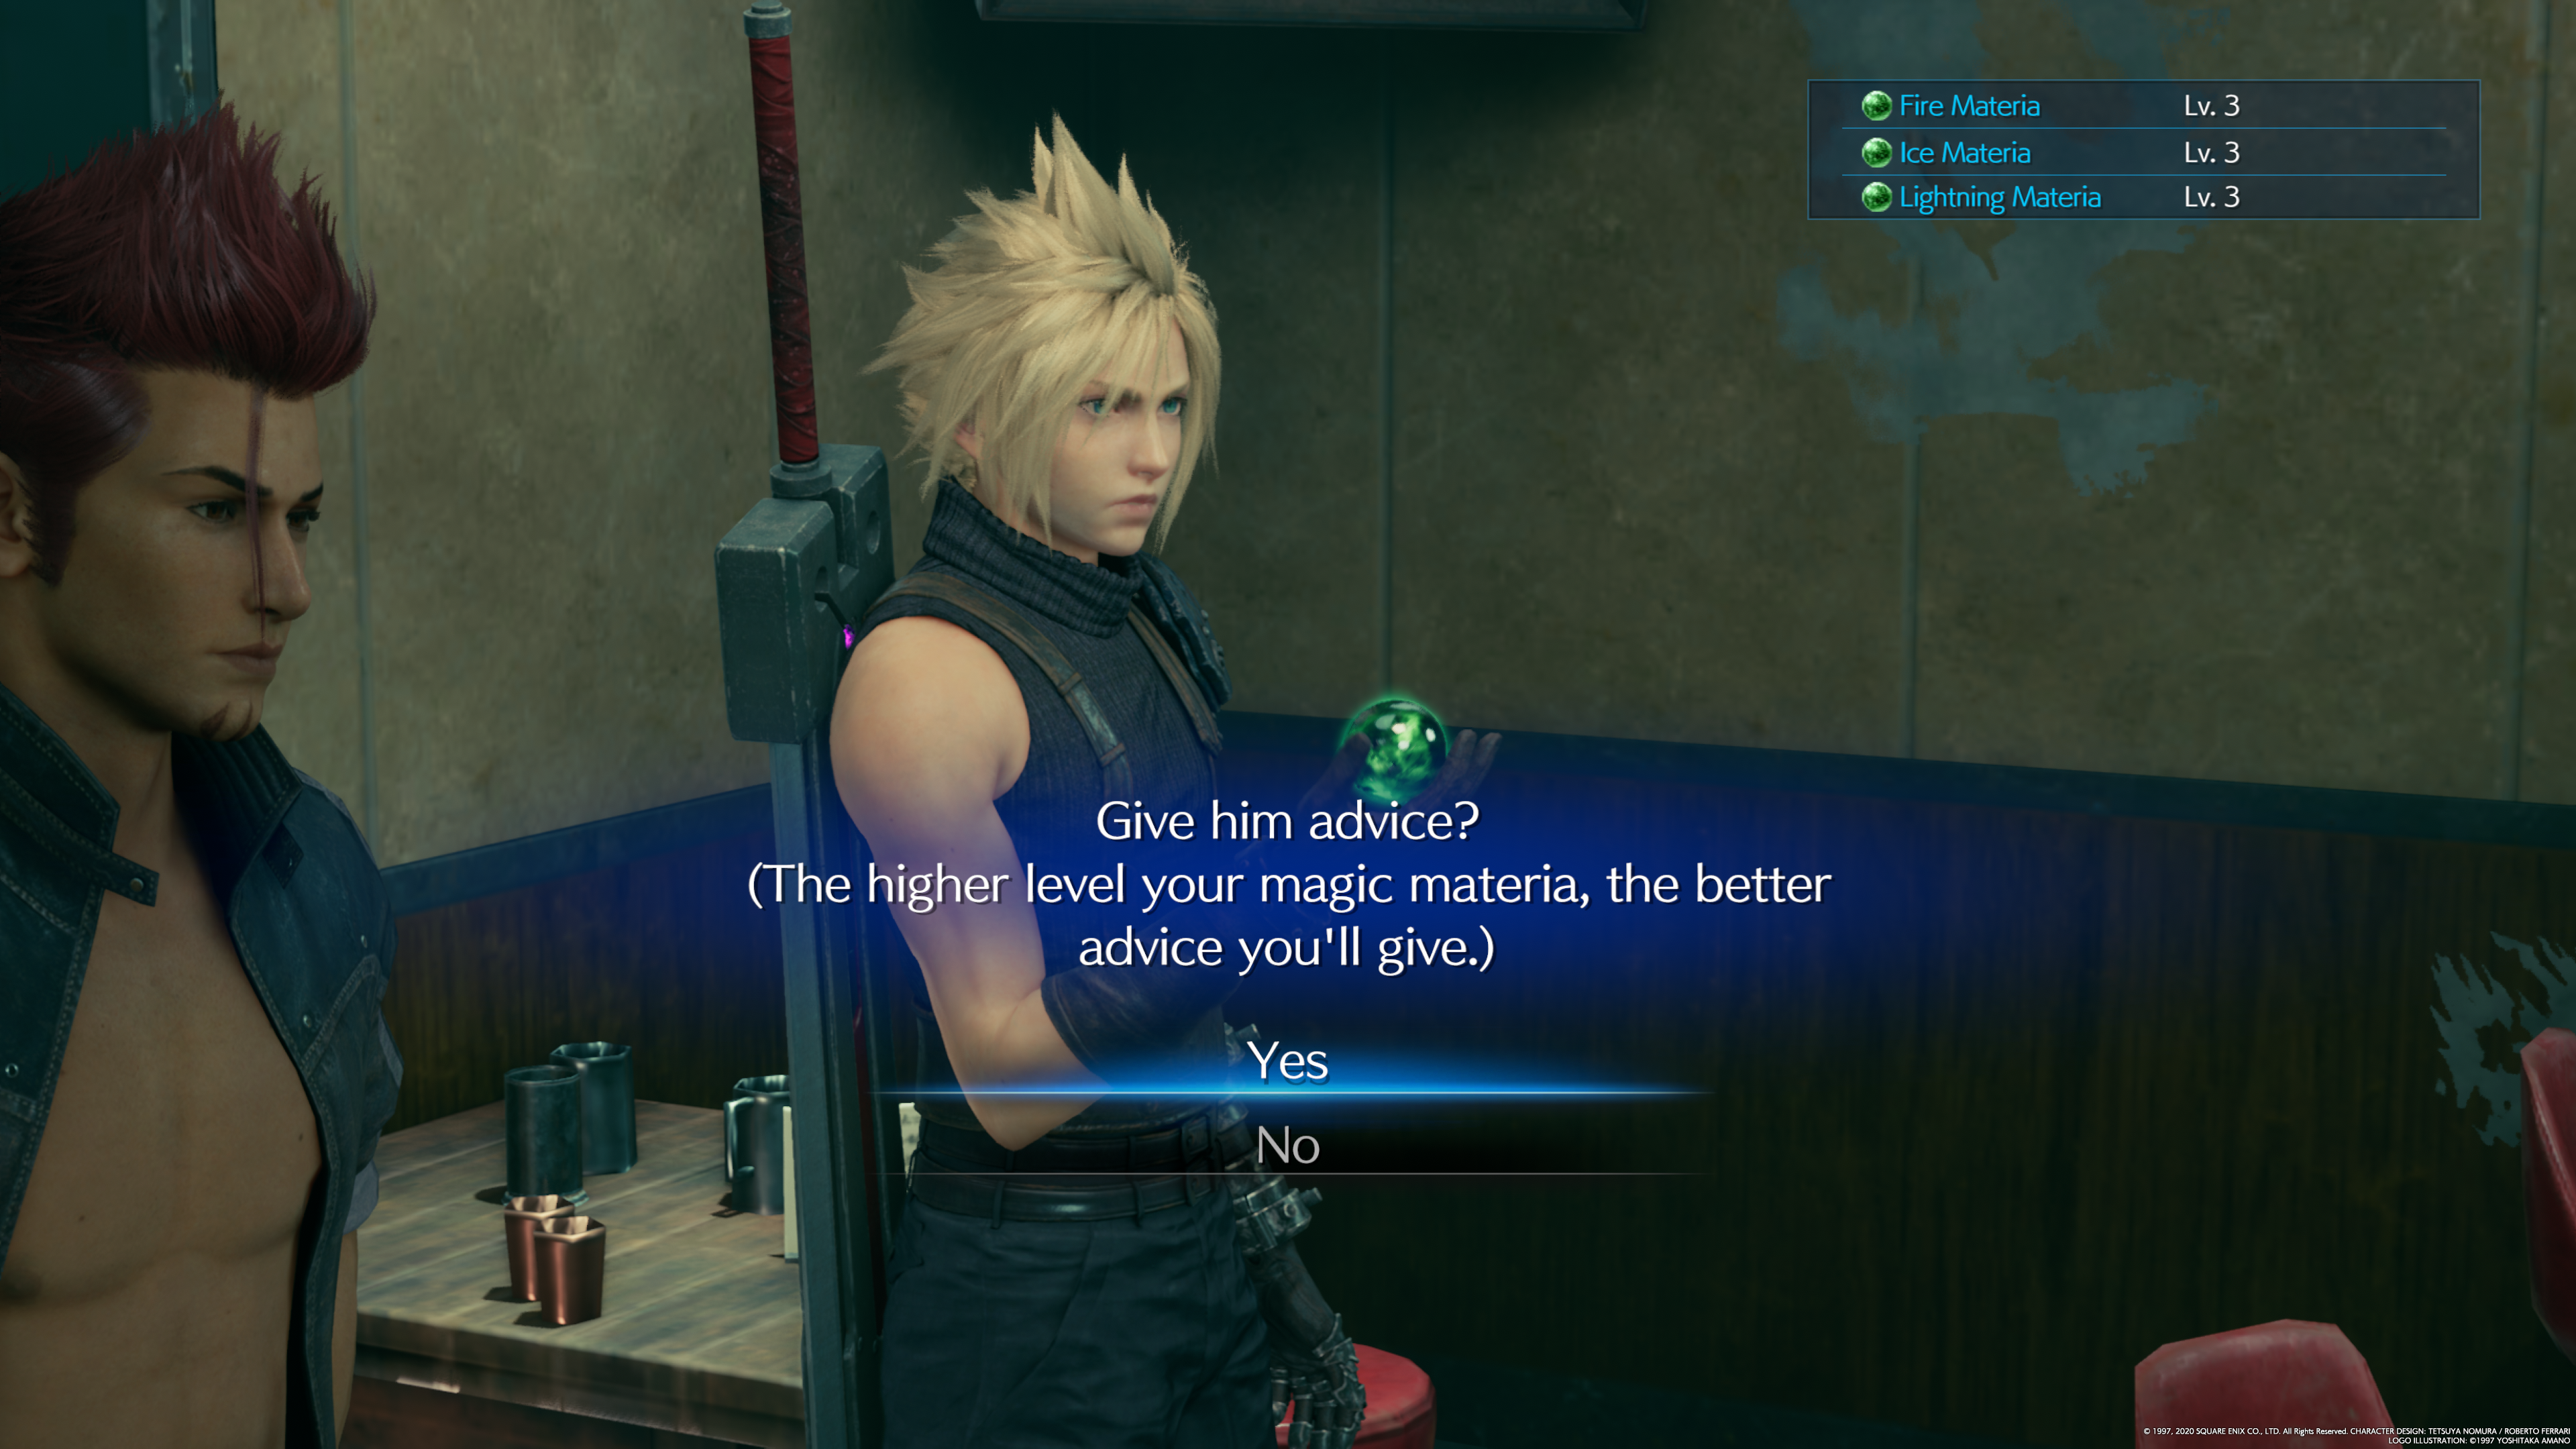
Giving Johnny Advice
Advertisement. Keep scrolling for more
As covered in our dresses and Wall Market guide, this choice is mostly just for a free Moogle Medal. You’ll have different outcomes depending on the level of your Fire, Ice, or Lightning materia, and you’ll be able to choose a suggestion based on which one happens to be the highest level. Again, if you pick one with a Level 3 materia (such as “Stove” if your Fire materia is level 3), you’ll earn a Moogle Medal. This doesn't affect any other outcome.
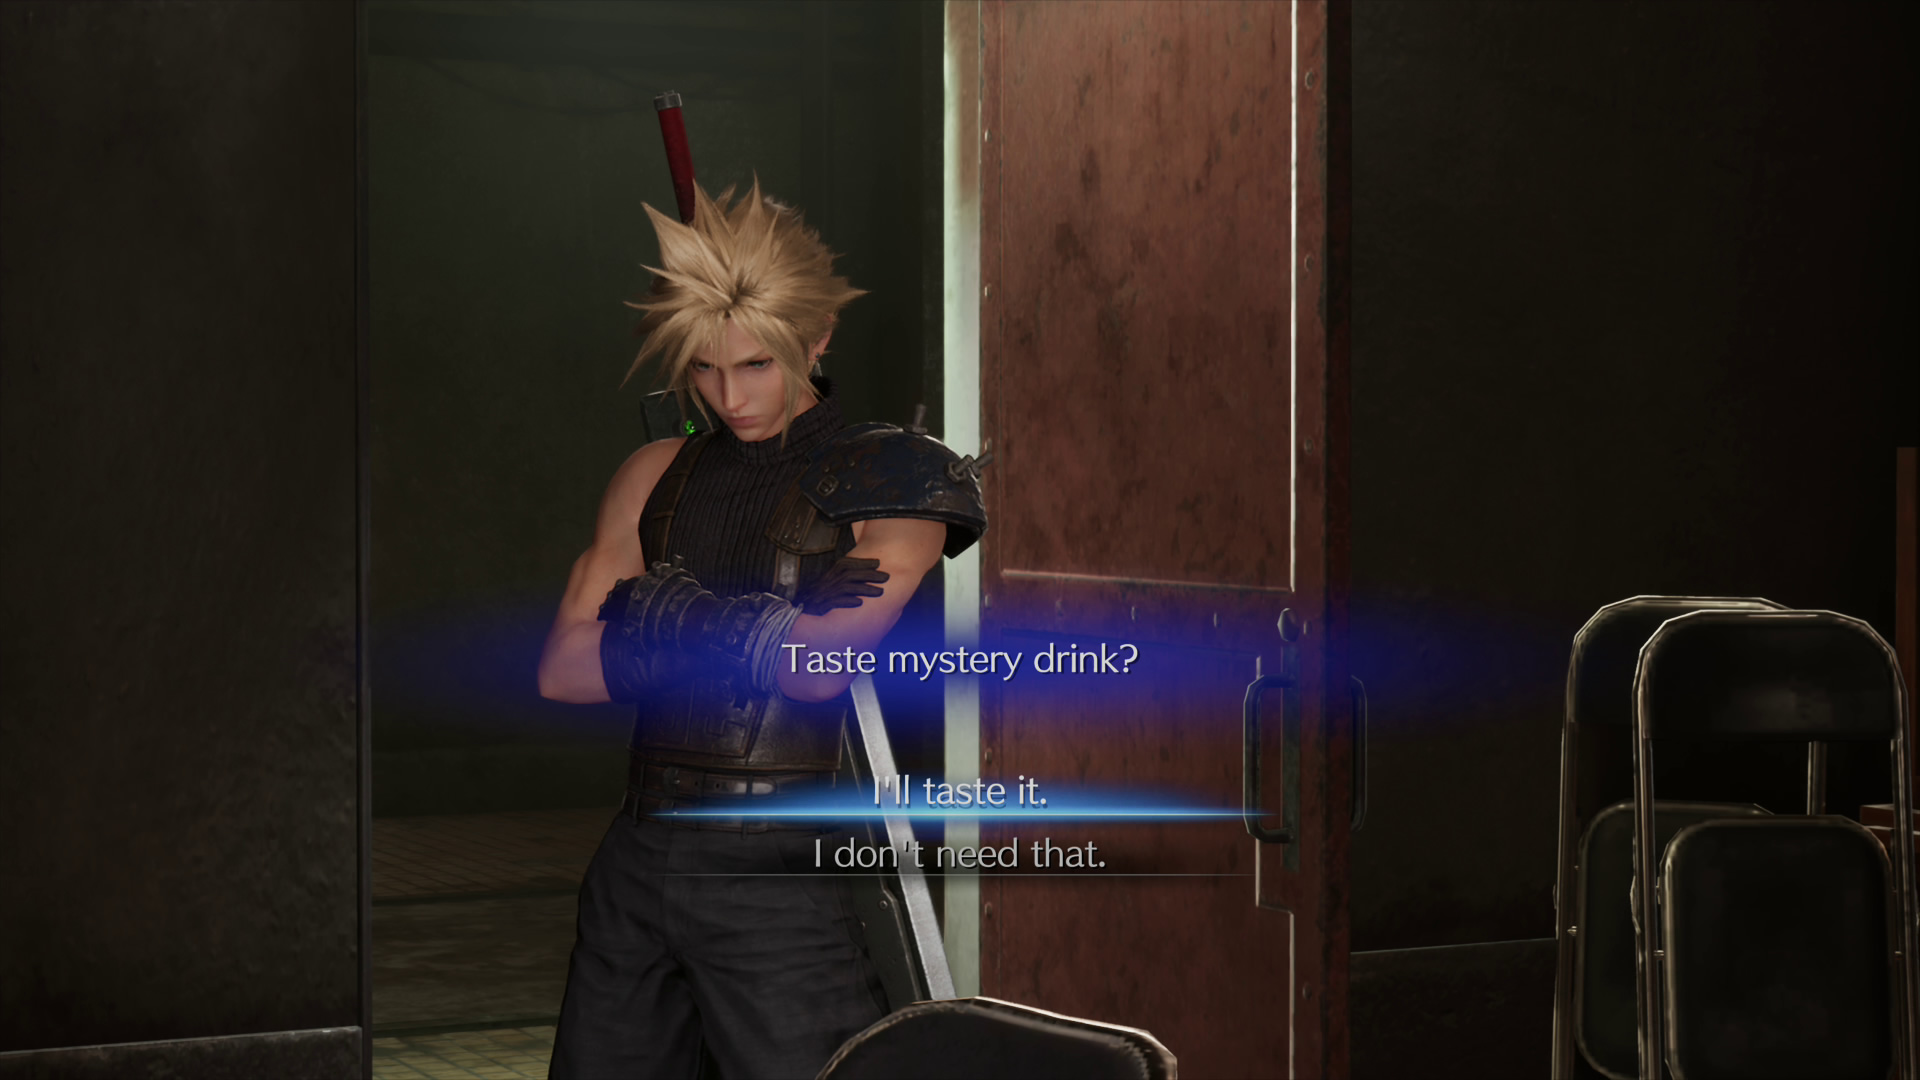
Should you Taste Mystery Drink?
This is the last choice that affects which pair of quests you'll get in Chapter 9 -- or you can just ignore it if you want (which we've done accidentally on a few of our Chapter 9 playthroughs). Johnny will say that the drink will help in the upcoming fights, but you'll have to choose whether or not to trust him on that.
"I'll taste it." you'll get +1 points for Chocobo Sam.
"I don't need that." will have Cloud skip the option to take the drink. This is the same as ignoring it -- ie no points either way.
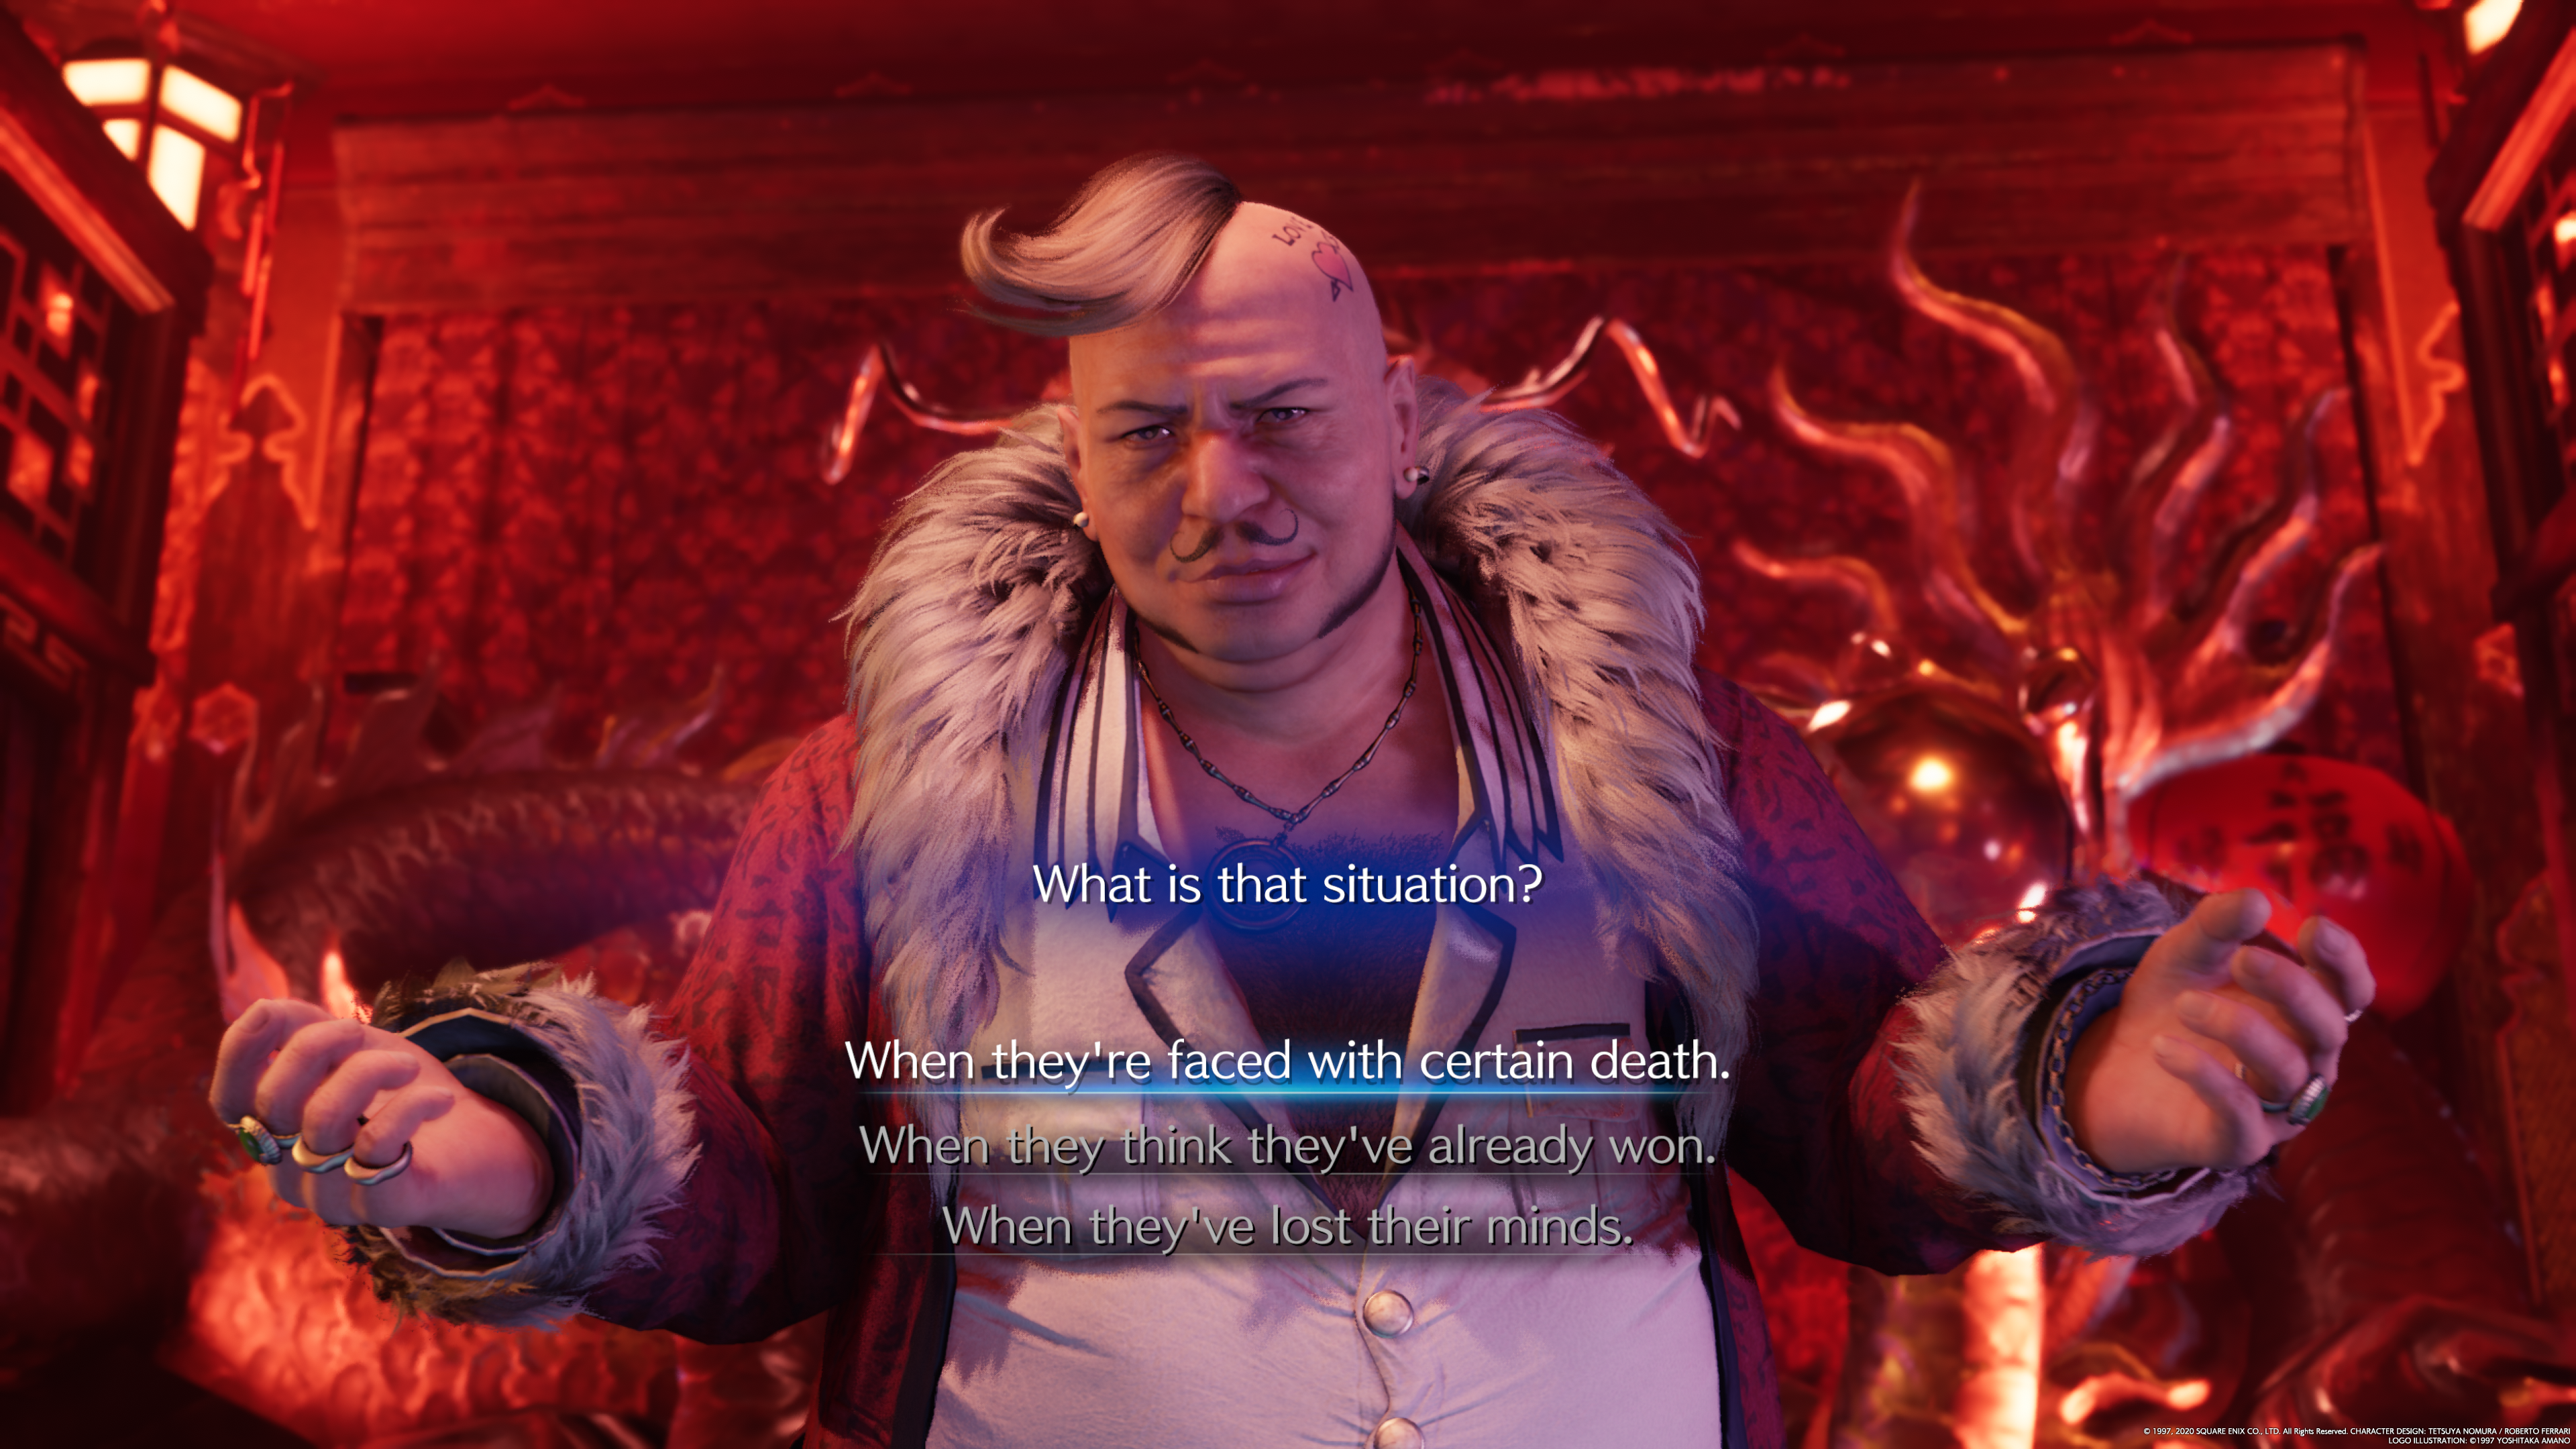
Explaining your Situation
"What is that situation?"
This question is clearly a throwback to Final Fantasy VII where Don Corneo asked basically the same thing. It's likely that this is merely a homage and doesn't have any far-reaching implications. And you'll end up in the sewer regardless of what you select.
For what it's worth, 'When they think they've already won.' is the answer Don is looking for.
Uniquely, this selection can actually time-out, forcing Don to pull the lever leading to the sewers if you simply refuse to make a choice.
Chapter 10 Choices: Aerith or Tifa?:
Advertisement. Keep scrolling for more
While not explicitly listed as a choice in-game, you'll get a unique cutscene depending on which party member you check in on first between Tifa and Aerith at the very beginning of the chapter.
In the original game, whichever character you checked on first got extra points on their 'affection' to Cloud, while the other got negative points. It's the same here, but leading to the Chapter 14 resolution scene - so simply check on the one you want to have like Cloud more.
The party member you check in on first will get +1 point for viewing her resolution scene later. If you are completing all sidequests, this ends up being the tiebreaker.
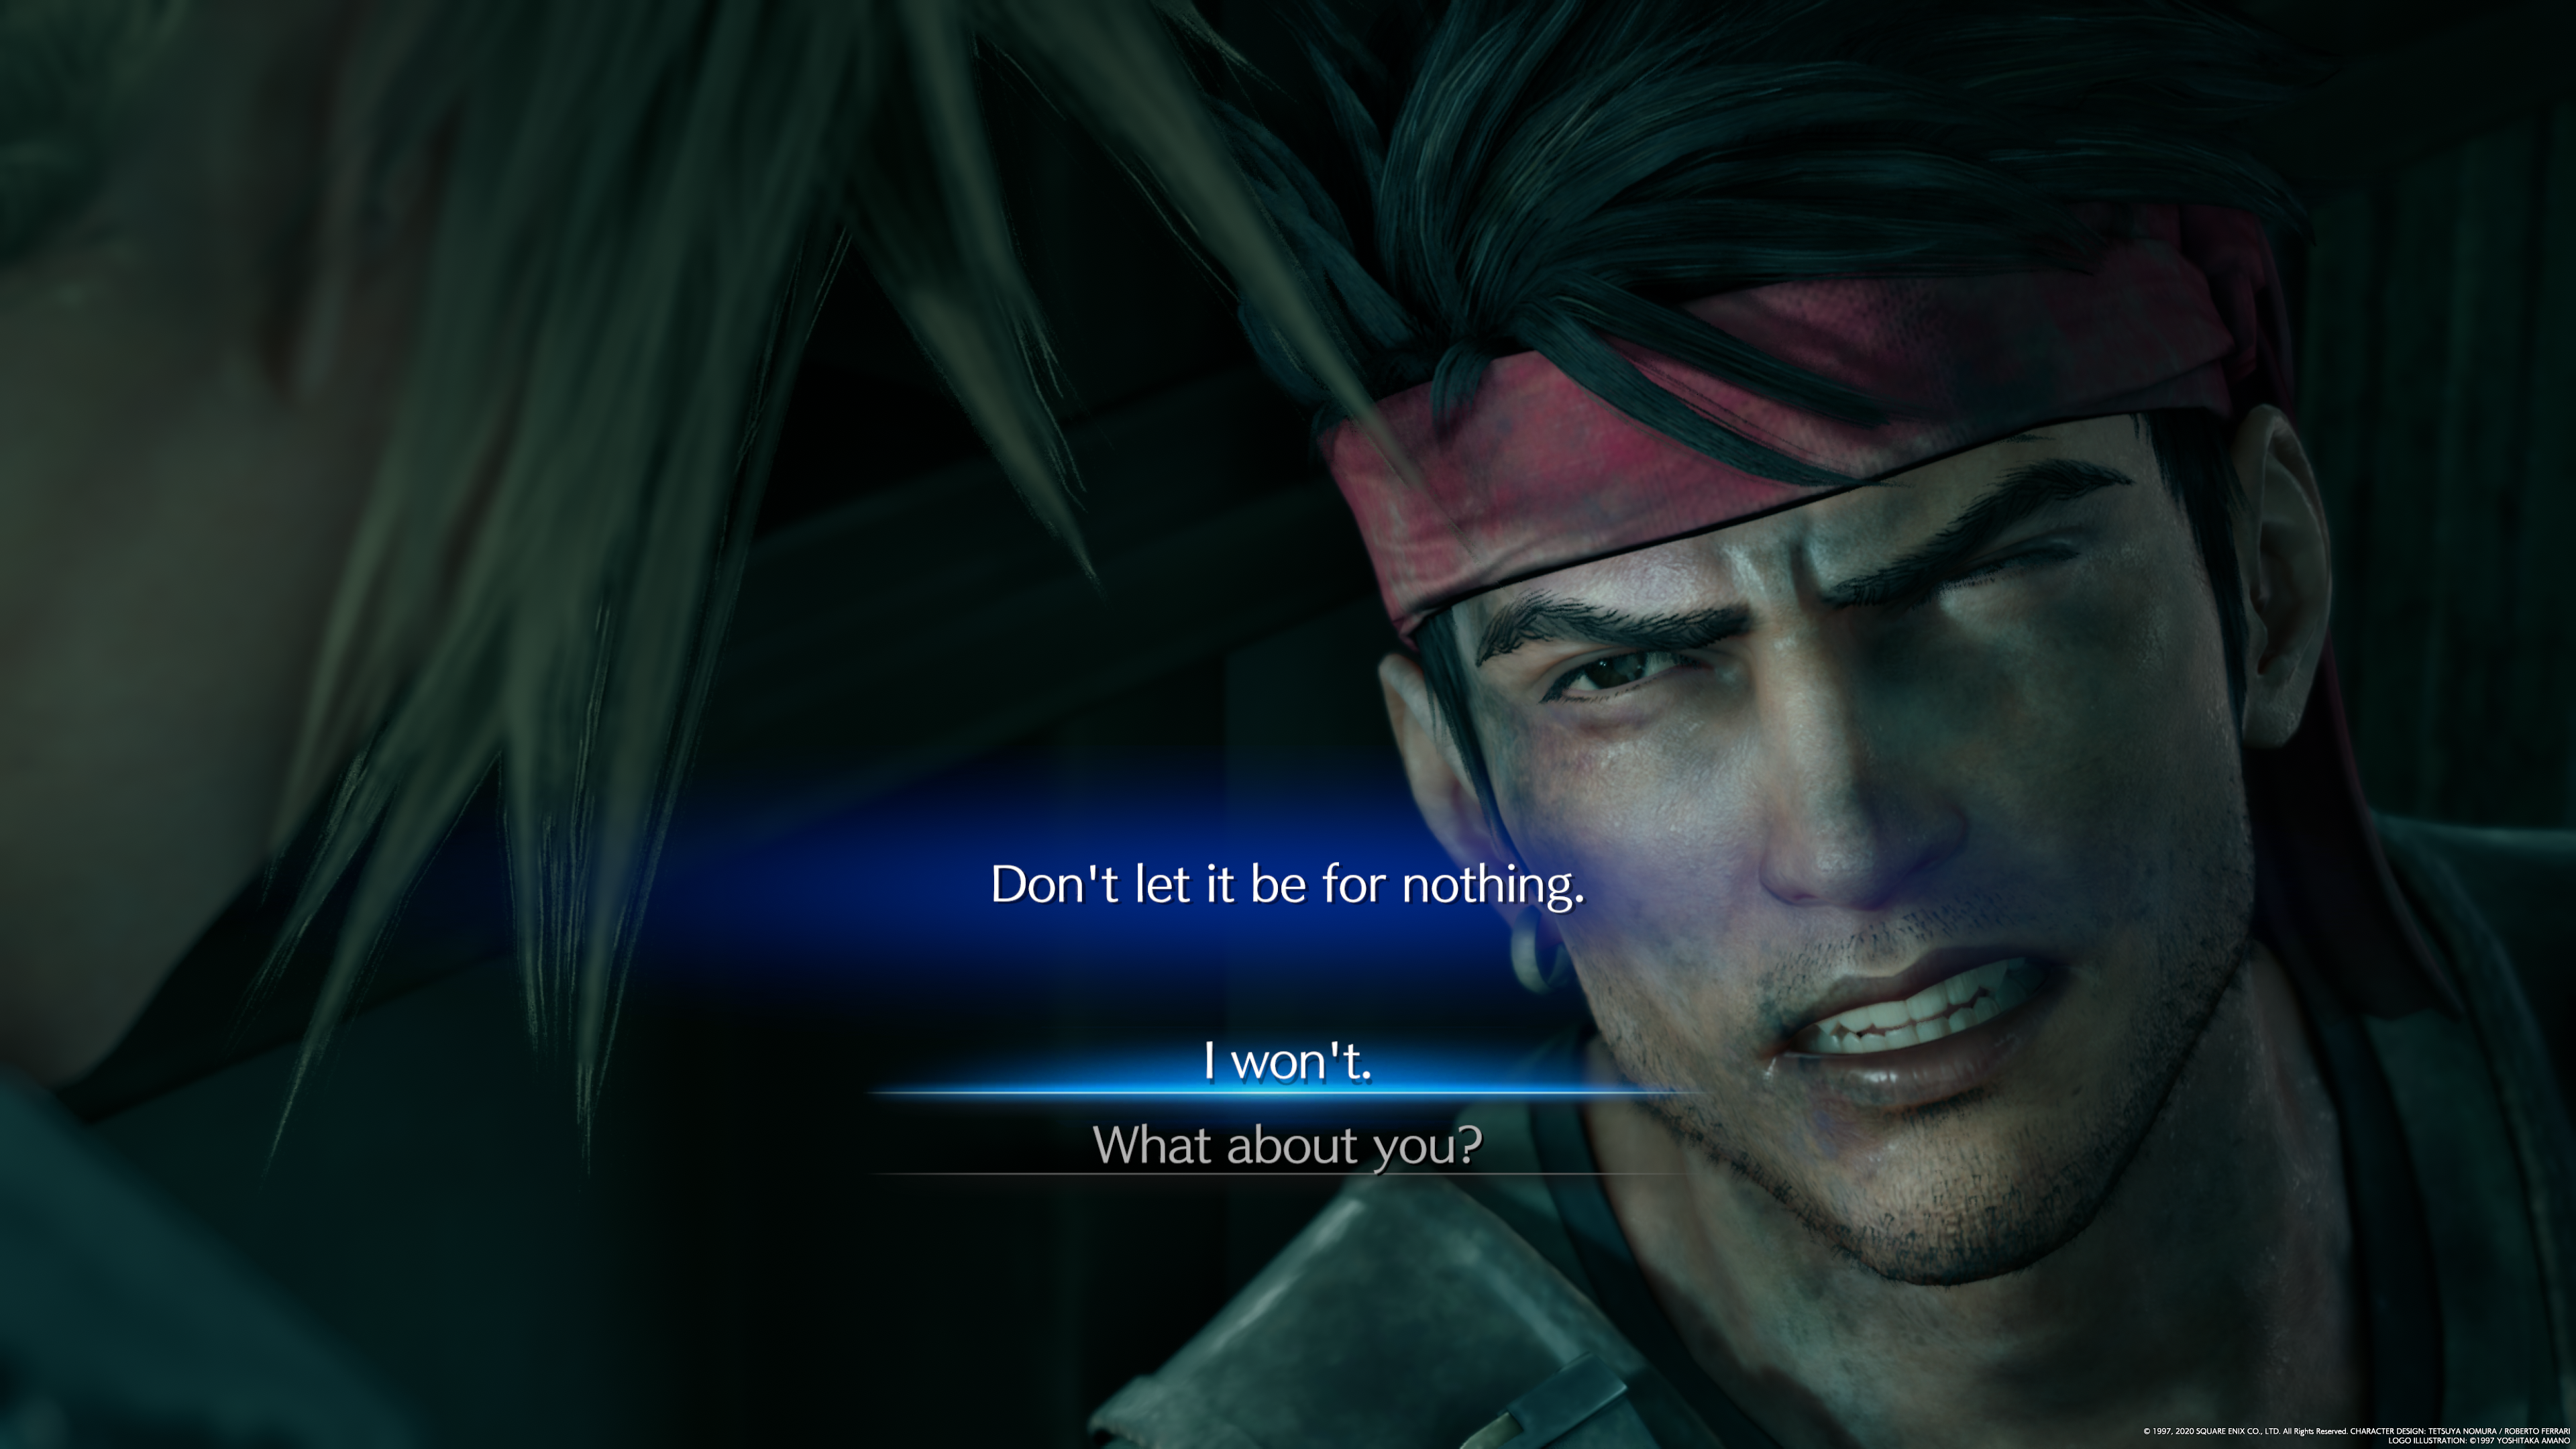
Chapter 12 Choices: Final Moments
"Don't let it be for nothing."
Similar to Jessie's choice in late Chapter 4, the choice made to Biggs while climbing the Sector 7 Pillar doesn't have any obvious consequences. Simply select whichever you prefer.
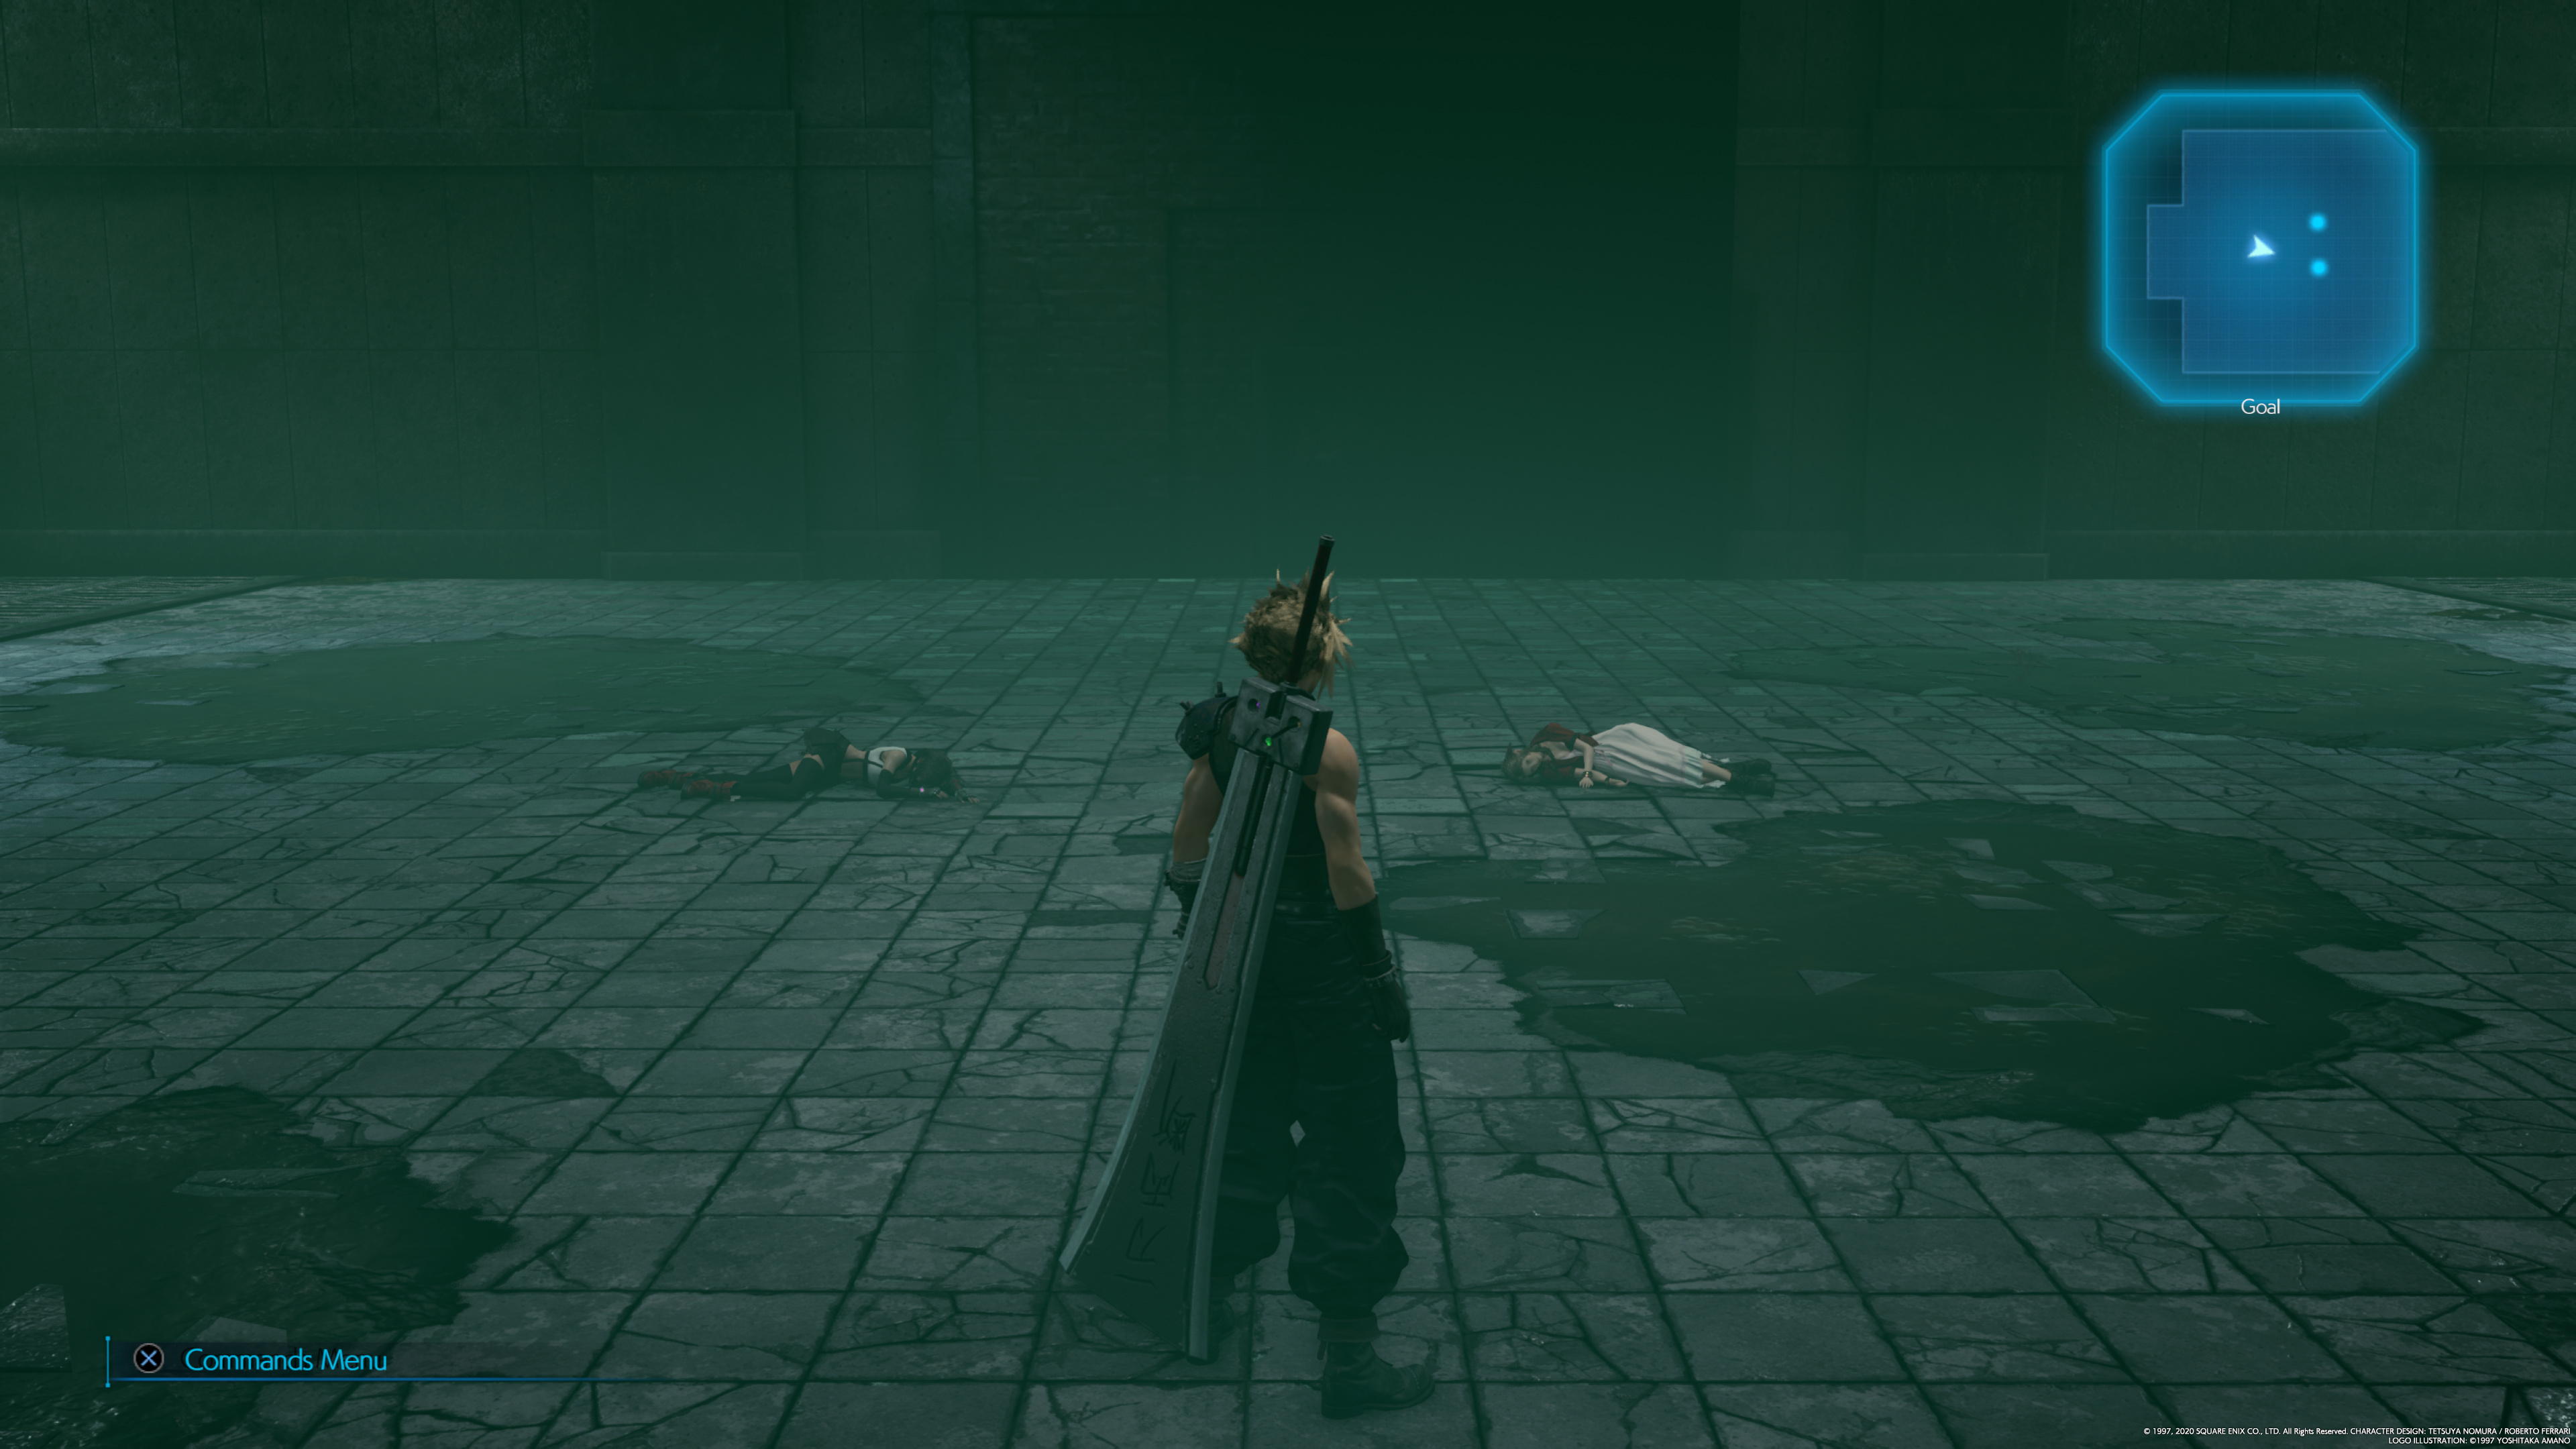
Chapter 14 Resolution Scene Explained
Early on in FF7 Remake Chapter 14, you'll meet a party member in the garden of Aerith's house and see a small cutscene. The in-game Play Log will title this the "Chapter 14 Resolution' scene, and will actually record how many of the three possible options you've seen. So in a manner not unlike the Gold Saucer date scene in the original game, this scene is the consequence of what you've done in the game up to this point so far.
Advertisement. Keep scrolling for more
Tifa, Aerith, and even Barret all have scenes here. The main factor that determines which scene you'll see is how many quests you completed with Tifa in Chapter 3, how many quests you did with Aerith in Chapter 8, and finally which girl you checked in on first at the start of Chapter 10 in the sewer.
You'll earn 2 points for each quest you complete while partnered with Aerith or Tifa. Since both Chapter 3 and Chapter 8 have six quests, this would mean the choice in the Sewer at the start of Chapter 10 acts as the tiebreaker.
Since Barret doesn't have any opportunities to earn any 'points' leading up to this moment, we were able to force his scene by simply skipping the majority of sidequests in Chapter's 3 and 8. You'll get his scene if you fail to get more than 5 points for either of the other two (ie, if you do only one or two quests for each).
Chapter 16 Choices: Elevator or Stairs
The elevator or the stairs
In a manner similar to climbing the Shinra Building in the original, you'll have an option to take the emergency stairwell to reach the upper floors, or simply use the elevator. In the original, there were some items to be gathered on the stairwell, so there was actually some benefit to doing the tedious thing and taking the stairs all the way up.
In this remake, there doesn't seem to be any particular reason to take the stairs here, except potentially to witness some humorous banter between Tifa, Cloud, and Barret. There's also a unique piece of dynamic music that changes as you get closer to defeating the epic 'boss battle' that is 59 floors of climbing stairs. The stairs scene is funnier, and is all about Cloud, Tifa and Barret.
If you instead decide to take the elevator, you'll fight a pair of short battles and witness a few shorter cutscenes which give you a little more insight into the Shinra company and the people who work there. Both are valid - the stairs are a classic FF7 moment remade, but in the end, taking the elevator will get you to the top much quicker, and it's the route we generally suggest.
Advertisement. Keep scrolling for more
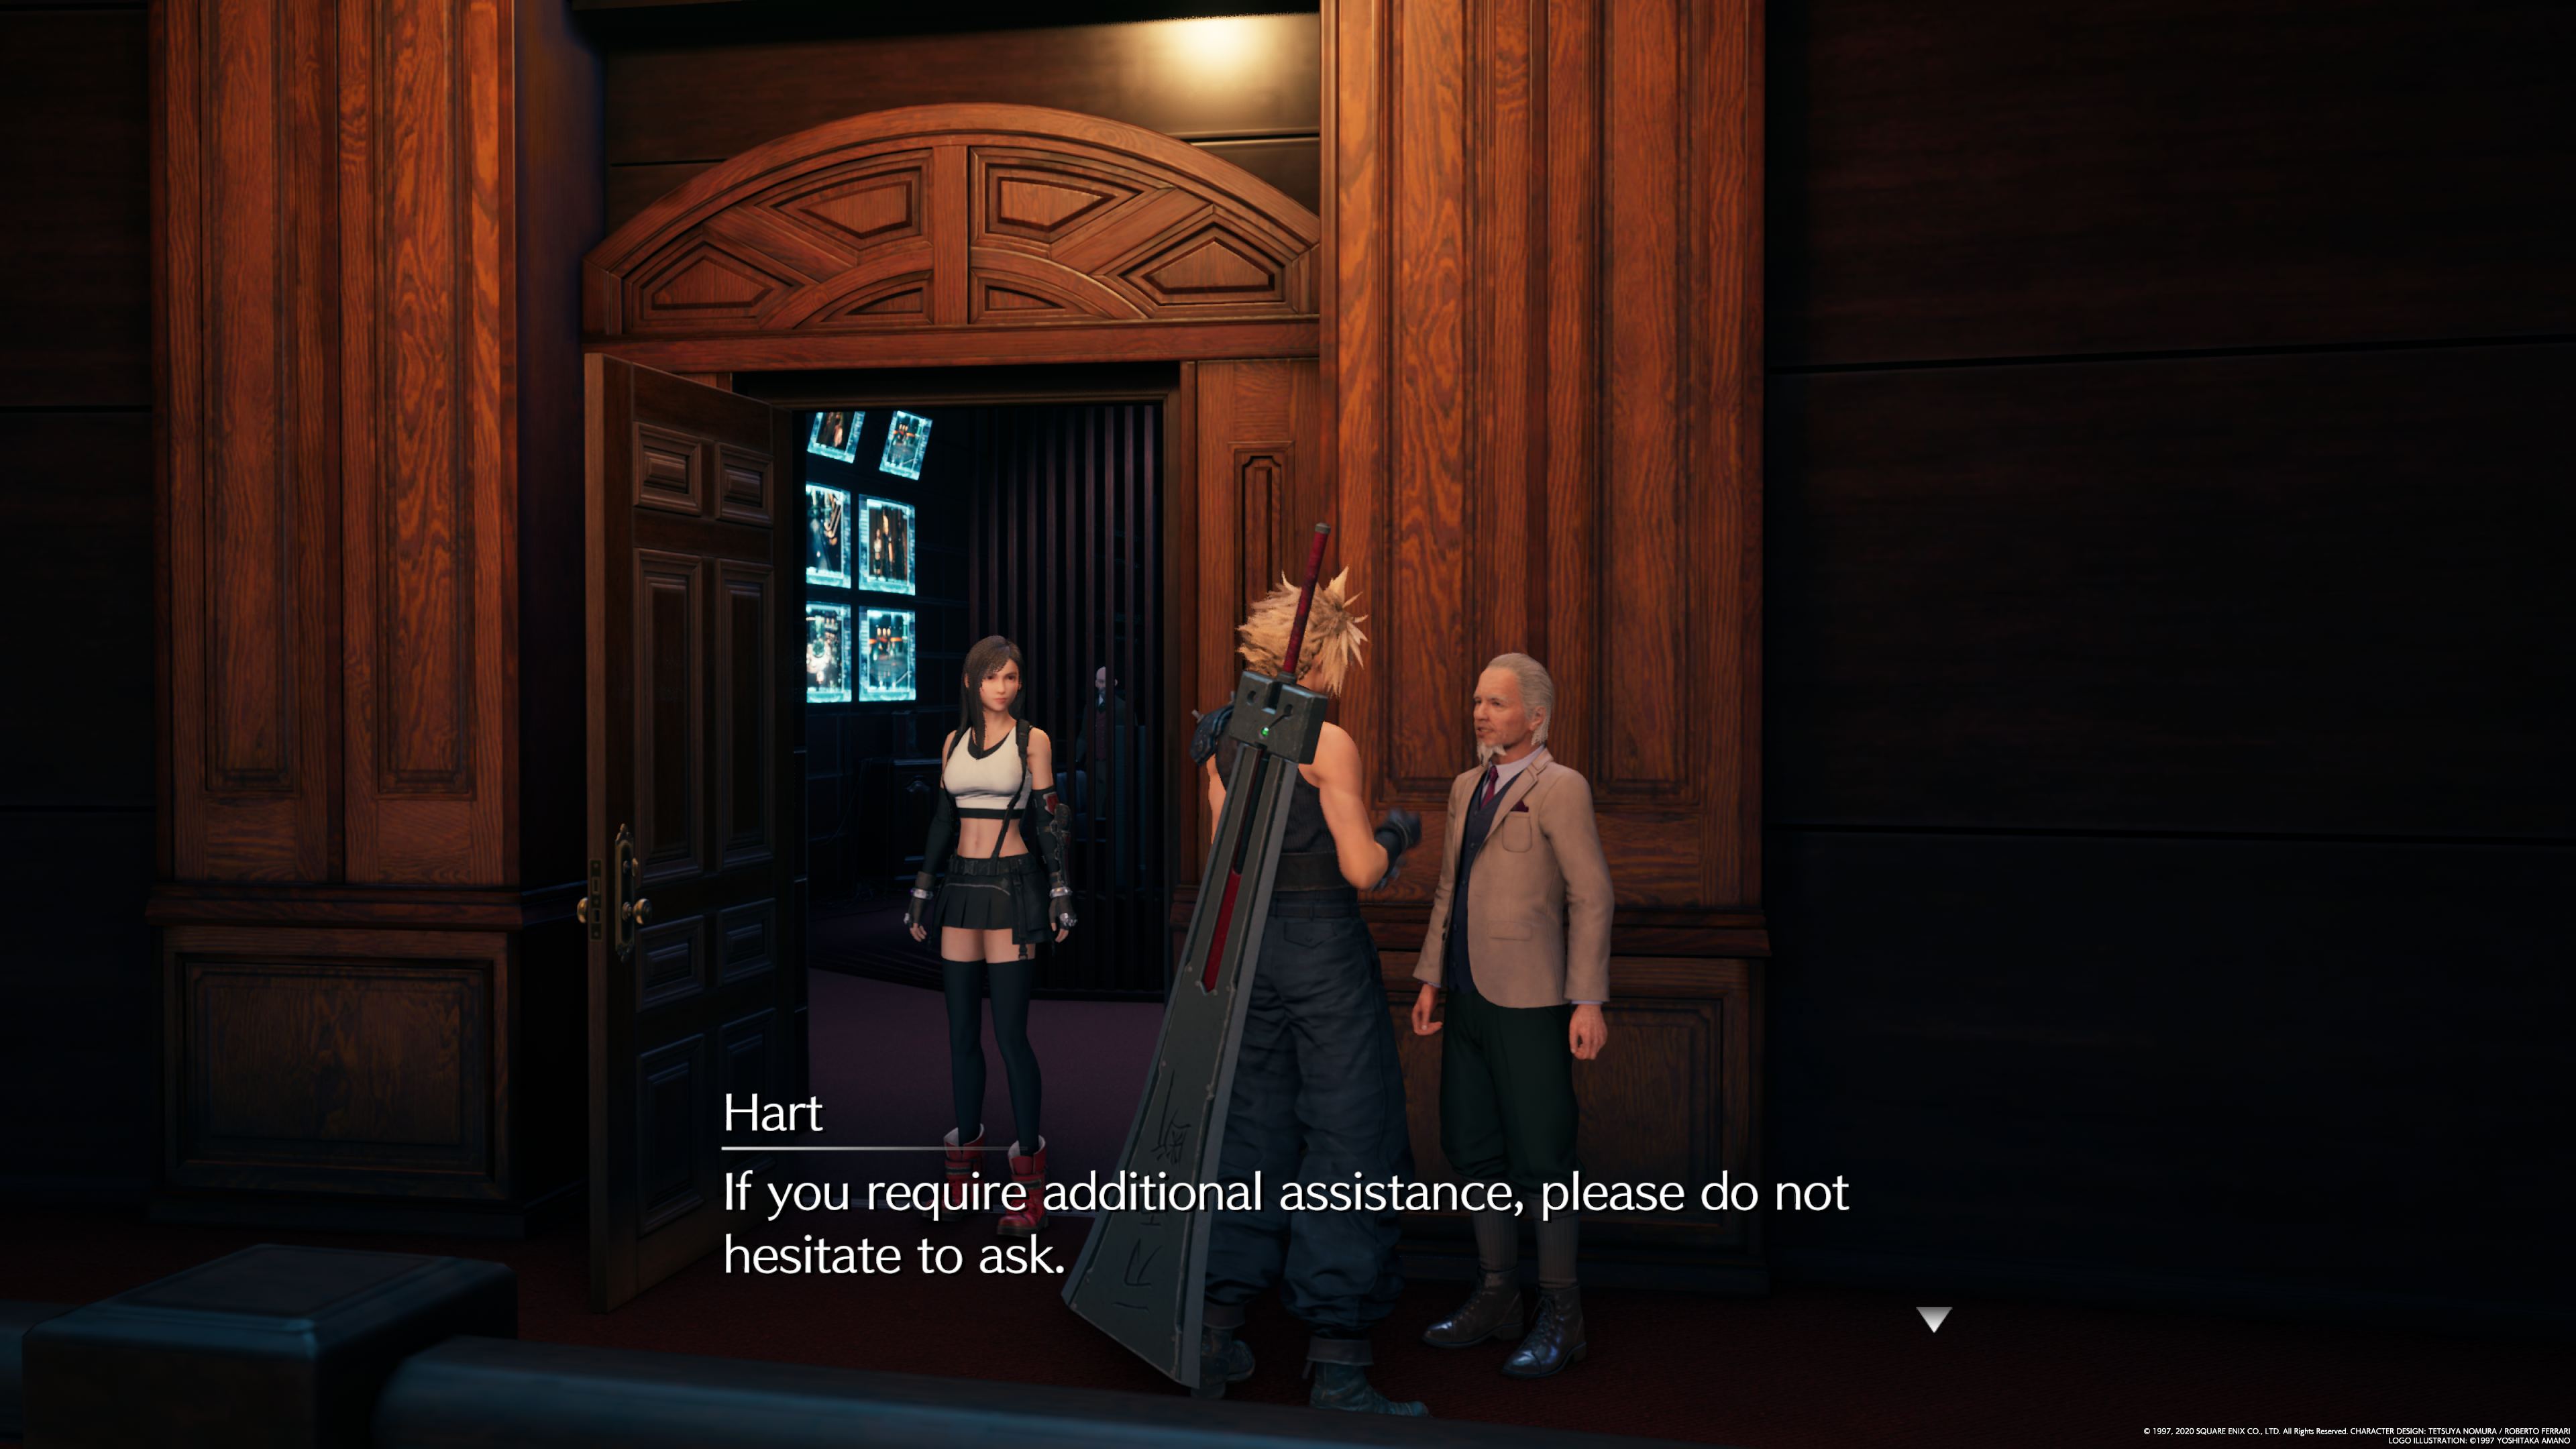
Should you give 10,000 gil to Hart?:
If you speak to Hart after talking to Mayor Domino (The Best!), he'll ask you to give him 10,000 gil for a hint. Go ahead and give him the gil for a useless hint, but you'll also receive the EKG Cannon for Barret, which makes it all worth it.
Chapter 18 Choices: Joining Allies
One final consequence of the choices you've made throughout the game will manifest during the fight with the final boss.
After a short stint fighting with Cloud alone, the order your party members join up to assist in the battle will depend on the choices you've made leading up to the climax of the game.
This will also determine your party of final three for the final, final boss battle - it will be based on all your choices and how much you've used each character up to that point.