
Final Fantasy VII Remake Accessory List: best accessories, effects and locations
Final Fantasy VII Remake inherits its basic equipment system from the original FF7: each character can equip a unique weapon, a single piece of armor and an accessory. While undoubtedly the least important part of your gear in FF7 Remake, Accessories are still a major part of your character load-out that can have a big impact in battle.
Because of their slightly reduced importance, accessories can be obtained in a number of different ways. Some can be bought from shops, while others are rewards for quests, mini-games and other optional content. Others are of course just rewards out in the world, while a handful can actually be taken from enemies and bosses as detailed on our FF7 Remake Stealable Items list. On this page we present a full accessories list complete with locations so you know exactly how to get them.
Final Fantasy VII Remake Accessory List: all accessories and where to get them
Generally speaking, you'll easily come into contact with a good range of accessories right throughout FF7 Remake just by playing the story and opening any chests you see. Once you get to the late game and begin thinking about challenging hard mode or the arena super bosses in the Shinra VR Battles, however, you'll want to more carefully think about your character load-outs right from considering the best materia combinations to your choice of summon materia and limit break and, of course, using manuscripts to max out your weapon upgrades.
Last but certainly not least is your accessories, which can provide buffs ranging from big boosts to your stats to saving you from death in a limited capacity. They should not be overlooked - so here's the complete list. Before that, however, here's our stand-out picks for the best accessories.
The Best Accessories to Equip in FF7 Remake
FF7 Remake is a well-balanced game, and that means that the truth is that there's no specific best accessory, just as there isn't a best weapon in the game, only recommendations of what might most make sense depending on your play style. With that said, we do have a few ideas about the best accessories that are must-equips, especially as you move into the late game tackling the Shinra VR Missions and hard mode.
- Gotterdammerung is without a doubt the best accessory in the game, allowing you to enter battle with a fully-charged Limit Break meter and then providing a constant boost to how fast limit breaks charge. This accessory can even made hard mode a breeze, but there's a catch - it's locked behind the very last Shinra VR Mission in the game, which is basically the hardest battle in the game. That also means you can only get one. It can make extra play-throughs you feel like doing a breeze, however.
- With Final Fantasy VII Remake Episode Intermission, you can earn two more Gotterdammerungs through the added battle in the combat simulator.
- Speaking of that super boss, don't underestimate the Revival Earrings. These items can be purchased pretty freely from about halfway through the game, and make it so you are instantly revived if killed - but only once. Once used once, this accessory breaks - which is why you can buy more relatively cheaply. The Revival Earrings are perfect for surviving one-shot attacks like Bahamut's Mega Flare, which can make or break certain encounters.
- The Transference Module is obtained via the whack-a-box mini game on hard, which is easy enough to clear. It boosts your limit meter whenever you use ATB charges, and is great on a character that can quickly build and then burn through ATB charges. We had it equipped to Barret, which then let us unleash his Catastrophe limit more regularly to rapidly stagger enemies. It can also be handy on Aerith, to keep a constant flow of healing coming.
- Of all the stat boosting accessories in the game, the Champion Belt is the best. You can get two of these easily - one each for completing the hardest difficulty of the Squats and Pull Ups mini games at Wall Market. It can also be stolen from certain enemies. It boosts both HP and Strength, and is absolutely perfect for Tifa but is also a good fit on Cloud.
- A few dungeons have lots of enemies that can slow you with spider webs and such, and in those dungeons equipping the Protective Boots can be a godsend.
- The Tarot Cards can be won in the Colosseum, and they're useful if you make use of status effects like slow, poison, silence and so on - they make them last longer. Just remember, getting these effects to stick on a boss isn't always easy.
- If there's a particular character you don't really like playing as, the best accessory for them is probably the Crescent Moon Charm. It reduces damage taken by characters when they're controlled by the AI - so if there's one character you tend to leave in the hands of the AI, give them that.
- The Enfeeblement Ring is just silly. A lot of people are wondering if there's more to this item, but it really does just let you begin battle as a frog/toad. You could use it if you really wanted a challenge, I suppose, but in real terms this accessory sort of just exists as a joke.
FF7 Remake Accessory List & Locations
With the above list of the best accessories considered, here now is a list of every accessory in FF7 Remake - plus some examples of where you can find or buy each.
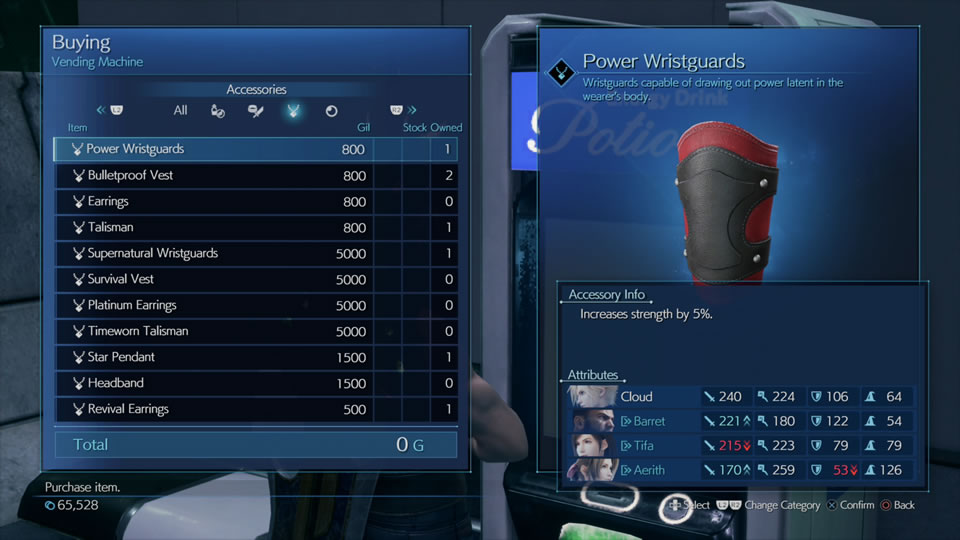
- Power Wristguards
- Increases strength by 5%.
- Found: Upper Sector 8. Purchase from Sector 7 weapon shop (800 Gil).
- Bulletproof Vest
- Increases vitality by 5%.
- Found: Purchase from Sector 7 weapon shop (800 Gil). Mako Reactor 5.
- Earrings
- Increases magic power by 5%.
- Found: Purchase from Sector 7 weapon shop (800 Gil).
- Talisman
- Increases magic defense by 5%.
- Found: Purchase from Sector 7 weapon shop (800 Gil). Sector 5 Slums in the church. Drop from Specimen H0512.
- Revival Earrings
- Enter battle with Auto-Life status effect, automatically reviving you on death. Breaks upon use.
- Found: Purchase from Sector 7 weapon shop (500 Gil). Kill 50 monsters and visit the board in Sector 7. Sector 7 Sewers in a treasure chest.
- Crescent Moon Charm
- Reduces damage taken when equipped by non-active characters.
- Found: Reward for “Alone at Last” Discovery Scene, where you choose Tifa's dress for Wall Market. Reward for ‘A Verified Hero’ side quest if you score well enough in whack-a-box. You can also earn another in Whack-a-Box Hard Mode.
- Star Pendant
- Become immune to poison.
- Found: Chapter 5, after reuniting with Barret, look for the path branching off to the south before following the tracks northwest. There’s another in the Section 6 Slums, north of Wall Market.
- Whistlewind Scarf
- Enter battle with a slightly filled ATB gauge.
- Found: Buy from The Moogle Emporium for 3 Moogle Medals.
- Salvation Badge
- Increases the effectiveness of healing spells cast on you when HP is 25% or lower.
- Found: Buy from The Moogle Emporium for 1 Moogle Medal.
- Protective Boots
- Become Immune to Slow and Stop.
- Found: Reward for ‘Weapons on a Rampage’ side quest. Sewer System (Post Collapse) during Chapter 14.
- Spectral Cogwheel
- Consuming MP fills the limit gauge.
- Found: Reward for ‘A Verified Hero’ quest if you score well enough in whack-a-box.
- Supernatural Wristguards
- Increases strength by 10%.
- Found: Buy at Wall Market weapon shop.
- Survival Vest
- Increase vitality by 10%
- Found: Buy at Wall Market weapon shop.
- Platinum Earrings
- Increases magic power by 10%
- Found: Buy at Wall Market weapon shop.
- Timeworn Talisman
- Increases Spirit by 10%.
- Found: Buy at Wall Market weapon shop and later. Steal from Specimen H0512
- Headband
- Become immune to sleep.
- Found: Buy at Wall Market weapon shop.
- Clarity Pendant
- Completely fills the ATB gauge after using Refocus.
- Found: Reward for Colosseum battle challenge ‘Two-Person Team vs. Slum Outlaws’ at Wall Market.
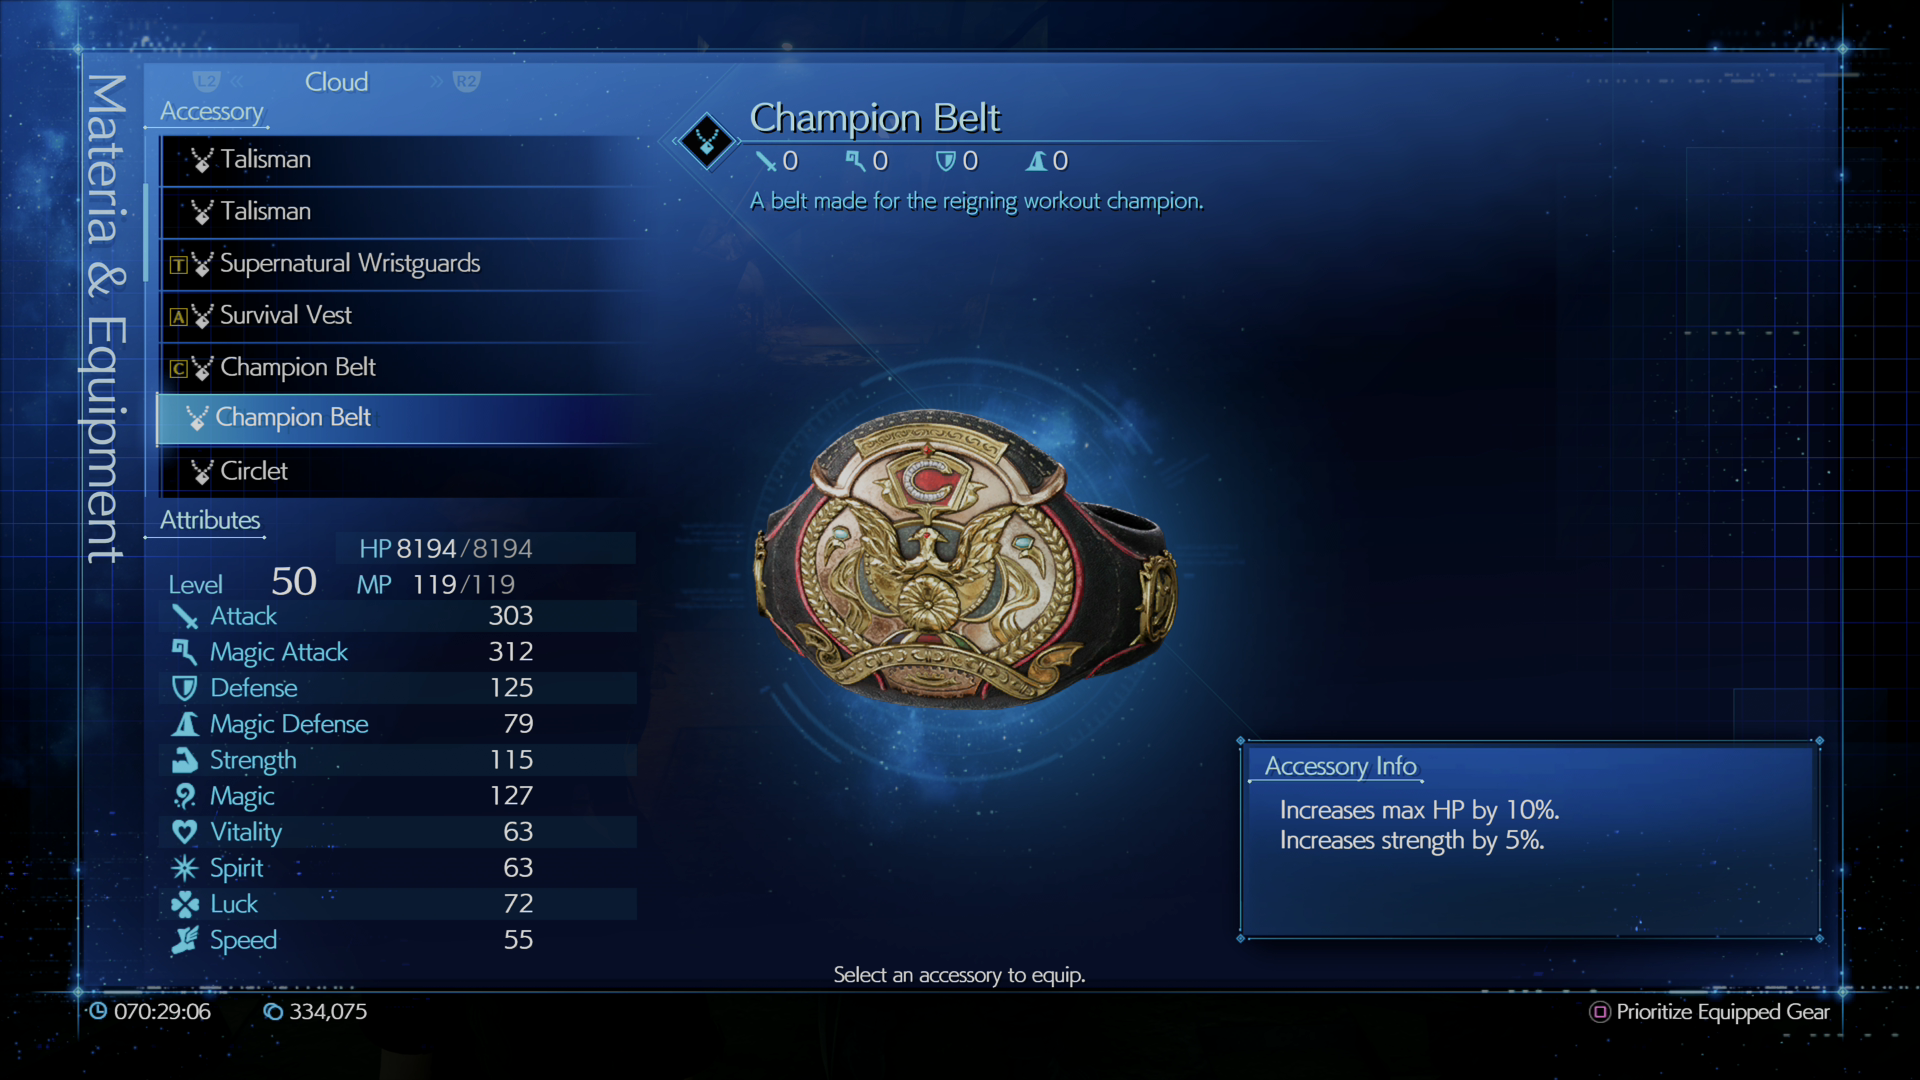
- Champion Belt
- Increases max HP by 10%. Increases strength by 5%.
- Found: Defeat Jules (pro level) in squats at Wall Market. Steal from Grungy Bandit in the Collapsed Expressway. Win Pro level Pull-ups in Wall Market in Chapter 14.
- Otherworldly Crystal
- Reduces the duration of detrimental status effects.
- Found: Wall Market, in Corneo’s Mansion (head towards the basement when controlling Aerith.)
- Healing Carcanet
- Increases the effectiveness or healing items, spells, and abilities.
- Found: Sector 7 Slums (Post Collapse).
- Mythical Amulet
- Strengthens summons called forth in battle.
- Found: Aerith’s house (Can be grabbed before heading to Sector 7 in Chapter 13, or after the Resolution Scene in Chapter 14).
- Transference Module
- Consuming ATB charges fills the limit gauge.
- Found: Score 30000 or more in Whack-a-Box Hard mode (Chapter 14).
- Fury Ring
- Enter battle with the berserk status effect.
- Found: Corneo’s Mansion, first floor (As Aerith/Tifa in Chapter 9, or later in Chapter 14).
- Enfeeblement Ring
- Enter battle with the toad status effect.
- Found: Buy from The Moogle Emporium. Find behind a Corneo Stash door in the Sewers (Post Collapse).
- Tarot Cards
- Extends the duration of detrimental status effects applied to others.
- Found: Reward for ‘Three-Person Team vs. Shinra Warriors’ Colosseum battle challenge.
- Moogle’s Amulet
- Increases the probability enemies will drop items when defeated in battle.
- Found: ‘Two-Person Team vs. Team Payback’ Colosseum battle challenge.
- Enchanted Ring
- Extended the duration of beneficial status effects applied by wearer.
- Found: Steal from Type-0 Behemoth. Find while climbing up the Sector 7 Plate.
- Gotterdammerung
- Enter battle with a full limit break gauge. Limit break gauge gradually fills during battle.
- Found: Defeat Pride and Joy Prototype in the Shinra Combat Simulator
- Found: Defeat Weiss in the Shinra Combat Simulator (Episode Intermission Only)
- Superstar Belt
- Avoid incapacitation once per battle. Does not work against instant death attacks or when HP is at 1.
- Found: Available only as DLC.
- Mako Crystal
- Reduces fire, ice, lightning, and wind damage taken.
- Found: Available only as DLC.