
Final Fantasy VII Remake Combat Simulator guide: rewards and strategy for all battle trials
As well as taking on Shinra and Sephiroth in a mission to save the world, Final Fantasy VII Remake also includes some incredibly sharp combat that really shines, especially in super-hard encounters. The home of those super-hard encounters? The Shinra VR Combat Simulator - basically a second home for a harder tier of arena battles.
These battles far outstrip those found in our Corneo Colosseum guide - they form some of the end-game challenges, and some don't unlock until after credits roll, or after you've completed more or less everything else. Because this is where FF7 Remake's ultimate postgame content hides, this guide will naturally contain some spoilers of the boss identities later on.
Anyway - make sure you're primed with your pick of the best weapons and materia combos, upgrade your gear by nabbing all the manuscripts and prepare yourself - this is where FF7's ultimate challenges lie. It's also a great chance to AP farm, for what it's worth.
Shinra Combat Simulator VR Battle Challenges
The Shinra Combat Simulator can be accessed in Shinra HQ in Chapter 16 or 17. It's easiest to reach in chapter select by picking chapter 17 and playing a few minutes into the chapter - before the characters take the elevator to The Drum, you'll have a chance to enter the simulator. We're splitting this guide into two sections - first, the battles that have 2-4 star difficulties - battles that can easily be powered through with the right strategy.
Later on, we break down the 5 and 6 star battles, which form FF7's ultimate challenges.
- Three-Person Team vs. Mayor is Best (Story Required)
- 2 Star Difficulty
- Cost: 0 gil
- Round 1: 2x Cutter
- Reward: Mega-Potion, Story Progression
- Cloud, Tifa, Barret or Aerith vs. SOLDIER Trainees (4 separate missions, all identical, one for each character)
- 4 Star Difficulty
- Cost: 400 gil
- Round 1: 1x Sahagin Prince
- Round 2: 1x Phantom
- Round 3: 1x Grungy Bandit
- Round 4: 1x 3-C SOLDIER Operator
- Round 5: 1x Cutter
- Rewards:
- Cloud: Cog Bangle
- Barret: Supreme Bracer
- Tifa: Rune Armlet
- Aerith: Geometric Bracelet
- Two-Person Team vs. High Flyers
- 4 Star Difficulty
- Cost: 400 gil
- Round 1: 16x Bugaboos
- Round 2: 2x Slug-Ray and 2x Byobapolis
- Round 3: 4x Monodrive and 2x Terpsicolt
- Round 4: 2x Elite Helitrooper
- Round 5: Rust Drake
- Reward: Gil Up Materia
- Three-Person Team vs. Team Ragbag
- 4 Star Difficulty
- Cost: 400 gil
- Round 1: Abzu Shoat
- Round 2: Trypapolis and 2x Varghidpolis
- Round 3: Hellhound and 2x Bloodhound
- Round 4: Smogger and 2x Ringmaw
- Round 5: Blast-Ray and Sweeper Prototype
- Reward: EXP Up Materia
5 Star Shinra Combat Simulator Arena Battles
These battles in the Shinra VR suite are significantly more difficult, and as a result we've broken them out into their own section - and for these missions, we go into more depth with our guides on how to beat them.
Cloud, Barret, Tifa or Aerith vs. 3-C SOLDIER Candidates guide
- 5 Star Difficulty
- 4 separate missions, all identical, one for each character
- Cost: 500 gil
- Round 1: Unknown Entity and Enhanced Shock Trooper
- Round 2: Zenene
- Round 3: Sledgeworm
- Round 4: Armored Shock Trooper
- Round 5: M.O.T.H. Unit
- Rewards: Weapon Manuscripts for each character
- Cloud: The Art of Swordplay Vol. XIII
- Barret: Sharpshooter’s Companion Vol. XIII
- Tifa: Way of the Fist Vol. XIII
- Aerith: Telluric Scriptures Vol. XI
Vs. 3-C SOLDIER Candidate guide
- This battle is super difficult with certain characters, but can be made way, way easier with one simple materia combo: Lighting and Elemental materia on a dual armor slot. This will make you either immune to or even allow you to absorb lightning element damage if your Elemental materia is level 2 or 3 - and that makes battle 3 and 5 absolutely trivial, and also unlocks lightning magic to use on round 4.
- Don't be afraid to play defensively. Some of these battles, especially against the MOTH Unit and Sledgeworm, require patience and holding back, either to build ATB or to wait for your opening.
- If you don't have Lightning Elemental armor, block all of the high voltage attacks and use thunder magic whenever the MOTH is pressured after executing a big attack. Exploit those openings!
Two-Person Team vs. Dynamic Duos guide
- 5 Star Difficulty, Hard Mode Only
- Cost: 500 gil
- Round 1: Phantom and Ghost
- Round 2: Elite Shocktrooper and Elite Helitrooper
- Round 3: Grungy Bandit and 3-C SOLDIER Operator
- Round 4: Hellhound and Zenene
- Round 5: Sweeper and Queen Grashtrike
- Reward: Refocus Materia
Tips for the Dynamic Duos battle:
- Bring Fire Element magic and the Ifrit Summon. The Hellhound, Phantom and Ghost are all weak to this element.
- Wind element magic is useful for taking down the Elite Helitrooper, which can be a deceptively difficult encounter. This encounter is easier with Barret's ranged attracks.
- At least one of the two should have Ice Element damage for the Hellhound in battle 4.
- Round 1: Focus on Ghost first.
- Round 2: Go for the Helitrooper first, use Wind to bring them to ground level.
- Round 3: Dodge and kill the Grungy Bandit first, as he can grapple you and deal big damage. Luckily, he's slow, and bad under sustained pressure.
- Round 5: Let rip with as much Lightning Magic as you can to rip the Sweeper to shreds, then move to focus on the Queen Grashtrike.
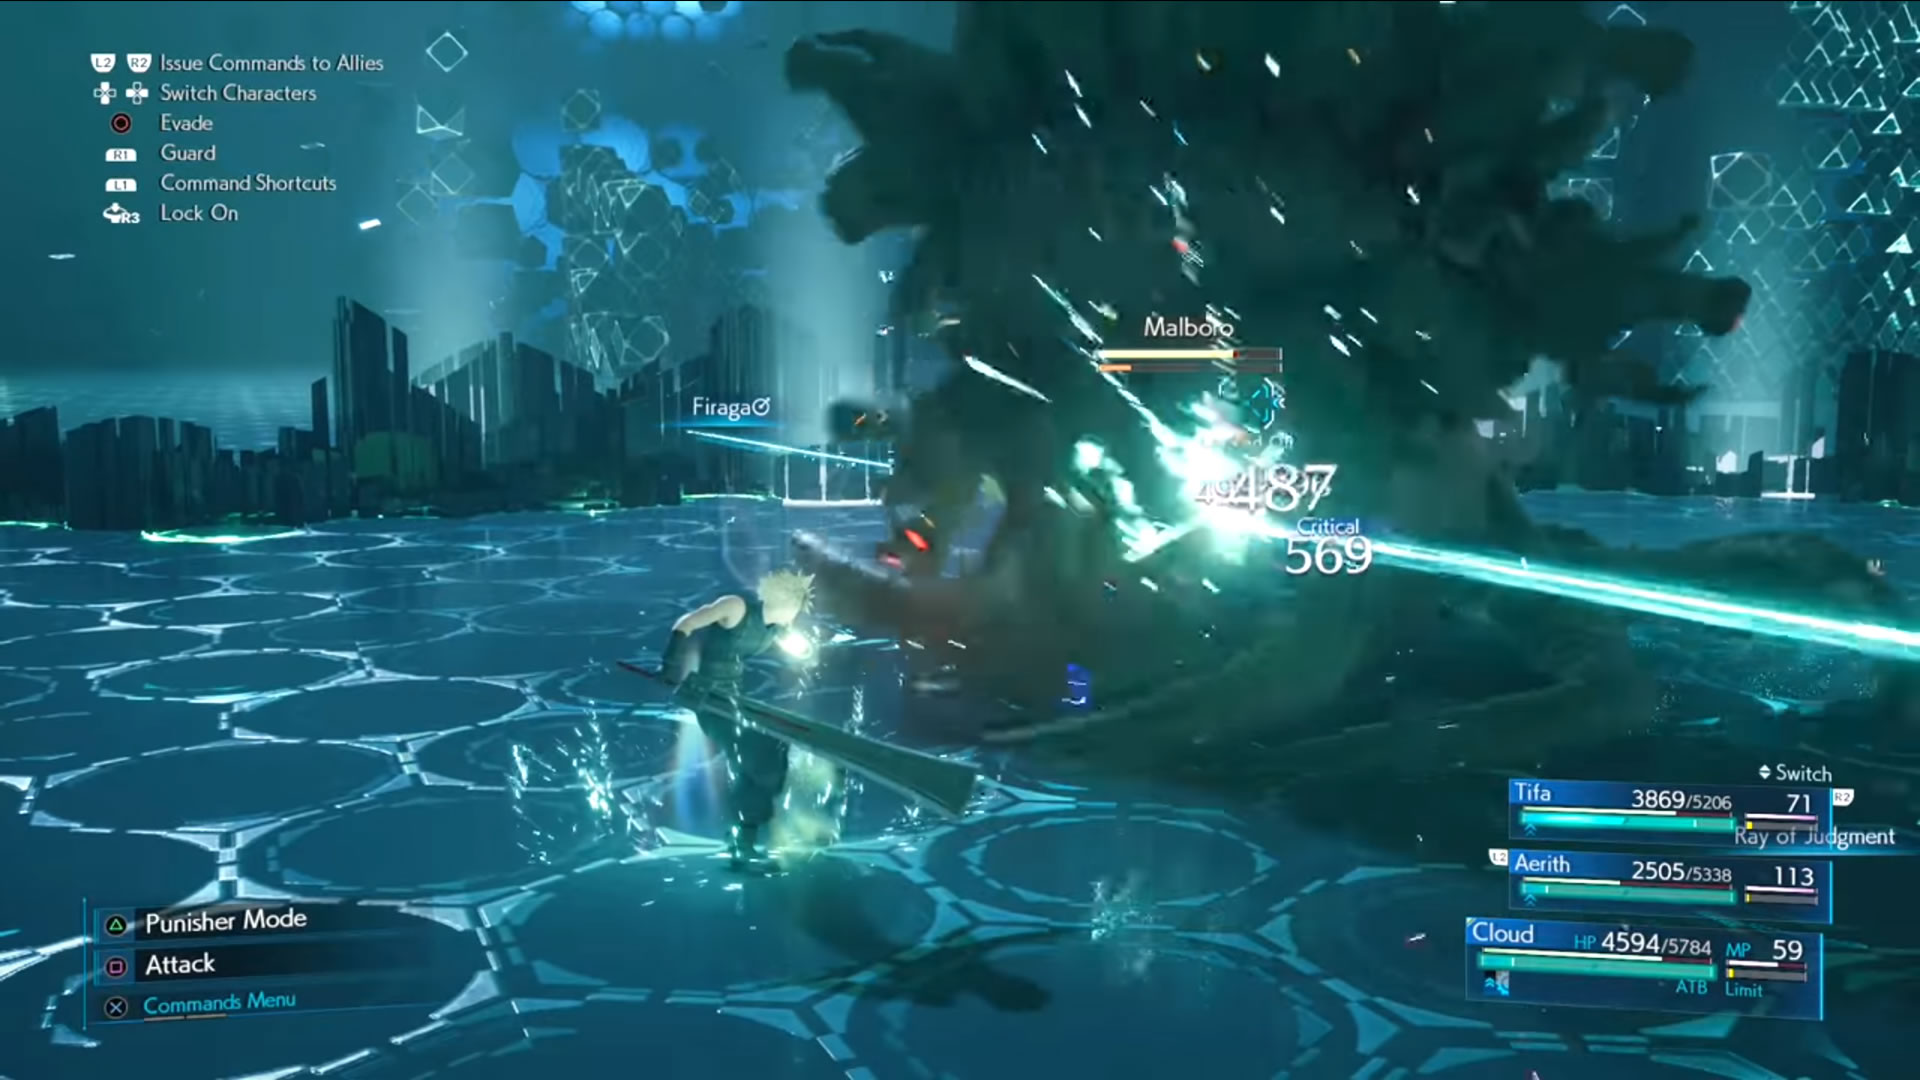
Three-Person Team vs. Monsters of Legend guide: battling the Malboro
- 5 Star Difficulty, Hard Mode Only
- Cost: 600 gil
- Round 1: Bomb
- Round 2: Tonberry
- Round 3: Type-0 Behemoth
- Round 4: Bomb and Tonberry
- Round 5: Malboro (your only chance to learn the Bad Breath enemy skill)
- Reward: Refocus Materia
This is a difficult encounter, but not strictly because of the difficulty of the five encounters contained within individually - moreover, it's that facing them all back-to-back can be difficult. In the Monsters of Legend VR arena battle you'll have to face off against a slew of monsters you'll have already met on your journey, followed by an all-new monster - Malboro. Malboro is an FF staple and is always a super difficult encounter - and this is the only place where you'll fight one in FF7 Remake
Monsters of Legend guide: top tips
- All three characters should have Raise magic equipped. You'll face two Tonberry in this challenge, and they can very easily one-hit KO you. Raise magic will ensure you don't remain a man down for the rest of the fight.
- Your designated healer should have magnify equipped with their cure spells. This will mean any cure spell cast will heal everyone, which, again, lessens the load in a big way.
- VS Tonberry, duck and weave. Tonberry visibly charges up for its attacks, and can't be easily interrupted. Instead you'll want to dodge back, let it attack thin air, then jump in to attack it when it is in a post-dodge pressured stater.
- If a Tonberry stuns a party member, immediately switch away from them and try to draw aggro to a different character. Generally, Tonberry will stun a character, calmly walk towards them, then Chef's Knife them to one-hit KO. We don't want that.
- With the Type-0 Behemoth, attack its upper and lower body to stun it, and then when it's down attack its horn. It will keep healing its body parts until you break the horn - so you may need to cripple it a couple of times.
- Don't use spells - save your MP for healing. Until the horn is destroyed, the Behemoth has a nasty counter against magic.
- When you reach Malboro, dodge its Bad Breath skill by simply flanking and walking around it when it charges up and uses the move. You might want to get hit with Bad Breath once to learn the enemy skill - if that's the case, have Esuna at the ready.
- Malboro isn't too hard - use that Magnified Cure to heal up, and remove poison when necessary. Other than that pile on the pressure, using the creature's slow nature against it to run around and flank it.
Three-Person Team vs. Top Secrets guide: beating the secret boss
- Hard Mode Only. Must complete every other battle challenge (both Corneo Colosseum and Shinra Combat Simulator).
- Cost: 700 gil
- Round 1: Shiva
- Round 2: Fat Chocobo
- Round 3: Leviathan
- Round 4: Bahamut (Summons Ifrit)
- Round 5: Pride and Joy Prototype
- Reward: Gotterdammerung
This is by far the hardest battle challenge in the game; it is the final test of your FF7 remake combat skills, and boy, it pulls no punches. Three-Person Team vs. Top Secrets pits you against every summon in the game in a row, with no opportunity to heal beyond the standard 50% top-up between fights - and then at the very end you're faced with a final Secret Boss, the Pride and Joy Prototype. Fans of the original FF7 might think the Pride and Joy Prototype looks a little familiar: it certainly appears to be a prototype of the Proud Clod or Proudclad which appears very late in the original game.
Anyway, first, you have to beat the summons, which is actually the main challenge of Three-Person Team vs Top Secrets. Here's some tips for that:
Top Secrets guide - General Tips:
- Recommended Party: Cloud, Barret and Aerith. You absolutely want Aerith, as you'll need her Limit Break for healing without costing too much MP. Tifa or Barret is debatable, but we think Barret is the better choice.
- Recommended Materia: Each party member should have one or two HP Up Materia. Everybody should have Healing Materia and Revival Materia. Aerith should have Barrier. Aerith should also have Magnify either alongside Barrier or alongside Cure - your choice. Cloud and Barret should have Lighting Materia and Elemental Materia slotted together in their weapons so they deal Lightning Damage. Finally, all three characters should have Fire Materia equipped.
- Recommended Equipment: We recommend weapons that have the Reprieve ability unlocked to allow you to withstand a killing blow. To double up on this, we also recommend Revival Earrings accessory, which will also revive you instantly for one death. You can buy Survival Earrings for just 500 Gil at the vending machine right near the VR Simulator.
- Recommended Level: You should be at level cap, level 50, and you should have picked up most manuscripts and upgraded your weapons at least most of the way. Otherwise, you're gonna have a bad time.
- On Summons: Save your summon for Round 4. That is where you need it. Do not use it earlier. Equip Bahamut or Shiva for this fight - the reasoning behind this choice is explained in Round 4's guide.
Round 1: Shiva Tips
- Shiva is, of course, weak to Fire Magic. It also rapidly fills up her stagger bar. You'll want to use fire magic to pressure her and boost her stagger bar.
- When Shiva summons Frost Familiars, she's immune to elemental damage, even fire. To get rid of the Frost Familiars, however, you do just need to keep casting magic - each fire spell flung her way will remove one of the frost familiars. Just use low-cost, level 1 magic for this. When the familiars are gone, pummel her with powerful magic.
- Dodge Whiteout as a priority. Whiteout is a move that spreads across the ground, and if it hits you it'll put you to sleep. Dodge past it to get close to Shiva. If she puts you to sleep, you're going to have a bad time.
- When she begins charging Diamond Dust, heal up. Diamond Dust is Shiva's ultimate move, and you will just have to eat it. You want to save those free deaths from your equipment for later, however, so heal up before it lands, then heal again afterwards.
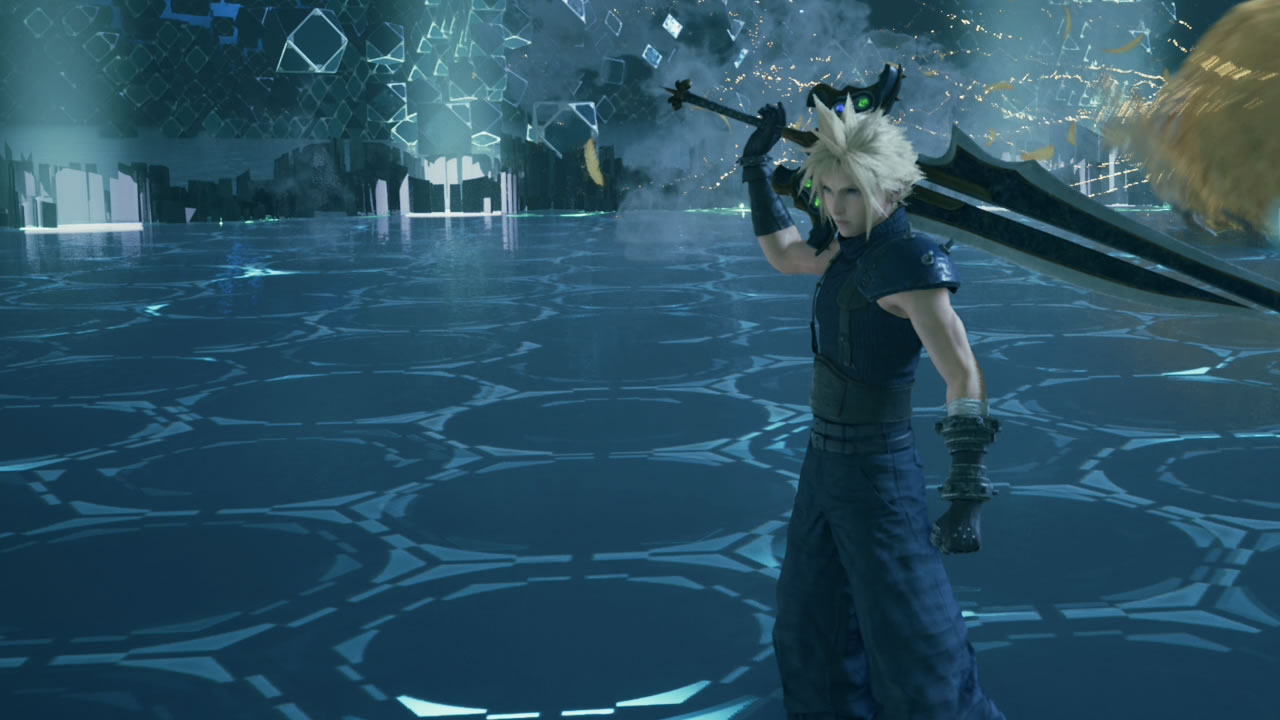
Round 2: Fat Chocobo Tips
- Fat Chocobo is nice and easy. You should stay on your toes but also treat this as a battle to rest up.
- Resting up means using less magic and focusing instead on ATB skills so you get a full MP replenishment in time for round 3.
- Fat Chocobo's attacks are slow and predictable, so learn its patterns and know when to block or dodge.
- When Fat Chocobo says 'Kweh' twice, be ready to block. This is a big attack and can deal huge damage.
- Fat Chocobo Summons other creatures - take them out fast. Some of these creatures, like Tonberries, have one-hit KOs. These summoned versions do a whole lot less damage than their real counterparts - a pair of Triple Slash executions from Cloud usually clears the board.
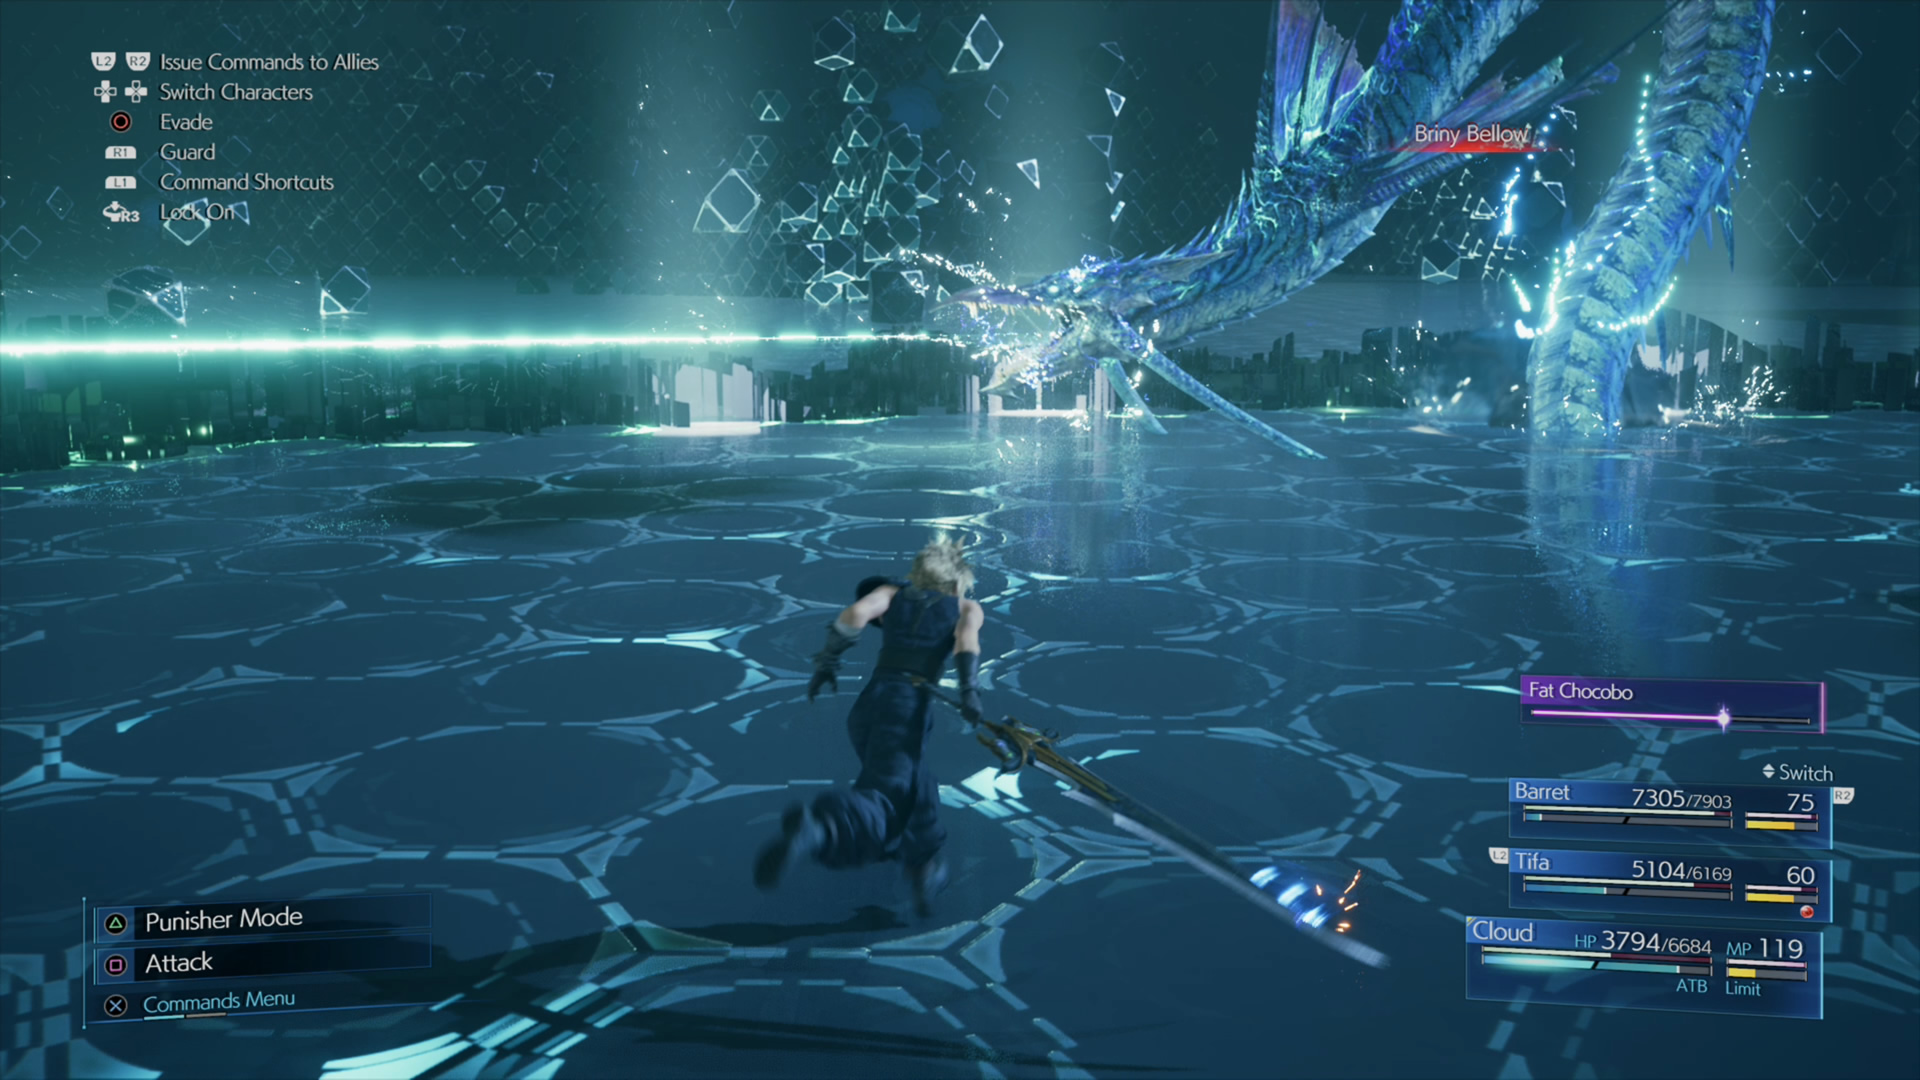
Round 3: Leviathan Tips
- Leviathan is weak to lighting magic, despite the fact that there's technically no water element in FF7 Remake. Use and abuse that fact and remember that Lightning Magic never misses!
- Barret comes into his own here. Leviathan spends a lot of time away from you, but if you equipped elemental and lightning to Barret's gun, he can deal a steady stream of lightning damage at any range.
- Healing is key here, as you will eat a lot of damage. Keep Aerith back as a focused healer and keep everybody topped up. Additionally, you may want to cast Manawall on the party to guard against Leviathan's moves, especially Tidal Wave. Manawall will significantly reduce the damage taken from Leviathan's attacks.
- Leviathan will charge up to use Briny Below, and this is Cloud's chance to shine. This is when Leviathan is at its most vulnerable to melee attacks, so get Cloud in there with that lightning elemental sword and slash away.
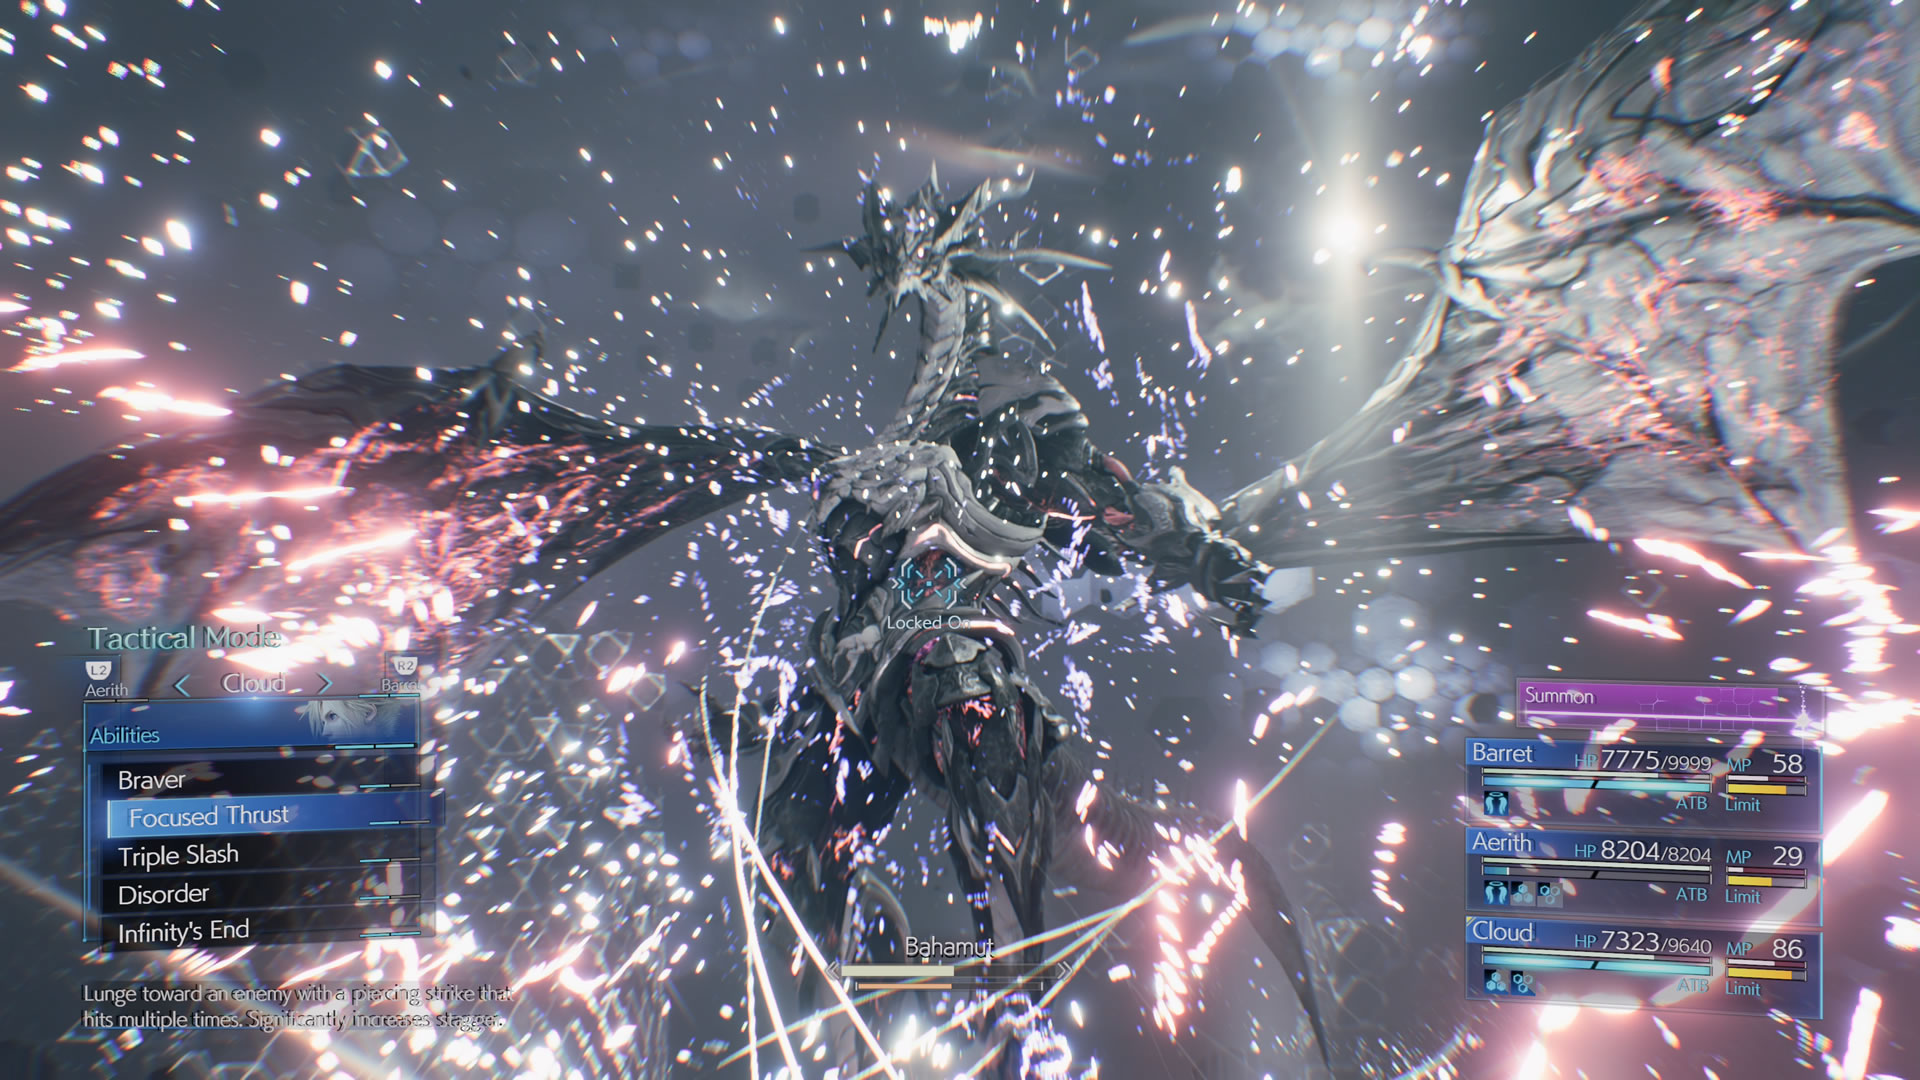
Round 4: Bahamut and Ifrit Tips
- While this is only round 4 of five, this is the hardest fight in FF7 Remake. No question. So, be prepared.
- Bahamut is fought the same way as before, and will still count down to Megaflare, its ultimate attack. Megaflare is what we wanted reprieve and those revival earrings for.
- When Bahamut reaches 50% health, it summons Ifrit. This is where the fight gets silly.
- First thing's first: save your summon for when Ifrit appears. By summoning a second Bahamut or Shiva that's on your side during this section of the fight you'll make your life significantly easier. Bahamut is more powerful, but Shiva is a great choice as she exploits Ifrit's weakness.
- Aerith's double-cast ability can be incredibly useful. Designate a spot and use it.
- Attack Bahamut and wear him down. Your simple goal is to stagger Bahamut and kill him in one stagger - but that is going to take time. As a rule of thumb, you should have him hit at least 50% stagger before he triggers Megaflare for the first time. Not long after this, he'll likely hit 50% health and summon Ifrit.
- When Bahamut dive bombs, he'll attack the character you were most recently controlling. Switch character and let the AI worry aboy blocking.
- You are going to eat one Megaflare - your goal is not to eat two. Bahamut kindly counts down, so be ready for that Megaflare. Heal up beforehand, and use Manawall just as you did with Leviathan to lessen the damage. If it heals you, that's what we had that auto-life equipment for. Heal up and get back in the fight.
- Some recommend focusing on Ifrit once he appears, but we disagree: keep focus on Bahamut and fight for that stagger. Pop the summon to help distract Ifrit, as previously mentioned. When you stagger Bahamut, go all-in with as many moves as you can to take it down quickly. The aim is that we don't want him to have a chance to let rip another megaflare. We were able to take him down when he reached three on his second count.
- Killing Ifrit once Bahamut is gone should be surprisingly easy, so you can focus on healing up a bit ready for the next fight.
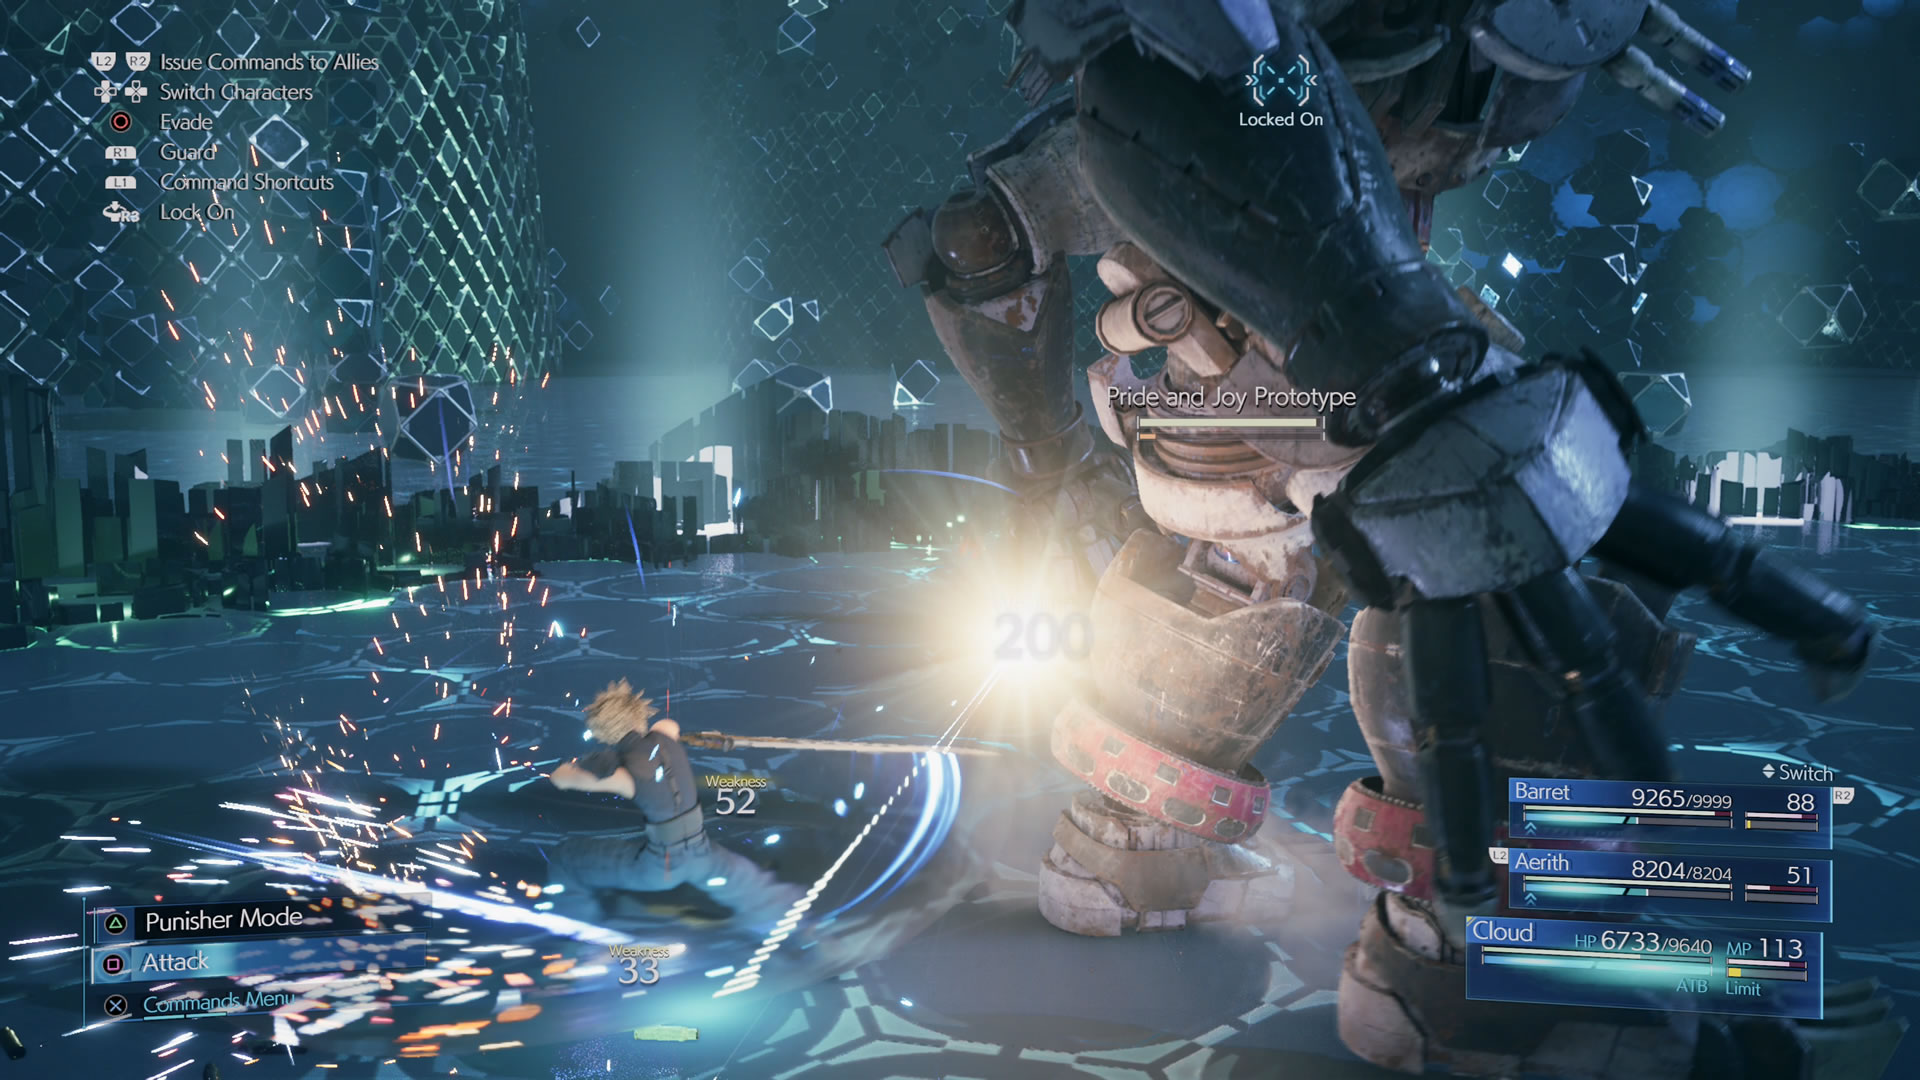
Round 5: Pride and Joy Prototype (Secret Boss)
- The good news is that The Pride and Joy Prototype is another Shinra mech - you've fought a lot of those before, and they're weak to Lightning Magic.
- The most dangerous move the Pride and Joy prototype has is a grab. It'll hold a grabbed character until its arm is damaged, and if left there, that character will die. Use powerful thunder spells to disrupt the arm when an ally is grabbed.
- This boss moves in a cumbersome way, so get behind it and deal damage from behind. It's slow moving, so you can easily stay behind it. Its legs are appendages that can be individually targeted, too, and gravely damaging both its legs causes an instant stagger.
- If the Pride and Joy prototype begins charging Beam Cannon, run. Try to get behind it. This ranged attakc is also its most powerful.
- Generally speaking, try to stay in close quarters and behind the Pride and Joy Prototype - but watch out for a stomp move and for the previously mentioned grab. it should go down quickly enough.