
Live A Live Final Chapter walkthrough: Character & Boss Strategies for The Dominion of Hate
So, here it is - the Final Scenario of Live A Live. Because this chapter is the end of the game, this guide will naturally contain spoilers - so if you don't want spoilers, we suggest you turn back now. Like all of our walkthroughs, this page will cover the events of the Final Scenario in full, step-by-step detail.
If you're not yet at the point where you've completed all eight of the main story chapters, turn back to our Live A Live walkthrough contents page and select the chapter you're currently on for help there.
The final chapter offers you choices which can seriously effect which ending you get - and though this page is focused on the Good Endings, we do explain the branches. If you'd rather be on the side of evil... we've got a separate guide for the bad end route. Let's do this.
Live A Live The Dominion of Hate Walkthrough: The Final Chapter
In the final scenario of Live A Live you will need to select your main character of your choice and then recruit other characters for the final battle. Each main character you select will start at a different location, so if you find a particular character too hard to recruit, picking them as your protagonist can neatly skip this problem.
The final battle contains some different interactions between the final boss depending on your choices and recruitment - and as such completionists might want to replay this scenario to see all the extra interaction.
Choosing a character for the Final Chapter
The first question is, of course, which character to choose to be your starting protagonist of the final chapter of Live A Live. The answer to this question will largely be down to which you enjoyed playing as most in their individual chapters - but there's nevertheless pros and cons to each.
For the main, true ending of Live A Live, your choice is between the first seven protagonists you met. If you pick Oersted from the Middle Ages chapter, a different story plays out which leads to the Bad Ending of Live A Live. The other seven all lead to the same story, and each has pros and cons:
Pogo
Pros
- Pogo has some of the highest stats in the game. Pogo has insane pool of HP, making him a really tanky unit along with really hard hitting techniques.
- His Special Attacks can inflict status ailments.
- Can carry some really amazing accessories if you defeated the optional super boss along with the hidden item, The Rock of Rocks.
Cons
- Special Attacks are really weak, if you encounter enemies with high physical defense, Pogo might not be the best option.
- Lacks healing abilities.
Oboromaru
Pros
- Ninjutsu can deal massive damage if Oboromaru is equipped with high a Special Attack stats.
- Ninjutsu is probably the strongest AOE type of attacks in the game.
- Shuriken Barrage is probably the best range physical attack, good accuracy with massive damage.
- Can easily change the tile of the battlefield.
- Carries amazing items for the final scenario if you find them during his scenario.
Cons
- Heavily reliant on his high special attack stats making his physical attacks very weak in comparison.
- Moderate defense stats, pretty frail and should avoid close range encounters.
Earthen Heart Shifu
Pros
- The Earthen Heart Shifu is one of the strongest characters in the game if you focused on training on only one pupil during the training segment. They will get a lot of extra permanent stats, making them really strong. Regardless of which pupil you have chosen.
- Has high special and physical attack stat, letting them deal with any type of enemies.
- If Lei is your main pupil, she gets the best AOE ability when reaching higher levels.
- If Yun is your main pupil, he gets the strongest single target attack when reaching higher levels.
- If Hong is your main pupil, he is the most durable party member in the game.
Cons
- Yun is the frailest out of the three pupils.
- Hong has the most useless natural abilities out of the three pupils.
Sundown Kid
Pros
- Specialize in range attacks that does multiple hits.
- Gets the best ability in the game at Level 16 called Hurricane. (Hurricane does 12 hits that can hit for over a 100 damage per hit, letting you one shot bosses on a good hit).
Cons
- Lacks any support abilities.
- Underwhelming kit except for his Hurricane ability.
- Hard to recruit - you must talk to him in many different locations before he will finally join you. If you part ways with him, he will be at a random location from those where you previously saw him.
- Extremely frail and really weak compared to other characters.
Masaru Takahara
Pros
- One of the tankiest protagonist you can use in Live A Live.
- Has the highest physical attack attribute in the game.
- Can learn abilities he missed out during his scenario from leveling.
- Can start out with all his abilities if you learn them from his opponents during his scenario.
Cons
- Abilities are underwhelming compared to the Earthen Heart Shifu.
- Doesn't learn anything new if you acquire his ability already from his scenario.
- Masaru is a poor starting protagonist, he begins at level 2 and completely devoid of items. If you encounter a bad situation a game over will likely occur.
- Final ability has a long charge time for poor damage.
Akira
Pros
- Can read minds, adding extra story interaction in his trial dungeon.
- Large set of abilities that can hit large range and cause debuffs.
- Can provide healing to allies.
- Carries a good amount of items from his scenario that can be used and given to allies.
Cons
- Jack of all trades character in the game. Akira has versatile skill set, however other characters are better at doing things that he can do.
- His stronger AOE abilities has a long charge time.
- Moderate stats compared to other characters.
Cube
Pros
- Best support unit in the game. Can AOE heal as a counterattack.
- Attacks can do heavy debuffs on enemies.
- Can obtain new ability by equipping the right accessories.
- Immune to most status ailments.
Cons
- Cannot level up normally. Waste of EXP if you need to level someone.
- Rather poor offensively compared to other characters.
- Lacks any meaningful items when used as the protagonist.
- Must be upgraded using robotic parts, these are drop by machine type enemies that must be destroyed before killing the enemy leader.
- Abilities have long charge time.
Whichever character you choose as your lead can't be removed from the party even as you recruit others - but you'll be able to swap the others in and out at will once recruited. Each protagonist in the final scenario starts at a different location. If you want the best possible ending, you must have recruited all of the playable characters - more on that below.
It's worth noting that by far the most difficult one to recruit is The Sundown Kid, as he moves around and has to be tracked down multiple times. If you want to make your life easiest, this means picking The Sundown Kid as your starting character for the final chapter is recommended. However, The Sundown Kid is also squishier in combat than most - and some recruitment requires a battle first.
Recruiting your Party
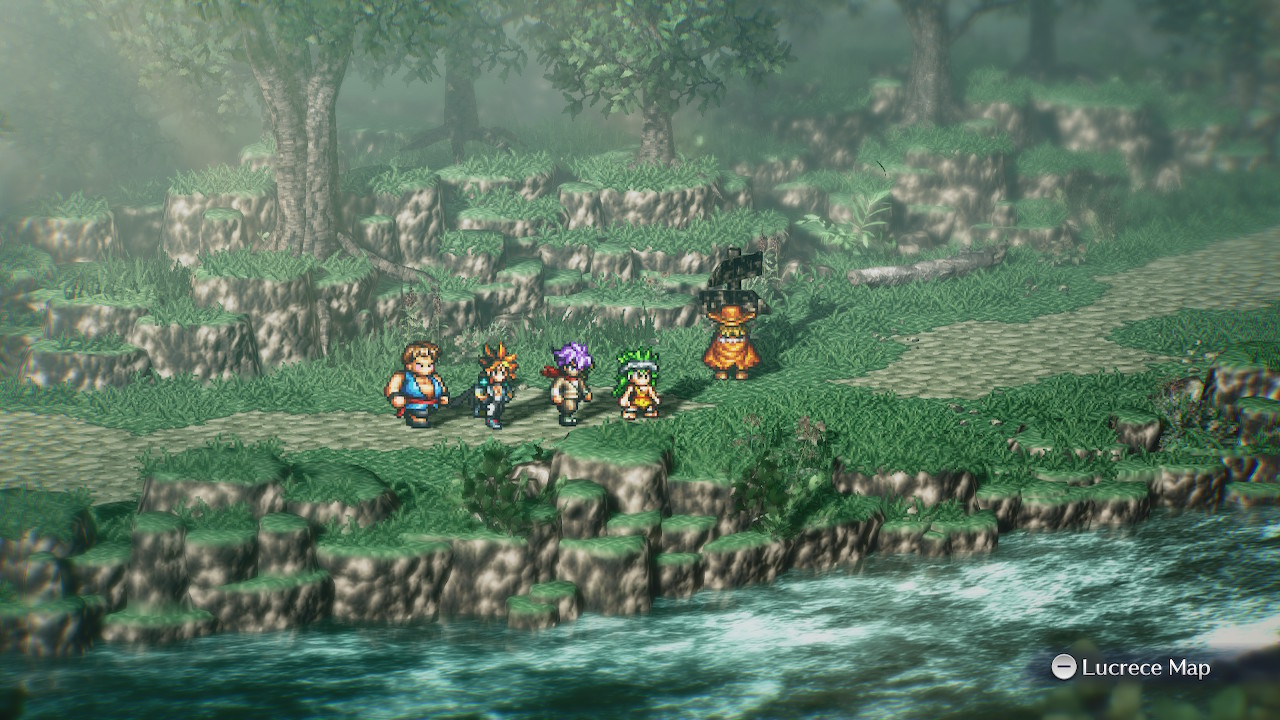
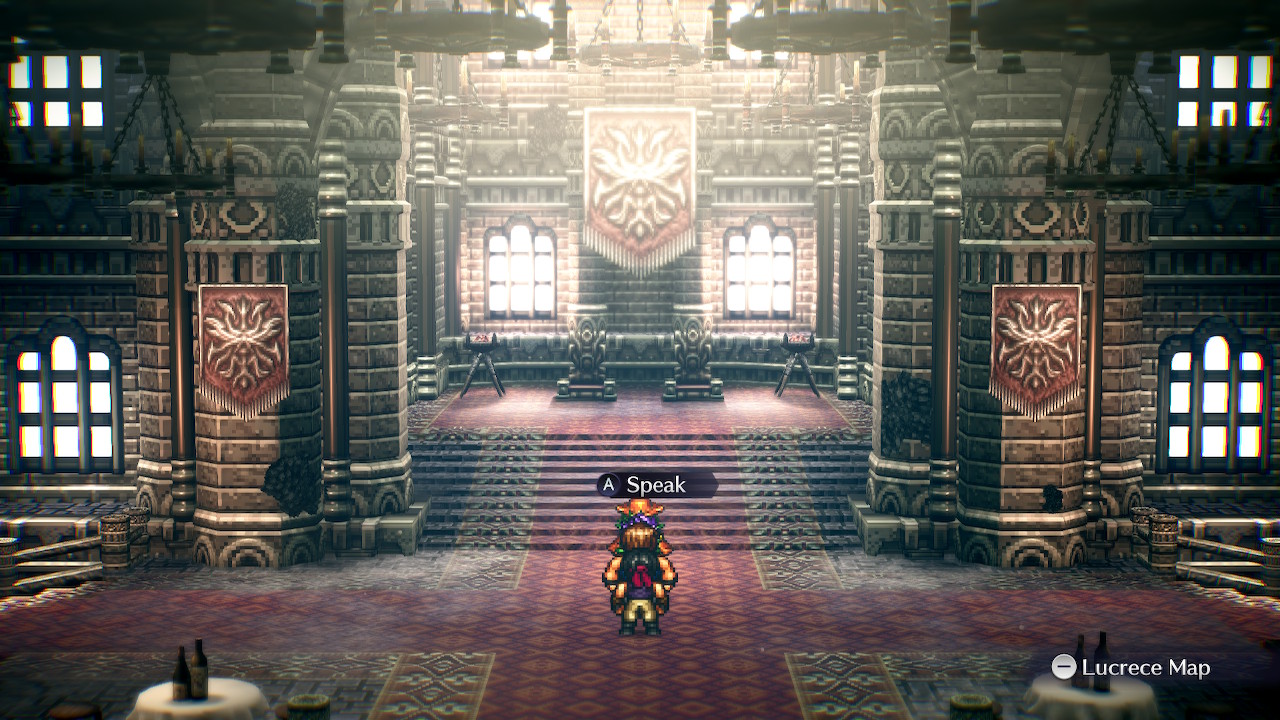
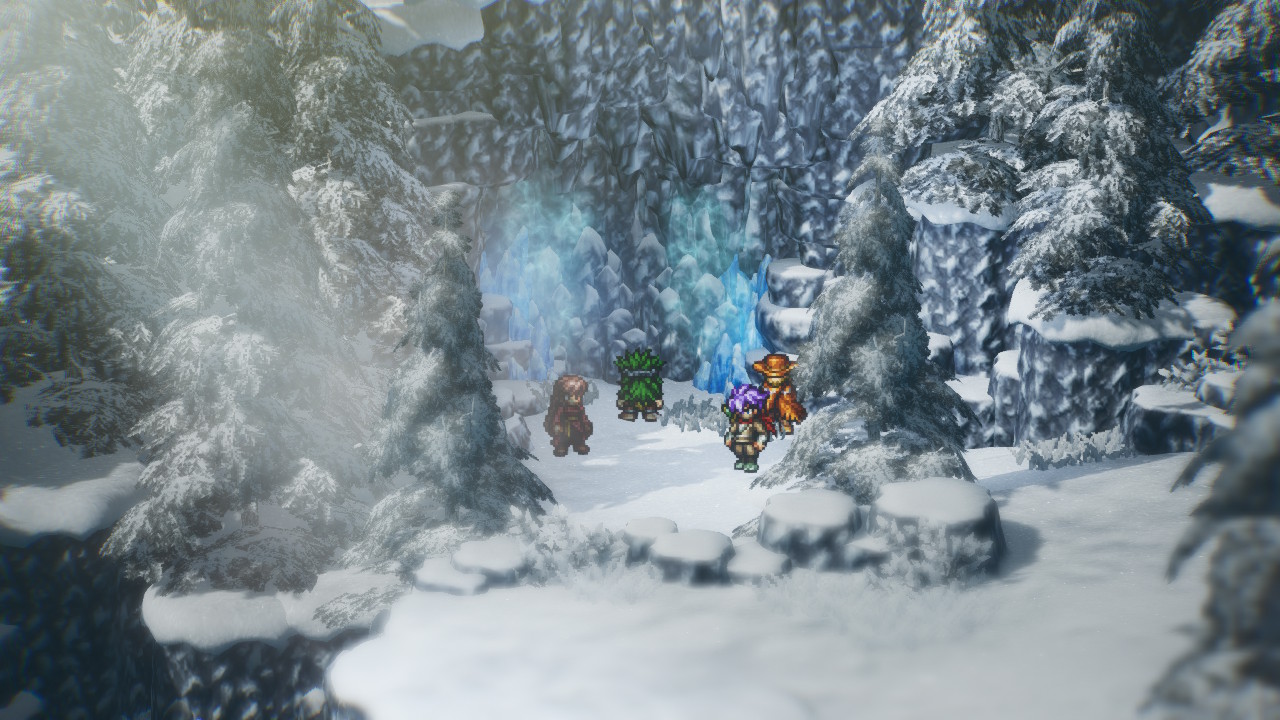
The main busywork in the final chapter of Live A Live is really in enlisting the various heroes to join your party. Once you've chosen your starting protagonist, you'll find yourself back in the Kingdom of Lucrece from the Middle Ages Chapter of Live A Live - but the locations now have different, far more sinister names.
To recruit characters, you simply need to find them within the world - and then each will require something or other to get you to recruit them. You can have up to four characters in your party, and when you surpass the four character limit, you'll be forced to part ways with one party member to make way for another. However, that character remains 'recruited', and can be instantly re-added to your party by returning to where you found them and talking to them again.
For the best ending, you must recruit everyone, and then once everybody has been recruited once, build your ideal party for the final encounters. Certain characters being in your party also unlocks particular areas of the final scenario map - which we detail in full later in this very guide.
We've got a full Character Recruitment guide, which goes into much more detail - but here's the broad strokes of where to find everybody:
- Pogo: Pogo starts in a flowerbed that is just a little bit south of the Condemned Village (Fugalia Village), in the Silent Wood. To recruit him, you must play a game of hide and seek in the flowerbed area and then defeat him in battle. If she became the new Shifu Master, Lei doesn't have to fight him, and skips the battle.
- Oboromaru: Oboromaru starts in the middle of the road towards Archon's Roost. If you want to recruit him, examine the sign just right before the entrance to Archon's Roost. Some characters will trigger combat when you try to recruit him.
- Earthen Heart Shifu: The new Earthen Heart Shifu Master starts at the Last Hero's Grave (AKA Hero's Rest) summit. Recruiting Hong requires feeding him before he will join you. You can feed him Balmgrass which can be farmed in the flowerbed area south of the Condemned Village; you'll have to feed him quite a few of them. The others just join you outright, no questions asked. Make sure you grab the sword on the tomb before you leave if you come to the summit.
- Masaru Takahara: Masaru starts and is found inside the Seat of the Betrayers (Lucrece Castle) Prison Cell. Some characters will trigger combat when you try to recruit him.
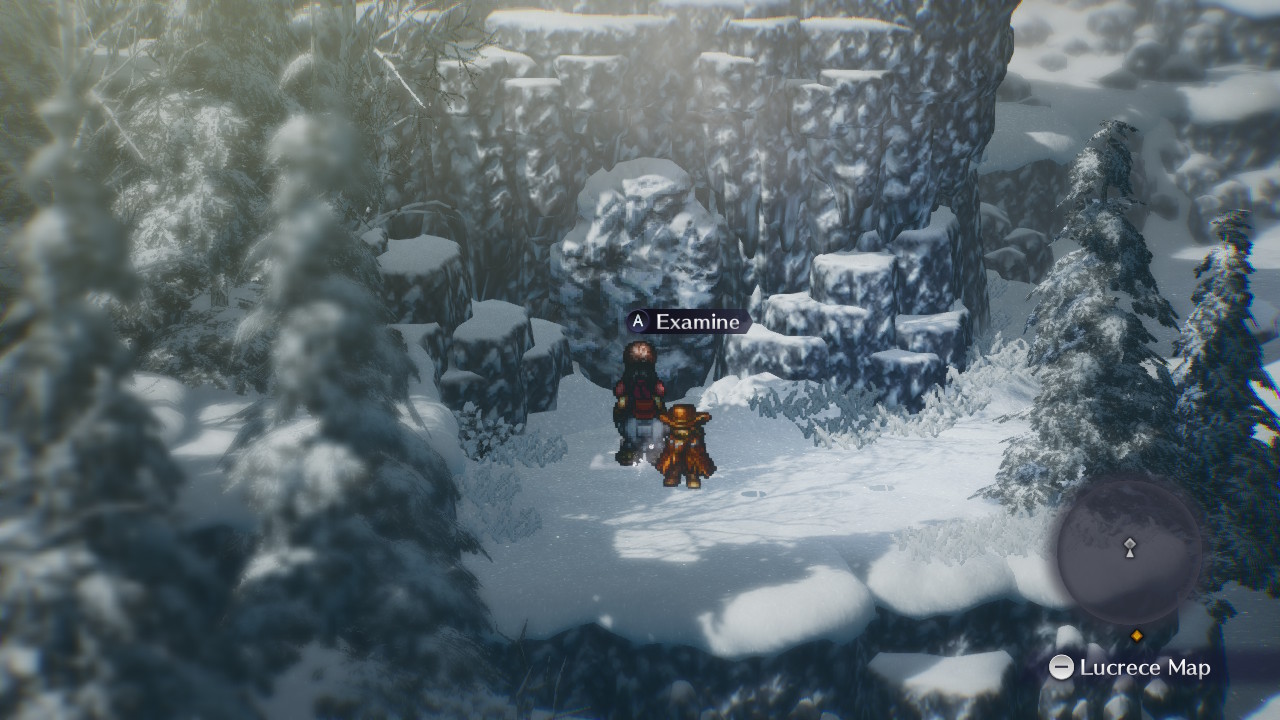
- Akira: Akira will start at the base of Condemned Village (Fugalia Village) in the West. He is one of the easiest characters to recruit if he's not your protagonist. If you say you don't trust him, you'll have to fight him, however.
- Cube: Cube starts at the rooftop of the Seat of the Betrayers (Lucrece Castle). You will need to find the strange object in the Last Hero's Grave if you want to recruit Cube - this is the battery that he requires to boot back up.
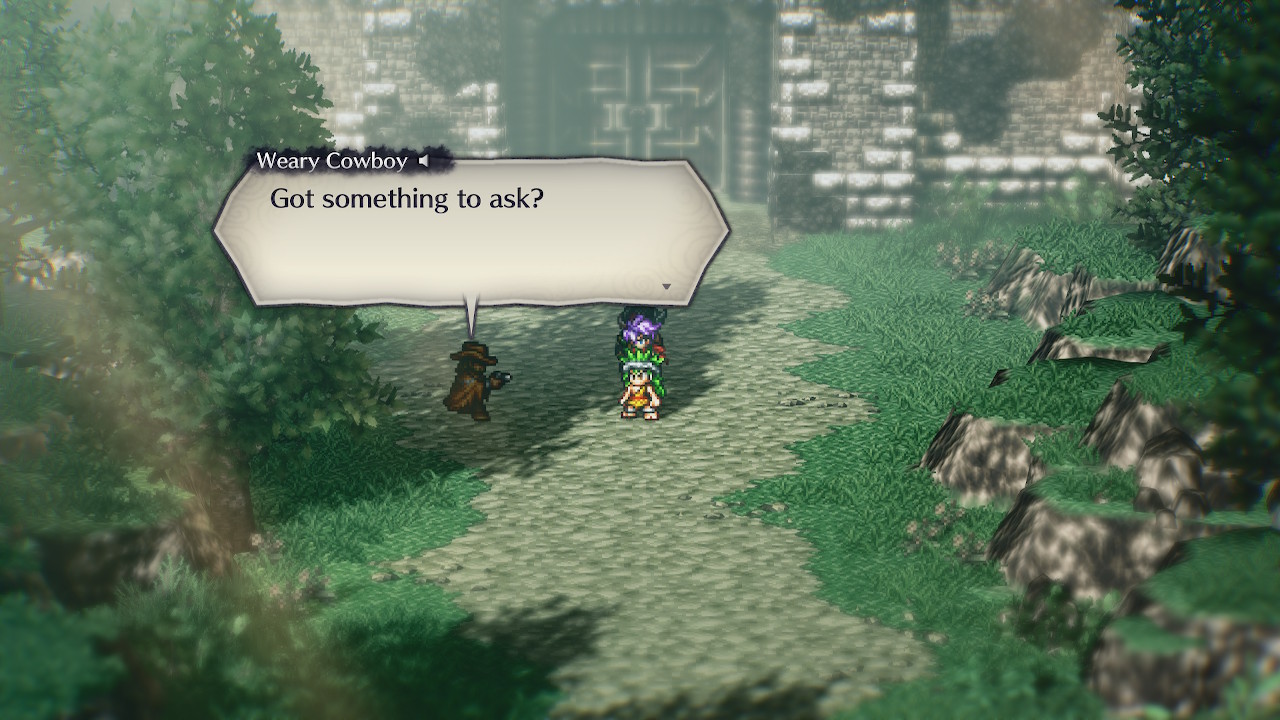
- Sundown Kid: If you kick the Sundown Kid, his recruiting location with be random. This could be any of the location of where you previously encounter him before. Sundown Kid will be marked on the map with a ?. He first appears on the mountains next to the cabin, then in the southeast of the mountains, then at the signpost towards the castle town, then in front of the throne, follow him left where he’ll be in bed and finally once you’ve exited the castle town, he’ll offer to join you. See the below images:

Items to Search for
After picking and recruiting the character of your choice. There are some items you can collect around this world. The final scenario is mostly doing optional stuff. If you do not feel like doing the optional content, heading towards the end of Archon's Roost will let you encounter the final boss. If you want to do the optional content first, there is the Trial Dungeons which will let you collect the strongest weapon for that character's trial. The other optional content is there are hidden super bosses found in this scenario.
The Last Hero's Grave (AKA Hero's Rest)
- Brion (On the tombstone in the Summit)
- ??? Requires to activate Cube (Southeast area before the summit)
Note: This item has a different name depending on which protagonist examines it. - Balm Grass (Just near the entrance)
Condemned Village (Fugalia Village)
- Balmgrass x5
- Joshua Tree Seeds x 2 (Just outside southwest of bridge)
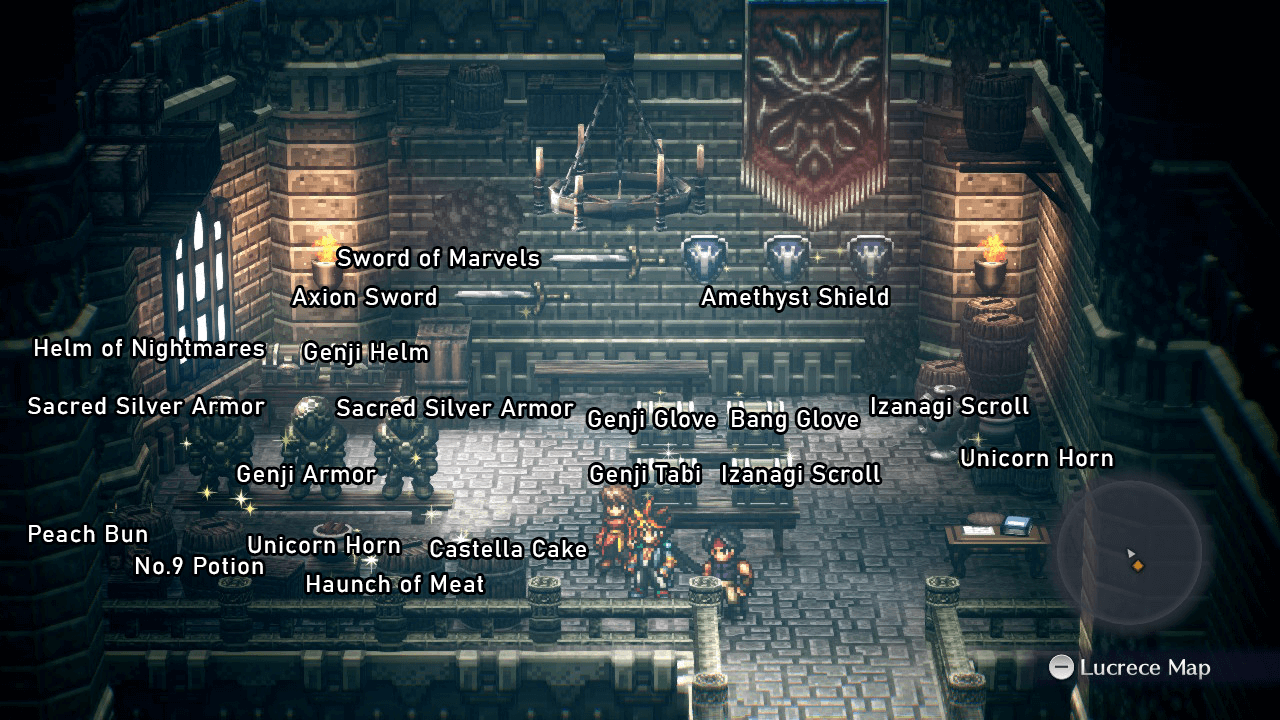
Seat of the Betrayers (Lucrece Castle)
- Defender (Room before the prisoner cell)
- Peach Bun (Treasure Room)
- No.9 Potion (Treasure Room)
- Unicorn Horn ((Treasure Room)
- Haunch of Meat (Treasure Room)
- Castella Cake (Treasure Room)
- Sacred Silver Armor (Treasure Room)
- Genji Armor (Treasure Room)
- Sacred Silver Armor (Treasure Room)
- Helm of Nightmares (Treasure Room)
- Genji Helm (Treasure Room)
- Axion Sword (Treasure Room)
- Sword of Marvels (Treasure Room)
- Amethyst Shield (Treasure Room)
- Amethyst Shield (Treasure Room)
- Amethyst Shield (Treasure Room)
- Genji Tabi (Treasure Room)
- Izanagi Scroll (Treasure Room)
- Genji Glove (Treasure Room)
- Bang Glove (Treasure Room)
- Izanagi Scroll (Treasure Room)
- Unicorn Horn (Treasure Room)
- Sword of Marvels (Resting Room, west of the throne)
- Amethyst Shield (Resting Room, west of the throne)
- Divine Armor (Resting Room, west of the throne)
- Unicorn Horn (Resting Room, west of the throne)
- Sacred Silver Armor (King's Resting Room, east of the throne)
- Parasite Sword (King's Resting Room, east of the throne)
- Izanagi Scroll (King's Resting Room, east of the throne)
The Trial Dungeons: How to get the Best Weapon for each Character
As well as recruitment, much of this final chapter is opened up to you in order to allow players to prepare themselves for the battles ahead. If you want the strongest weapon for each of the characters in the game, you must complete the trial dungeons that are now open to you. Each dungeon is located in a different area. Some dungeons do not require to right party member to enter, but it is highly recommend that you do so, as each dungeon is built with them in mind.
Additionally, on the PlayStation and PC versions, you'll get a trophy for getting the weapon from each trial, so seven in total.
Trial of Instinct
- Location: Found in the Last Hero's Grave. In the first map, go to the northeast side of the map. There is a hidden pathway.
- Mandatory Member: Pogo
Item List
- Alice Biscuit
- Unicorn Horn
- Bird-of-Paradise Tailfeather
- Great Stone Axe
Exploring the Trial of Instinct is pretty straightforward, there is a bunch of passage that leads nowhere. The very left path will lead you to the next part. You can use Pogo's sniffing ability to sense where to go, but its highly unnecessary. When you reach downstairs, you will find three exits. The first one is a room with an Alice Biscuit, and the third room has a Unicorn Horn.
Then proceed to the middle room, there are two stone statues that you can read the mind of if Akira's is in your party. This is to give you a hint on how to encounter one of the hidden bosses found in the Cosmic Equipment section.
Then you go downstairs, follow the passage east, and as you get out, look to your left to the find the Bird-of-Paradise Tailfeather. Then move down to the last floor, you can find a giant fish to the very left side of the map. If you have the Golden Topknot in your inventory you can give that item and start a boss encounter to obtain the Cosmic Ring. Anyways, if you go further to the right it will lead you to the end of the dungeon and you will find the Great Stone Axe.
Trial of Keys
- Location: Residence in Lucrece Castle.
- Mandatory Member: Oboromaru
Although this dungeon is designed for Oboromaru, you don't exactly need him in your party to navigate through the area. But clearing this dungeon will give him the strongest weapon he can use. The dungeon has many starting points and just like his scenario you can take any approach to clear this dungeon.
Item List
- Key of Suzaku
- Key of Genbu
- Key of Seiryuu
- Key of Byakko
- Castella Cake
- Parasite Sword
- Murasame
For this guide, we will start from the southwest entrance. There will be two doors and they will be both locked. You will need to trigger a random encounter until you fight the ninja type enemy called Shadow. Defeat the ninja to get the rusted key.

Use the key to open the doors. These enemies will spawn frequently if you need more keys. Take the left exit to go downstairs. Encounter enemies until you get another rusted key to open the door next to you. Then you will need one more key. This will open the door that will lead to a treasure chest. Open it to get the Key of Suzaku. Leave and go downstairs.
Go to the stairs to the north. then leave through the right. there will be another locked door towards the east end of the map. Unlock it, you will find the Key of Genbu in the treasure chest here. Then take the northwest exit to go upstairs. Use the rusted key to leave the dungeon.
Go to the building beside it, the one with the tavern sign. Get a rusted key to unlock the door to the right. then go downstairs. Use another key to take the southeast exit. Follow the stairs until you see another locked door on the bottom right side of the map. Inside you will find the Key of Seiryu.
Return to the previous room and go downstairs. Continue east until you find another set of stairs to go up. Continue west and go downstairs. The door to the right will lead you to a room with the Key of Byakko. Now you can reach to the end of the dungeon, or you can backtrack to grab two treasures (Castella Cake, Parasite Sword). If you want to reach the end, take the southeast exit. Use the four keys to unlock the sealed door. At the end, you will find the Murasame for Oboromaru.
- Green Door = Key of Genbu
- White Door = Key of Byakko
- Blue Door = Key of Seiryu
- Red Door = Key of Suzaku
If you want the two treasures we didn't get earlier (Castella Cake, Parasite Sword), return to the previous room and go upstairs from the left side. Follow the passage to the very east side of the map. The bottom exit is there room to find a Castella Cake. Then go to the to the top. Then take the left exit. It will split into three doors. Go to the door to the middle to get the Parasite Sword. Then return to where you found the castella cake. Go to the middle exit, it will lead you outside.
Trial of Skill
- Location: Found in the Last Hero's Grave. In the first map, go to the northwest side of the map. You will find boulder by the cliffs.
- Mandatory Member: Earthen Heart Shifu
This trial is found by going to the Last Hero's Grave. In the very first map, go to the northwest side. Then examine the boulder with Earthen Heart Shifu in your party. The shifu will break the boulder letting you go in.
Item List (First Map)
- First Boulder - Requires: Heavenly Peaks Descent (Dynamite)
- Second Boulder - Requires: Wise Fox's Grace (Glove of the Goddess)
- Third Boulder - Requires: Chipmunk's Delight (Chest Hair)
- Fourth Boulder - Requires: Monkey's Withdrawal (Gold Hairpin)
- Fifth Boulder: Requires: Traveler's First Step (Charioteer's Boots)
- Sixth Boulder (Bottom) Requires; Lion's Dismissal (Ice Helm)
The layout of this dungeon has boulders that you can break that will lead to a treasure chest. However, each boulders have a different condition to break them. Read the list above to see what you can get and what skill is required to break the boulders. It is highly recommended that you trained the Earthen Heart Shifu to level 16 so that you have all the abilities to break each boulder. This will reduce backtracking to this area. It is still possible to obtain all the treasures without reaching level 16 as there other paths that will lead to previous rooms. Once you have broken all the possible boulders and collected all the treasures from the first map. Head inside the cave from the second boulder and go downstairs.
Item List (Second Map)
- Seventh Boulder (Center) Requires: Heavenly Peaks Descent (Holy Water)
- Eighth Boulder (Downstairs to the right) Requires: Tiger and Dragon's Rebuke (Loin Guard)
Note: Room to the left leads to the first boulder room
After grabbing the two items. Travel to the southeast side of the map to get downstairs. From here we will be counting the rooms from right to left.
- Ninth Boulder (Southeast) Requires: Wisefox's Grace (Mermaid Tights)
- Tenth Boulder - Requires: Chipmunk's Delight (Glove of the Goddess)
- Eleventh Boulder (Center): Requires: Lion's Dismissal (Amon's Blood)
- Twelfth Boulder: (West): Requires: Monkey Withdrawl (Bael's Blood)
- Thirtheenth Boulder Requires: Traveler's First Step (Saint's Bell)
After collecting all the items from this floor. Use the rooms on the ninth boulder. Go through the passage to go downstairs.
- Fourteenth Boulder Requires: Wisefox's Grace (Nunchaku of the Master)
Then go directly upstairs and break the boulder on the far right. You will seen an enemy mob here, if you defeat this one, it will remove all the enemies in this dungeon. Then pick up the weapon, you will get the Nunchaku of the Master. This weapon can also be used as a glove for the Shifu.
Trial of Time
- Location: Southeast of Silent Wood
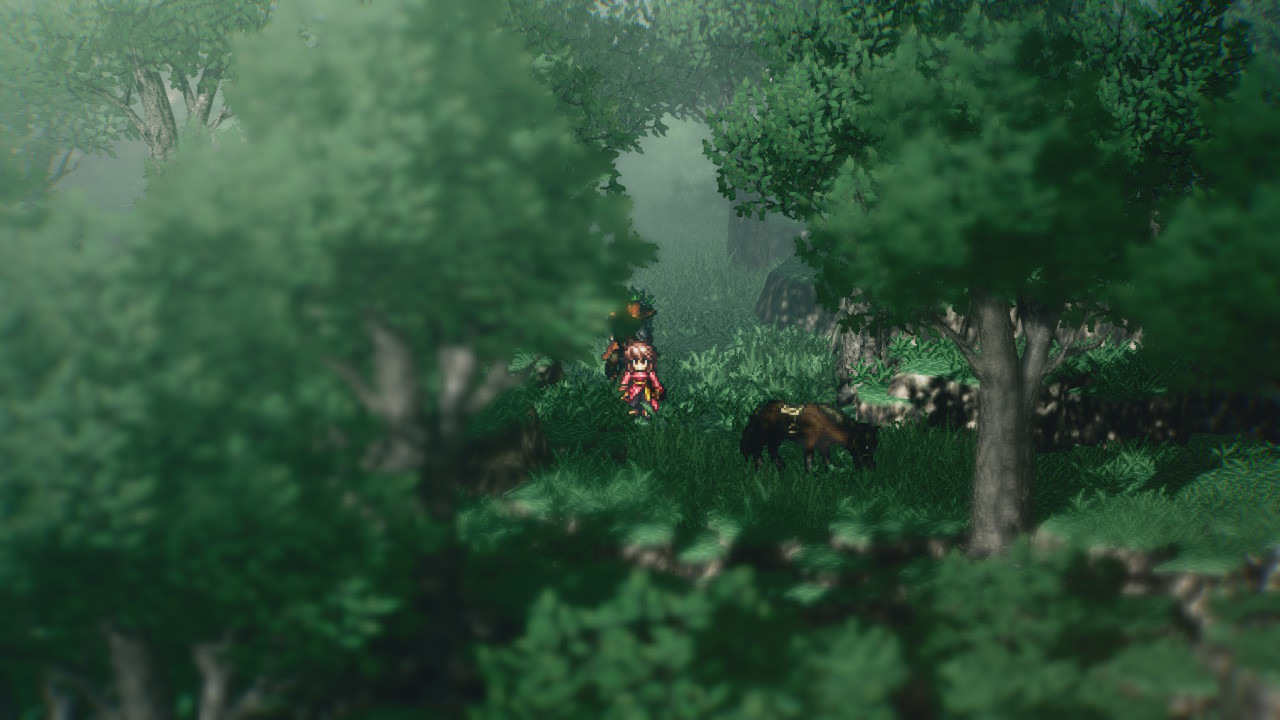
- Mandatory Member: Sundown Kid
The Trial of Time can be found by having Sundown Kid in your party, you will see a horse on your way towards the Archon's Roost. Follow the horse and it will take you to the Trial of Time.
Item List
- Fertility Charm
- Eye of Argos
- Holy Water
- Magicked Wood
- Charioteer's Boots
- .44 Magnum
Inside this dungeon, there is a gimmick where the screen will get dimmer with every 20 seconds. This is similar to playing the Wild West scenario with the time limit. If you run out of time, a hidden boss will appear to fight you. For more details related to this boss, you can read about it in the Cosmic Equipment Section. If you defeated the boss, this gimmick will be completely removed. Since you only got 2 minutes and 30 seconds to fully explore this dungeon, I personally prefer killing the hidden boss instead. If you want to defeat the boss, I would suggest having at least one of the party members to be level 16 so they have their ultimate ability to deal with this boss.
When you reach the end of this dungeon, you will find the .44 Magnum.
Trial of Power
- Location: East of the sign board near the The Last Hero's Grave
- Member: Masaru
The Trial of Power is found just right before the sign board to the Last Hero's Grave. There is a hidden passage and you will see a boss hiding there. Defeat the boss and you can go inside for the trial.
Boss Fight: Apophisphilo
The good news is this boss has pretty low HP and the boss is weak towards kick attacks. Try using kick attacks from a mid-ranged distance so that you don't get counterattacked. The boss will eventually go down and will drop a Blood of Amon when defeating him.
Although you will see a treasure chest in the area, you cannot pick it up until you reach the end of the dungeon and pick up the Champion's Warp. This is the strongest weapon for Masaru and can also be used as a glove. Now you will see the entire dungeon lit up. Leave and pick up all the treasures along the way.
Item List
- Mermaid Tights
- Ice Helm
- Demon Blood Armor
- Golden Topknot
- Empty Chest
- Amethyst Shield
- Glove of the Goddess
- Charioteer's Boots
- Empty Chest
- Holy Water
- Occult Pendant
Trial of Heart
- Location: Can end up here randomly by using Akira's Teleport ability.
- Mandatory Member: Akira
Item List
- Helm of Nightmares
- Demon Blood Armor
- Coral Ring
- Holy Water
- Guts and Glory Glove
Trial of Heart can occur at random when you use the teleport ability with Akira in your party. The layout of the dungeon is pretty huge, but you can freely use your teleport ability inside here without any consequences. The main gimmick of this dungeon is that you can examine the blue flames to read the souls from the dead people of Lucrece.

This dungeon can only be visited once, so the moment you leave, you cannot come back. This dungeon does not contain any boss at the end, so do not be afraid. If you have trouble with the random encounters, just flee from combat.
Navigating through this dungeon, you should look for the west path first that will take you through a maze downstairs. You can grab two treasures in the bottom part of the dungeon. While if you take east path from the starting point, it will eventually lead you upstairs and to the exit. Clearing this dungeon will let you obtain Akira's strongest weapon, the Guts and Glory Glove.
Trial of Wisdom
- Location: Houses in the Condemned Village.
- Mandatory Member: Cube
The Trial of Wisdom can be enter when you have Cube in your party. To find this trial dungeon, you will need to go to the Condemned Village. There are two entrance to go inside Cube's Dungeon, they both lead to the same area so it doesn't matter which one you take. Head downstairs and go to the next room. Talk to the Cube Replica and go to the next room. There are no combat within this dungeon, however there are a series of puzzle you will need figure to get to the end of this dungeon. You can check glowing chairs for a hint.
The first room you enter, you will see checkered floors. each time you go through the checker floors, your controls will be inverted. The first room will have your horizontal movement inverted. You will just need to head north until you see a room where the entire floor is checkered. In this room your controls completely flipped. Try to get use to the controls, there are two exits here, one is a dead end and the other one proceeds to the next area.
Examine the chair to open up the next puzzle. You will see Cube's reflection on mirror and mimic the movement to solve the puzzle.
- Right - Right - Up - Up - Up - Left - Left - Up - Up
- Right - Up - Up - Left - Up - Up
- Right - Right - Up - Left - Up - Up - Right - Right - Right - Up - Up
Then head inside the next room, examine the chair to start the puzzle. You will see a red arrow marked on the ground. Follow the direction of the arrow until you reach the next room.
Examine the stair to get the hint for the next puzzle. This puzzle is that touching the Iron Ball will cause your characters to warp. The solution to touch the Iron Ball in a clockwise order. Starting with the northeast one first, then the next one in southeast, southwest, and then northwest. Then touch the giant ball in the bottom to complete the puzzle. You will find the 17nm diode at the end.
After clearing this dungeon, you can revisit the checkered floor area to fight a hidden boss that will drop the Cosmic Equipment. For more details check the Cosmic Equipment Section.
The Cosmic Equipment
After nabbing the loot from the trial dungeons and equipping yourself with the best weapons in the game in the process, it's time to think about your other gear. For this, we're in search of The Cosmic Equipment, which is the best gear in the game.
The Cosmic Equipment is accessed via some optional, hidden bosses dotted throughout this final scenario. Defeating them will make them drop a piece of the Cosmic Equipment - though the bosses are quite well hidden. We're here to help, though.
Additionally, on the PlayStation and PC versions, you'll get a trophy/achievement for defeating each boss here, so five total.
Cosmic Mail (Boss Fight: Death Prophet)
- Location: Flee from combat a 100 times.
- Stat: Defense +30, Petrify Immunity
To find the boss that drops this armor, you will need to flee from combat exactly 100 times. There will be a dialogue box that will appear once you have fled around 95 times. When you flee a fight for the 100th time, you will fight the boss.
If you're playing the SNES version, you can actually cheese this boss with the Sundown Kid's Hurricane ability - but that isn't really possible in the HD-2D remake for Nintendo Switch.
In the remake, you'll need to defeat this nasty boss the old fashioned way. Physical attacks that do multiple hits work great, like Pogo's final ability or even Oboromaru's Shuriken Barrage. The boss mostly does single target attacks, giving you plenty of time to heal up. Defeating this boss has a chance of it dropping the Rock Launcher accessory.
Cosmic Ring (Boss Fight: Lucretius)
- Location: Trial of Instinct
- Stat: Defense +8, Petrify Immunity
Before you search for this boss, make sure that you have a Golden Topknot in your inventory. There are two that can be found in this chapter; one is found within the Trial of Power Dungeon, and the other is located near the end of Archon's Roost. Once you have this in inventory, you can find this boss almost near the end of Trial of Instinct. It should be the room to the very left on the last floor.
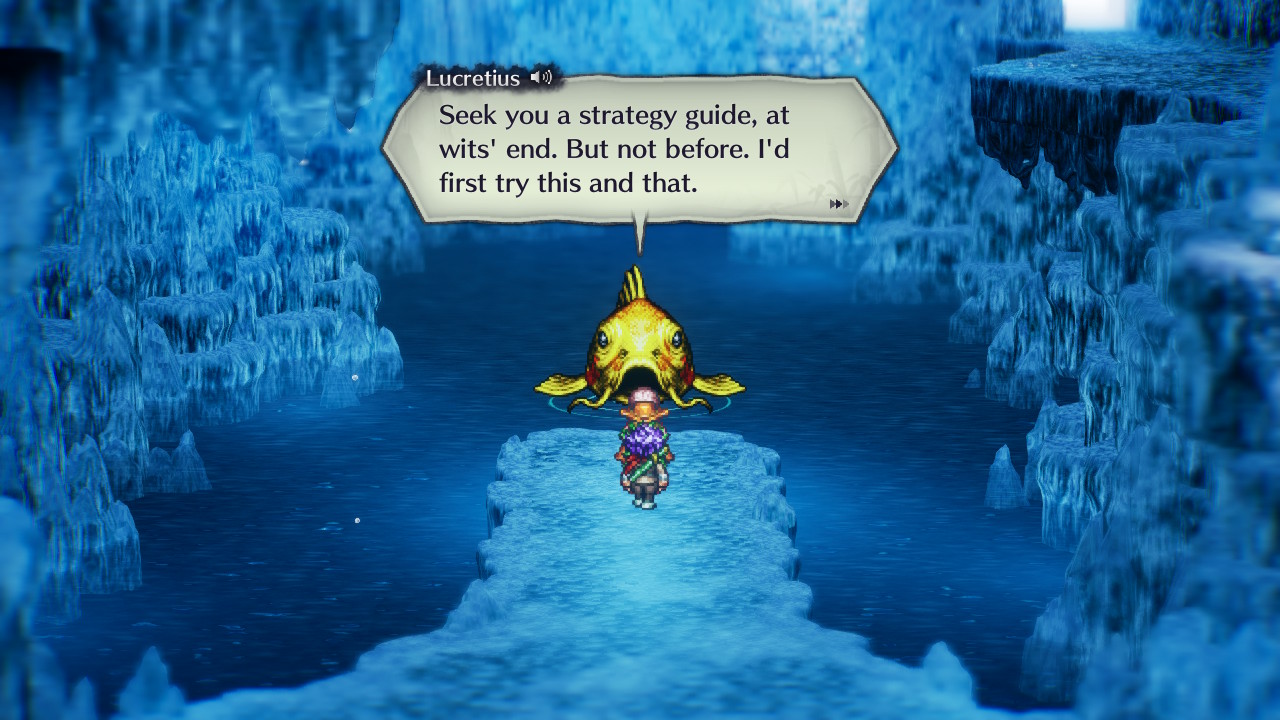
Talk to giant fish and answer the 1st choice on all questions. At this point, the fish will demand a Golden Topknot from you. Then answer yes on the next two questions to start the boss battle. After defeating the boss, you can talk to the boss to learn more about the Lucrece Kingdom, if you so wish. If you answer the dialogue choices incorrectly, you will not able to fight this boss, so be careful.
Cosmic Helm (Boss Fight: Euraokos)
- Location: Trial of Wisdom
- Stat: Defense +10, Petrify Immunity
This boss only appears after first clearing the Trial of Wisdom. To find the boss, head back down the dungeon once again. On the puzzle aea with the checkered floors, you can find the boss roaming around the area. Touch it to engage in combat.
Keep your distance so that the boss will spam it's AOE missile attack. Cube will usually counter with its healing ability making this fight really easy. Defeating this boss will make it drop the Showa Goldfish Launcher.
Cosmic Glove (Boss Fight: Jaggedy Jack)
- Location: Trial of Time
- Stat: Defense +10, Petrify Immunity
This boss is found when navigating through the Trial of Time. The boss will show up when you run out of time. This is easily done as the time limit is only 2 minutes and 30 seconds.
Since the full screen AOE attacks do poor damage and has a long charge time, try to focus on one enemy at a time. The main thing you need to be careful about is when they switch the grid into lightning tiles, as this will restore their health. As in some earlier boss encounters, try to use skills that switch the tile to something else to prevent that.
Cosmic Boots (Boss Fight: Head Hunter)
- Location: After meeting the Lord of Dark, leave instead of confronting him.
- Stat: Defense +10, Petrify Immunity
This boss is found in the strangest of places. First, you will need to meet the Lord of Dark at the end of Archon's Roost. But instead of greeting the final boss, leave the map as soon as he introduces himself to you. You will be warped into the strange dimension. Move around and you will fight this hidden boss.
This debuff period will be the best opportunity to attack it. If you have any characters that have powerful single target attacks, this boss can be easily cleared. Especially if you got Sundown Kid's Hurricane ability - he's the MVP here, as this skill can easily 1 shot the boss on a good hit.
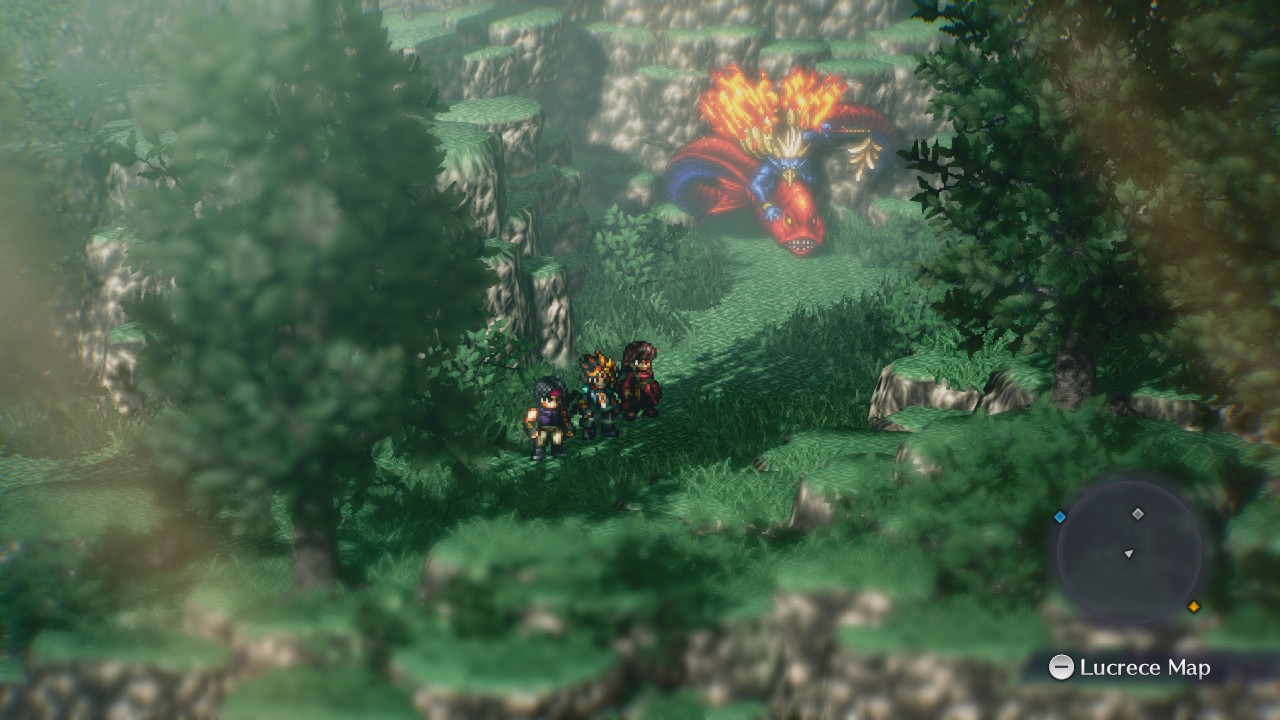
The Archon's Roost
If you're ready for the final battle then go to Archon's Roost. Make sure you have Brion in your inventory. This is the sword that is found at the summit of The Last Hero's Grave. Then go to Archon's Roost by traveling southeast from the Condemned Village. If you have not taken any items from Oersted's Scenario, they will be upgraded into better items in the Archon's Roost.
Item List (First Area)
- Alice Biscuit
- Shroud of Demons
- Fujin Scroll
Item List (Second Area)
- Unicorn Horn
- Enma Charm
- Shroud of Demons
Item List (Third Area)
- Izanagi Scroll
- Golden Topknot
Item List (Fourth Area)
- Golden Burial Gown
- Eye of Argos
- Ferility Charm
- No. 9 Potion
Navigating through the demon's lair is the same as before, back when it was a differently named location in the Middle Ages chapter. There are no changes, but if you didn't pick up the items during Oersted's scenario, they will be upgraded into the items listed above, meaning you can get some powerful and valuable loot in exchange for your earlier restraint.
You can find three items within the first map. When you gather everything, go to the next area by taking the west exit. There are also three items in this next area. Gather all the items and then look for the exit in the very east side of the map to go to the next area.
In here enter the first room to the right to find an Izanagi Scroll. Then look for the room to the east to find a Golden Topknot. Continue all the way west until you reach the end - this will take you to the final area.
The first room on the to the left will let you find a chest with the Golden Burial Gown. This armor has negative stats but gives you poison and sleep immunity. Then look for the room to the very west side of the map. You will find a room with three treasures. Grab them and leave, Then head to the east end.
This will lead you to the ominously-named Lord of Dark room. Examine the statue to reveal the secret passage, then go downstairs. Go to the end and examine the statue at the lair's summit.
Then try to leave for an event scene. From here, if you decide to leave, there will be a hidden boss you can fight to get the Cosmic Boot - for more information read the Cosmic Equipment section from earlier.
What you're meant to do, rather than attempt to leave, is engage with the Lord of Dark - kicking off the final boss fight of Live A Live.
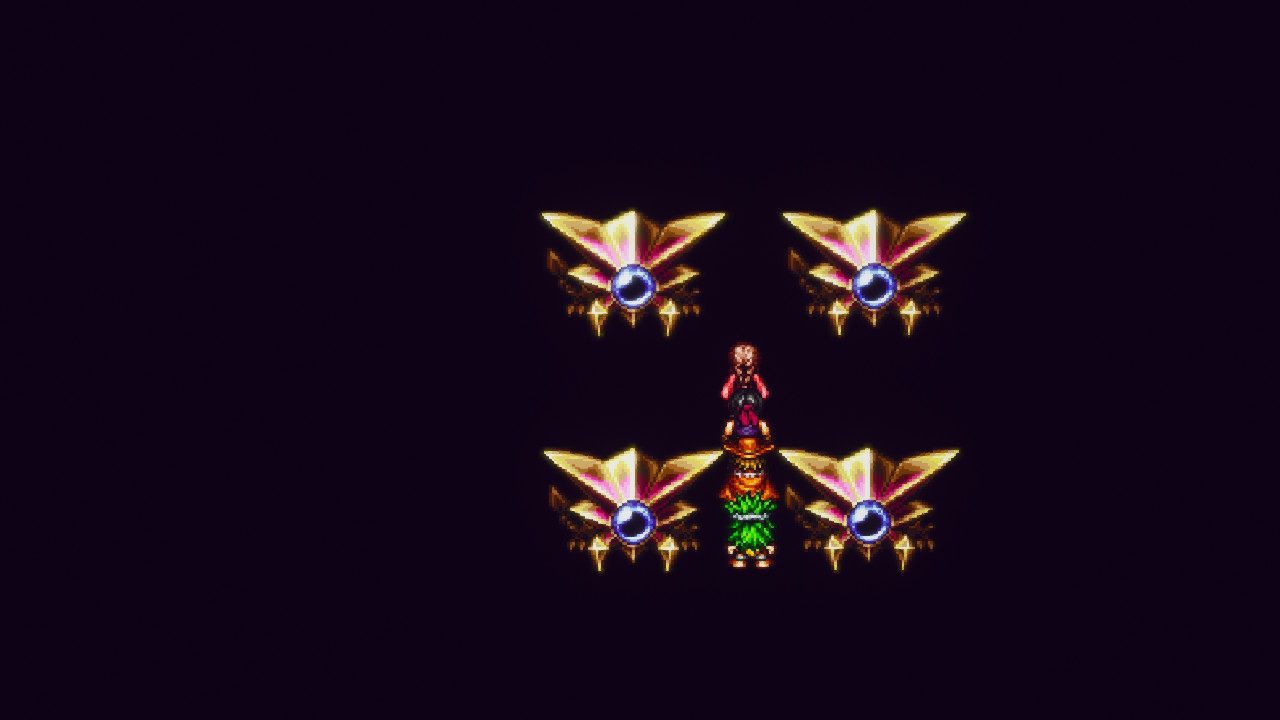
Boss Fight: Final Battle, Part 1
The last boss has four body parts - and you can choose which to attack. You do not want to attack the brow of the boss for any reason. The brow is nearly invincible and as soon as you hit it, the boss will give a massive buff for the other parts. As far as the other body parts go, the eyes are probably the deadliest piece as they have hard hitting attacks. You do not want to go near them as they will life drain anyone close by.
The maw piece although has the highest HP of the body parts, but is actually also the most frail. If you can land special attacks on it, the maw should go down relatively quick. Each body piece also has different types of weakness, so it can work out pretty well if your characters have to ability to hit their weakness.
Another note you should worry about is that Odio can switch tiles of the battleground into a lightning tile. You do not want anyone using a charge ability on the lightning tile as if they K.O. they will likely be wiped out from the rest of the battle by the tile. Watch your positioning and focus on destroying one body part at a time. When you've destroyed the eyes and the maw, the brow will transform into its second form.
The second form is much easier to deal with than the first. The second form uses a full screen AOE attack called Denial. This will cause knockback and can interrupt any charging skills. - but it takes a long time to charge.
Characters with really high speed can land at least three attacks before the boss can reuse this ability again. Since this ability just hit everyone, have everyone stay together so they can use AOE healing items or abilities. Then use your strongest attacks, and the boss will go down.
After defeating the final boss, you are given the choice to spare or kill him. Spare him to get the true ending, as described in our Live A Live endings guide. If you choose to kill him then you will see one of the bad endings.
To continue on the path to the True Ending, leave the area. During the event scene, you will fight all of the previous scenario final bosses in a sort of boss rush - but don't worry, these bosses are in a much weaker state than when you first faced them, and with your characters at their current level and with their end-game equipment, each of the fights will end in an instant. The next part is exclusive to the Live A Live Remake. If you're playing the Super Famicom version, the game ends now.
Final Boss Fight Part 2
Attacks from the arm can be dodged by going to the opposite side. On the HD-2D Switch Remake, you can watch the visible ATB bar to time your character movements. Even so, getting hit by it isn't exactly the end of the world.
When you injured any of the body pieces to a significant degree, the boss will use an attack called condemnation that will remove the current party members from combat. At this point, the last remaining three party members will join you. Do a little more damage and everyone will rejoin you.
During this part just use whatever attack from each character to finish the final boss once and for all - and enjoy the finale.
During the ending, there are some dialogue exchanges between your main character and the final boss. You can always replay this chapter to see the different outcomes and dialogue depending on who the party lead is. You can also replay the chapter to see the different endings.
Regardless, make sure to create the clear save file. Congratulations - you have completed Live A Live!
Live A Live Walkthrough Hub / Chapter Walkthroughs: