
The Distant Future walkthrough & Passwords | Live A Live guide
The Distant Future is one of the most straightforward story chapters featured in Live A Live, though that is largely because it serves a different purpose - it's a narrative information dump first and foremost, topped off with just the tiniest bit of combat. In the grander scheme of things in Live A Live, we rank it as the easiest scenario - but it's still medium length.
Because of the story-heavy nature of this chapter, we don't recommend it as a first chapter - save it for later. This walkthrough to the Distant Future chapter will guide you through it, step-by-step, mostly focused on who you need to interact with and when in order to advance the story. If you need help with another chapter, go back to our Live A Live walkthrough homepage.
Far from Earth, in the vast void of space, the transport freighter Cogito Ergo Sum Slowly makes its way home. Aboard this tiny vessel, a new form of life is born. Alas, as a series of incident puts the safety and well-being, of the ship's crew in jeopardy, this autonomous support unit but recently build by the engineer Kato must work together with its creators to ensure all is not lost...
Live A Live: The Distant Future chapter walkthrough
As we said, of every scenario in Live A Live, the Distant Future is the most easy to wrap your head around. Cutsey protagonist Cube's story is mainly progressed by interacting with the ship's crewmates - and as such, this guide takes the form of a list, detailing who to talk to and when in order to push this scenario along and ultimately finish it. At the end of it all, you'll face down a boss.
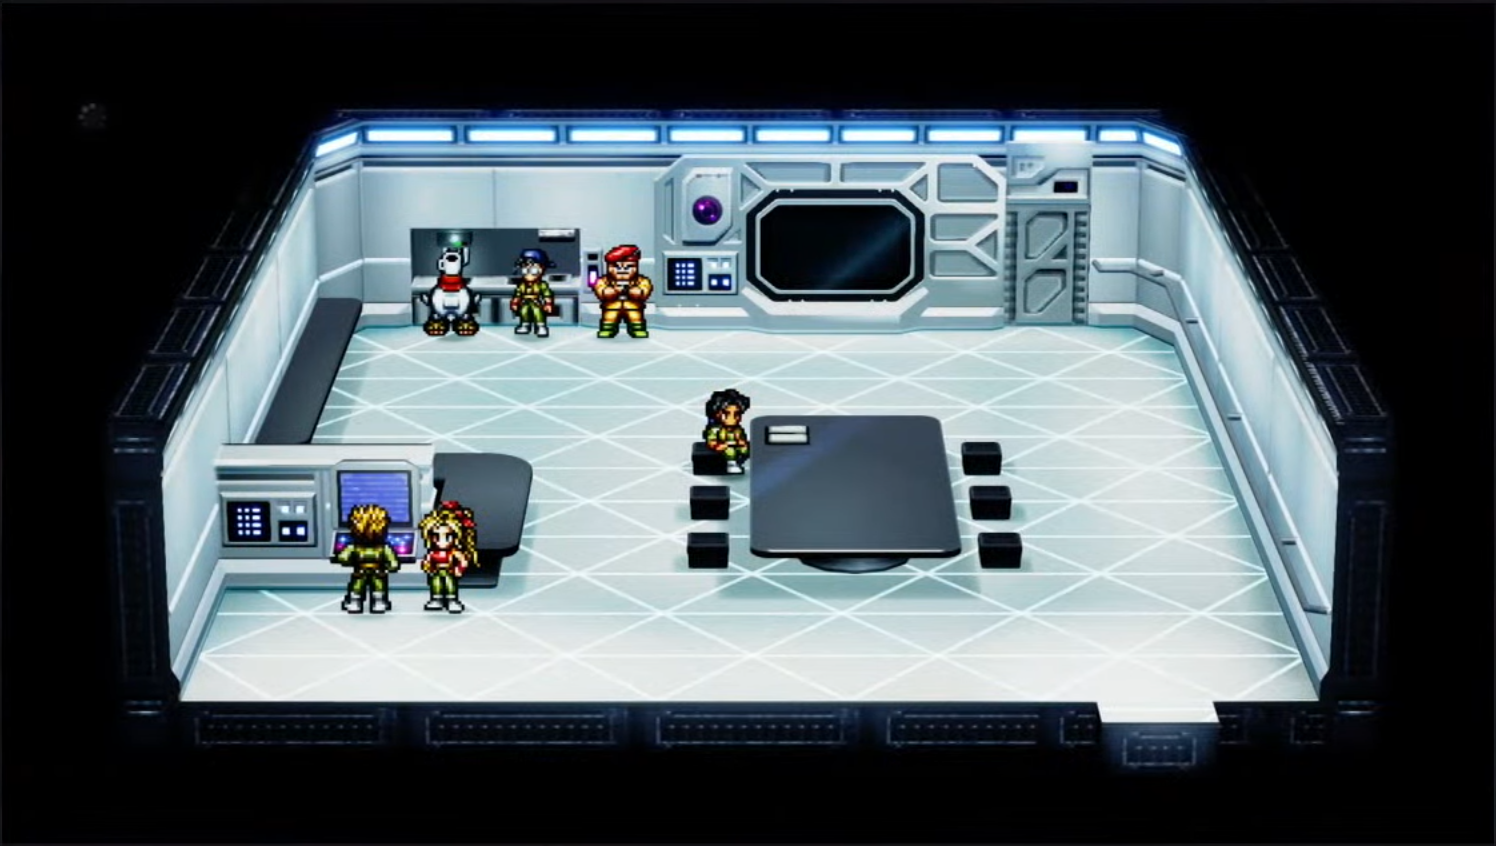
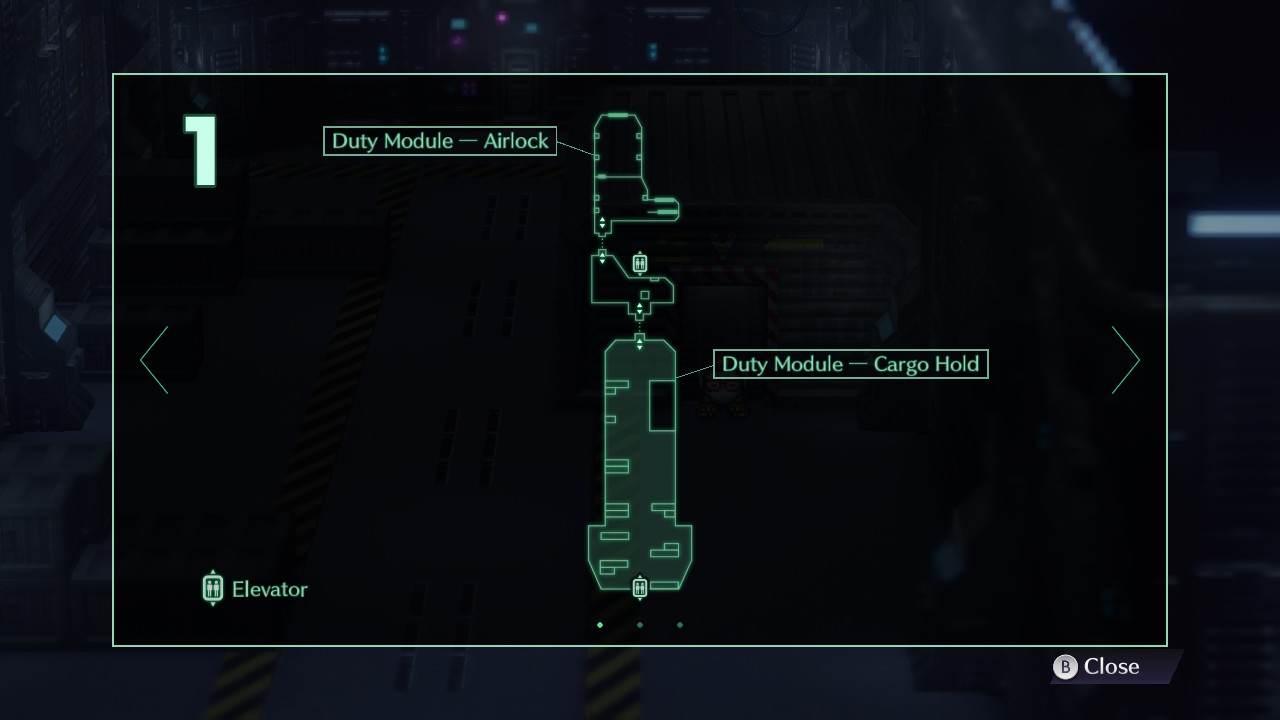
- Start by moving, the engineer will introduce himself as Kato. Leave the room and talk to Kato. He'll bring you to the Duty Module room.
- Examine the system interface. Name the protagonist. You will get a full view of the map by pressing the Minus - button on your Switch (or equivalent on PlayStation or PC)
- Look for Kato by going through the north hallway.
- Go inside the Cryostasis Chamber. Examine the control panel by the north side.
- Examine each of the Cryostasis pod. After the event, examine Huey.
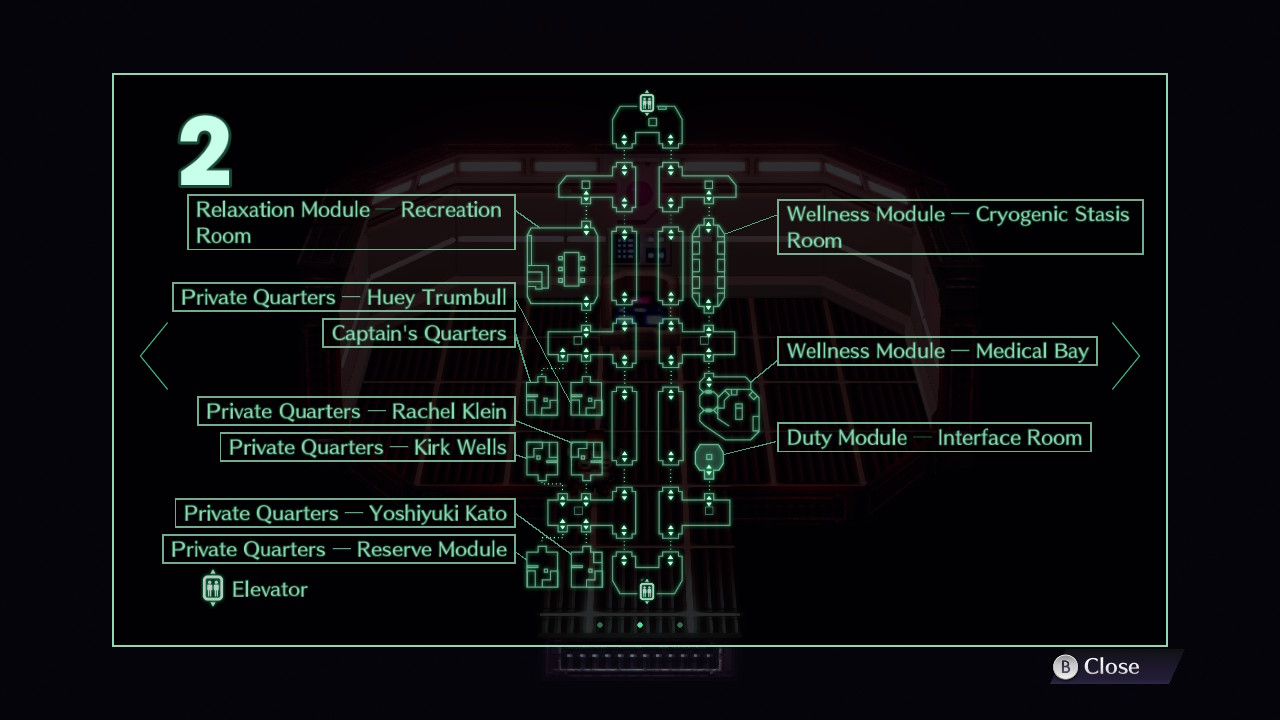
- After the briefing, look for the recreation room. This is located northwest of the ship.
- Inside the recreation room, talk to Huey and then Kato. Use the coffee machine next to him.
- Then talk to Commander Darthe.
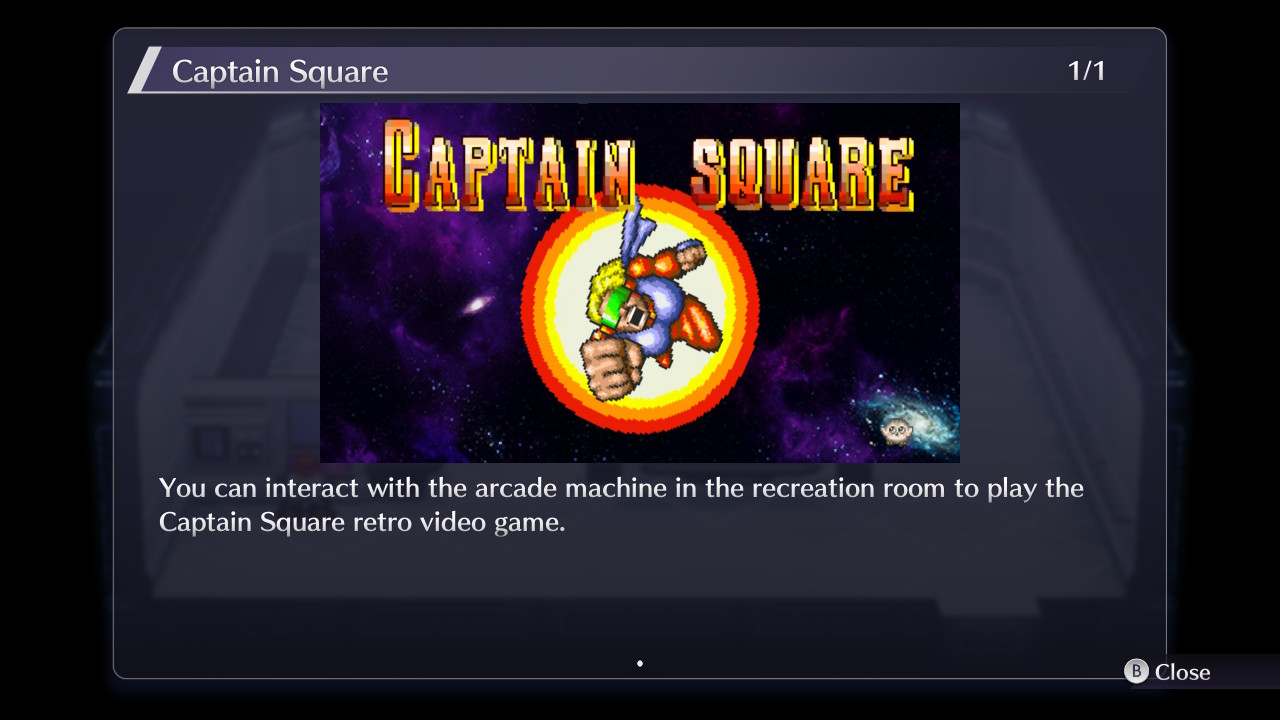
- After the event scene, you can also examine the arcade machine to the left. If you examine the arcade machine, you will play a video game called, Captain Square. This is where most of the battle encounters take place in Cube's Scenario. I would recommend playing this mini game after you found the Memory Card. That way you can keep your stage progress if you decide to stop combat. If you beat the entire game right now, there is an extra scene with Kirk and Rachel at this moment.
- Leave the room and look for an elevator in the north or south end and go to Level 3.
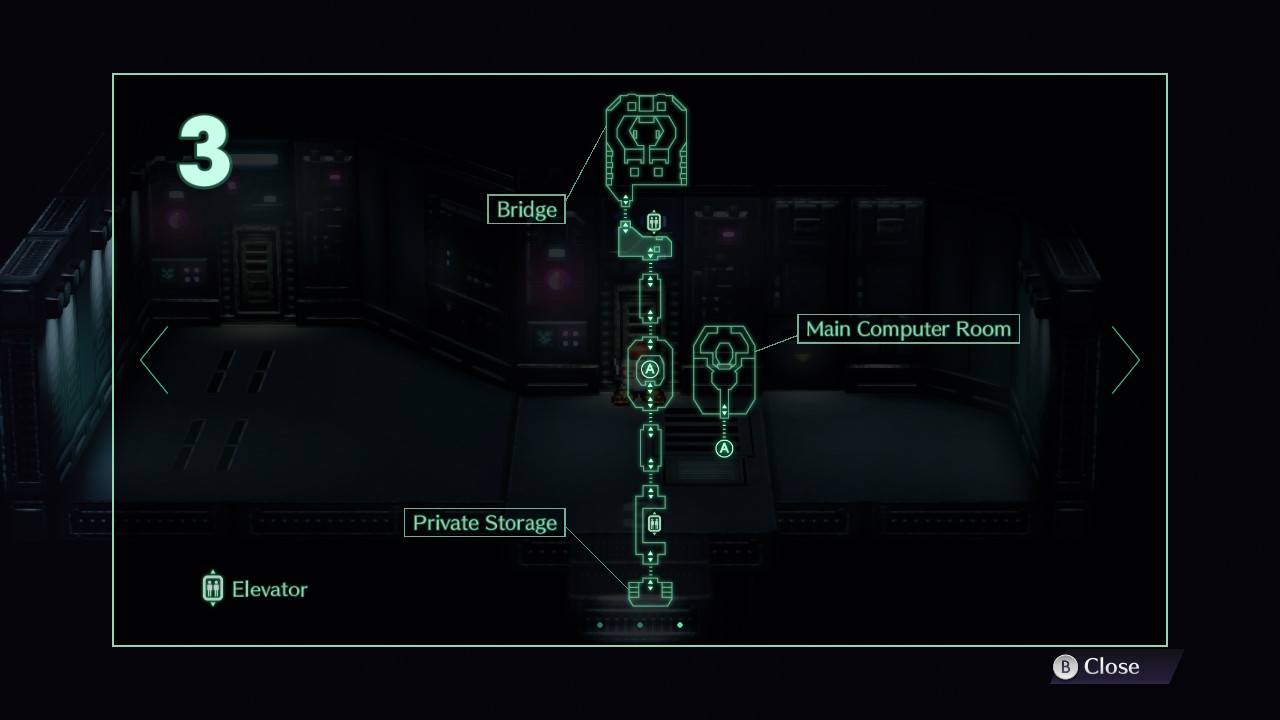
- Then go inside the main computer room and talk to Kato. Then choose to go to the Cargo Hold with Kato.
- After the event scene, you can examine the Behemoth if you want. But leave the Cargo Hold and go back to Level 3.
- Enter the Bridge. Then talk to everyone. After Kato and Huey leaves, talk to Rachel.
- Leave the Bridge and talk the elevator to level 1. Head inside the Airlock room. (You can also trigger a game over scene, by pressing Airlock Button 1 and then 2.)
- Afterwards, take the elevator to level 3. Go to the bridge and talk to Huey.
- Move to level 2, and go to the Wellness Module - Medical Bay.
- Talk to Rachel and then Commander Darthe.
- Head to level 3 and go to the Bridge. Then to talk to Kato.
- After the event, examine the coffee machine and offer it to Huey.
- Look for Kirk's Quarters in the map. You will need to enter your character's name to access the room. Talk to everyone here and interact with the objects.
- If you want the Memory Card Key item, examine panel near the bed and enter "warp speed" as the password. You will get a hint that Kirk has the memory card hidden under the bed. Then you will be able to pick it up.
- Head to the Airlock Room in Level 1 and talk to Huey.
- Return to Level 2 and go to the Medical Bay.
- After the event, return down to the Airlock Room and report to Huey.
- Return to the Medical Bay on Level 2.
- Leave Rachel's room and go to the Airlock room on Level 1.
- After seeing the event, go to the Cargo Hold.
- Examine the Behemoth control panel. Then leave the room and try to head south.
- Escape from the Behemoth and go back to the Airlock room.
- Talk to Comannder Darthe.
- In the recreation room, examine the coffee machine and offer the coffee to Rachel.
- After the event scene, check the main monitor screen until everyone leaves the room.
Mercury: Use Plasma Ball on the enemies from a distance.
Venus: Use Plasma Ball on the enemies from a distance. Electric tiles will heal them, but they should still go down easy.
Earth: Allow a Waterspout to cast Aquaflare to leave water tiles on the field. Then lure the Firewhirl into the field to instantly kill it. Then use weak attacks like Spinning Star to mop up the Waterspouts.
Mars: You want to focus your attacks on the Teil Broodmother, the darker of the enemies. Recommend using a strong single-target attack like Quark Sword. Remember that Plasma Charge can be used to heal and buff in a pinch. Might take a little bit of luck depending on if you can have any of the enemies miss with their Teil Whip attacks.
Jupiter: The enemies here heal from electric fields. Pion Bomb is decent at taking them out, try to position yourself to hit as many as possible. Make sure not to stand in electric tiles, the damage adds up.
Saturn: The enemies here do not move. Simply move away, use Plasma Ball to damage the Gemparapet and place an electric tile under them. Use Plasma Charge to heal.
Uranus: More annoying electric tiles. Your target here is the El Mirage enemy. You can use Quark Sword to clear a single Pymli if needed. Then you can use Pion Bomb a couple of times to clear out a handful of them. In order to defeat El Mirage, use Supernova to create a fire tile, then lure El Mirage on top of it.
Neptune: You want to target the star named Lala instead of Lalu. Move next to Lala and use Tachyon Sword on it twice.
Pluto: Move away from the Polka-dot X as they will explode if you are standing next to it. On top of that, it will leave a fire tile. Cosmic Suicide Headbutt can interrupt your abilities, which is frustrating. Keep your distance and use ranged skills like Pion Bomb, Plasma Ball, or Spacephage to attack.
- Find everyone in the hallway. Afterwards look for the Duty Module Room, be careful when exploring now, the Behemoth can be anywhere. Encountering it will lead to a game over.
- Inside the Duty Module room, examine the control panel. You will get the password, "OAKFDE"
- Then head to the Cryostatis chamber just directly north.
- After this event, you will get the Powered Prybar.
- Go in the Captain's Room. Then check computer terminal to the left to hear the Audio Logs.
- Afterwards look for the Reserve Module room. Enter your name to head inside. Inside there, read the computer logs.
- Return to the Captain's Room and talk to Kato.
- During this scene, you will be separated, use the Prybar to open the door and head down to Level 1.
- Go through the Cargo Hold Room and take the south exit to the elevator. Go to level 3.
- Passthrough the hallway and use the prybar to get through. Find the elevator and head down to Level 2.
- Move down until you see the Fake Cube, follow it, it will lead you to Kato's Room.
- Talk to the fake Cube and answer with Roundy.
- After the event scene, all the elevators are disabled. Go north to where the elevator is, use the Prybar to the shaft next to the door.
- Head downstairs and look for Kato in his room. Talk to him.
- Then return upstairs and meet up with Commander Darthe.
- After receiving the Communicator from Commander Darthe, head downstairs to the Recreation Room. Examine the Captain Square arcade machine and use the Communicator.
- Engage in the boss fight.
Boss Fight: MUR-TH-UR Matrix, Stablizer
The 8 Stabilizer units are actually quite harmless, but if it does move it will try to restore the main computer's health. You should remove some of the Stabilizer first so that it cannot restore the main boss's HP.
The best approach to fight the main boss is to hide in the very corner of the map then spam the Maser Cannon. This can deal around 180 to 240 damage. Ending this boss fight fairly quickly. If you do get hurt. Cube luckily comes with healing abilities as well.
- Afterwards, the last crewmate will show up in the ship. If you offer coffee to him, the game will end. There is still some more things you can do.
- If you do not offer the coffee and choose to wander around. Go to the Duty Module room and access the terminal. You will get a password, JUDGE.
- You can use this password to access the Main Computer room in Level 3. Enter JUDGE as the password to get in. Then enter OAKFDE as the override key. You will find the computer's main assessment.
That's all there is to this scenario. Offer the coffee to the last crewmate whenever you want to see the ending. Afterwards, save the clear data, as you will need it for the final scenario.
Live A Live Walkthrough Hub / Chapter Walkthroughs: