
Prehistory walkthrough & how to beat King Mammoth | Live A Live guide
Prehistory is the earliest of the chapters in Live A Live, which is why it's nicknamed 'The First' - which makes sense given that it takes place all the way back in Prehistoric times. It's a chapter that plays more like a traditional RPG, with less in the way of gimmicks.
You'll play as Pogo, a tribal man coming of age in prehistory. This is a medium-difficulty chapter, and is a good choice of first chapter to play. This page is a complete Prehistory walkthrough, dealing with everything in the chapter including compulsory content, treasures and items to find, and even how to beat King Mammoth, an optional super-boss. For similar for every other chapter, head to our Live A Live walkthrough contents hub for our other chapter guides.
In a forgotten era before kings and kingdom, a young man comes of age, and is given permission by his tribe's stern elder to go forth and hunt together with his best friend Gori. Bereft of spoken words, they rely on their sense to survive - in particular, a powerful sense of smell. Guided by their nose, they track game and find shelter, and learn much of the world and its danger.
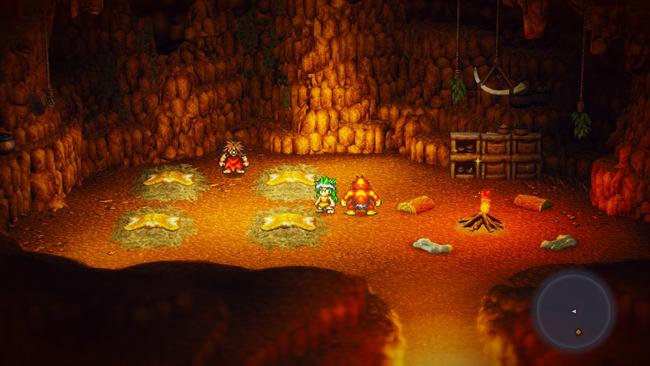
Live A Live Prehistory walkthrough: Caveman Orientation
The Prehistory scenario of Live A Live has a unique gimmick where words haven’t been invented yet. Navigation throughout this chapter is spoken through signs and grunts, rather than text and voice acting. The length of this scenario is also much longer than most of the others, and plays out in a style more attuned to typical JRPG fare.
As well as the language gimmick, this chapter also features a unique gameplay mechanic in the form of a crafting system. For this, you'll want to collect as many items as you can - which this walkthrough will help you to do - and 'feed' them to the Artisan NPC, who will give you high quality items in return.
Safe Cave
After some cutscenes, you'll gain control of Pogo and be inside a cave - a safe space during this chapter. When you can first control Pogo, you'll want to scour the area for any useful items that you can lay your hands on - vital since it feeds into one of this chapter's unique gimmicks - creating new items with the Tribe Artisan.
Item List
- Stick (Pogo's Room)
- Hard Rock (1st Room to the right)
- Stick (1st Room to the right)
- Pelt (1st Room to the right)
- Stick (Room to the far right)
- Bone (Room to the far right)
- Stick (Elder's Room to the NW in the main lobby)
First, check the shelf to the left to find a stick. Then wake up your buddy and leave the room. Explore the rooms to the right to find items. Then check the room to the very southwest side.
You will find a caveman, the Tribe Artisan, that you can trade items with - he'll then craft them into better items. The item crafting/trading system is very useful in obtaining new equipment. For more detailed related to the trading system, check our Tribe Artisan item Crafting guide
You can actually exchange for a very powerful weapon early on with the random materials you just found. The combo of using the Hard Rock and Bone can let your forge a stone knife. Then if you combine the stone knife and a stick, it will forge you the Quick Spear. Although there are plenty of items you can create, the spear is a great weapon to start out with. If you still feel undergeared, read the item exchange for a list of items you can forge.
There's also a minigame you can do at this point. In the room next-door to Pogo's, there's a caveman who asks you to do a head-counting minigame. Select the haystack that matches the caveman's request, and he'll give you a bunch of crafting items, and you'll get an achievement. You can do this several times to craft some really great gear. If you want, you can preemptively craft gear for Beru now, since you can't access this minigame later. A Fury Knife and a Wildheart Dress are good to start.
With that done, your objective is to find the Elder and speak with him. Look for him to the room in the northwest side of the area. Enter the room with the Elder and talk to him. Then open the drawer to the left to grab a stick. Then leave the room. You can now go to the room to the north. Go up around the path and find the elder. Talk to him a few times, and then there will a be a tutorial for Pogo's unique ability. Press left face button to activate your sense of smell. Touch any of the clouds on the screen until you engage in combat. Defeat all the enemies around. When you have collected enough meat, Pogo will make a sign of the elder's face. Report back to the elder.
Item List
- Stick (Cloud in the northeast end)
- Hard Rock (Cloud right under the Dinosaur Bone)
- Pelt (Cloud to the southeast)
- Bone (Cloud to the far northeast)
Afterwards, head back to your room in the cave. Examine your bed and go to sleep. Durning nighttime, look for Gori. Go to the west side to the main lobby, Gori is found in the cave northeast, the one marked with a bone.
Leave the room and come back. Examine the bone by the haystack. Then examine the haystack where the girl is hiding. When you can no longer find the girl by examining, activate your sense of smell to find her. Grab the meat to the left and offer it to her, but she won't take it quite yet.
Once again, leave the room and come back. Talk to the girl and she will join you. After this pick up Gori and leave the room. Try to return to your room, you will see that is blocked. Return back to the previous room and grab the haystack. Return back to your room and go to bed. When you wake up, examine the haystack to the left. Head outside to the Hunting Grounds. Trigger some battles until you get some meat. You might want to fight enemies out here until Gori is level 5 to learn Poop Throw. When done, bring the meat back to the girl.
Then check the north exit of the cave. A group of cavemen will invade your place. Then go back down to trigger an enemy encounter. Defeat the grunts and then fight the boss.
Boss Fight: Zaki
Beru is also really weak unless you had her geared beforehand. For this case, you should have Beru pass her turn. The strongest attack will be Pogo's Pow Kick. If you prefer attacking Zaki from a distance, then use Gori's Poop Throw, it will turn the tile around Zaki into a field of poison. If you have crafted some decent equipment, then Pogo should hit relatively hard, making this fight much easier.
After the cutscenes, you'll end up in the Wild Lands.
Wild Lands
Enemies in the Wild Lands are massively stronger than in the previous area. If you came unprepared, enemies in this region can be rather difficult. Beru's Sing Heal can provide AOE healing to your party - a must-have when traversing through this area.
Another note is that if you're still lacking in equipment, there is a caveman located northwest that can craft items for you. Enemies here can quickly level you up if you're feeling weak, and you should fight a few battles to get some easy stats. Make sure to give Beru some decent armor and equipment from the craftsman, because once you enter the northeast cave, you'll lose access to her until the end of the chapter. If you want to refresh the enemies in the Wild Lands before losing Beru, you can enter the cave and immediately. When you're set to move with the story, look for a cave in the northeast corner of the map, and click the firepit.
When you regain control, go to the northwest exit to trigger a boss battle.
Boss Fight: Zaki
Wake up Gori and break open the wall. In the flower fields, wander around until you find Beru. You will end up in a dark cave. Activate your sense of smell, if you see a skull you will encounter an enemy. The enemies here will usually drop an item synthesis mat. Most of them are a crocodile type enemy. If you do not have Burn Spark in your ability list, this section might be a bit difficult. To move on with the main story, use your sense of smell until you find a wall that smells like Zaki. Smash the wall three times to get through.
Follow the passage, when you're near the end, there is a caveman you can talk to for Item Syntheize. Craft the items you need and then head further. Check the caveman guarding the entrance. Then go to the top of cliff and examine the top to trigger an event with Gori. Head down and the passge is cleared. There will be three caves here, the first two will trigger battles with Kuu Warriors. Head inside the 3rd one.
Kuu Village
Now it's time for a visit to a Prehistoric village. Once again, there's a smattering of items for Pogo to nab.
Item List
- Stone Knife
- Pelt
- Hard Rock
- Bone
- Stick
Grab all the items in the drawer. Then look for Gori and talk to him multiple times. So that he returns to you party. From here, there's some optional things you do can before heading in further for the final boss encounter.
The first one is there a powerful accessory you can get. This accessory requires a bone in your inventory. What you need to do is backtrack to the Wild Lands area head outside just before Zaki's Cave. You'll know you are on the right path, as you'll see a scene with cavemen and the hole in the floor from earlier. Look for a small head statute with a face, as pictured:
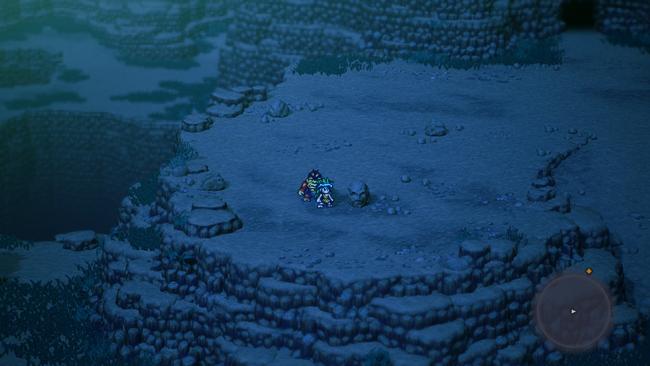
On the stone, you now need to press A exactly 100 Times. At the 100 press, you will hear a sound. Once you hear the sound, do not press any buttons, or else you gotta redo this step all over again.
Then head to northwest side, you will see a hidden entrance to a cave. When you're inside, offer the blue mirror a bone. You will get a powerful accessory called Rock of Rocks. Equipping this item will increase your Special Attack by 50.
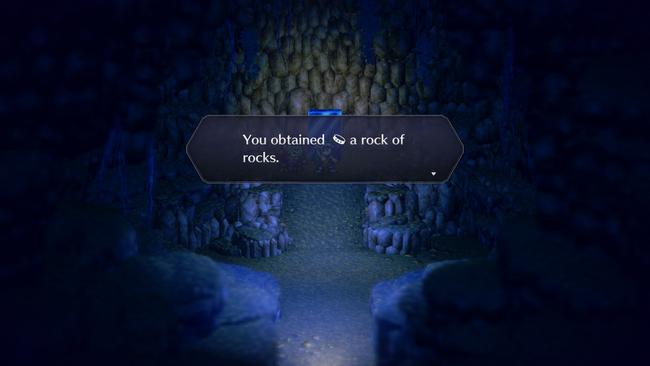
With the Rock of Rocks accessory in hand, there is now another thing you can consider: an optional super boss that you can fight. I would not recommend this boss unless you're have crafted the best gear possible and have a stock of healing items. I would highly recommend that you craft the Fertility Charm (Stone Knife x Hard Rock); this item can be used to heal unlimited times. Additionally, make sure you keep a save just before this fight.
To find this super boss, you need to go to the Wild Lands, you need to move sniff for cloud that shows a Mammoth Icon. It could be anywhere, but usually when you're close to it, your screen will start to shake and you will hear a loud stomp noise. Approach the exclaimination mark after sniffing the mammoth icon.
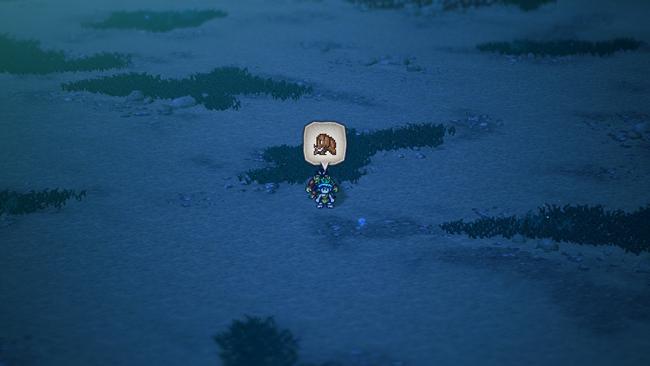
Optional Boss Fight: Mammoth King
Matters aren't helped by the shorter nature of Live A Live's chapters; you can only grind so much before facing down this boss. To a certain degree, defeating the Mammoth King is totally luck based due to how often your attacks will miss.
The best approach is to have Pogo go near the boss and use Poke Bind and hope it hits. If the hit is successful sometimes it can paralyze the boss and it will prevent it from moving. If the Mammoth is successfully paralyzed, use Sleep Trick on the Mammoth, there is a chance of putting it to sleep. That way when the paralyze effect wears off, the boss is still asleep. Repeat these attacks on the boss so that it can't do anything.
If you level Pogo up to level 16 before the battle, he will learn the ability Big Bang Boom. This is a highly damaging attach, but it has a high chance of missing, and it will lower Pogo's stats in battle when used. However, if the enemy is paralyzed ahead of time, the attacks will all land, allowing for a lot of damage. So, it's worthwhile to get the boss to about half-health, hope to land a paralysis on him, then use Big Bang Boom to deplete the rest of his health in one blow.
Meanwhile, Gori should spam Poop Throw on the boss. It will change the ground into a poison tile. If the boss ever switch the battlefield into a fire tile, use Poop Throw to switch the title or else the boss is going to heal a ton. Defeating the boss also has a chance of it dropping the Cola Bottle.
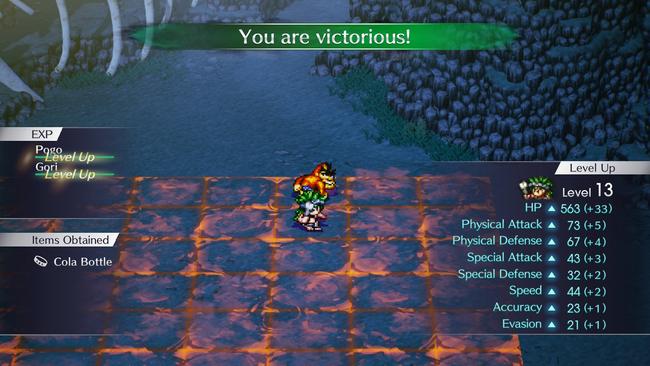
This item will raise your speed by +30 and will also let you use the special ability, Fast fast dieeeeee! when used as an item. This ability does 10 hits of 150 to 300 damage each. This will trivalize every fight in the game. There are a few enemies that are immune to this, but using item might ruin your experience with the game.
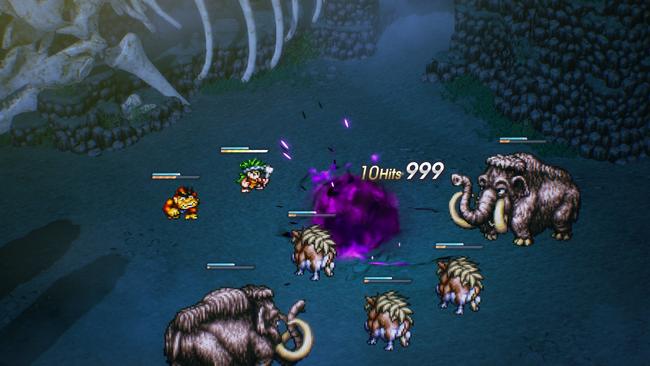
The item does not always drop however. So you might have to redo this boss if you want this accessory. The other item you get is Fang of the King right afterwards. This will raise your physical attack by 20.
Now, with both optional elements taken care of, it's time to return back to focus on the main story. Happily, there isn't much left. Reach to the end of Zaki's Cave. To trigger an event.
Boss Fight: Zaki
Boss Fight: Odo
Either way, just use range attacks with one person up close and Odo should be a breeze. If anyone is injured, just use the meat in your inventory to restore your health, as none of these items goes to the final scenario. Use 'em or lose 'em!
Afterwards save your clear data, you will need it for the final scenario - and then move on to your next chapter of choice:
Live A Live Walkthrough Hub / Chapter Walkthroughs: